Animation Retargeting#
Overview#
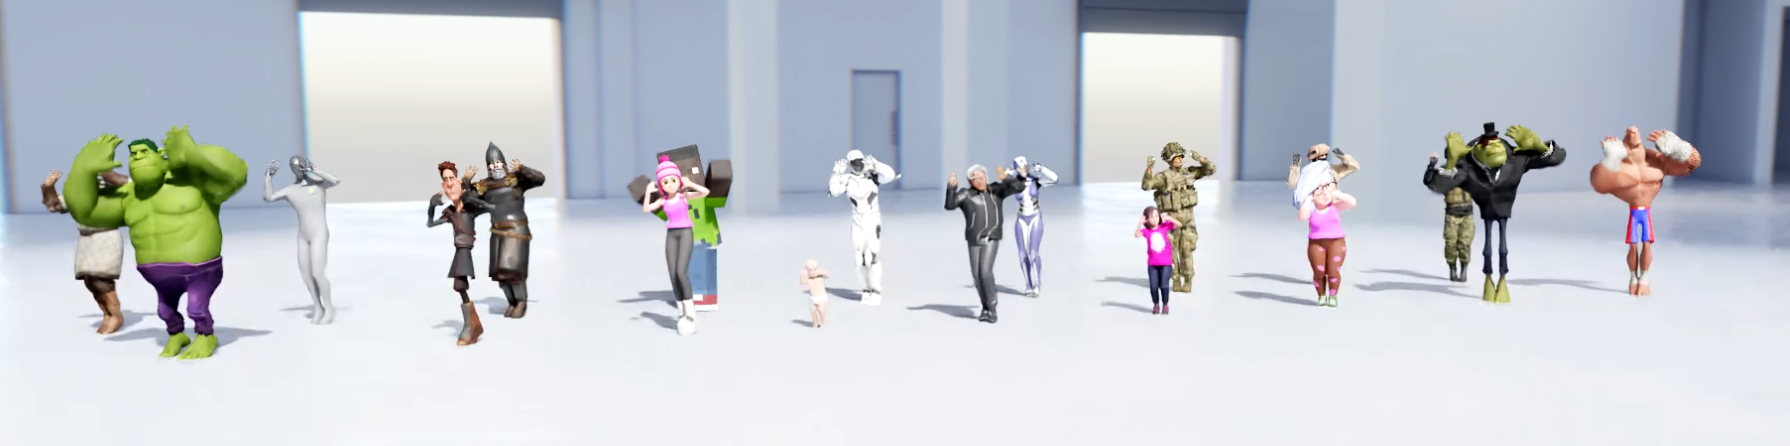
The Animation Retargeting extension is a set of tools that maps the skeleton of one character to an NVIDIA Human rig, allowing you to reuse animations made for one character skeleton and apply them to other characters with different proportions, joint names, hierarchies, and more.
The extension provides tools for setting up retargeting, and methods to automate what is traditionally a challenging process. This guide covers enabling the extension, using automatic retargeting, previewing retargeted animations, configuring the skeleton and facing directions, using SkelAnimation and Animation Graph, and tips for best results.
Note
Animation Retargeting is currently only supported on a Human rig.
Setup#
Enabling Retargeting#
To use this extension, ensure omni.anim.retarget.bundle is enabled in your Omniverse Kit based application.

Note
Refer to Omniverse Extension Manager documentation for details on enabling extensions.
After the extension is enabled in the Extension Manager, open the Animation Retargeting window by choosing Window > Animation > Retargeting.
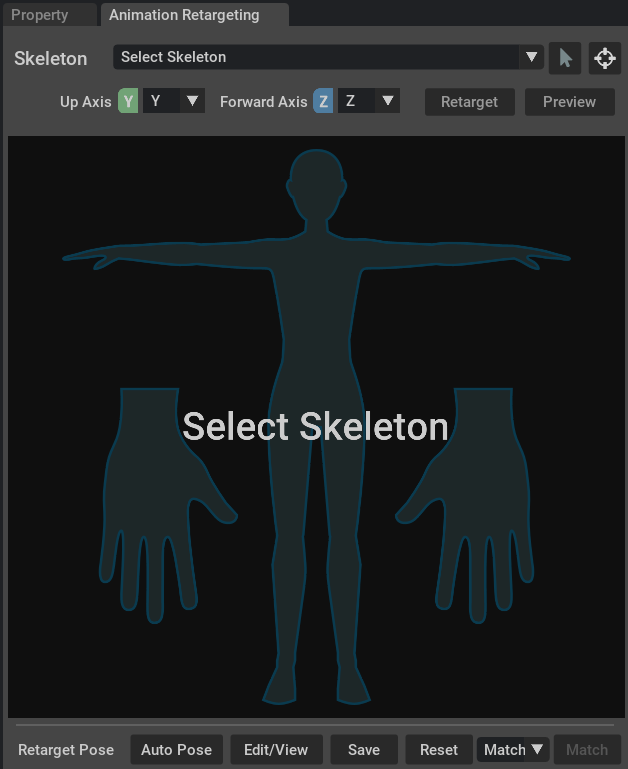
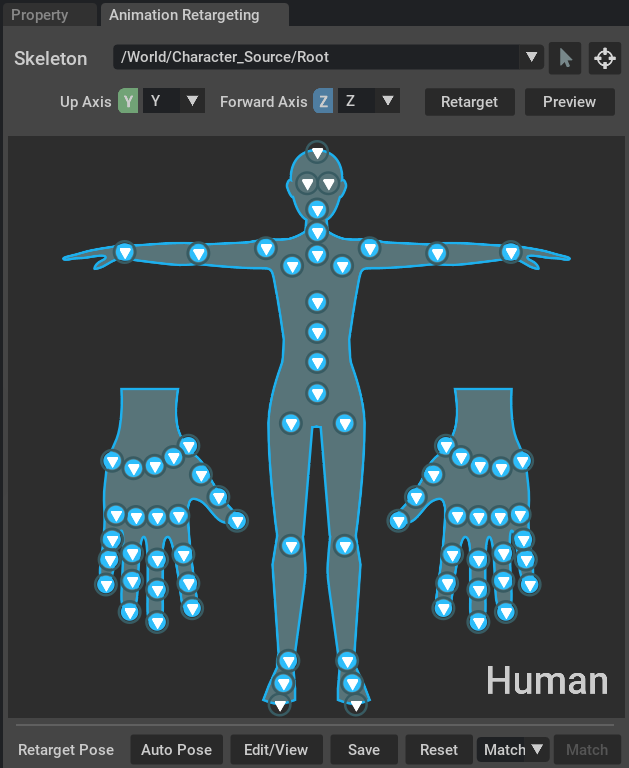
The Animation Retargeting window is organized into four sections (top to bottom):
The Skeleton section, including the Select Skeleton drop-down menu, the Select in Scene (arrow) button, and a Focus button.
The Axis, Retarget, and Preview section with drop-down selectors for Up and Forward Axis, a Retarget button, and a Preview button.
The Interactive Rigging section with a Human body diagram and joint tag pins.
The Retarget Pose section with buttons for Auto Pose, Edit/View, Save, Reset, and a Match drop-down menu and Match button.
Automatic Retargeting#
The Retargeting system uses tags on joints to identify them for retargeting. If you use popular third-party character systems such as Reallusion (Character Creator, iClone), Unreal Mannequin, and NVIDIA Digital Human, the retargeting process will automatically apply the correct tags.
To apply retargeting to your rig, in the Animation Retargeting panel:
Select your Skeleton in the drop-down menu.
Optional: Click the Focus button and enable the display of skeletons in the viewport settings.
If the skeleton has invalid tags, press the Fix button.
Press the Retarget button.
If any tags remain yellow, assign them to joints by clicking the tag icon in the Human view.
Refer to the Previewing Rig Animation section to validate the retargeting.
If your character is a supported character system, the Human rig will now be displayed fully configured within the interactive rigging view, and the Up Axis and Forward Axis drop-down menus will be populated.
With unsupported characters, the Retargeting system will attempt to do as much of the setup as possible. Use the Retarget button in the command bar to run auto-setup on demand, and click on tags to edit.
Skeleton Section#
The Skeleton section displays which skeleton is currently being set up for Retargeting. The chevron at right opens a drop-down menu to select a skeleton from your scene.
If Retarget settings were changed and the file is unsaved, there will be a bracketed asterisk Skeleton[*] shown. Retargeting information needs to be saved along with the entire scene to be reused elsewhere.
The skeleton can also be set using the Assign Skeleton from Selection (arrow icon) button at upper-right of the panel.
To focus the viewport on the selected skeleton, click the Focus button at the upper-right of the panel.
Axis, Retarget, and Preview Section#
The command bar contains the Facing controls (Up and Forward Axis drop-downs), the Retarget button, and the Preview button. The Retarget button will show Fix if there are invalid tags in the rig, and change to Retarget once fixed.
Refer to the Previewing Rig Animation section for more details on preview animations on your rig.
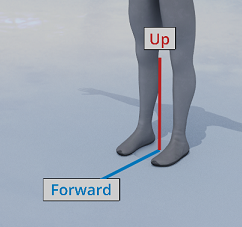
When a rig is selected in the Skeleton drop-down, Forward and Up Axis indicators will display in the scene viewport at that rig.
These controls are mirrored in the Property panel when the skeleton root is selected. Changing the settings in one place changes the other.

The Retarget button automatically sets up the currently selected Human rig. When you select a skeleton that does not yet have retargeting set up, you can click Retarget to run the auto-setup processes. The same button can be used on-demand to re-run or complete setup.
Note
The Retarget button is labeled Fix when the skeleton has invalid tags. Press to automatically assign default tags.
Interactive Rigging Section#
The Human diagram in the center of the panel shows tag pins for each Human joint. Tags tell the retargeting system how to remap sections of the body across different characters. For each tag, a skeleton joint is specified. Click a tag pin to select the joint in the Stage and edit the tag.
An imported skeleton rig with invalid tags is shown in the interactive rigging view, below.
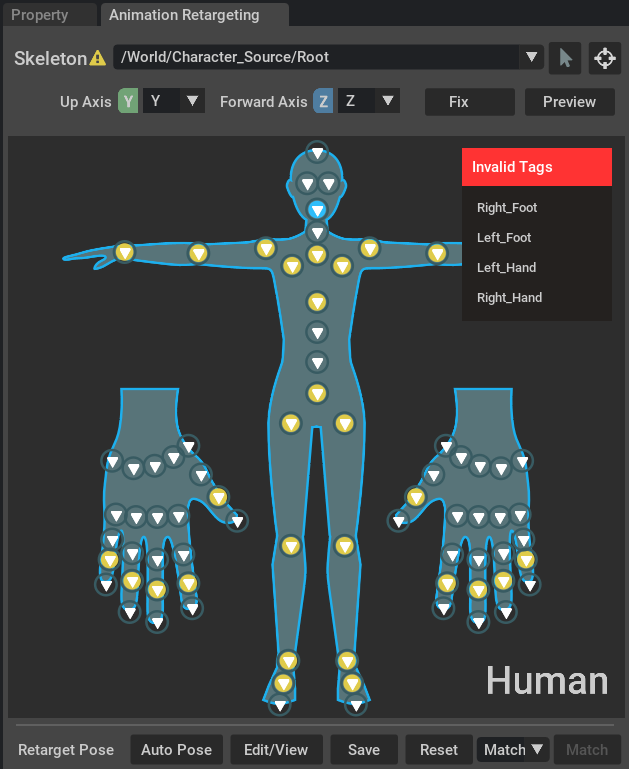
Any tags shown in yellow are tags that are required to be defined and need retargeting. The tags without a background color are optional tags.
After Fix is applied, the Fix button changes to Retarget. After pressing Retarget the yellow tags will turn blue to indicate they are properly defined.
A retargeted rig with all required tags defined (blue background) and optional tags on the head and toes (no background):
To manually change a tag, left-click a tag pin to open a menu and assign a joint from the drop-down list, or use a pre-selected joint from the Stage. When a tag is selected in this panel, the joint assigned to the tag is also selected and shown in the Stage panel.
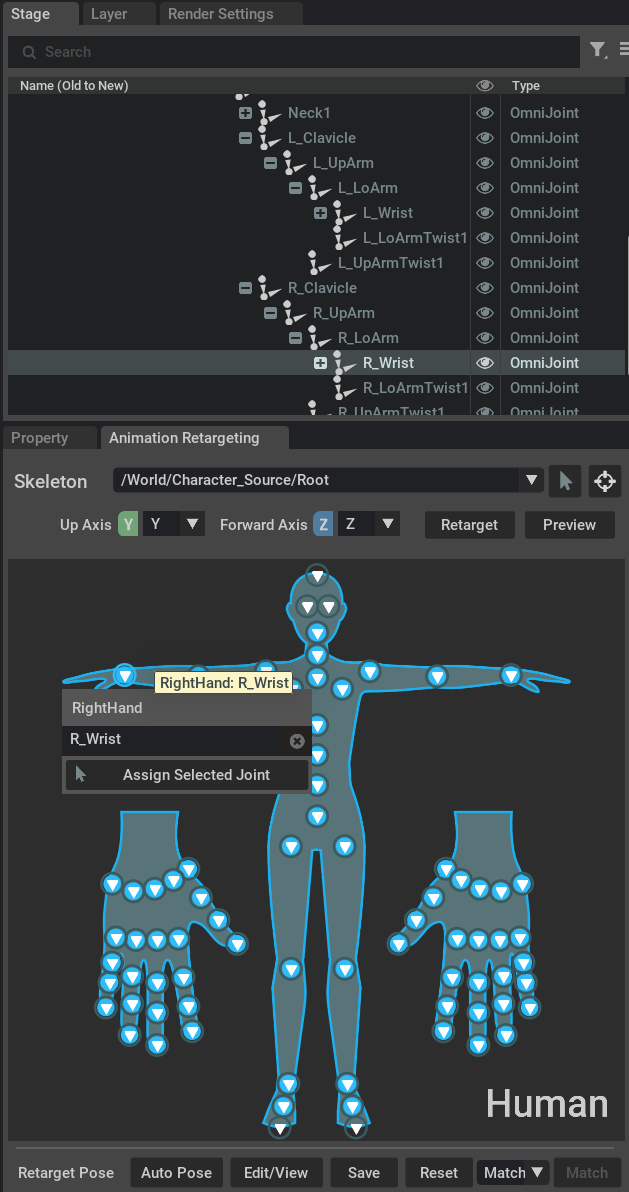
Select the tag definition to drop-down a list of rig joints you can assign. Click the “x” next to the name to undefine the tag. If you have a joint selected in the stage, use the “Assign Selected Joint” button to use the selected prim.
Right-click a tag pin to assign a tag to a joint or delete the tag’s joint definition.
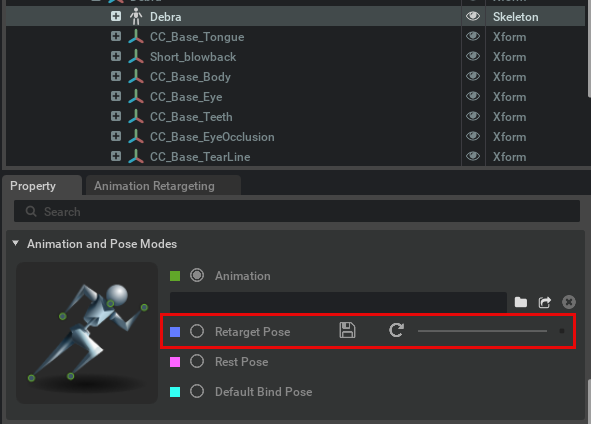
Retarget Pose#
The Retarget Pose is a custom pose that is stored with the character’s retarget settings. There are several buttons and features to aid in viewing and editing this pose:
Retarget Pose Options
Option |
Result |
|---|---|
Auto Pose |
Sets the skeleton into an automatic T-pose |
Edit/View |
View the character’s retargeting pose and enable editing the pose |
Save |
Save the current pose as the retarget pose |
Reset |
Reset to rest transform (deletes the existing retarget pose) |
Match |
Match to the pose of the specified skeleton in the Match drop-down |
The Retarget Pose options Edit/View, Save, and Reset are the same operations as found in the Property panel and when the Skeleton root object is selected.
The Retargeting system assumes that the source and destination characters have matching “T” poses. The system uses the rest transform pose of the skeleton. However, not all characters are built in the same default “T” pose.
To get a high-quality retarget, you may need to adjust the source used for a Match operation, or the selected character’s retarget pose.
The Auto Pose button sets the skeleton into an automatic T-pose that can be manually adjusted afterwards.
If the desired pose is not achieved with the automatic methods, enable Edit/View and rotate joints in the viewport to adjust the pose.
Important
Click the Save icon or press Save button in the Animation Retargeting window to save the rest transform pose edits to your rig. You must exit the Retarget Pose (Edit/View) mode to continue working in your scene.
Previewing Rig Animation#
Use the Preview feature to apply animations to your rig and validate the retargeting. The Preview feature will give you a quick visual on how your retarget is functioning. Animations such as idle, wave, and walk are included with the Animation Retargeting and Behavior extensions.
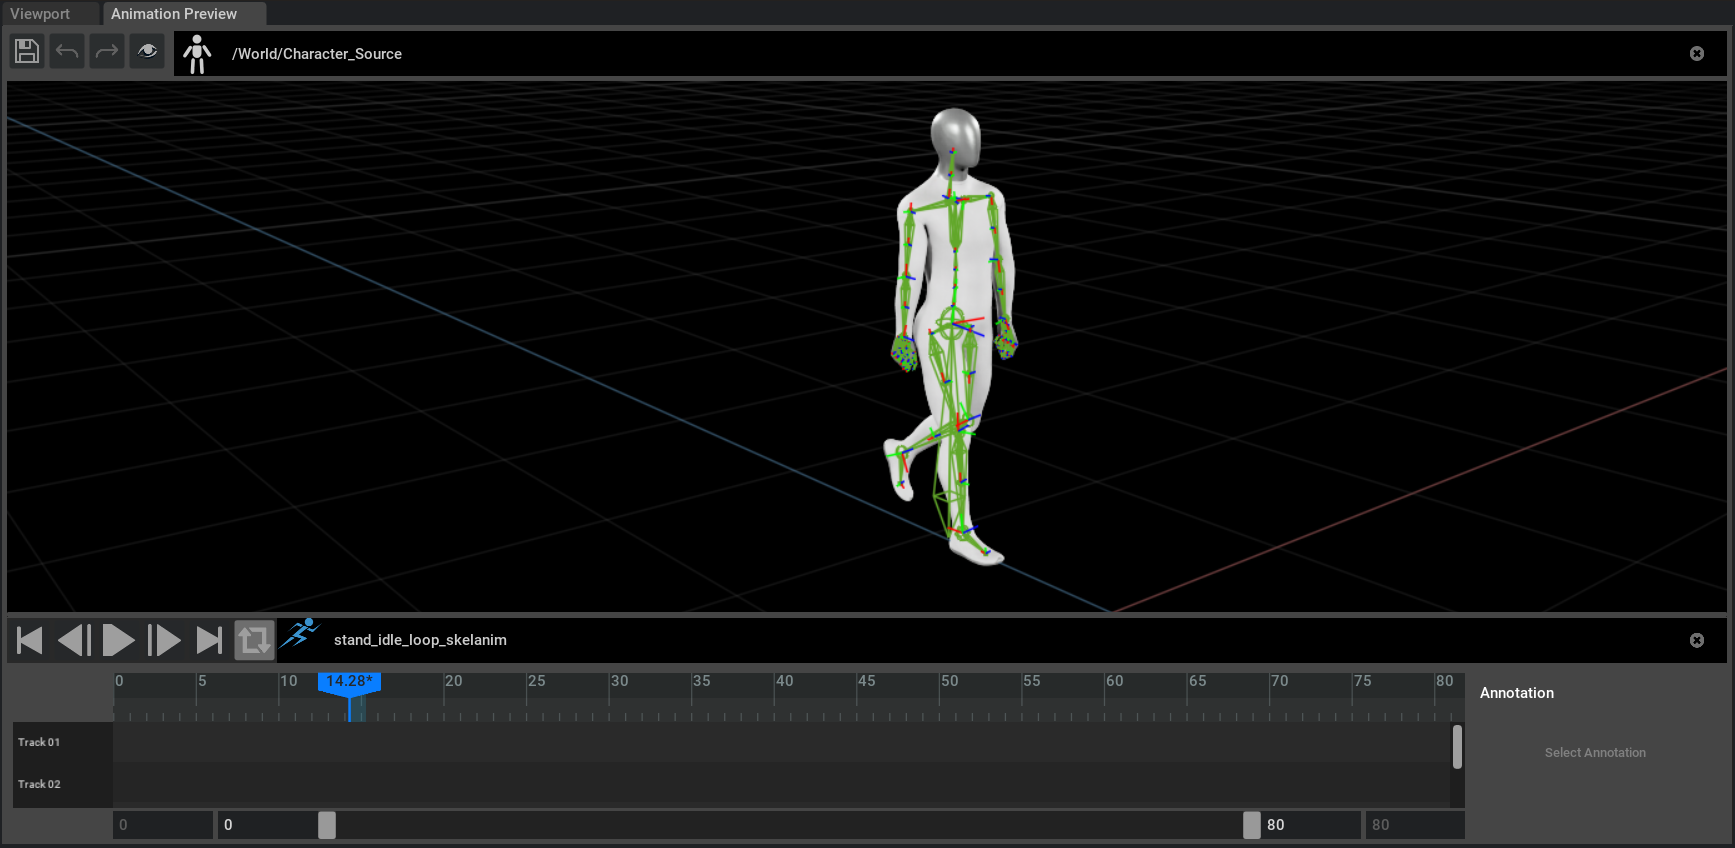
To launch the preview, select the rig in the Skeleton drop-down and click Preview. The Animation Preview viewport appears as a tabbed view along with the Viewport tab.
Select an animation from the playback bar - the stand_idle_loop_skeleton animation is shown above - and click the Play icon to preview.
Warning
Using the Preview may slow framerate. Also, using skeleton preview with Retargeting will not represent any post-retargeting modifiers set on the skeleton - it will only provide a snapshot of the Retarget. Close the Animation Preview viewport when completed.
Retargeting with SkelAnimation#
The most straightforward way to use Retargeting is the SkelAnimation method within USD. This uses two separate links:
Skeletal Binding (on the animation) — Tells the retargeting system which character the animation was authored for. The system uses this source skeleton to compute pose offsets when the same animation is applied to a different character.
Skeletal Animation (on the character) — The standard USD link that drives a skeleton: the skel:animationSource relationship on the destination character’s Skeleton prim points to the SkelAnimation prim to play.
Both the source character (the one the animation was authored for) and the destination character must have Retargeting set up in the Animation Retargeting window first (see the Automatic Retargeting section above: select skeleton, Fix if needed, Retarget, resolve tags). Without this, assigning the clip will not retarget correctly.
To retarget a SkelAnimation from one character to another:
Ensure both characters have Retargeting set up (per Automatic Retargeting).
On the SkelAnimation prim: add Skeletal Binding and set Source Skeleton to the source character’s Skeleton prim.
On the destination character: select its Skeleton prim and set Skeletal Animation to that SkelAnimation.
The following subsections describe each step in detail.
Enabling retargeting for an animation
So that the animation can be retargeted onto other characters, you must specify its source character (the Skeleton prim it was created for). Ensure your scene contains both the animation and that source character.
Select the SkelAnimation prim (the animation clip) in the Stage.
Add the Skeletal Binding: choose Add > Animation > Skeletal Binding (via the Stage right-click context menu or the Property panel Add button when the animation is selected).
In the Property panel, set Source Skeleton to the source character’s Skeleton prim in the scene. (The relationship picker may appear as Add Target.)
The animation is then ready to retarget.
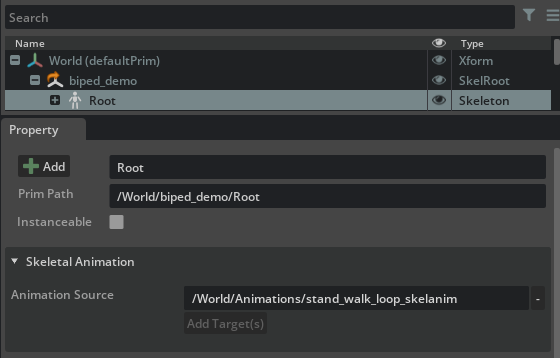
Assigning an animation to a character
To play that animation on another character, set the Skeletal Animation on the destination character’s Skeleton prim. Select the Skeleton prim under the character’s SkelRoot. In the Property panel, assign a SkelAnimation by choosing a clip in the scene or adding a reference. That sets the Skeletal Animation (animation source) for that character.
Multiple animations can be set up for Skeletal Binding at once by multi-selecting the SkelAnimation prims, adding Skeletal Binding, and then setting the Source Skeleton for each.
Tip
To maintain the binding across different use cases, bring all animations into one scene along with the source character, and then reference that scene into others. The Skeletal Binding only has to be applied once. The source character can be hidden in the viewport if needed.
Retargeting with Animation Graph#
Retargeting can also be processed using the Animation Graph runtime animation system.
Note
Retargeting will execute after the Anim Graph final pose has processed.
When setting up an Animation Graph prim, a skeleton must be specified. Retargeting needs to be set up on this character for the changes to carry through the Retarget system and on to other characters that are also setup for Retargeting.
The Retarget rigging works automatically if the Animation Graph is using a different skeleton than the graph was authored for. For example, if you have an Animation Graph with Skeleton A, but if you apply that Animation Graph prim to Skeleton B, it will automatically apply retargeting.
After both characters are set up for Retargeting, apply the Animation Graph to the destination character by right-clicking the SkelRoot in the Stage and choosing Add > Animation > Animation Graph. For more information, see the Animation Graph documentation.
Tips and Limitations#
It is strongly recommended all of your characters (including animation source characters) are set up with a root joint. This joint is directly under the Hips or Pelvis, and on the ground plane.
Animating translation or scale will not retarget properly; scale is always 1 (Actual Size).
“T-Pose” – where the character’s legs are straight down and arms and fingers straight out to the side – is highly recommended as the base pose for all your character authoring. Doing so will make Retargeting’s Auto Setup faster.
It is recommended that both source and destination characters included in your Retargeting pipeline should all face the same direction. All character skeletons should face in the direction of positive Z.
Sometimes it is easier to set the source character pose to match the destination character pose. This will benefit by not having to set numerous destination character poses. For example, if the source character and animations all face -Z, and the destination characters downloaded online all face +Z, then it would be easier to adjust the source character facing to match, rather than adjusting many of the destination character directions.
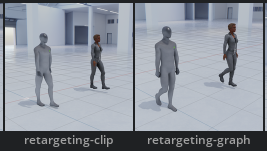
Examples#
Example scenes using Retargeting with both SkelAnim clips and the Animation Graph are available in the Examples browser. Open Window > Browsers > Examples. The Animation Graph extension (omni.anim.graph.bundle) must be loaded to access this panel.
Conclusion#
You have learned how to enable Animation Retargeting, configure skeleton tags and facing, and use retargeting with SkelAnimation and Animation Graph. For animation authoring workflows, see the Animation Graph documentation. To explore sample scenes, open Window > Browsers > Examples and try the Retargeting examples.