Introduction to OmniGraph#
Note
This document contains features from OmniGraph version 108.1
OmniGraph is a visual scripting system that enables you to create interactive behaviors without writing code. By connecting nodes in a graph, you can respond to events, transform data, and control scene objects in real time.
In this tutorial, you use OmniGraph in Omniverse USD Composer to move one shape in response to another. By the end, you will know how to:
Load the OmniGraph extensions
Create an Action Graph
Add and connect nodes to read and write prim transforms
Trigger graph evaluation using playback events
Note
While you use Omniverse USD Composer in this tutorial, you can follow similar steps to achieve the same results in other Omniverse Apps.
Load the OmniGraph Extensions#
Before you start, you must load the OmniGraph extensions into Omniverse USD Composer.
Open the Extension Manager#
In Omniverse USD Composer, click Window > Extensions:
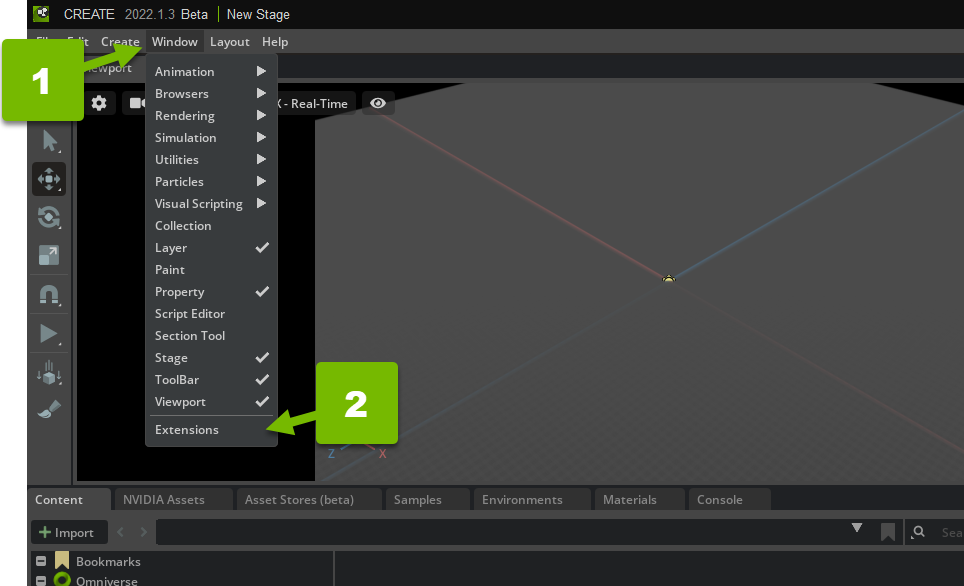
This opens the Extensions manager, which you use to enable and disable Omniverse Extensions.
Enable the Action Graph Bundle#
Search for “omni.graph.bundle.action”, and enable the Action Graph Bundle if necessary:
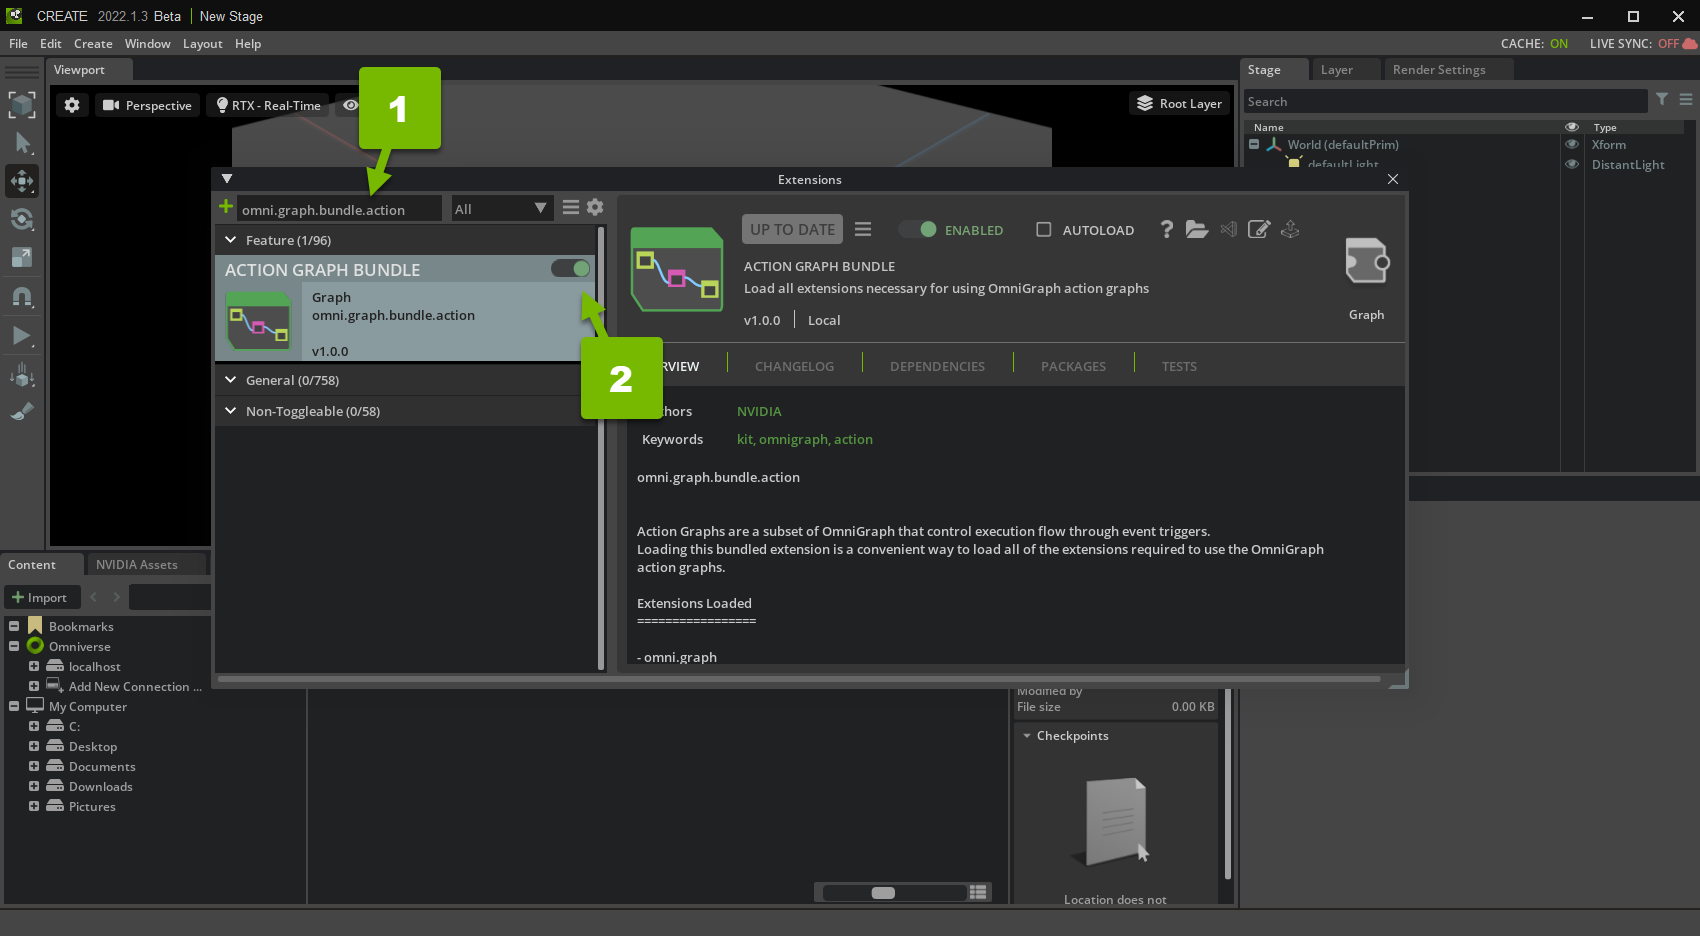
This loads the omni.graph.bundle.action Extension bundle into Omniverse USD Composer.
Note
If you can’t find the omni.graph.bundle.action Extension bundle, remove any filters you may have applied and try again.

Enable Autoload#
Enable autoload for the Action Graph Bundle:
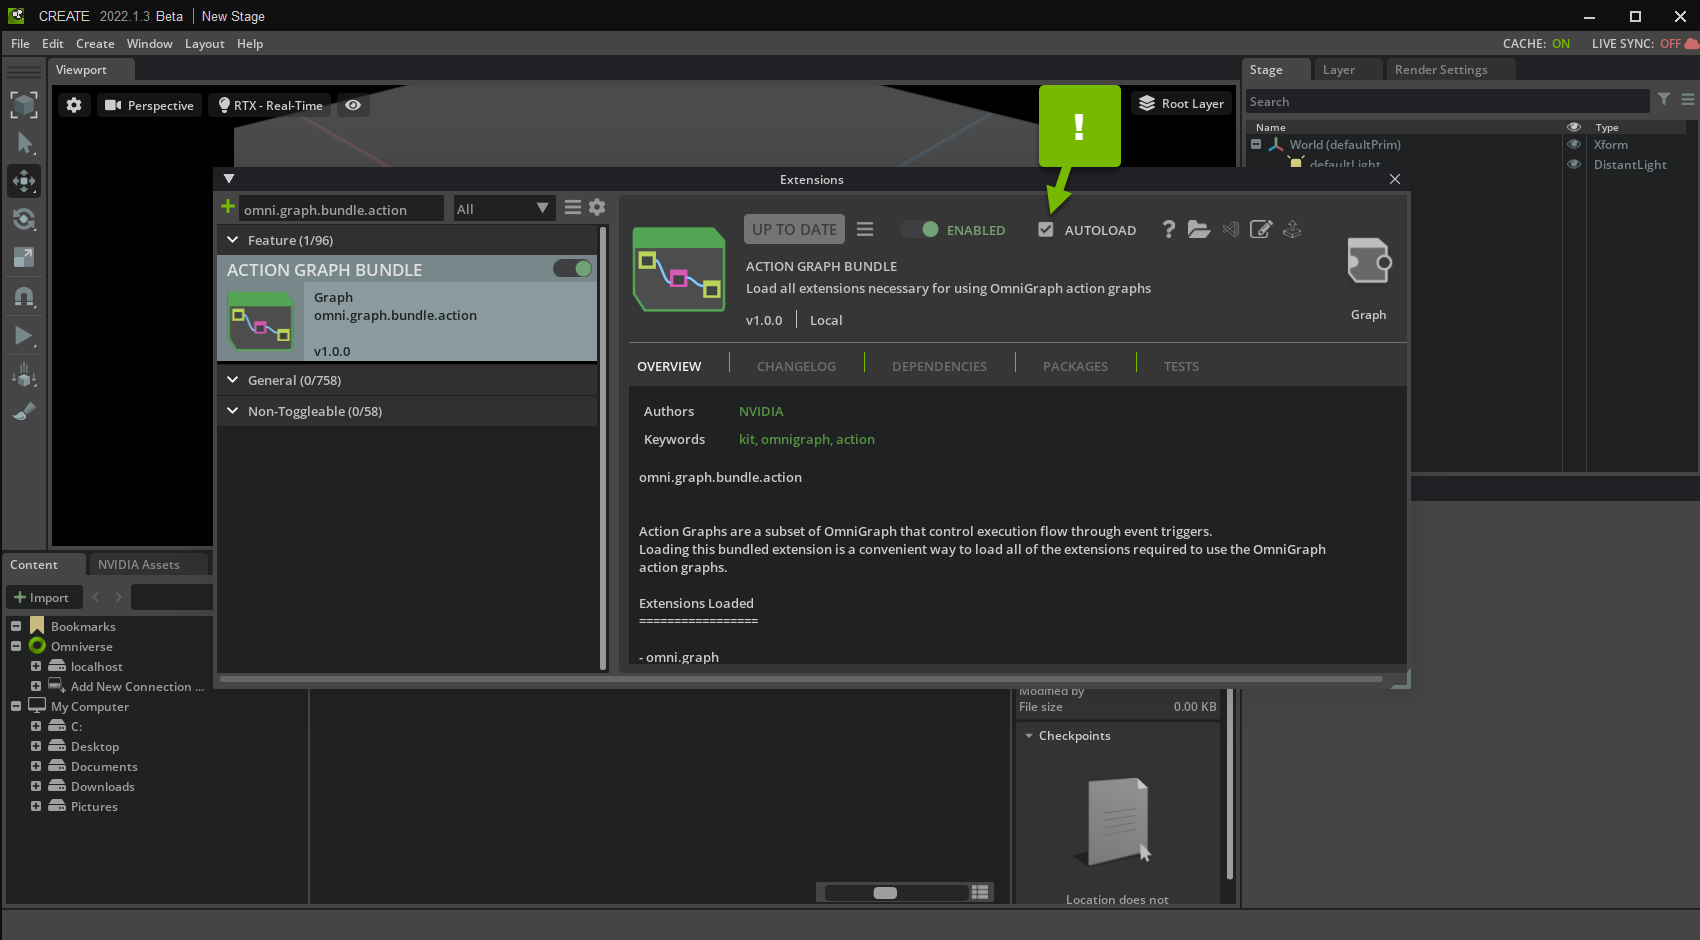
This ensures that Omniverse USD Composer always loads the Extension.
Now that you’ve enabled the Action Graph Bundle, close the Extension manager.
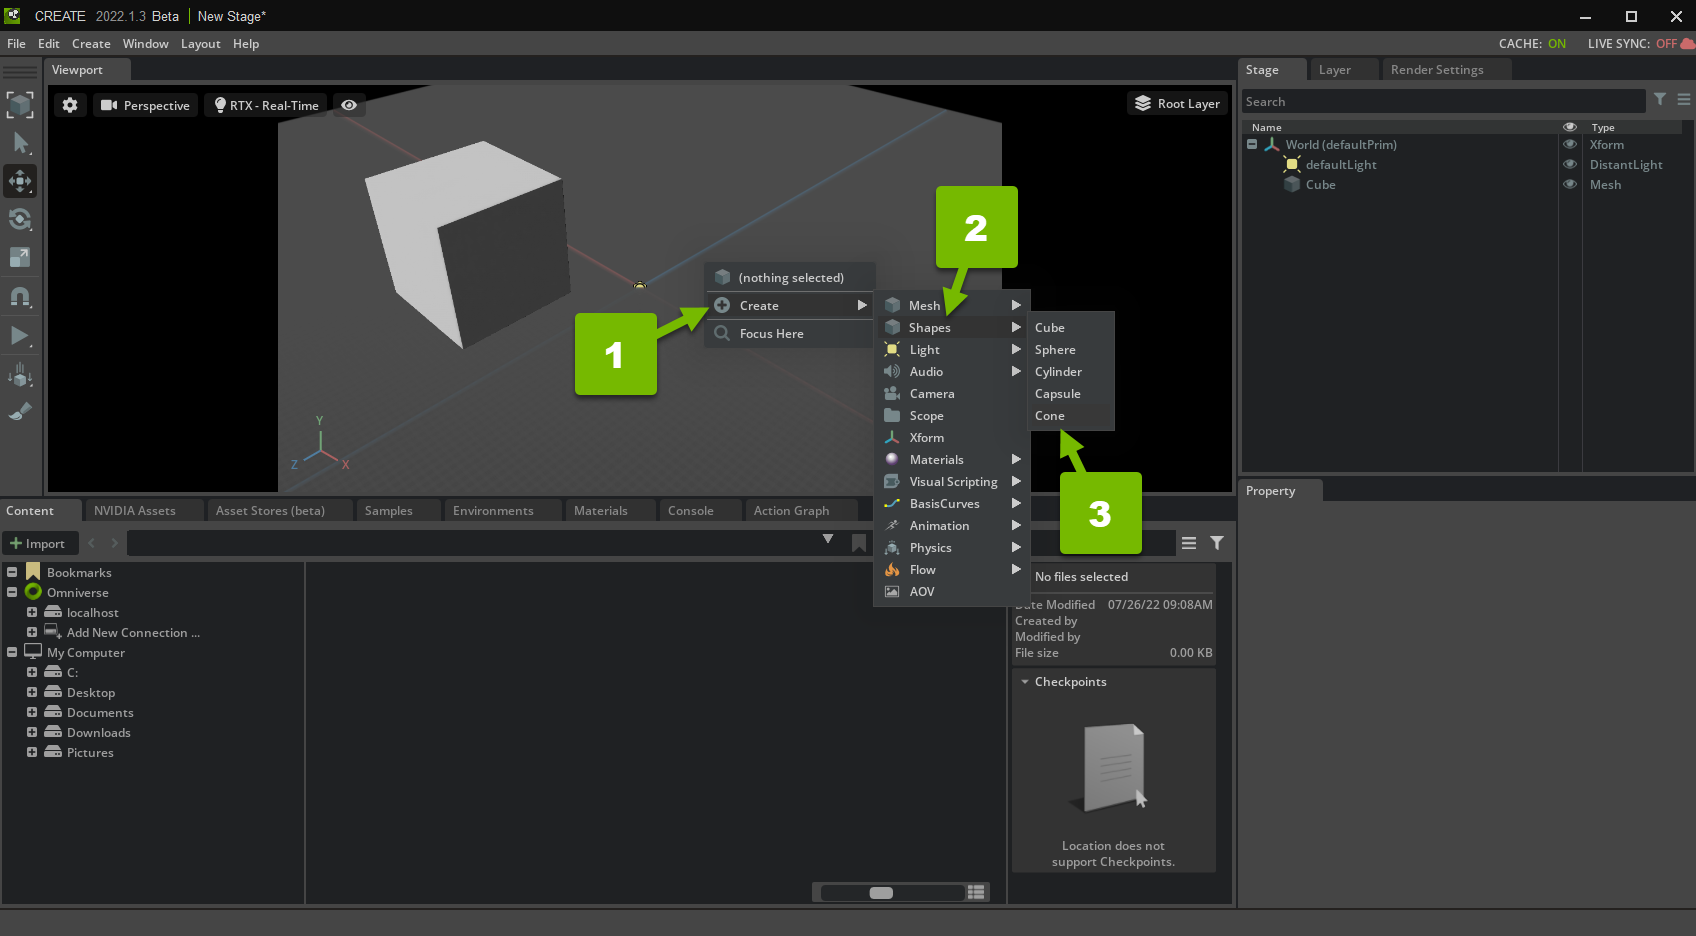
Prepare Your Scene#
Prepare your empty scene by adding a cube and a cone.
Add a Cube#
Right-click the scene, and click Create > Shapes > Cube:
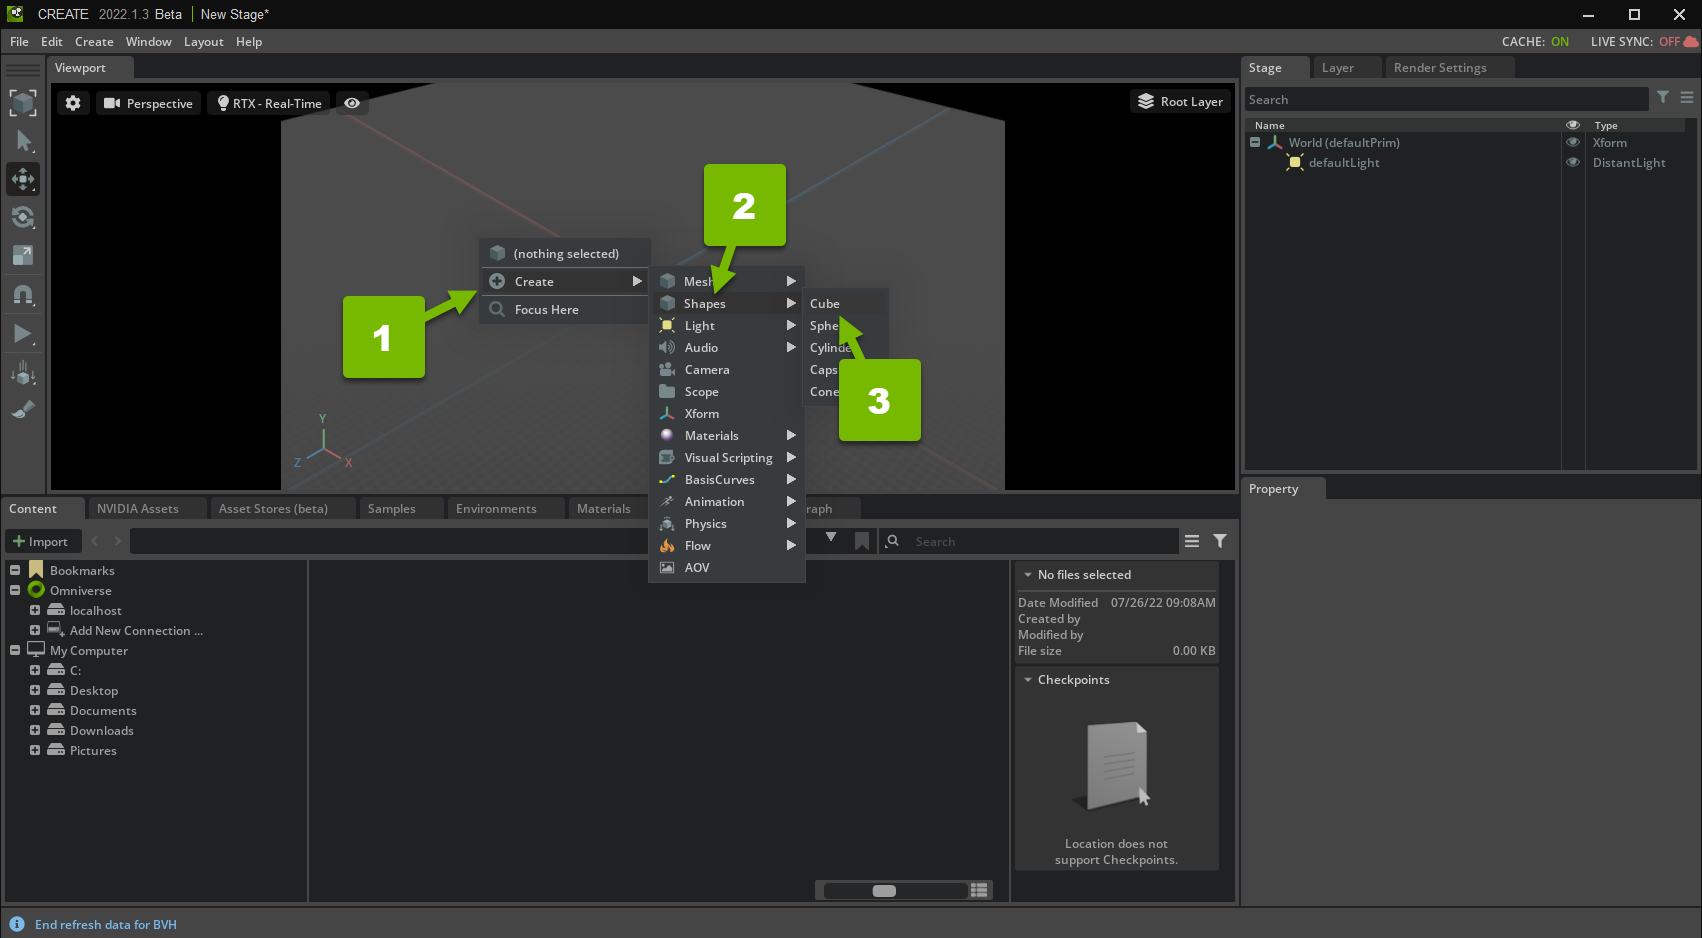
This creates a cube prim at the position of the cursor.
Add a Cone#
Similarly, right-click the scene, and click Create > Shapes > Cone to create a cone prim.
Now that you have added some Prims to your scene, you are ready to use OmniGraph.
Note
Alternatively, you can use the Create menu in the menu bar to add prims to the scene:

Set Up the Graph#
It’s time to use OmniGraph in your scene. Specifically, you use an Action Graph to trigger actions in response to a particular event.
Open the Visual Scripting Editor#
In the Window menu, click Visual Scripting > Action Graph:
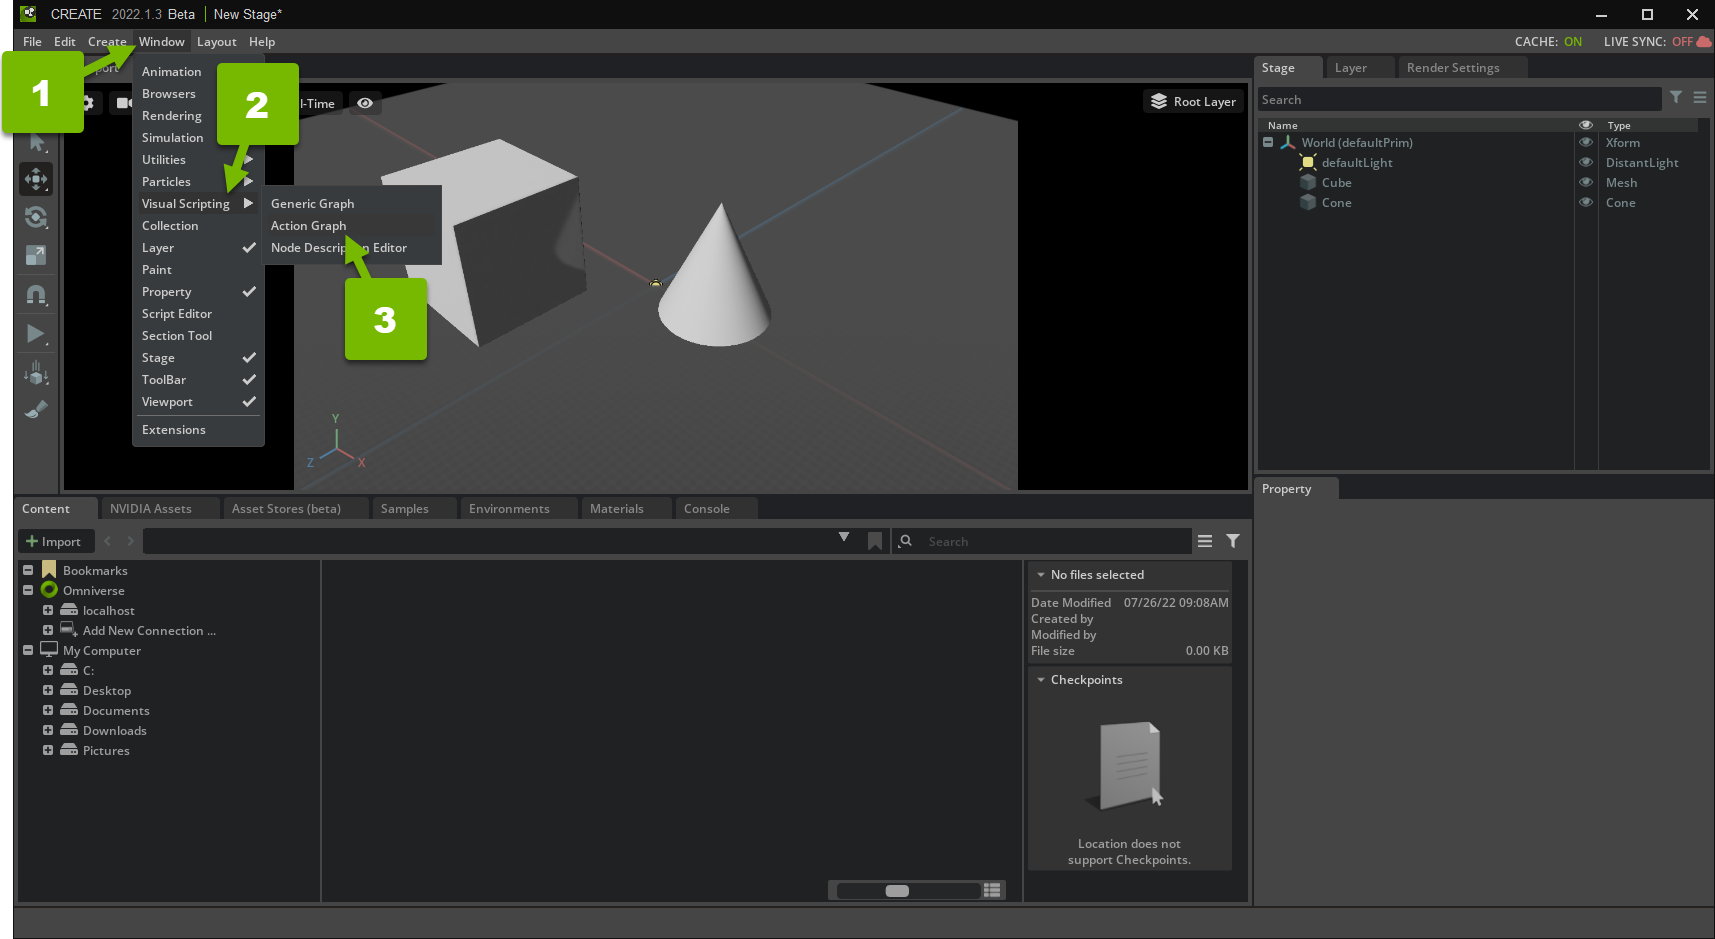
This opens the Action Graph editor panel.
Create an Action Graph#
In the graph editor, click New Action Graph:
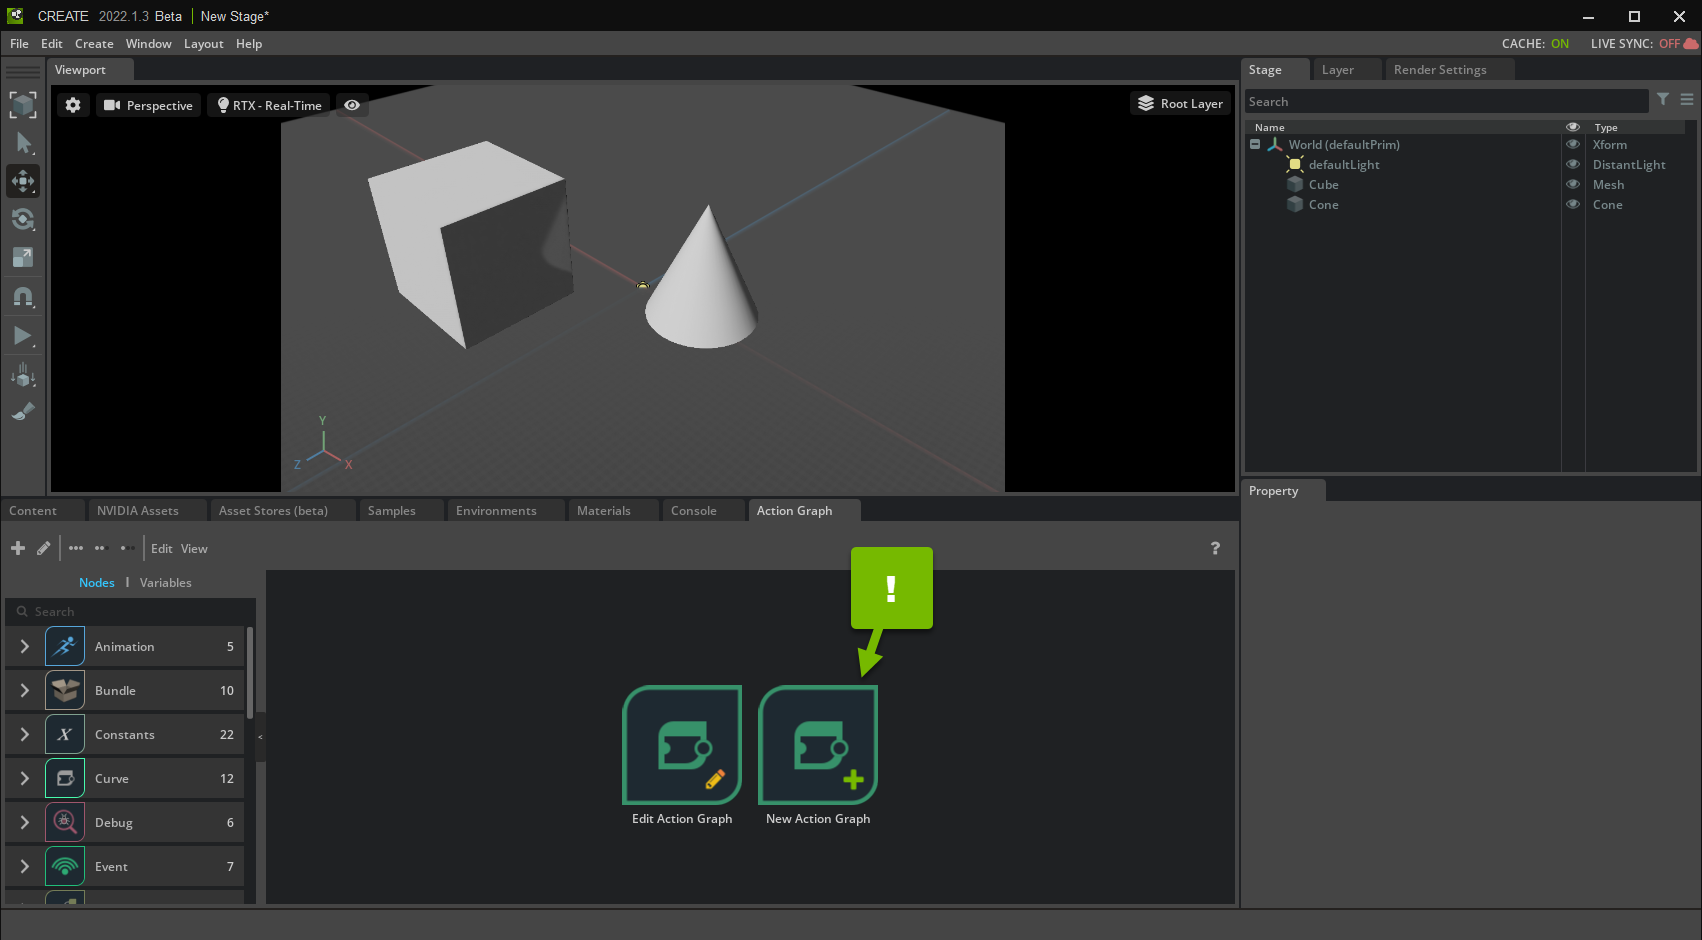
This creates an empty Action Graph at the default path. The graph editor now shows your newly-created graph. Next, you add some nodes to the graph!
Adding Nodes to the Graph#
Because this is an introductory tutorial, you start simple. You create a graph that automatically moves the cone whenever you move the cube:
Read the Cube’s Position#
Drag and drop the cube from the Stage panel to the Action Graph panel:
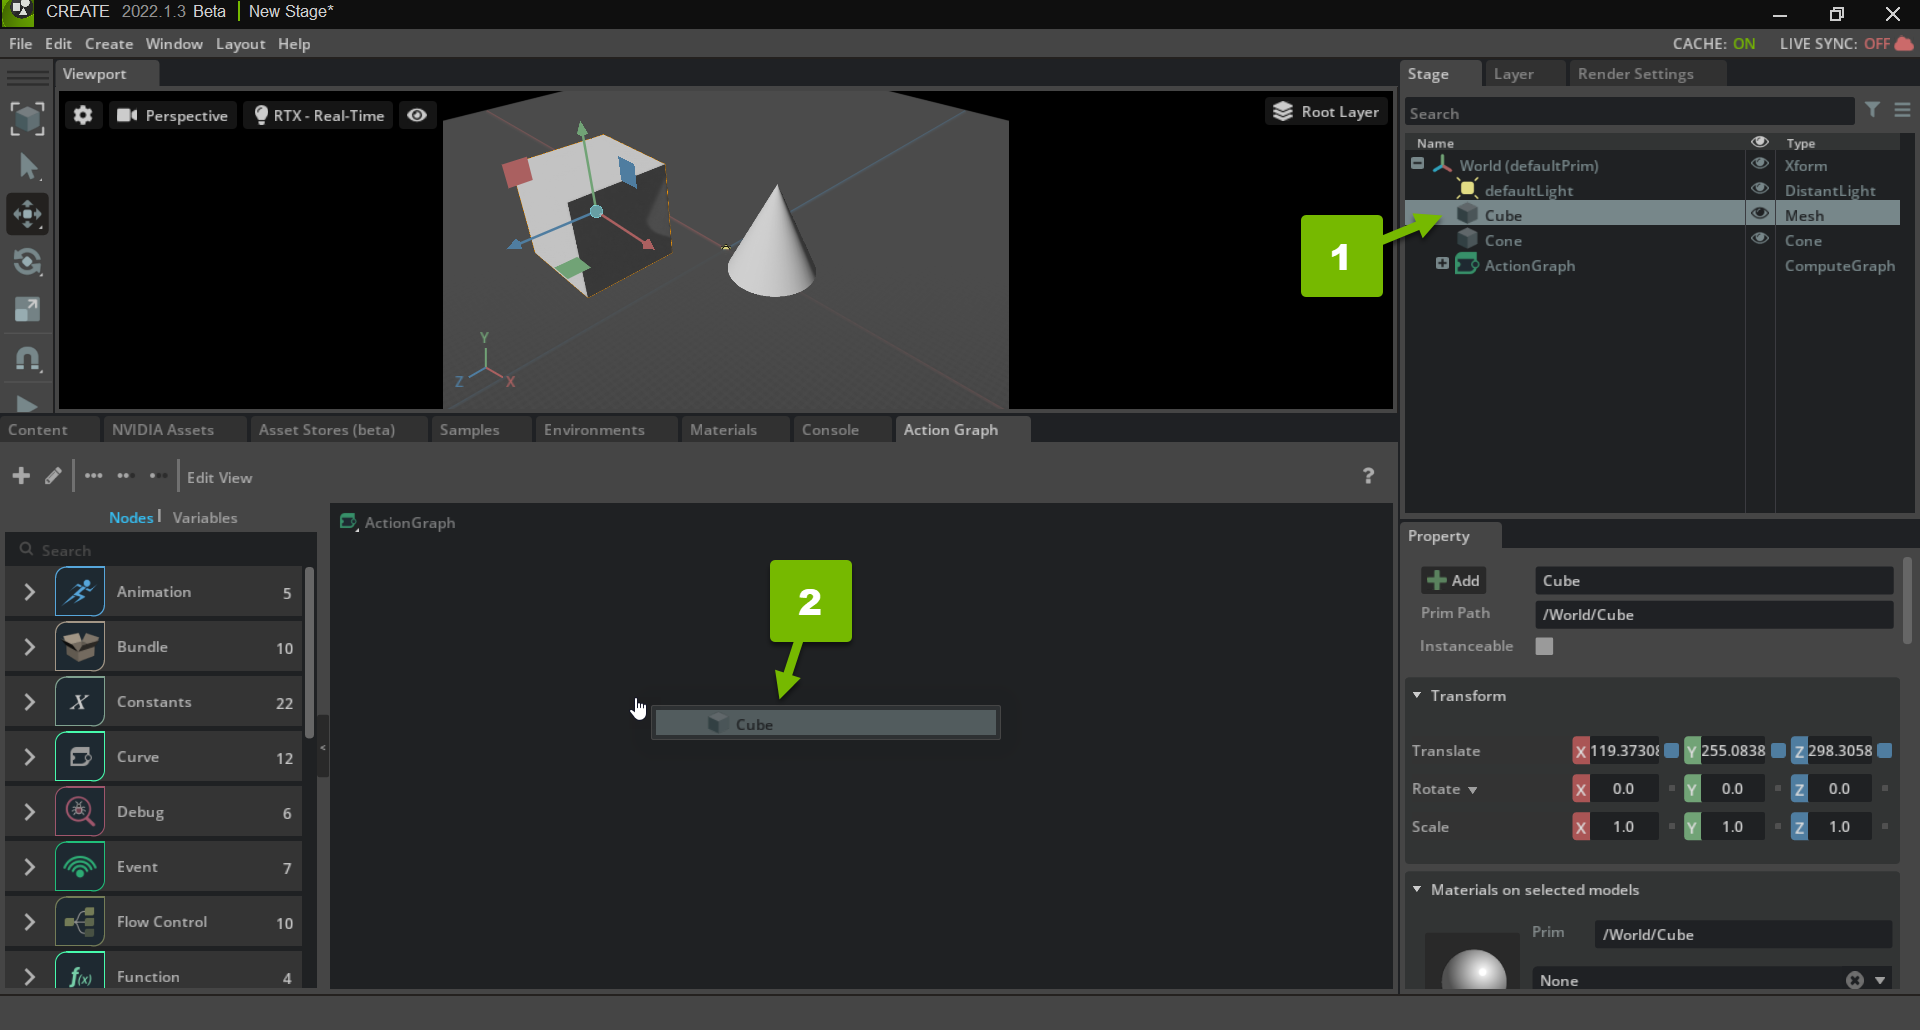
In the popup dialog, select Read Transform. This creates a Read Prim Local Transform node, which can read the Transform of the cube prim that you dragged in.
Note
When the graph runs, it reads the runtime value of the Transform, which may not match the authored value in USD. OmniGraph reads and writes runtime values. Authored values are only used when the graph is initialized.
Modify the Translation of the Transform#
In the search box, type “Add”, and drag and drop an Add node into the graph editor.
Type “Get Translation”, and drag and drop a Get Translation node into the graph editor.
Type “Set Translation”, and drag and drop a Set Translation node into the graph editor.
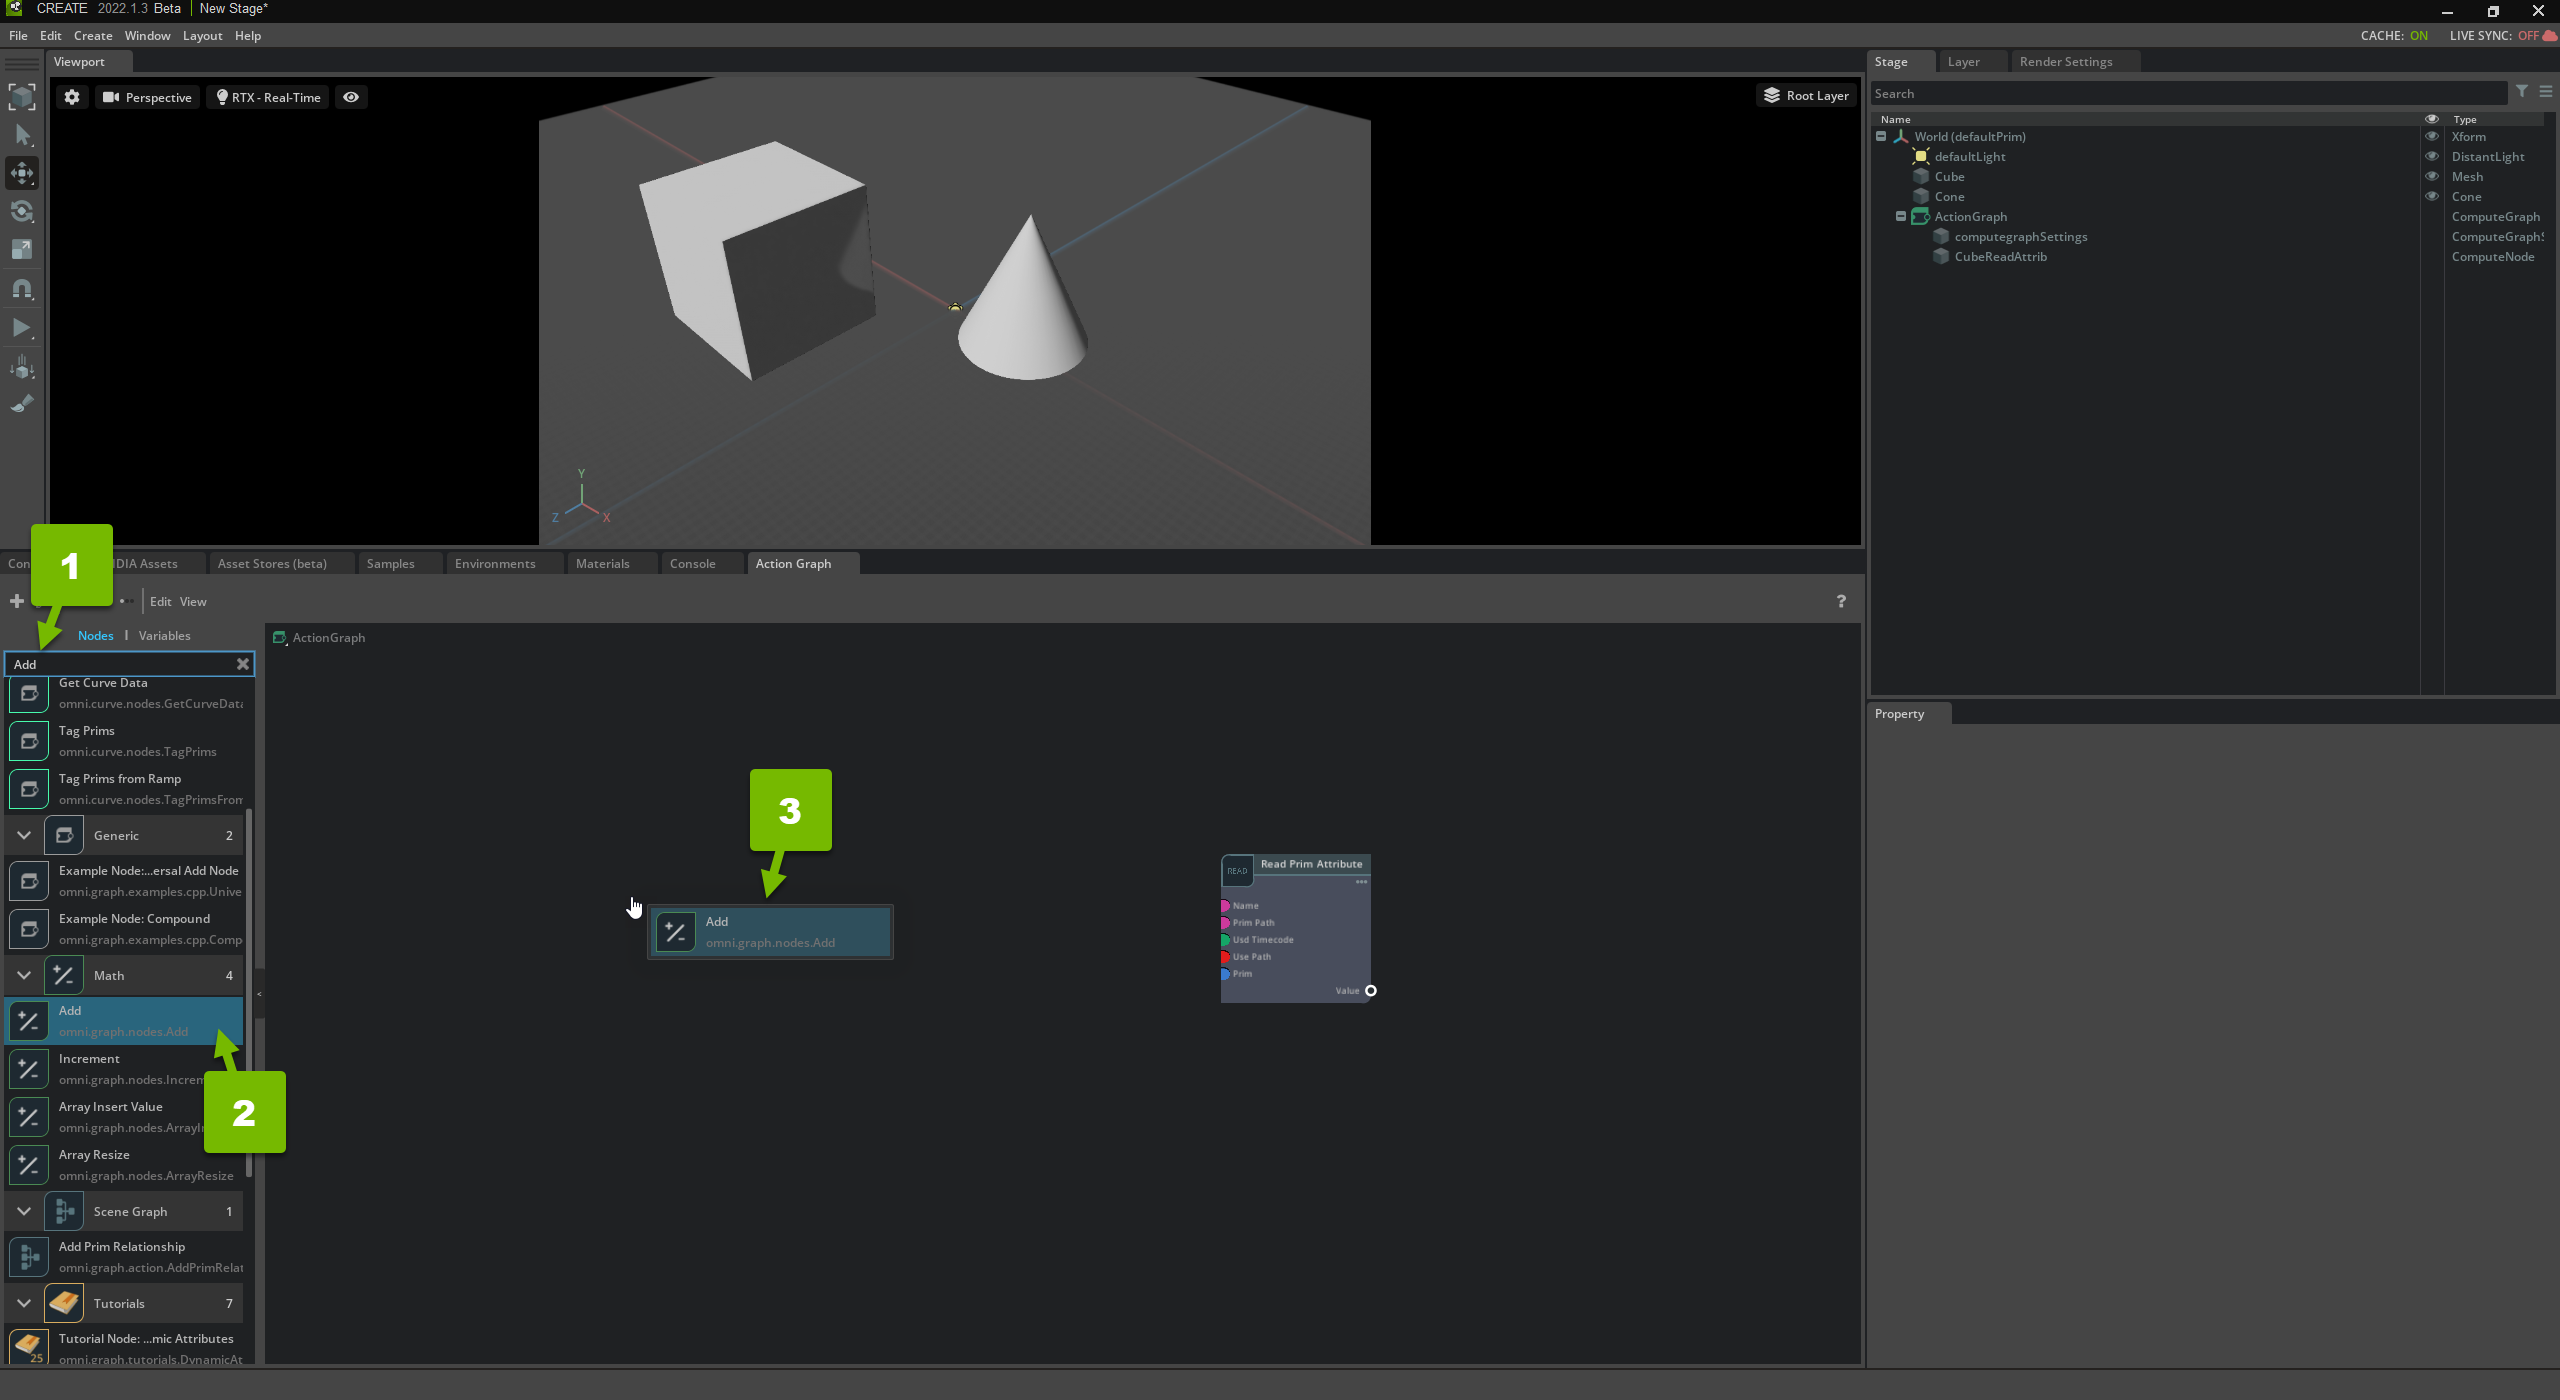
This extracts the translation component of the Transform, adds a constant to it, and creates an updated Transform with it.
Wire them up and create a Constant Node#
Make the following connections:
Read Prim Local Transform node’s Value port to the Get Translation node’s Transform port.
Read Prim Local Transform node’s Value port to the Set Translation node’s Matrix port.
Get Translation node’s Translation port to the Add node’s A input.
Add node’s Sum port to the Set Translation node’s Translation port.
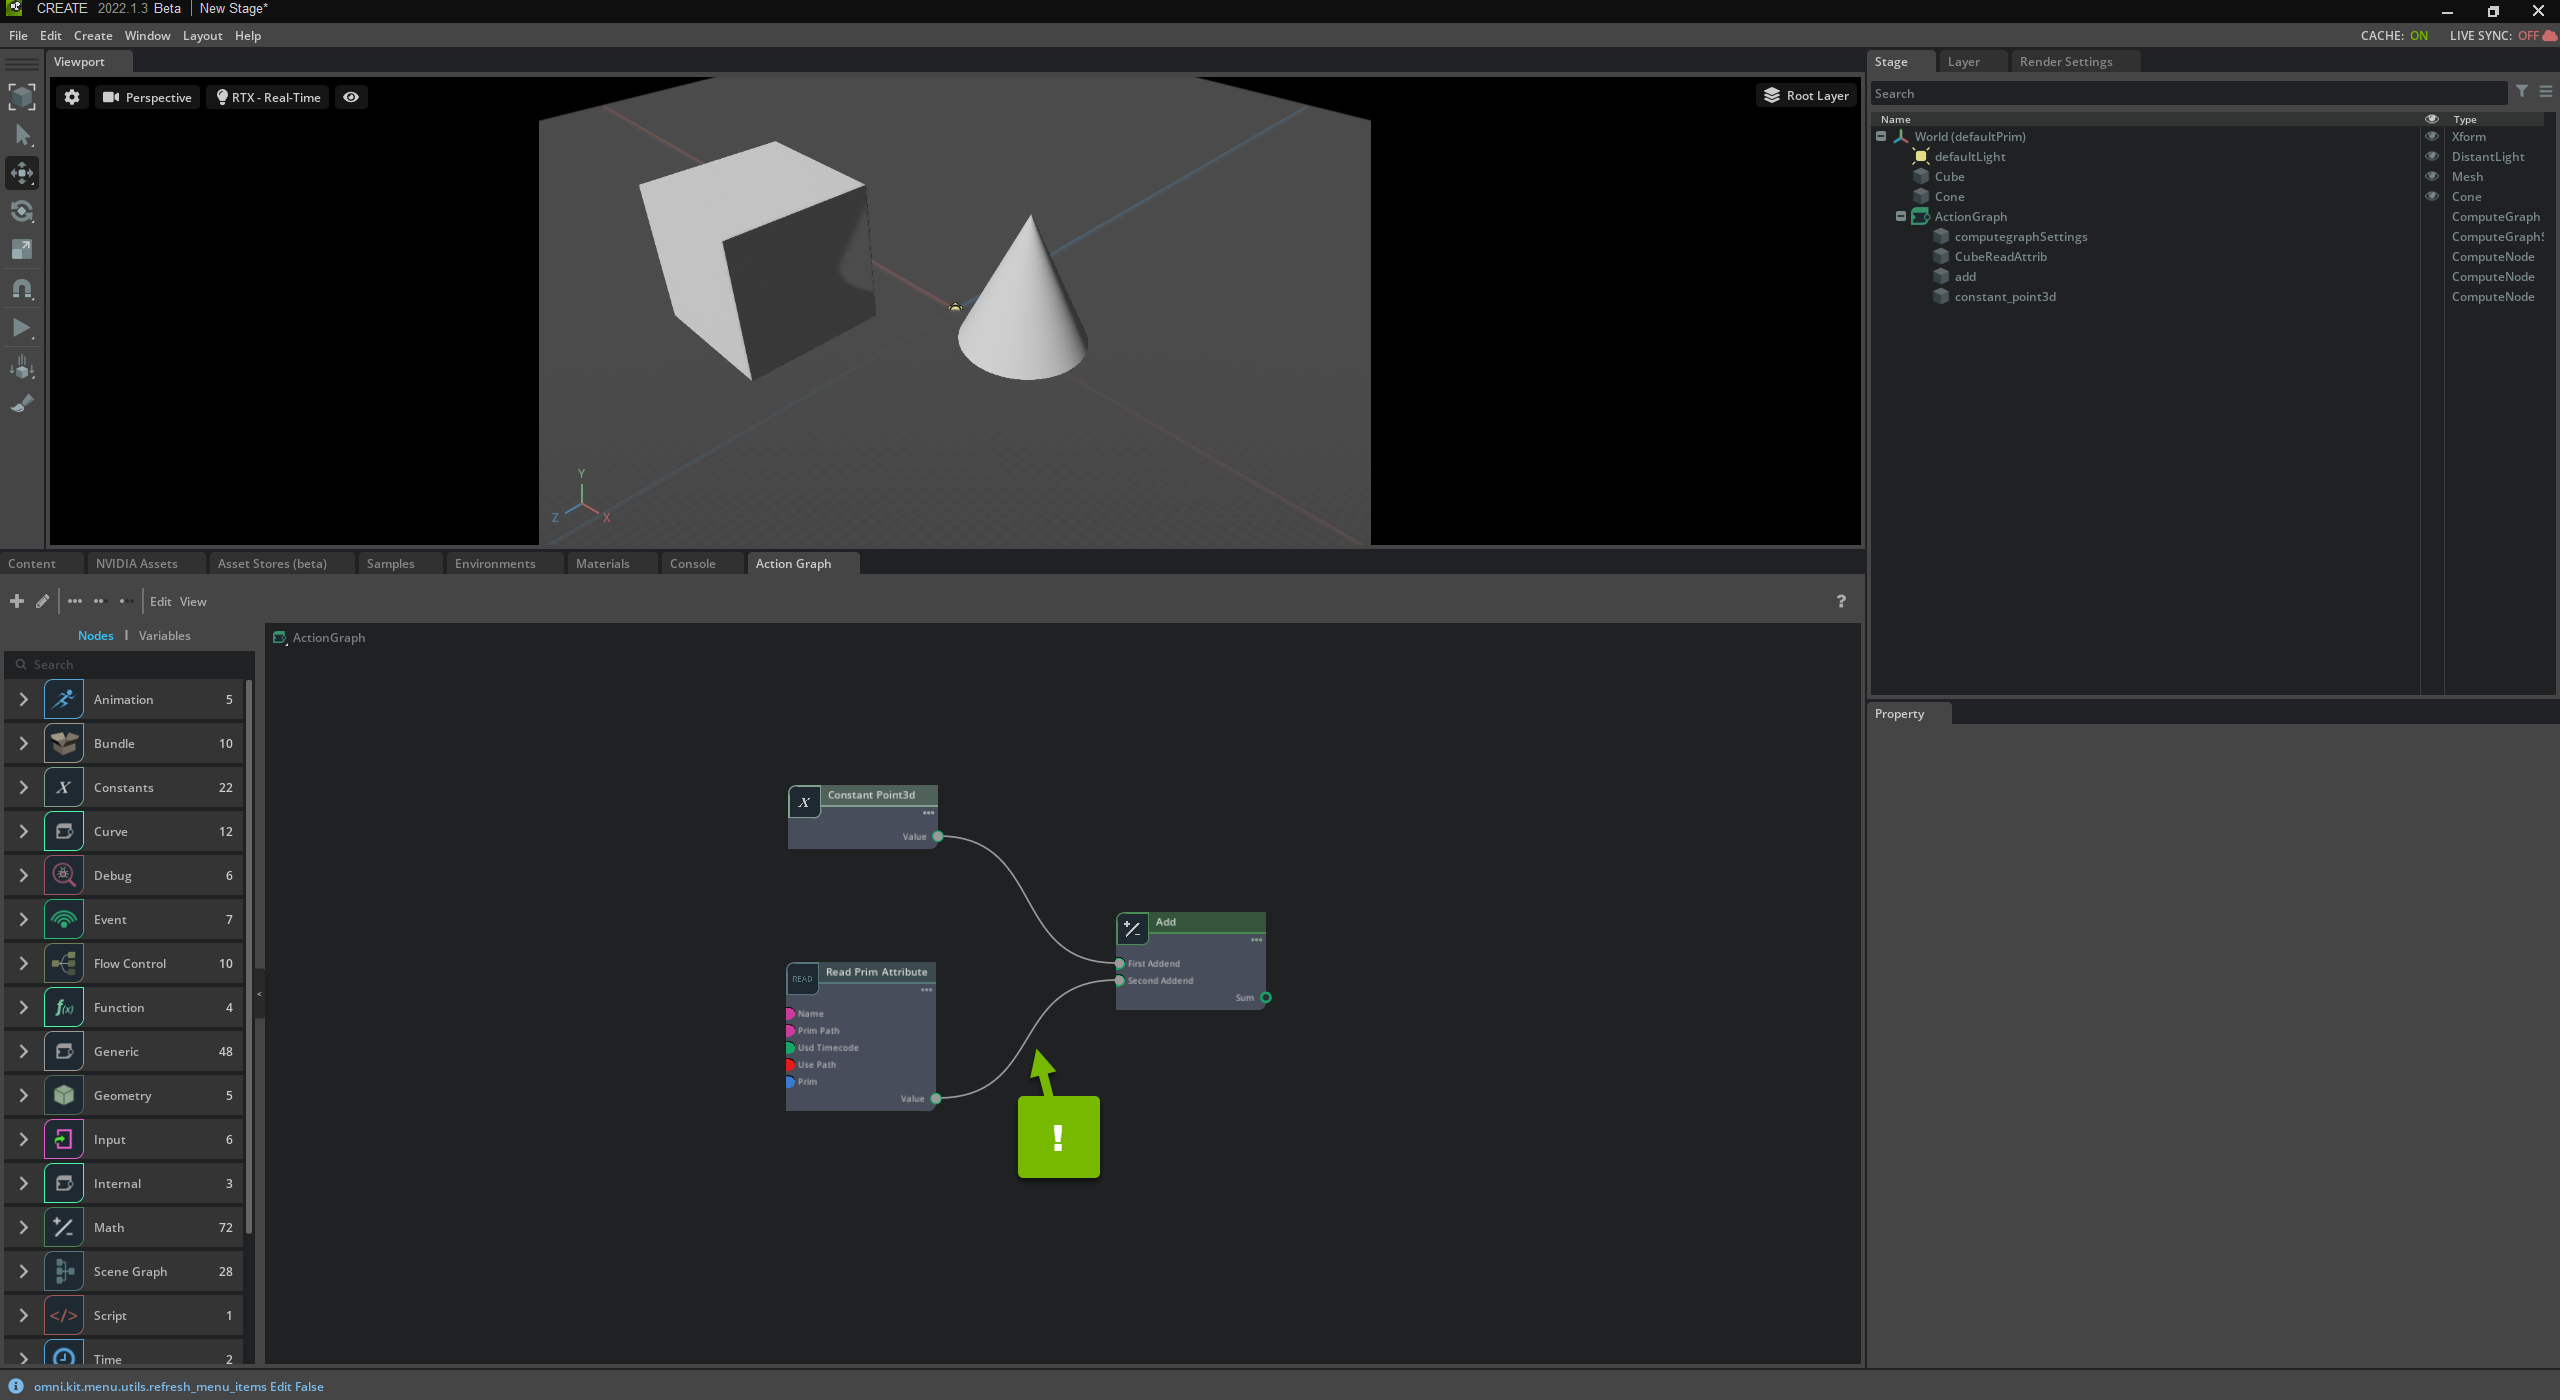
Specify the Constant Value#
Right click on the B input of the Add node, select Promote to Constant from the popup menu. This creates a Constant Vector3d node.
Click the constant node, and set its X input value to 0.0, its Y value to 120.0, and its Z value to 0.0:
With this, the Constant Vector3d node holds the constant 3-tuple: (0.0, 120.0, 0.0).
In summary, you have an Add node that captures two numerical values:
The constant numerical tuple, that specifies a positive Y value and neutral X and Z values
The variable translation XForm value from the cube prim
The resulting value of the Add node, then, contains the cube’s full transform with a shift on the positive Y axis by 120.0 units. Next, you pass this value to the cone.
Note
Feel free to drag the nodes around the editor to keep the UI clean and clear.
Write the Cone’s Transform#
Drag and drop the cone from the Stage panel to the Action Graph panel. In the popup dialog, select Write Transform. This creates a Write Prim Local Transform node, which can write the Transform of the cone prim that you dragged in.
Click and drag the Set Translation node’s Matrix port to the Write Prim Local Transform node’s Value port.
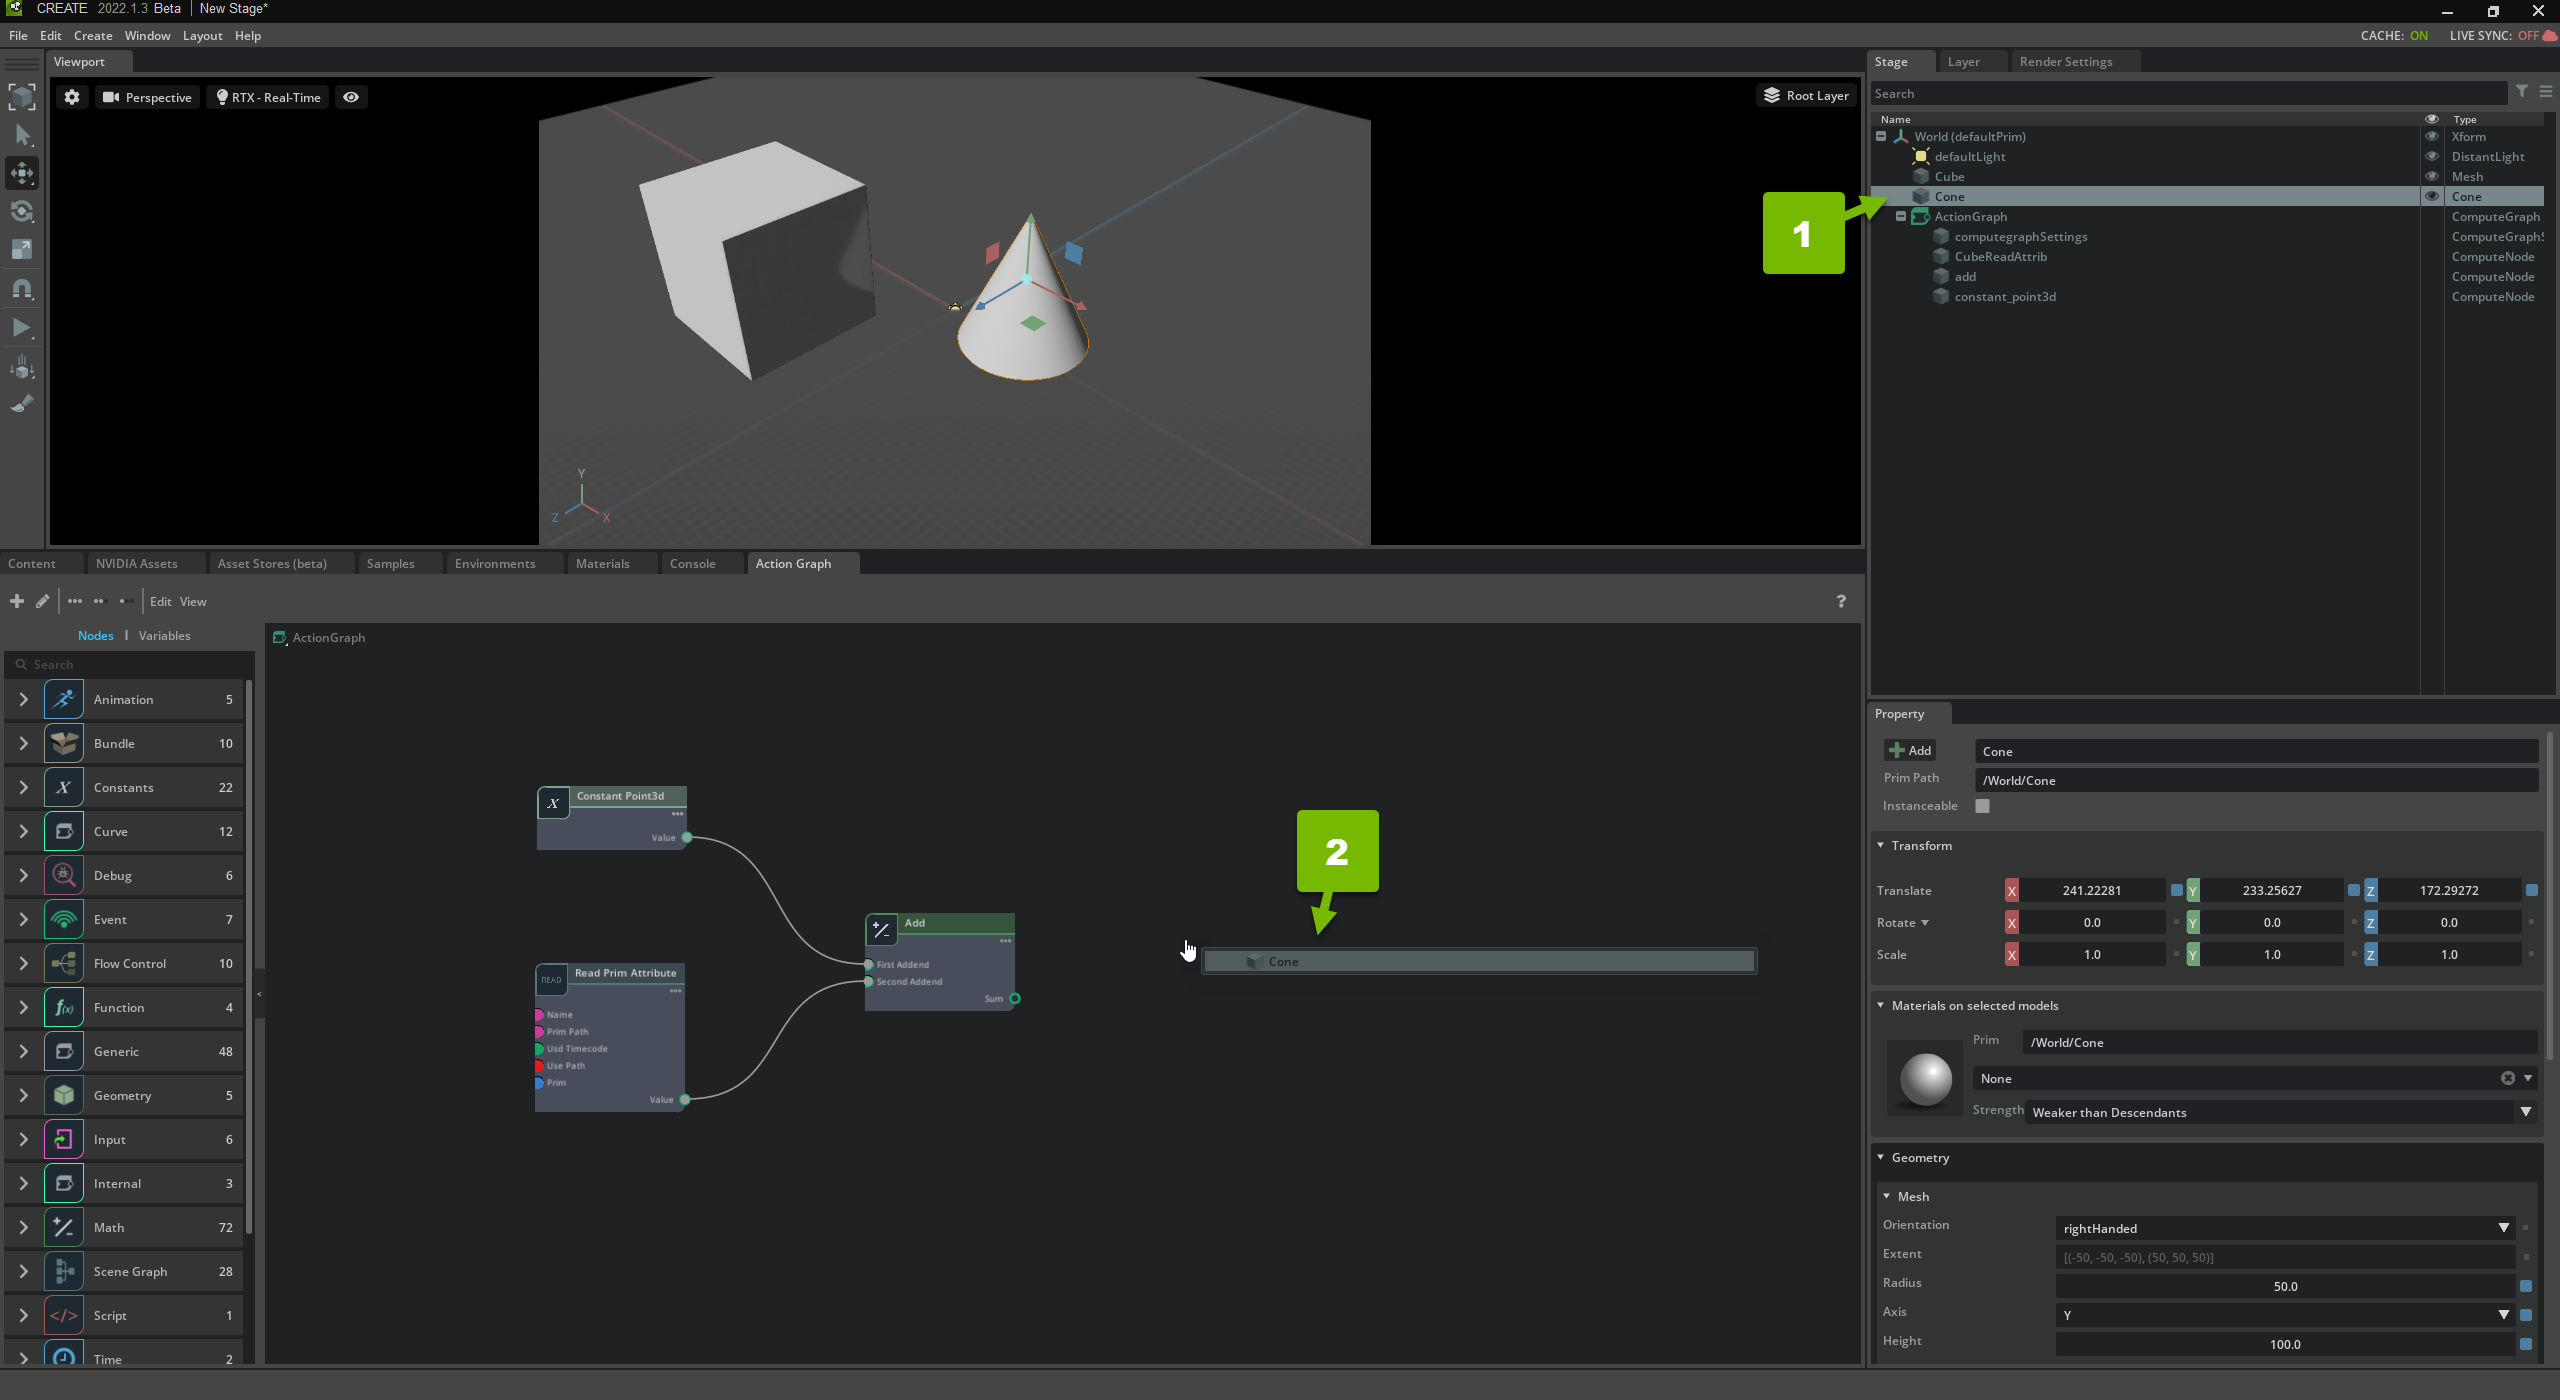
This sets the location of the cone to the resulting sum of the Add node.
Trigger the Node Evaluation#
Remember, the Action Graph evaluates its nodes when an event occurs. In this case, you use the “on playback tick” event.
Use an On Tick Node#
In the search box, type “On Playback Tick”, and drag and drop an On Playback Tick node into the graph editor:
The On Playback Tick node fires an execution signal through its Tick execution port every single frame during playback. Therefore, anything connected to its Tick port is evaluated every single frame.
In this case, you want to update the cone’s position on tick.
Wire up the On Playback Tick Event#
Click and drag the On Playback Tick node’s Tick port to the Write Prim Local Transform node’s Exec In port:
Now, when you press play, your cone’s position is updated to the result of the Add node, which is the sum of the cube’s location and the constant point tuple (0.0, 120.0, 0.0). In other words, as you move your cube, your cone moves with it, but 120 units higher on the Y axis.
Technical Detail
The execution evaluator works by following node connections downstream and computing the nodes the evaluator encounters until there are no more connections to follow.
In this case, the evaluator executes the network downstream from outputs:tick attribute, whose next node is the Write Prim Local Transform node. Before Write Prim Local Transform can be computed, the evaluator evaluates its upstream data-dependency: the Set Translation node, but before it can do that it has to evaluate everything further upstream. Finally, the Write Prim Local Transform node is computed, which sets the cone’s transform in the runtime data.
Review Your Work#
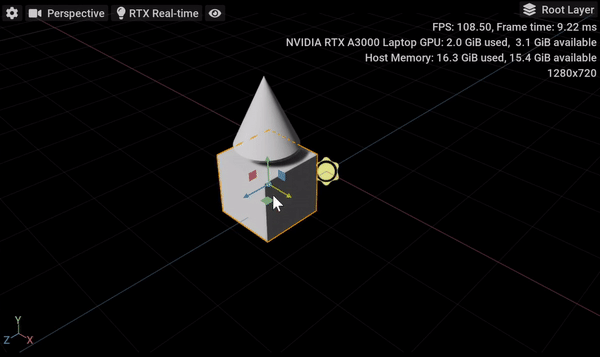
Click Play in your scene’s toolbar. Finally, drag the cube around the scene:
The cone moves with the cube, but above it by 120 units.
Common Problems and Caveats#
If you encounter problems or have questions, read through this section to find an explanation of your problem, and potential solutions:
Common Problem/Question |
Explanation |
|---|---|
You are unable to connect to a node input due to incompatible types. |
Remove all connections from the target node and try reconnecting. When extended types are resolved, the node has to be disconnected to reset the types. |
The node is set up correctly, but is not working. |
Check the Console panel for error or warning messages, try saving and reloading the scene, and ensure you have loaded the Action Graph extensions bundle. |