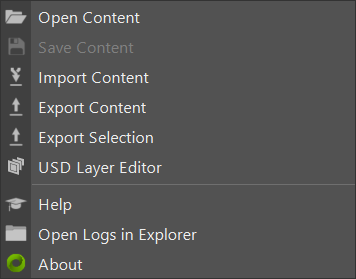
Maya (Native) Connector#
Overview#
The Maya Native Omniverse Connector uses the built-in Autodesk Maya USD plug in that ships with Maya. Users can now open Omniverse USD content and work with all the built-in tools and workflows available in Maya.
Important
We recommend using the Autodesk USD for Maya Plug-in.
Compatible Versions#
The Omniverse Maya Native Connector works with the following versions of Maya.
Version |
USD Version |
Windows |
Linux (not tested) |
|---|---|---|---|
2022.4 (not tested) |
Maya USD 0.27 (USD 21.11) |
Yes |
CentOS 7.9 |
2023.3 (not tested) |
Maya USD 0.27 (USD 21.11) |
Yes |
CentOS 7.9 |
2024.2 |
Maya USD 0.29 (USD 22.11) |
Yes |
No |
2025.3 |
No connector use USD for Maya GitHub |
N/A |
N/A |
2026.x |
No connector use USD for Maya GitHub |
N/A |
N/A |
USD for Maya 2025 support
We recommend the Autodesk USD for Maya 2025 plugin for Import and Export support. Learn more here.
GPU Drivers#
Driver Version Support |
Windows |
Linux |
|---|---|---|
Recommended |
537.58 (GameReady, Studio), 537.70 (RTX/Quadro, Grid/vGPU)
|
525.85.05 (GameReady, Studio, RTX/Quadro), 525.85.12 (Grid/vGPU)
|
Unsupported |
495.0 up to 512.59 and 525.x up to 526.91
|
495.0 up to 512.59 and 515.0 up to 526.91
|
Tip
Some GPU Driver versions need to have ECC disabled to prevent the following error: “pluginWin.mel Unable to dynamically load”.
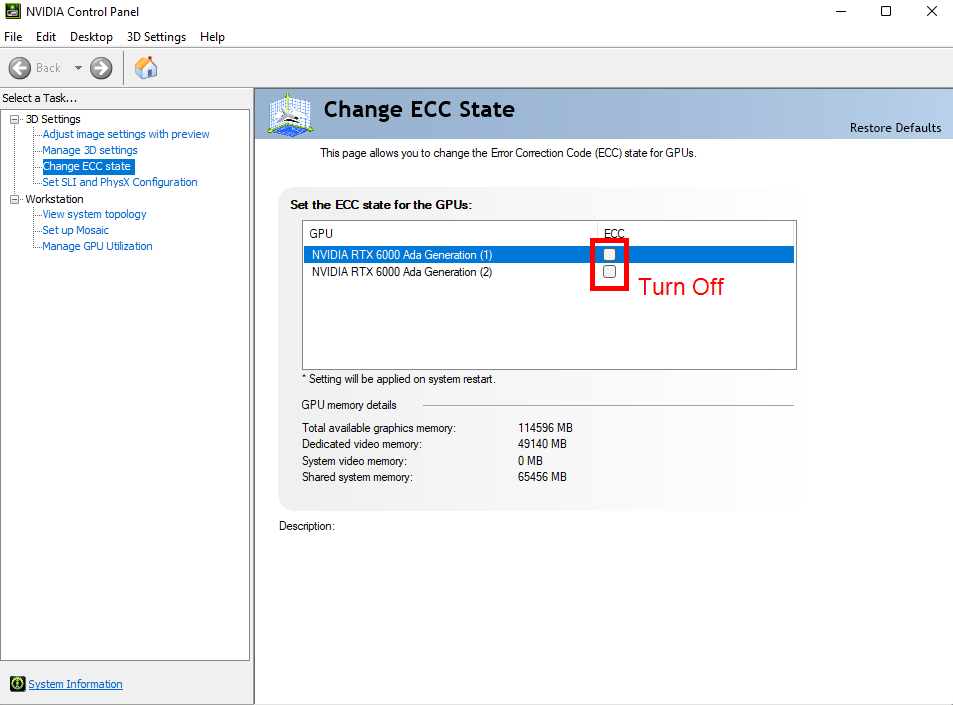
See Omniverse Technical Requirements for additional requirements information.
Tip
The latest NVIDIA driver versions should work, but may not have yet been fully tested for Omniverse.
Installation#
Download#
You can download the Omniverse Maya Connector from the NVIDIA NGC Catalog.
Warning
Please ensure you are using Maya 2024 as the connector is only compatible with this version.
Install#
Follow these steps to install the Omniverse Connector:
Download the Autodesk USD plugin Installer Install the Autodesk USD for Maya plugin for 2024.
Download the Connector Installer: Visit the NGC Catalog to download the latest version.
Unzip the Package: Once downloaded, unzip the package to access the installer.
Run the Installer: Locate and run the .exe file to start the installation process.
License Agreement: Read and accept the Omniverse Software License Agreement.
Choose Installation Location:
Default Location: Install in the default directory provided by the installer.
Specific Location: You may also choose to install it directly into your application plugins folder.
After installation, you should see the Omniverse Connector listed in the Windows Add/Remove Programs panel, indicating successful installation.
Important
You must have the Autodesk USD for Maya plugin installed with the Omniverse Maya connector.
Uninstall#
To uninstall the Omniverse Connector, follow these steps:
Open the Windows Add/Remove Programs Panel: This can be found in the Windows Control Panel.
Locate the Omniverse Connector: Look for the Omniverse Connector in the list of installed programs.
Uninstall: Click on the Uninstall button to remove the connector from your system.
Note
If you installed the connector in a specific location, ensure that you have the necessary permissions to uninstall it.
Legacy Maya Connectors#
The Omniverse connector for Maya 2024 is available on the NGC catalog.
Visit developer.nvidia.com/omniverse/legacy-tools for more details.
Warning
In Maya 2023, you may get an error that the MayaUSD plugin cannot be found when you start Maya. To fix this error, make sure you update to the latest version of Maya (2023.1 and above will work).
Be sure that there are no USD conflicts on the System Path, for Windows and Linux, for USD to run properly.
You can only have one Maya connector installed at a time per Maya version.
Custom or Network Installation#
On Windows, if you have a non-standard or network install of Maya, the installer may fail because it looks for version subkeys, like 202x, under the HKEY_LOCAL_MACHINE/SOFTWARE/Autodesk/Maya entry in the Windows Registry to validate Maya is installed.
As a workaround, you can either install on a computer with Maya installed and copy the software package from $APP_DATA/Local/ov to your network path and copy the maya-native*.mod file from $MyDocuments/maya/202x/modules to a shared MAYA_MODULES_PATH, or you can create the Registry entries before installation.
If you use a non standard MAYA_MODULE_PATH, you will either need to copy the omni_native-*.mod file that was installed in $MyDocuments/maya/202x/modules to your custom path or update your MAYA_MODULE_PATH with the local path.
User Interface#
Omniverse Shelf#
The Omniverse Shelf allows quick access to important Omniverse functions. The Export submenu offers the options to Export All or Export Selection. The Live submenu has actions for creating, connecting to, sharing, and leaving Live Sessions.
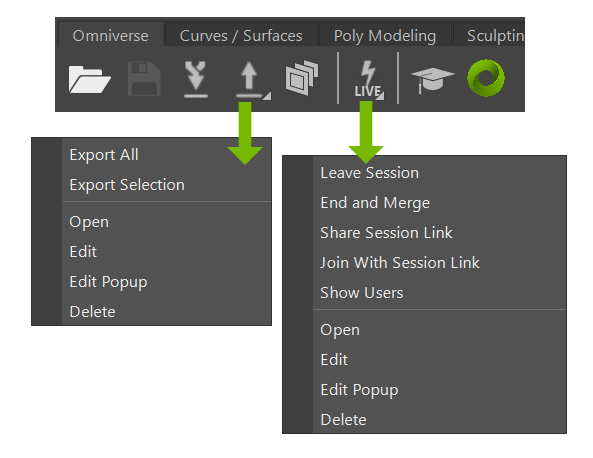
Option |
Description |
|---|---|
Export All |
Export all objects and materials in the scene. |
Export Selection |
Export only objects and materials selected in the Maya Outliner. |
Leave Session |
Leave the Live Session. |
End and Merge Session |
End the Live session and Merge the changes to the source USD file. |
Share Session |
Share the link to the Live Session you are in with as path to copy and paste. |
Join with Session |
Join a Live Session. |
Show Users |
Show a list of Users in the Live Session. |
Omniverse Export Content#
Export Content uses maya-usd to export the current Maya Scene or Selection as a USD file to your PC or Omniverse Nucleus.
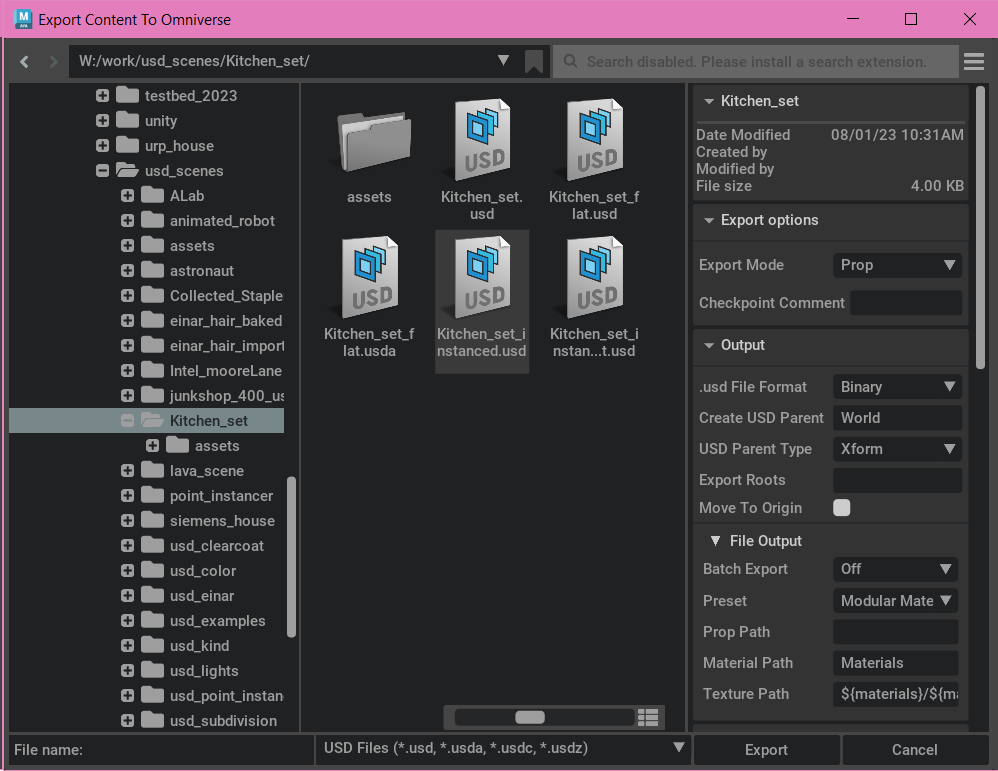
Any USD proxy nodes in the scene will not be exported. Refer to Autodesk Maya Documentation to determine which nodes are supported. If you are trying to modify the proxy USD stage, use Save Content instead of Export Content.
Further Reading
Read Autodesk’s USD Export documentation to learn more.
Export Options#

Menu Item |
Description |
|---|---|
Export Mode |
|
Checkpoint Comment |
Add a Nucleus checkpoint comment. |
*Refer to Autodesk’s docs for supported nodes and attributes.
Output#
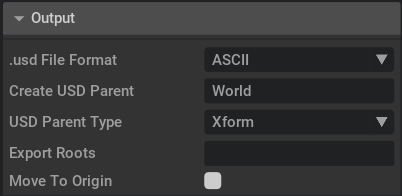
Menu Item |
Description |
|---|---|
.usd File Format |
Binary or Ascii |
Create USD Parent |
The name of the USD node that is the parent of the exported data. The default is World |
USD Parent Type |
Xform or Scope. The USD node type of parent, default Xform |
Export Roots |
Multi-flag that allows export of any DAG subtree without including parents |
Move To Origin |
All root-level nodes are centered at the origin in the output USD file. |
File Output#
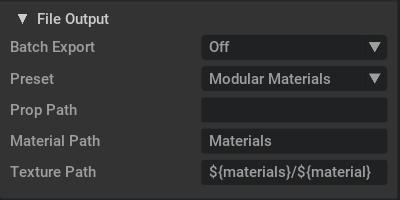
Menu Item |
Description |
|---|---|
Batch Export |
If References or Payloads are chosen, individual USD scenes will be added to the exported file either as References or Payloads, respectively. |
Preset |
Sets the preset mode for the exported Maya material |
Prop Path |
Sets the prop path for the exported Maya material |
Material Path |
Sets the material path for the exported Maya material |
Texture Path |
Sets the texture path for the exported Maya material |
Export#

Menu Item |
Description |
|---|---|
Lights |
Export Maya lights |
Cameras |
Export Maya cameras |
Filter Constraints |
Filter constraints, which aren’t supported in USD and can cause translation issues. |
Geometry#
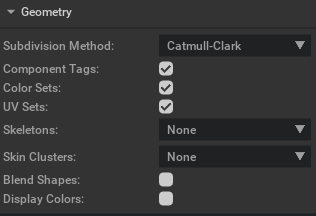
Menu Item |
Description |
|---|---|
Subdivision Method |
Binary or Ascii |
Component Tags |
Exports component tags |
Color Sets |
Enables or disables the export of color sets |
UV Sets |
Enables or disables the export of UV sets |
Skeletons |
Determines how to export skeletons. Valid values are:
|
Skin Clusters |
Determines how to export skinClusters via the UsdSkel schema. On any mesh where skin bindings are exported, the geometry data is the pre-deformation data. On any mesh where skin bindings are not exported, the geometry data is the final (post-deformation) data. Valid values are:
|
Blend Shapes |
Enables or disables export of blend shapes |
Display Colors |
Exports display color |
Materials#
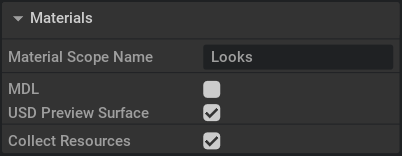
Menu Item |
Description |
|---|---|
Material Scope Name |
Name for the parent scope for material/shader prims. |
MDL |
Export materials to MDL. |
USD Preview Surface |
Export materials to USD Preview Surface. |
Collect Resources |
If checked, copy all textures and materials to the folder containing the exported file. |
Note
M_OmniPBR uses “mono average” for opacity. It will enable opacity and show in Kit apps, if set to “alpha default” and “mono alpha” to each material, or disable opacity during export.
You can Learn more about USD Preview Surface and Omniverse MDL Materials here.
Animation#

Menu Item |
Description |
|---|---|
Animation Data |
Toggle to export animation or not. |
Frame Range |
Start and end frames to include in the export. |
Use Animation Range |
Set the start/end frames to match current scene range. |
Advanced#
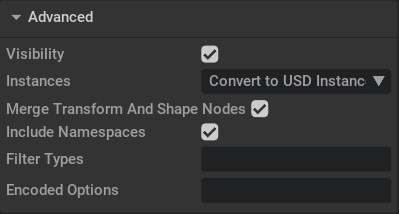
Menu Item |
Description |
|---|---|
Visibility |
Exports any state and animation on Maya visibility attributes |
Instances |
Enables or disables the export of instances |
Merge Transform and Shape nodes |
Combines Maya transforms and shapes into a single USD prim that has transform and geometry, for all “geometric primitives” (gprims). This results in smaller and faster scenes. Gprims will be unpacked back into transform and shape nodes when imported into Maya from USD. |
Include Namespaces |
Includes or Removes namespaces during export. By default, namespaces are exported to the USD file in the following
format: |
Filter Types |
Maya type names to exclude when exporting. If a type is excluded, all inherited types are also excluded,
e.g. excluding |
Encoded Options |
‘;’ delimited string of additional options supported by maya-usd |
Functionality#
Note
Autodesk Maya has developed a native OpenUSD plugin for Import and Export support. Learn more about USD for Maya here.
Opening USD and Maya files from Omniverse or local disk.
USD files with Default Render Context, USD Preview Surface.
Saving USD Files back to original file location.
Exporting Maya Scenes to Omniverse.
Bi-directional Live Session connections.
Missing Functionality#
Maya Native Connector does not support MDL render context in the viewport.
USD features are restricted to what the Autodesk Maya USD plugin supports per application and plug in version.
Saving a USD file as a new file to Omniverse ,that was originally in a different location, does not collect the dependencies.
Known Limitations#
MDL render context does not load in Maya Native, only USD Preview Surface. If a USD file has MDL context it wil not load with textures.
Exporting is currently limited to what Maya USD supports.
Only Maya shaders and utilities are supported, along with a limited set of properties (lambert, blinn, phong, standardSurface, usdPreviewSurface, pxrUsdPreviewSurface).
Live Workflow#
As of 208.0, Maya Native Connector provides a bi-directional Live workflow. Updates can be both transmitted from and received by Maya connected to a Live session.
Note
For more information on Live Workflows, visit OmniLive
Warning
Live Sync and Live Collaboration are experimental and will not be supported in the connector in future releases.
Creating a Live Session#
The most important thing about Live sessions is that they only work with files saved to Nucleus. If you are currently working in a Maya scene, you will first need to export your scene to Nucleus as USD.
Once your scene has been exported, you must open it from the Omniverse menu or Toolbar. Upon opening a scene, you will be greeted with a scene containing only a Maya-USD mayaUsdProxyShape object in the outliner. If you are not able to see objects in a hierarchy beneath the proxy shape node, make sure that the Outliner’s Display -> Shapes menu option is checked.
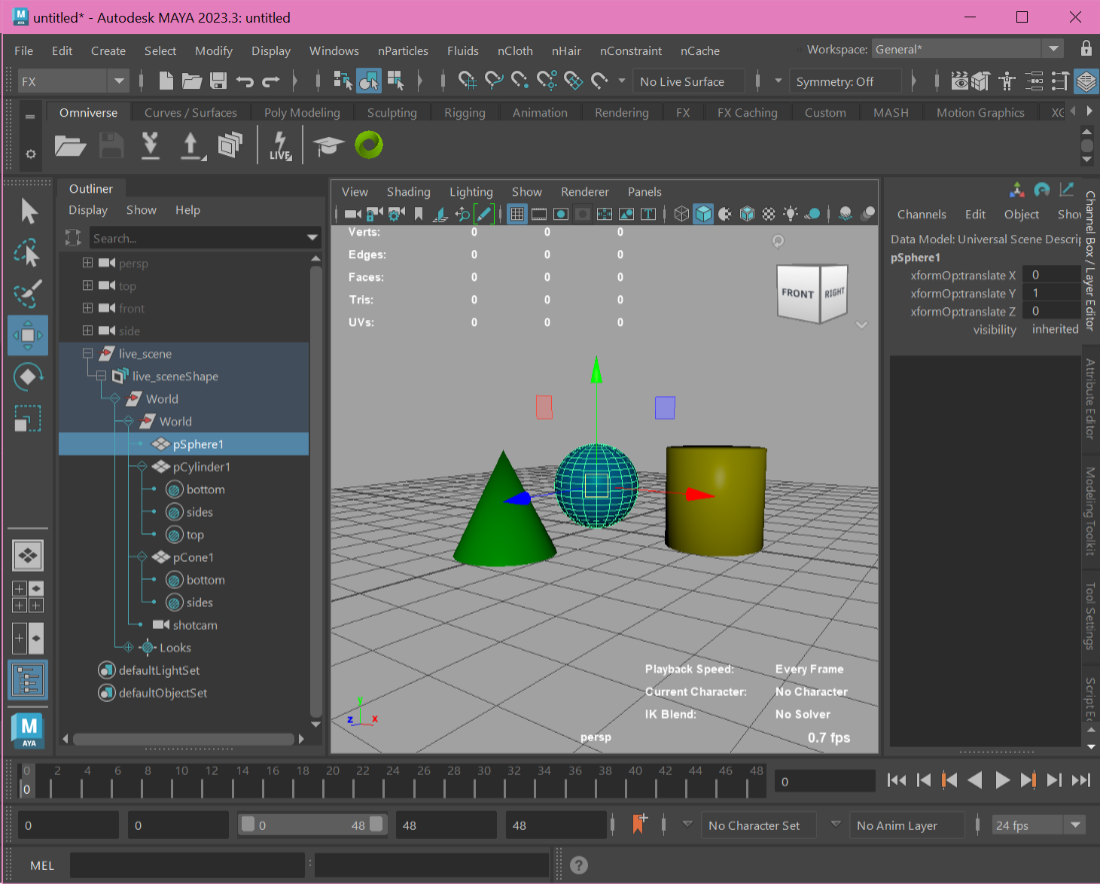
With a USD file opened from Nucleus, clicking the Live button in the Omniverse tab on the Shelf will present the following dialog:
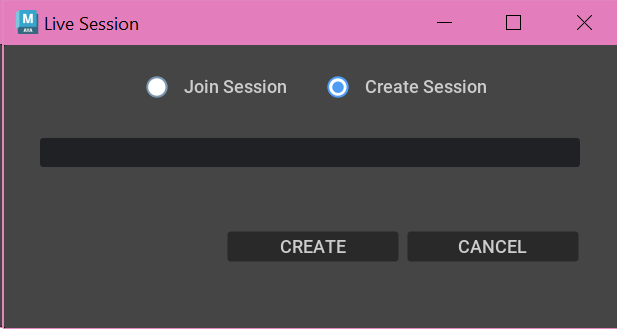
When Create Session is chosen, you have the opportunity to create a new Live session for the currently open USD scene. Give the session a name and click Create to start a new Live Session.
Right-clicking the icon will show additional menu options, including one for Sharing a Live Link, and one for joining sessions through a shared link.
Joining a Live Session#
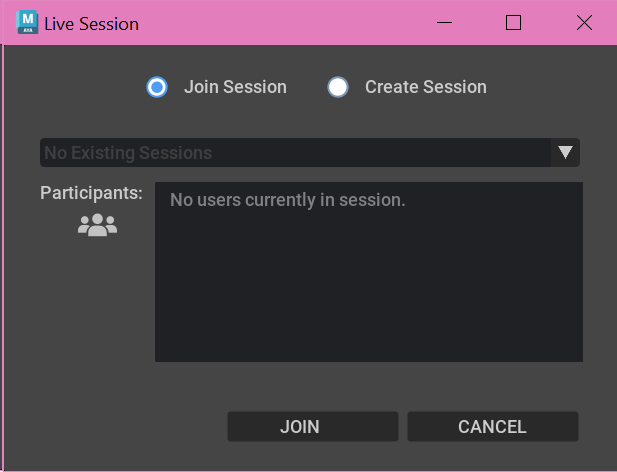
If Join Session is chosen, available sessions will be displayed as choices in the dropdown, and each session’s active participants will be displayed.
Sessions created from Maya can be joined from Omniverse Kit applications in the standard way.
Note
When Live syncing a file, the most recent settings on the Export panel are honored. For example, if you had cameras and light toggled off and then then toggled on live sync with a USD file that has cameras and lights, then cameras and lights would not subscribe to live sync.
Participating in Live Sessions#
While Maya is connected to a Live session, the icon will in the toolbar will be colored green. At this point, small edits in your current Live scene will appear to all other connected participants.
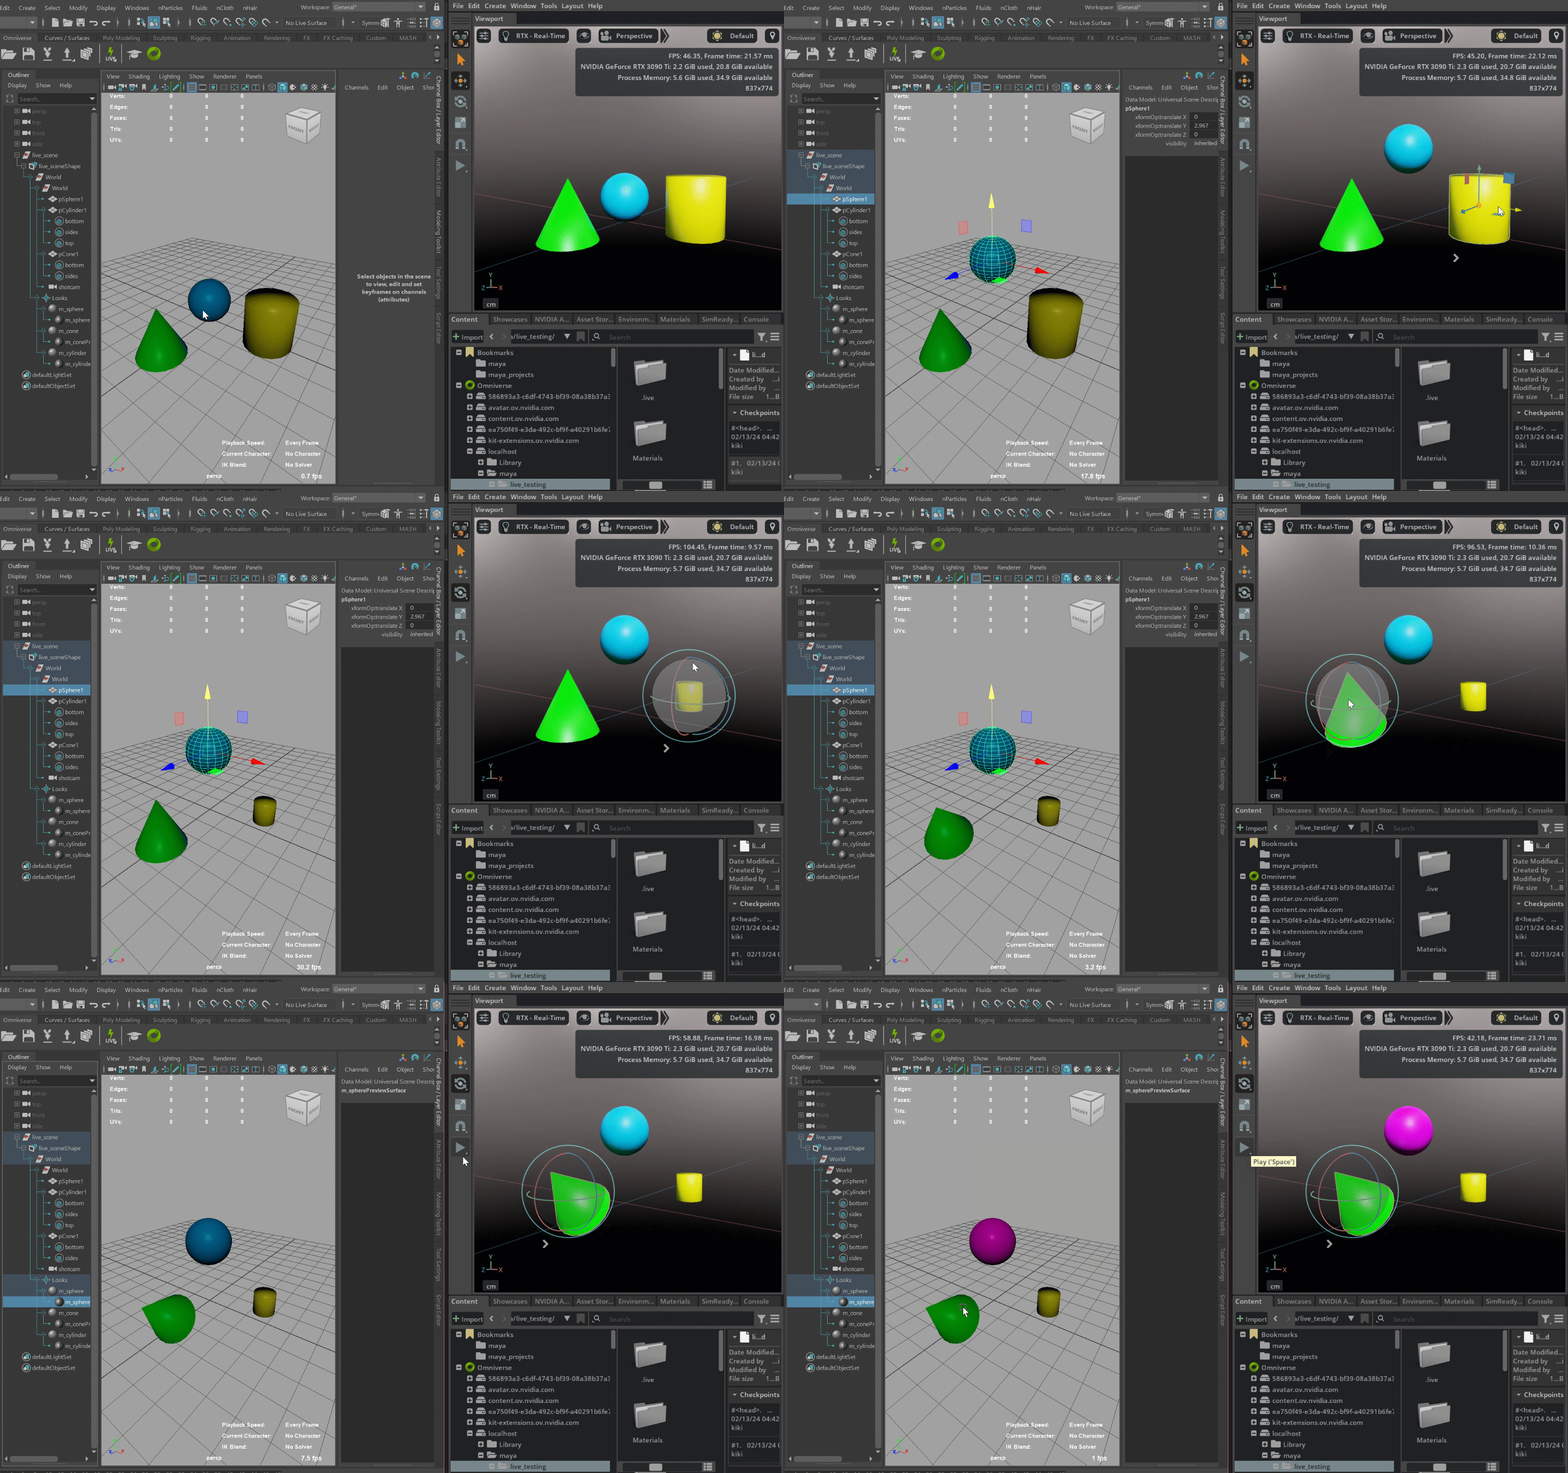
Note
Live is disabled if the target USD has animation or a different up axis than the Maya file. Duplicating a prim may not retain the prepend information, payload or reference, if used. This may result in incorrect or heavy mesh information in the USD stage.
Ending Live Sessions#
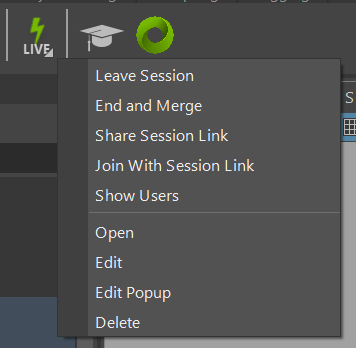
Similar to other Connectors, there two ways to end a Live session in the right-click menu of the Live button on the Shelf:
Option |
Description |
|---|---|
Leave Session |
Leave the Live session, and forget all the changes that accrued while connected. |
End and Merge |
Leave the Live session, merging all edits from participants into the Stage in memory. |
Live Sync Limitations#
In some cases Materials will appear to not Live Sync, depending on when the viewport textures (checker ball icon) are turned on. To reduce the issue, turn on viewport textures once you open the USD file; otherwise materials loaded before this is turned on will not sync properly.
