


Settings#
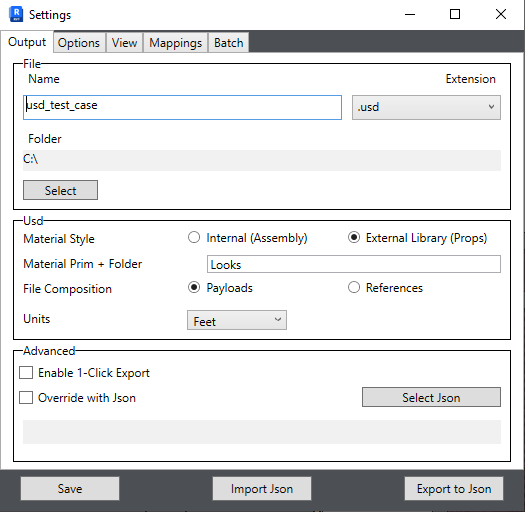
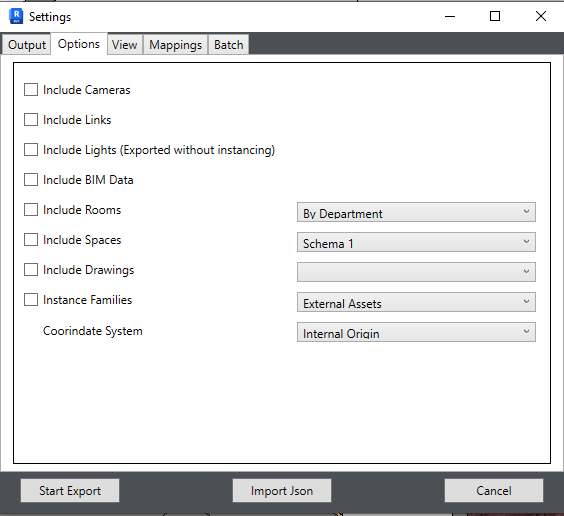
The Settings window uses the same tabs as Publish View, but the footer buttons differ by context. From the Settings ribbon button, use Save, Import Json, and Export to Json. From Publish View or Batch, the dialog shows Start Export and Cancel instead. The intent is to let you configure exports for batch, save a JSON settings file, or store settings in the Revit project directly.
Output#
|
|
File#
Action |
Result |
|---|---|
Name |
Name of the file to save |
Extension |
Choose between .usd, .usda, or .usdc |
Folder |
Press the Select button to specify the destination folder for export |
Usd#
Action |
Result |
|---|---|
Material Style |
Export with internal, or as an external library |
Material Prim + Folder |
The name of the Prim under which to write materials, and the name of the folder where texture assets will be saved |
File Composition |
For external material libraries and family assets, choose between USD Payloads (can be delayed-read on open) and References (will always be loaded) |
Units |
Specify the unit of the USD stage when exporting. The default is Feet |
Note
Advanced#
Action |
Result |
|---|---|
Enable 1-Click Export |
If enabled, settings will be saved internally to the Revit Project and require a Synchronization / Save of the Model to persist. When enabled and Publish View is clicked in the Ribbon, the internal settings will be used and no dialog will be presented before starting the export |
Override with Json |
Settings in the provided Json file will be used to override settings currently displayed in the dialog |
Options#
|
|
Note
When using ‘Include drawings’, drawings that meet the following conditions will be exported:
Plan view created from the model. The drawing must have a position that can be placed in 3D space. Sheets and rendered images are not output as drawings.
Crop View option must be enabled for each 2D Drawing in Revit. Drawings without a crop region (CropBox) will not be included in the export.
View#
|
|
Mappings#
|
|
Note
Batch#
|
|
JSON Settings File#
Export settings can be saved to, loaded from, and driven by a JSON file. The JSON structure mirrors the Settings dialog and is used for batch export, automation, and sharing configurations between projects.
Using JSON in the UI#
Export Json (Settings ribbon): saves the current configuration, including material and family mappings, to a JSON file.
Import Json (Settings or Batch dialog): loads a JSON file into the Settings window.
Override with Json (Output tab, Advanced): applies settings from a JSON file over the values currently shown in the dialog.
Per-model settings: when 1-Click Export is disabled, settings are also stored at
Documents/Omniverse/Revit/[model]/settings.json.
JSON Structure#
The top-level keys match the Settings tabs:
Key |
Description |
|---|---|
|
Output folder, file name, and USD extension |
|
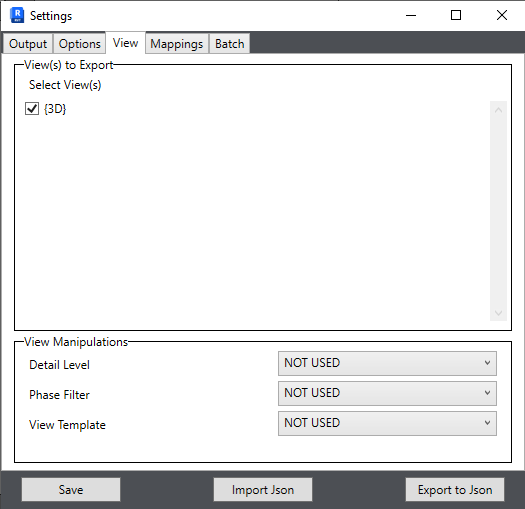
List of 3D view names to export (Publish View) |
|
Detail level, phase filter, and view template overrides |
|
Include cameras, lights, links, BIM data, rooms, spaces, drawings, instance families, coordinate system, units, and material options |
|
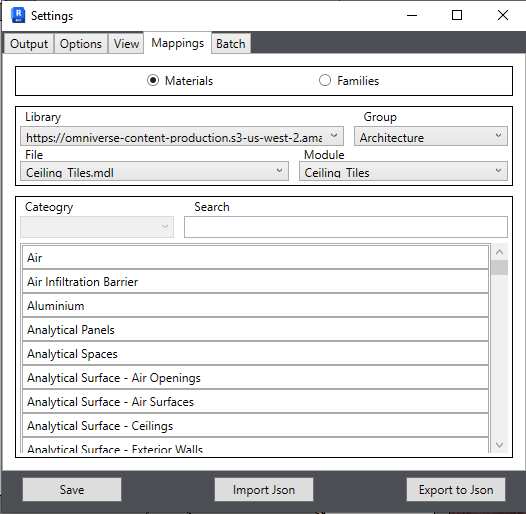
Material and family type library mappings |
|
Input folder, output folder, folder depth, and view-to-find string |
|
Path to a JSON override file (when saved in settings) |
NOT USED#
Put the value NOT USED in any string field that should be ignored during export—for example, detail level, phase filter, view template, or color scheme fields you do not want applied.
String Matching#
During batch export, string fields are matched against model data in this order: exact match, then prefix match, then substring match.
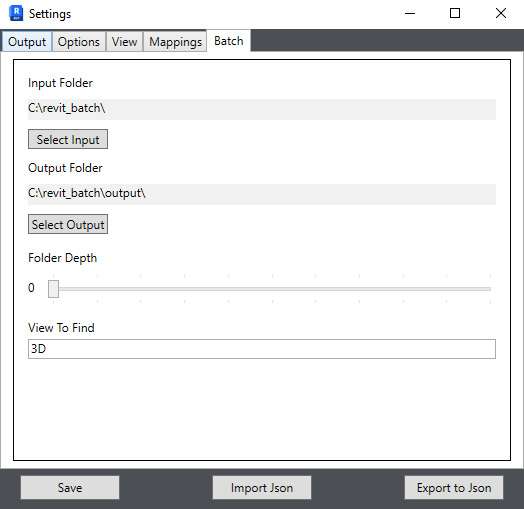
The View to Find field (Batch.ViewToFind) searches 3D view names. If multiple views match, each matching view is exported. The default is 3D.
Folder Paths#
Use forward slashes / in all folder paths, including local paths and Nucleus URIs.
Folder Depth#
Batch.FolderDepth controls how deeply batch export searches beneath the input folder. 0 searches only the input folder; 1 includes one level of subfolders, and so on.
Batch Output Layout#
For each Revit file, batch export creates {outputFolder}/{modelTitle}/{viewName}/ and writes a USD file named from the model and view. Filename pattern tokens such as <fileName> from earlier releases are no longer used in 203.0.
Legacy Format#
JSON files that use the older standard_export_settings format are automatically migrated when imported.