

Publish View#
Exports the selected Revit view or views to USD at the desired local or Nucleus location.
When you click Publish, the settings dialog opens so you can edit the settings before proceeding with the export.
Include Drawings#
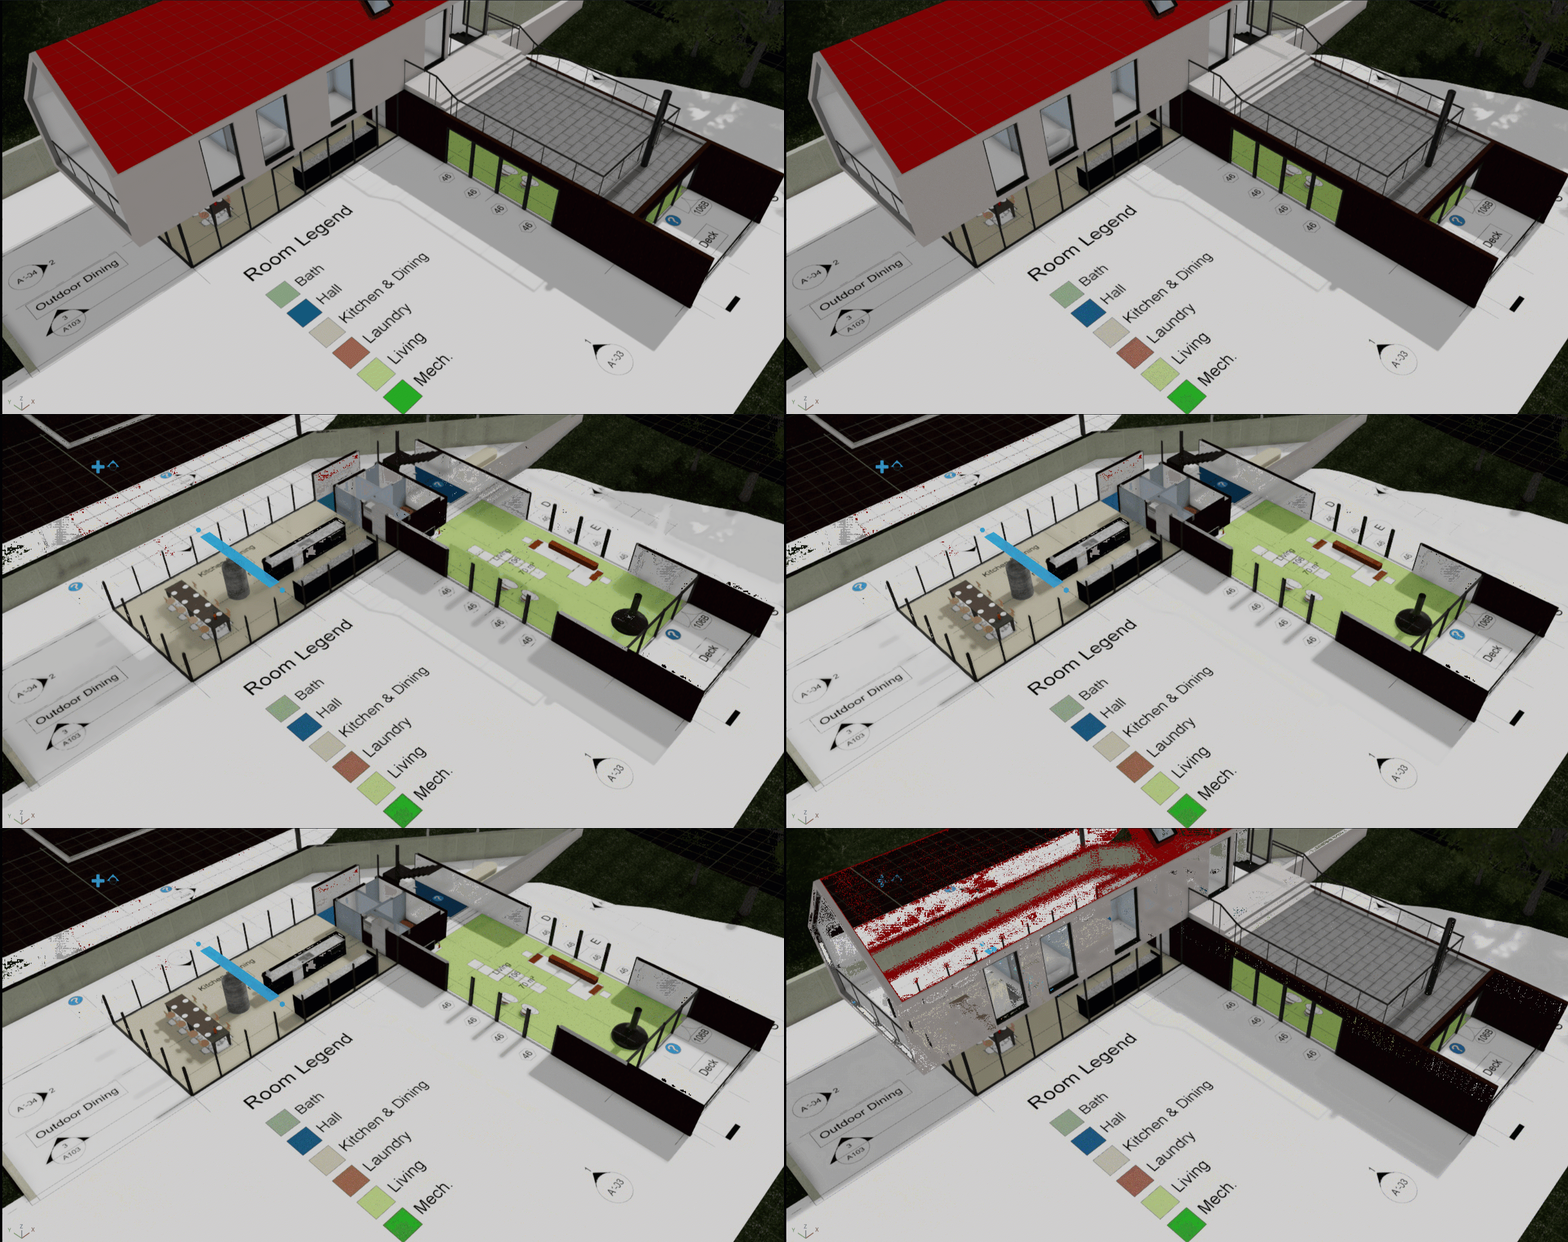
With this setting checked, you can now export drawings from Print Sets as textured mesh quads which are anchored in place to their respective areas.
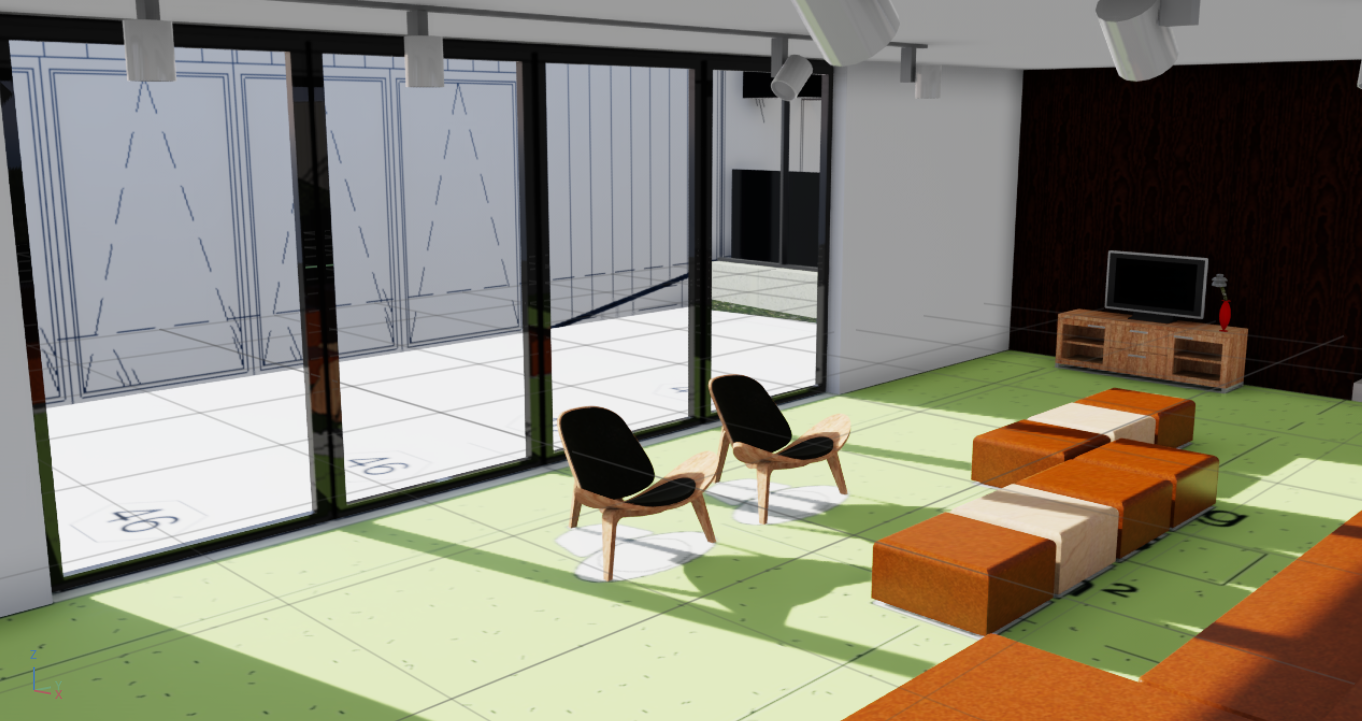
Drawings must have crop regions in their view in order to anchor to the model. If a drawing wasn’t successfully exported, this is because the drawing did not possess a crop region.
Drawings are located in the USD hierarchy under the path /{fileName}/Drawings/{publishSetName}/, which is invisible by default.
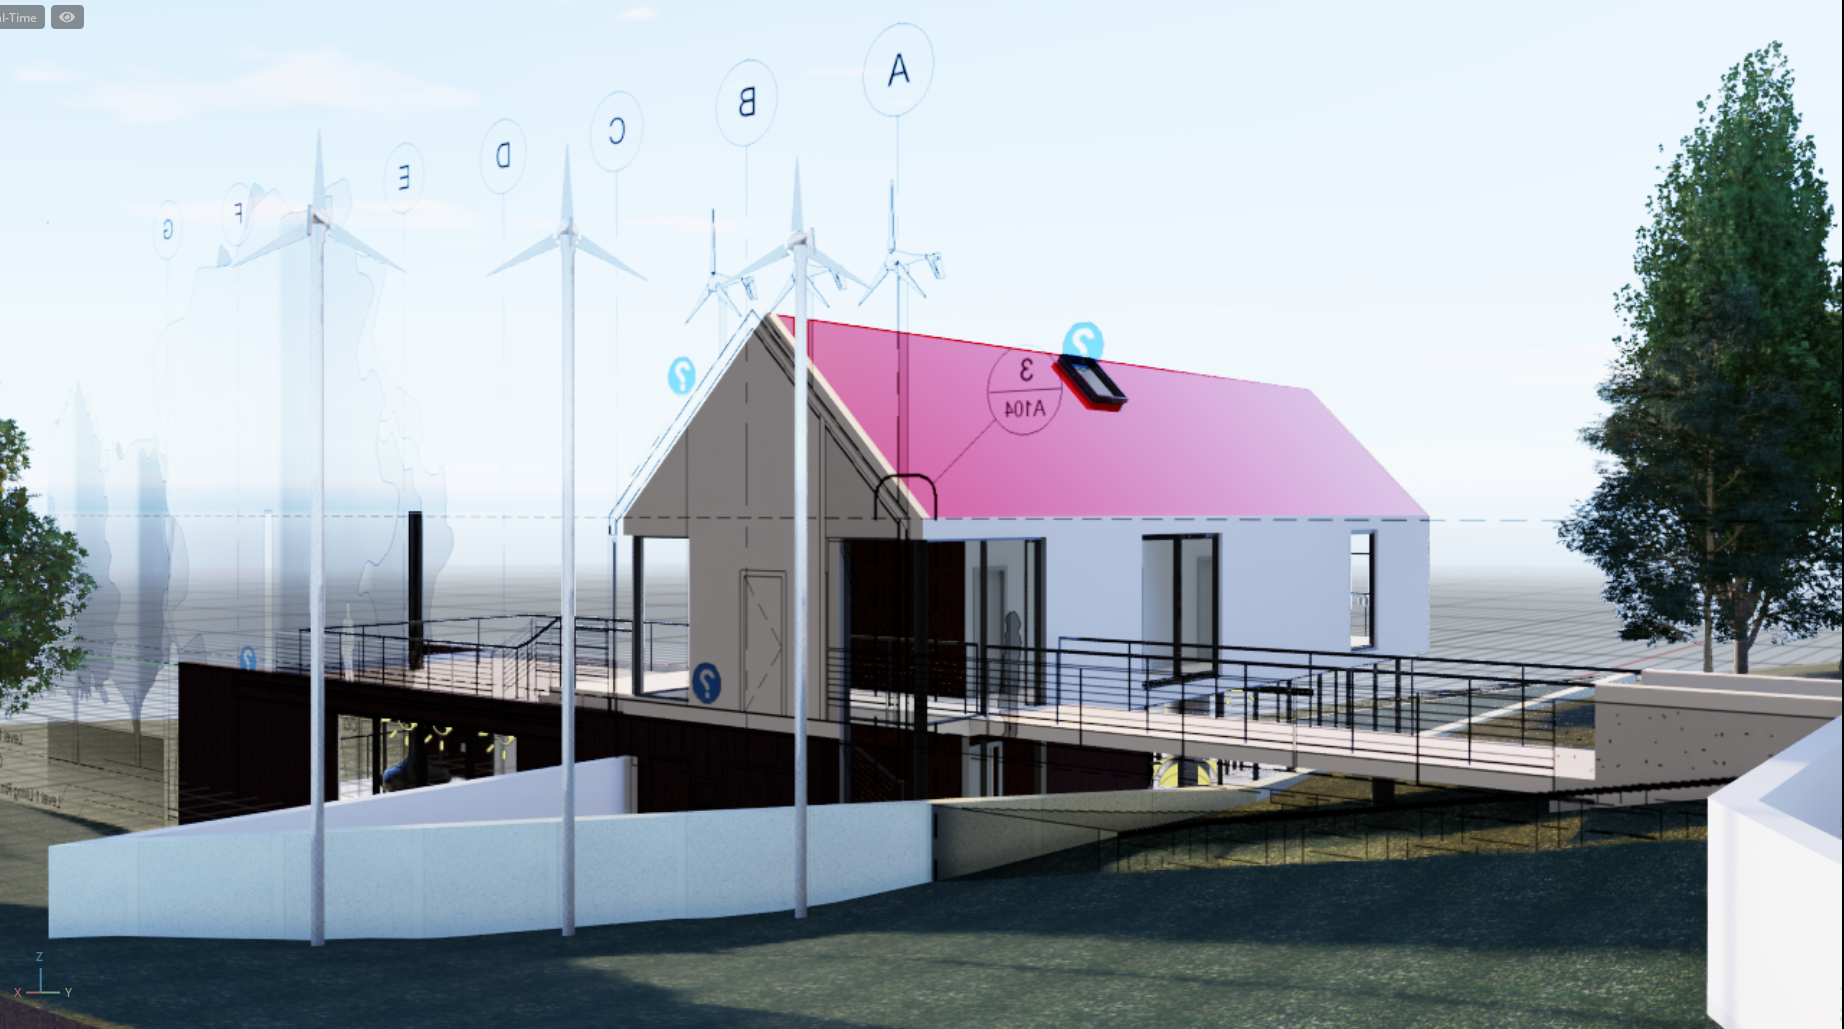
Use drawing export in combination with the Section widget in Omniverse USD Composer to bring your floorplans to life:
Additional Notes#
Transparency can be applied in images in Omniverse USD Composer by modifying the material.
Room & Space Export#
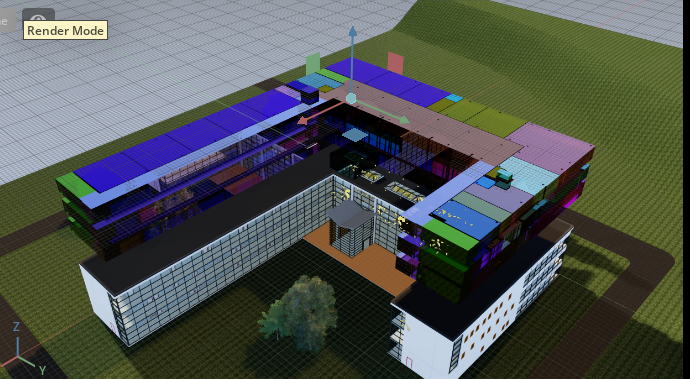
You can now check Include Rooms and Include Spaces in the settings window. This will export these areas as volumes.
Rooms and spaces are located in the USD hierarchy under the path /{fileName}/Instances/Rooms/, which is invisible by default.
Additional Notes#
Volume of room object may be smaller than the volume of the room.
If a valid color cannot be generated, a random or default one is assigned.
View#
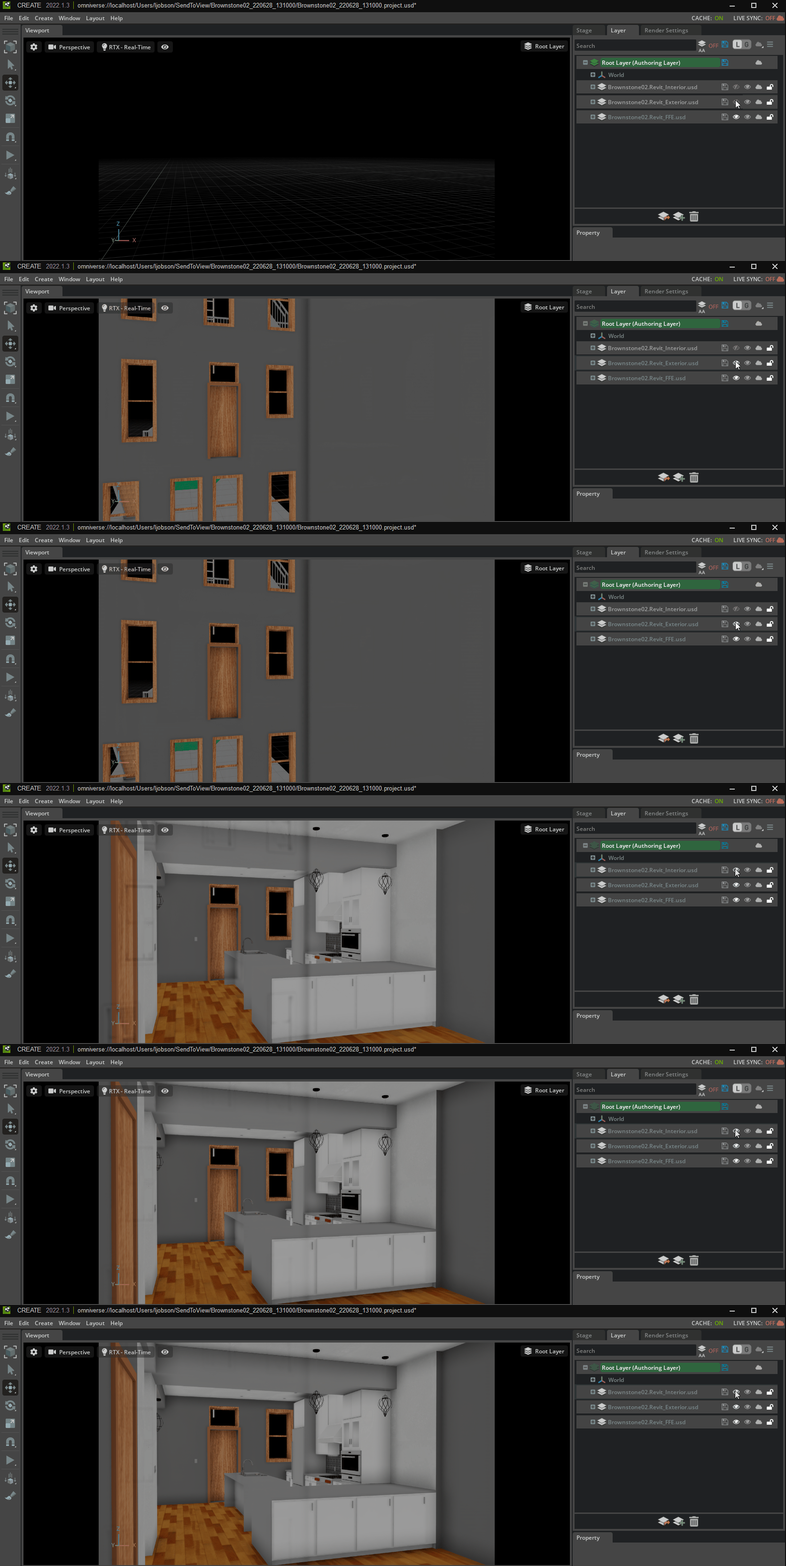
Users can export checked views within a single Revit file as separate USD files. Each selected view is written to its own subfolder under the output folder ({outputFolder}/{viewName}/{viewName}.usd).
This feature is intended for models whose elements are separated by views showing worksets, phases, or other forms of categorization set by the user. When multiple views are selected, each view produces an independent USD file (viewed separately in Omniverse USD Composer or other OpenUSD applications):
Additional Notes#
If an element is shown in multiple views, it will be exported to each USD representing that view.
Each exported view is written to a subfolder named after the view; the USD file inside uses the view name as its file name.
Mappings#
Mappings are used at export time instead of the original materials and geometry in the Revit Model. Materials allows the assignment of MDL materials from a Library. Families allows the assignment of USD geometry files.
Right-clicking on an item in the list at the bottom will allow the user to either Apply Mapping to Selected (choosing the Mapping file from the top), or Remove Mapping From Selected.
Batch#
Please see Batch Export.