Pose Estimation Synthetic Data Generation#
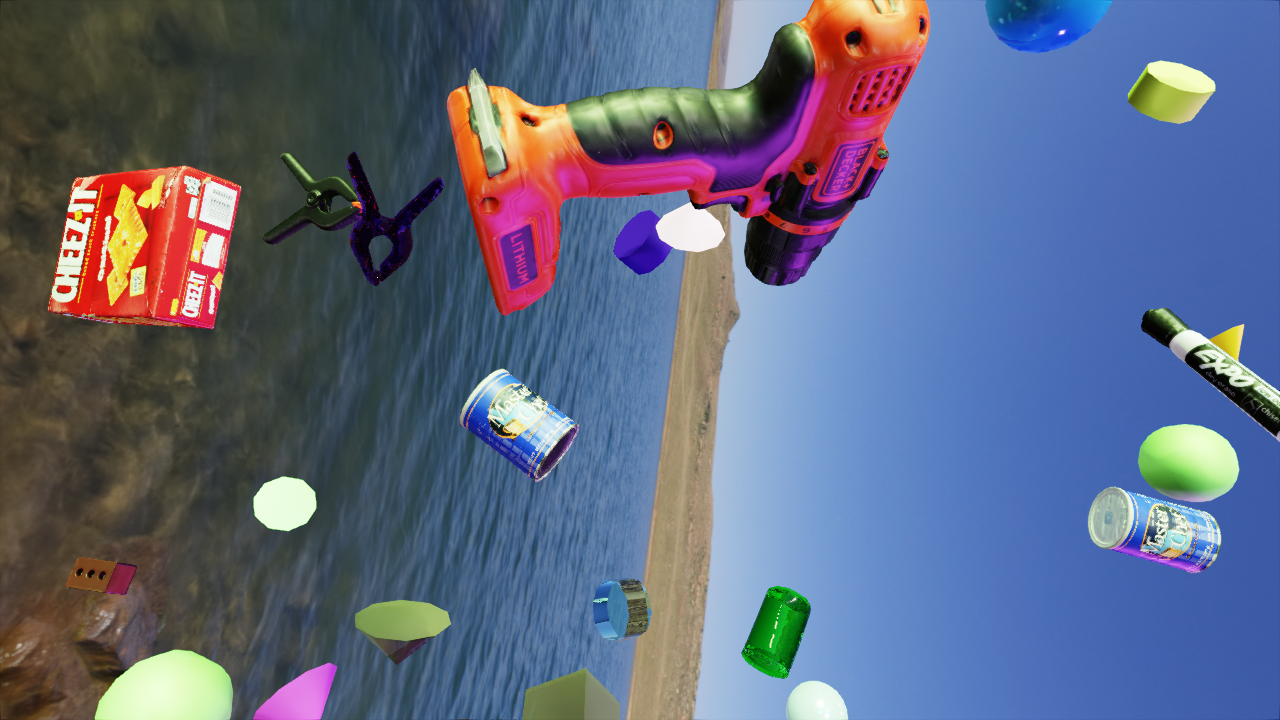
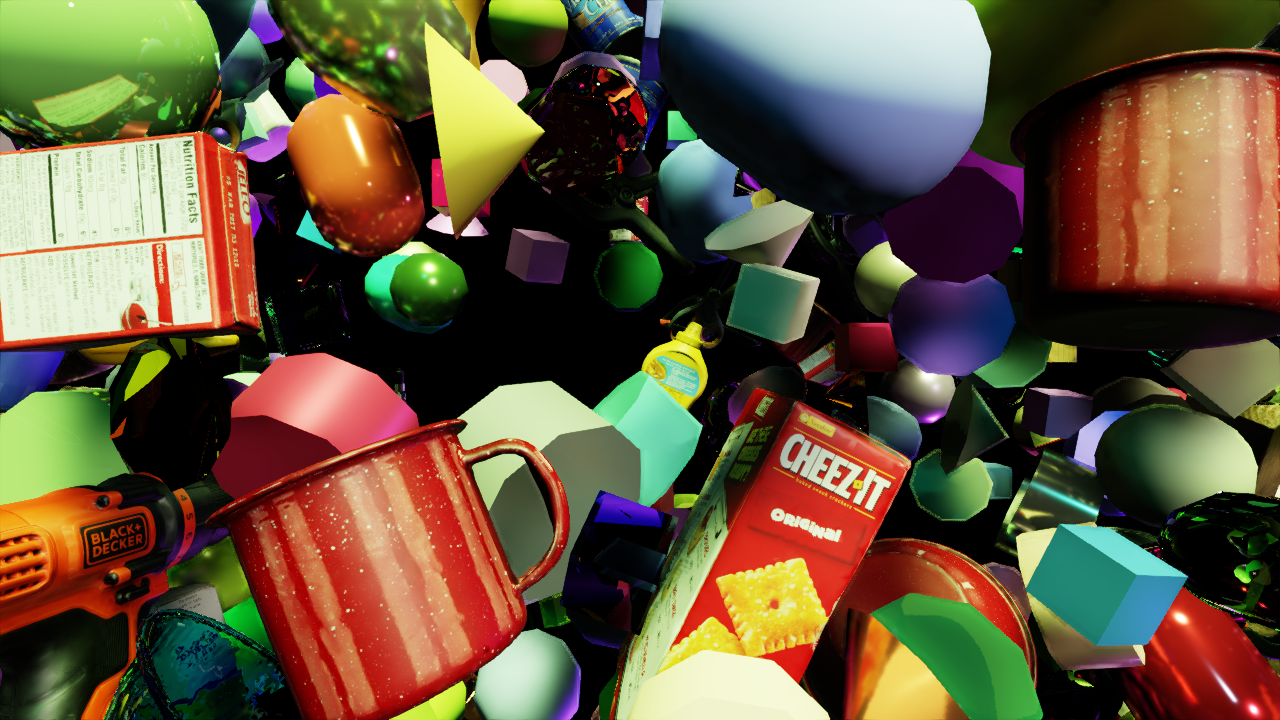
This tutorial demonstrates how to generate synthetic data to train a 6D pose estimation model, while leveraging Isaac Sim’s APIs to implement domain randomization techniques inspired by NVIDIA’s synthetic data research team. More specifically, it focuses on implementing randomization techniques similar to those shown by the MESH and DOME datasets in the NViSII paper. By default, data is written in a format compatible with the Deep Object Pose (DOPE) Model. Support for other pose estimators includes CenterPose and PoseCNN (YCB-Video format). Example images generated from this tutorial, corresponding to the MESH and DOME datasets, are shown below.
This tutorial examines standalone_examples/replicator/pose_generation/pose_generation.py to understand how Isaac Sim’s APIs can be used to allow flying distractors to continuously collide within a volume, and how the poses of objects can be manipulated.
The full example can be executed within the Isaac Sim Python environment.
50-60 min tutorial
Prerequisites#
This tutorial requires a working knowledge of the Scene Based Dataset Generation and Hello World tutorials. We also highly recommend reading the NViSII paper to learn more about the MESH and DOME datasets and how they can be used to help bridge the Sim-to-Real Gap. At a high-level, both the MESH and DOME datasets add flying distractors around the object of interest. These datasets also randomize the distractors’ colors and materials, in addition to lighting conditions.
For this tutorial, existing assets in Omniverse Nucleus are used. You must bring your own usd assets to generate training data for a custom object of interest.
If an existing usd asset is unavailable for a specific object, you can use tools like BundleSDF to
reconstruct high quality 3D models of the object of interest.
There are two notable differences between the MESH and DOME datasets:
the DOME dataset uses fewer distractors than the MESH dataset
the DOME dataset uses Dome Lights to provide realistic backgrounds
Getting Started#
To generate the synthetic dataset to train a pose estimation model, run the following command:
./python.sh standalone_examples/replicator/pose_generation/pose_generation.py
The above command line has several arguments, which if not specified are set to their default values.
--num_mesh: Number of frames (similar to samples found in the MESH dataset) to record. Defaults to 30.--num_dome: Number of frames (similar to samples found in the DOME dataset) to record. Defaults to 30.--dome_interval: Number of frames to capture before changing the DOME background. When generating larger datasets, increasing this interval increases performance. Defaults to 1.--output_folder: The folder to output data to. By default, this isoutput. If writing tos3, this specifies the path within the--bucketwhere the output goes.--use_s3: If this flag is passed in, then the output is written directly to ans3bucket. Writing to s3 is only supported when using the DOPE writer.--endpoint: If--use_s3is specified, this flag specifies which endpoint to write to.--bucket: If--use_s3is specified, this flag specifies which bucket to write to. This flag is required if you want to write tos3.--writer: Which writer to use. Options areDOPE,CenterPose, orYCBVideo. The default writer isDOPE.
Note
For large --num_mesh values (>1k) the frame capture rate can significantly slow down after a few hundred captured frames, this issue is being investigated.
Setting up the Environment#
Review the _setup_world() function, which populates the stage with assets and sets up the environment prior to dataset generation.
Creating a Collision Box#
Create an invisible collision box to hold a set of flying distractors, allowing the distractors to collide with one another and ricochet off the walls of the collision box. Because the distractors must be visible in our synthetic dataset, it’s important to place the collision box so that it’s in view of the camera and properly oriented.
Creating a Collision Box.
 1# Disable gravity in the scene to allow the flying distractors to float around
 2world.get_physics_context().set_gravity(0.0)
 3
 4# Create a collision box in view of the camera, allowing distractors placed in the box to be within
 5# [MIN_DISTANCE, MAX_DISTANCE] of the camera. The collision box will be placed in front of the camera,
 6# regardless of CAMERA_ROTATION or CAMERA_RIG_ROTATION.
 7self.fov_x = 2 * math.atan(WIDTH / (2 * F_X))
 8self.fov_y = 2 * math.atan(HEIGHT / (2 * F_Y))
 9theta_x = self.fov_x / 2.0
10theta_y = self.fov_y / 2.0
11
12# Avoid collision boxes with width/height dimensions smaller than 1.3
13collision_box_width = max(2 * MAX_DISTANCE * math.tan(theta_x), 1.3)
14collision_box_height = max(2 * MAX_DISTANCE * math.tan(theta_y), 1.3)
15collision_box_depth = MAX_DISTANCE - MIN_DISTANCE
16
17collision_box_path = "/World/collision_box"
18collision_box_name = "collision_box"
19
20# Collision box is centered between MIN_DISTANCE and MAX_DISTANCE, with translation relative to camera in the z
21# direction being negative due to cameras in Isaac Sim having coordinates of -z out, +y up, and +x right.
22collision_box_translation_from_camera = np.array([0, 0, -(MIN_DISTANCE + MAX_DISTANCE) / 2.0])
23
24# Collision box has no rotation with respect to the camera
25collision_box_rotation_from_camera = np.array([0, 0, 0])
26collision_box_orientation_from_camera = euler_angles_to_quat(collision_box_rotation_from_camera, degrees=True)
27
28# Get the desired pose of the collision box from a pose defined locally with respect to the camera.
29collision_box_center, collision_box_orientation = get_world_pose_from_relative(
30    self.camera_path, collision_box_translation_from_camera, collision_box_orientation_from_camera
31)
32
33collision_box = CollisionBox(
34    collision_box_path,
35    collision_box_name,
36    position=collision_box_center,
37    orientation=collision_box_orientation,
38    width=collision_box_width,
39    height=collision_box_height,
40    depth=collision_box_depth,
41)
42world.scene.add(collision_box)
In lines 13-15, the dimensions of the collision box are defined to minimize the number of out-of-view flying distractors. The distractors are also confined to be between MIN_DISTANCE and MAX_DISTANCE from the camera.
Find the pose of the collision box with respect to the camera’s frame. The translation is calculated on line 22, taking into account the camera coordinate system convention used in Isaac Sim.
On line 23, use the omni.isaac.core.utils.rotations library to find the quaternion representation of the collision box’s rotation relative to the camera.
The get_world_pose_from_relative() function on line 29 (and expanded below) allows us to get the absolute pose of the collision box using the relative pose to the camera’s frame.
Getting the Collision Box's World Pose.
 1def get_world_pose_from_relative(prim_path, relative_translation, relative_orientation):
 2    """Get a pose defined in the world frame from a pose defined relative to the frame of the prim at prim_path"""
 3
 4    stage = get_current_stage()
 5
 6    prim = stage.GetPrimAtPath(prim_path)
 7
 8    # Row-major transformation matrix from the prim's coordinate system to the world coordinate system
 9    prim_transform_matrix = UsdGeom.Xformable(prim).ComputeLocalToWorldTransform(Usd.TimeCode.Default())
10
11    # Convert transformation matrix to column-major
12    prim_to_world = np.transpose(prim_transform_matrix)
13
14    # Column-major transformation matrix from the pose to the frame the pose is defined with respect to
15    relative_pose_to_prim = tf_matrix_from_pose(relative_translation, relative_orientation)
16
17    # Chain the transformations
18    relative_pose_to_world = prim_to_world @ relative_pose_to_prim
19
20    # Translation and quaternion with respect to the world frame of the relatively defined pose
21    world_position, world_orientation = pose_from_tf_matrix(relative_pose_to_world)
22
23    return world_position, world_orientation
To get the transformation matrix from the local frame of a prim to the world frame, the USD built-in ComputeLocalToWorldTransform() function can be used. The function is used on line 9 to get the prim-to-world (or, camera-to-world) transformation matrix.
Additionally, using the desired pose of the collision box (defined locally with respect to the camera), the tf_matrix_from_pose() function from the omni.isaac.core.utils.transformations library is used to get the corresponding transformation matrix.
On line 21, the two transformations described above are chained and yield the desired pose of the collision box with respect to the world frame.
Flying Distractors#
To help manage the hundreds of distractors being added to the scene, several classes defined in the standalone_examples/replicator/pose_generation/flying_distractors directory are used. A high-level overview of FlyingDistractors, DynamicAssetSet, DynamicShapeSet, DynamicObjectSet, and DynamicObject is provided below.
The flying distractors used in the MESH and DOME datasets consist of primitive shapes and objects.
The DynamicAssetSet class is created to provide an API relevant to all flying distractors, regardless of whether the particular assets contained in the set are shapes or objects.
The API allows the flying distractors managed by the set to be kept in motion within the collision box and allows various properties of the assets to be randomized.
To create a suite of methods specific to shapes (and not objects), use the DynamicShapeSet class.
The DynamicShapeSet class allows dynamic shapes to be spawned and managed, in addition to inheriting methods from the DynamicAssetSet class.
These dynamic shapes are chosen from predefined classes found in omni.isaac.core.prims, namely DynamicCuboid, DynamicSphere, DynamicCylinder, DynamicCone, and DynamicCapsule.
Each of these dynamic shape classes is implemented in a similar way; the respective shape prim is wrapped with the RigidPrim class (to provide rigid body attributes) and the GeometryPrim class (to provide an API for collisions and physics materials).
For the purposes of this tutorial, GeometryPrim is critical because it allows objects to collide rather than intersect, leading to more realistic shadows for better Sim-to-Real transfer.
Similarly, within DynamicObjectSet, dynamic objects are created using the DynamicObject class, which in turn provides a way to take an asset from its USD reference and wrap it with RigidPrim and GeometryPrim.
In this tutorial YCB objects (common household objects) are used in DynamicObjectSet.
Finally, FlyingDistractors allows us to simultaneously manage multiple instances of the DynamicShapeSet and DynamicObjectSet classes.
For more information on FlyingDistractors, DynamicAssetSet, DynamicShapeSet, DynamicObjectSet, or DynamicObject, see the class definitions in the standalone_examples/replicator/pose_generation/ directory.
To keep our flying distractors in motion, define the apply_force_to_prims() method in DynamicAssetSet to apply random forces to them.
Applying Forces in Random Directions.
 1def apply_force_to_prims(self, force_limit):
 2    """Apply force in random direction to prims in dynamic asset set"""
 3
 4    for path in itertools.chain(self.glass_asset_paths, self.nonglass_asset_paths):
 5
 6        # X, Y, and Z components of the force are constrained to be within [-force_limit, force_limit]
 7        random_force = np.random.uniform(-force_limit, force_limit, 3).tolist()
 8
 9        handle = self.world.dc_interface.get_rigid_body(path)
10
11        self.world.dc_interface.apply_body_force(handle, random_force, (0, 0, 0), False)
The API Documentation provides a thorough physics interface and is leveraged in lines 9-11 to apply a random force to each distractor.
Adding Objects of Interest#
In this tutorial, the YCB Cracker Box and YCB Power Drill asset are used as objects of interest, on which the pose estimation model is trained.
The cracker box and power drills are specified in the config/*_config.yaml file. The exact file depends on the writer used.
If you do not have a 3D model of your object of interest, you can use tools like BundleSDF to generate one. See the link for more details.
Below is an example configuration that specifies the objects of interest as a single cracker box and single power drill:
Configuration for objects of interest.
# prim_type is determined by the usd file.
# To determine, open the usd file in Isaac Sim and see the prim path. If you load it in /World, the path will be /World/<prim_type>
OBJECTS_TO_GENERATE:
- { part_name: 003_cracker_box, num: 1, prim_type: _03_cracker_box }
- { part_name: 035_power_drill, num: 1, prim_type: _35_power_drill }
# Example from the centerpose config file
OBJECTS_TO_GENERATE:
- { part_name: SM_Mug_A2, num: 1, prim_type: SM_Mug_A2 }
- { part_name: SM_Mug_B1, num: 1, prim_type: SM_Mug_B1 }
- { part_name: SM_Mug_C1, num: 1, prim_type: SM_Mug_C1 }
- { part_name: SM_Mug_D1, num: 1, prim_type: SM_Mug_D1 }
Note
If prim_type names start with a numerical value you must rename them because USD names cannot begin with numerical values (e.g. 003_cracker_box –> _03_cracker_box).
Then, add the object of interest into the scene in the function _setup_train_objects():
Adding the Object of Interest.
 1def _setup_train_objects(self):
 2    # Add the part to train the network on
 3    train_part_idx = 0
 4    for object in OBJECTS_TO_GENERATE:
 5        for prim_idx in range(object["num"]):
 6            part_name = object["part_name"]
 7            ref_path = self.train_asset_path + part_name + ".usd"
 8            prim_type = object["prim_type"]
 9
10            path = "/World/" + prim_type + f"_{prim_idx}"
11
12            mesh_path = path + "/" + prim_type
13            name = f"train_part_{train_part_idx}"
14
15            self.train_part_mesh_path_to_prim_path_map[mesh_path] = path
16
17            train_part = DynamicObject(
18                usd_path=ref_path,
19                prim_path=path,
20                mesh_path=mesh_path,
21                name=name,
22                position=np.array([0.0, 0.0, 0.0]),
23                scale=config_data["TRAIN_PART_SCALE"],
24                mass=1.0,
25            )
26
27            train_part.prim.GetAttribute("physics:rigidBodyEnabled").Set(False)
28
29            self.train_parts.append(train_part)
30
31            # Add semantic information
32            mesh_prim = world.stage.GetPrimAtPath(mesh_path)
33            add_update_semantics(mesh_prim, prim_type)
34
35            train_part_idx += 1
To prevent the object of interest from moving off-screen due to a collision with a distractor, disable its rigid body kinematics on line 26. Then, semantic information is added to the part on lines 31-32, which is done similarly in the Adding Semantics to a Scene tutorial in the omni.replicator documentation.
Domain Randomization#
Define the following functions for domain randomization:
Randomize Lighting.
 1def randomize_sphere_lights():
 2    lights = rep.create.light(
 3        light_type="Sphere",
 4        color=rep.distribution.uniform((0.0, 0.0, 0.0), (1.0, 1.0, 1.0)),
 5        intensity=rep.distribution.uniform(100000, 3000000),
 6        position=rep.distribution.uniform((-250, -250, -250), (250, 250, 100)),
 7        scale=rep.distribution.uniform(1, 20),
 8        count=NUM_LIGHTS,
 9    )
10    return lights.node
Randomize the color, intensity, position, and size of the sphere lights in lines 4-7, to generate scenes under different lighting scenarios for the MESH and DOME datasets.
Randomize Domelight.
1def randomize_domelight(texture_paths):
2    lights = rep.create.light(
3        light_type="Dome",
4        rotation=rep.distribution.uniform((0, 0, 0), (360, 360, 360)),
5        texture=rep.distribution.choice(texture_paths)
6    )
7
8    return lights.node
The rotation and texture of the Dome Light is randomized on lines 4-5. This allows the samples similar to the DOME dataset to have a randomly selected background with realistic lighting conditions.
Randomize Shape Properties.
 1def randomize_colors(prim_path_regex):
 2    prims = rep.get.prims(path_pattern=prim_path_regex)
 3
 4    mats = rep.create.material_omnipbr(
 5        metallic=rep.distribution.uniform(0.0, 1.0),
 6        roughness=rep.distribution.uniform(0.0, 1.0),
 7        diffuse=rep.distribution.uniform((0, 0, 0), (1, 1, 1)),
 8        count=100,
 9    )
10    with prims:
11        rep.randomizer.materials(mats)
12    return prims.node
We randomize the metallic, reflective, and color properties of the distractor shapes on lines 5-7. This allows a wide variety of material properties to be present in the distractors.
To call the domain randomization, you must register these functions with rep.randomizer. For more examples on using omni.replicator.core.randomizer, see this page.
Registering and Calling Domain Randomization
1rep.randomizer.register(randomize_sphere_lights, override=True)
2rep.randomizer.register(randomize_colors, override=True)
3
4with rep.trigger.on_frame():
5    rep.randomizer.randomize_sphere_lights()
6    rep.randomizer.randomize_colors("(?=.*shape)(?=.*nonglass).*")
randomize_domelight() is only registered in the __next__ function because initially we don’t want the Dome lights to be randomized when generating images for the MESH dataset.
1rep.randomizer.register(randomize_domelight, override=True)
2
3dome_texture_paths = [self.dome_texture_path + dome_texture + ".hdr" for dome_texture in DOME_TEXTURES]
4
5with rep.trigger.on_frame(interval=self.dome_interval):
6    rep.randomizer.randomize_domelight(dome_texture_paths)
randomize_movement_in_view() is another custom method defined to randomize the pose of the object of interest, while keeping it in view of the camera.
Randomize Movement in View.
 1def randomize_movement_in_view(self, prim):
 2    """Randomly move and rotate prim such that it stays in view of camera"""
 3
 4    translation, orientation = get_random_world_pose_in_view(
 5        self.camera_path,
 6        MIN_DISTANCE,
 7        MAX_DISTANCE,
 8        self.fov_x,
 9        self.fov_y,
10        FRACTION_TO_SCREEN_EDGE,
11        self.rig.prim_path,
12        MIN_ROTATION_RANGE,
13        MAX_ROTATION_RANGE,
14    )
15    prim.set_world_pose(translation, orientation)
While get_random_world_pose_in_view() is a randomized version of how the pose of the collision box was determined, the set_world_pose() function is worth highlighting, as it provides a convenient way to set USD transform properties.
Because the object of interest is wrapped with RigidPrim, you can use RigidPrim’s set_world_pose() method.
If you want to manipulate the pose of an object that doesn’t have rigid body attributes, see XFormPrim.
Generating Data#
Our scene is randomized, ground truth data is captured, and the data is sent to the data writer within the __next__ function.
Generate Data
 1def __next__(self):
 2
 3    if self.cur_idx == self.num_mesh:  # MESH dataset generation complete, switch to DOME dataset
 4        print(f"Starting DOME dataset generation of {self.num_dome} frames..")
 5
 6        # Hide the FlyingDistractors used for the MESH dataset
 7        self.mesh_distractors.set_visible(False)
 8
 9        # Show the FlyingDistractors used for the DOME dataset
10        self.dome_distractors.set_visible(True)
11
12        # Switch the distractors to DOME
13        self.current_distractors = self.dome_distractors
14
15        # Randomize the dome backgrounds
16        self._setup_dome_randomizers()
17
18    # Randomize the distractors by applying forces to them and changing their materials
19    self.current_distractors.apply_force_to_assets(FORCE_RANGE)
20    self.current_distractors.randomize_asset_glass_color()
21
22    # Randomize the pose of the objects of interest in the camera view
23    for train_part in self.train_parts:
24        self.randomize_movement_in_view(train_part)
25
26    # Step physics, avoid objects overlapping each other
27    timeline.get_timeline_interface().play()
28
29    kit.app.update()
30
31    print(f"ID: {self.cur_idx}/{self.train_size - 1}")
32    rep.orchestrator.step()
33    self.cur_idx += 1
34
35    # Check if last frame has been reached
36    if self.cur_idx >= self.train_size:
37        print(f"Dataset of size {self.train_size} has been reached, generation loop will be stopped..")
38        self.last_frame_reached = True
Begin the data generation process by generating samples similar to those in the MESH dataset. While samples are being generated the:
randomization function is applied to keep the flying distractors in motion (line 26)
pose of our object of interest is randomized (line 31)
randomization functions are triggered by the internal
step()function of omni.replicator (line 38), as defined above, to change the material properties of the distractor shapes and the sphere lights
After num_mesh samples are generated (line 3), our scene is prepared to create samples similar to the DOME dataset by dynamically modifying the assets that are visible.
On line 14-17, the FlyingDistractors used for the MESH samples are hidden, and the smaller set of FlyingDistractors used for the DOME samples is shown.
Additionally, in _setup_dome_randomizers (line 23) the randomize_domelight function is defined, registered with rep.randomizer, and called within rep.trigger.
This randomizer gets triggered after calling rep.orchestrator.step() on line 38. Line 38 also calls the two previously defined randomization functions, randomize_sphere_lights() and randomize_colors().
For more information, see pose_generation.py.
Writing Output#
To capture data, create a camera using rep.create.camera() and create a render product using rep.create.render_product().
Creating Camera and Render Product
1# Setup camera and render product
2self.camera = rep.create.camera(
3    position=(0, 0, -MAX_DISTANCE),
4    rotation=CAMERA_ROTATION,
5    focal_length=focal_length,
6    clipping_range=(0.01, 10000),
7)
8
9self.render_product = rep.create.render_product(self.camera, (WIDTH, HEIGHT))
Setup writers to capture ground truth data.
Initialize a PoseWriter on line 2 before attaching the render product to the writer on line 3.
Setup Writers
1    # setup writer
2    self.writer = rep.WriterRegistry.get("PoseWriter")
3    self.writer.initialize(...)
4    self.writer.attach([self.render_product])
For more details on how the PoseWriter is defined, see pose_writer.py located in the omni.replicator.isaac extensions folder.
Switching Writers#
Optionally, you can switch to the CenterPose writer and output data in the format used to train a CenterPose network. To do so, specify --writer centerpose when running pose_generation.py.
CenterPose is a categorical 6D pose estimator whereas DOPE is an instance-based model. For this tutorial, you modify the objects of interest when generating data for CenterPose such that objects in the same category are used.
Specifically, the tutorial uses mugs and changes the configuration as follows:
Configuration for CenterPose to generate data for mugs.
OBJECTS_TO_GENERATE:
- { part_name: SM_Mug_A2, num: 1, prim_type: SM_Mug_A2 }
- { part_name: SM_Mug_B1, num: 1, prim_type: SM_Mug_B1 }
- { part_name: SM_Mug_C1, num: 1, prim_type: SM_Mug_C1 }
- { part_name: SM_Mug_D1, num: 1, prim_type: SM_Mug_D1 }

TRAIN_ASSET_PATH: /Isaac/Props/Mugs/
See configs/centerpose_config.yaml for the full configuration file.
Writing to S3 Bucket#
There is also the option to write directly to an S3 bucket when using the DOPE writer. To write to an S3 bucket instead of your local machine, pass in the --use_s3 flag at runtime.
The DOPE writer uses the boto3 module to write to the bucket.
boto3 expects a configuration file at ~/.aws/config. This stores your credentials and allows boto3 to authenticate before writing to the endpoint.
Below is a sample file. To setup, copy this into ~/.aws/config and insert your credentials.
Sample Config File
[default]
aws_access_key_id = <username>
aws_secret_access_key = <secret_key>
region = us-east-1
Summary#
This tutorial covered the following topics:
Getting transformation matrices with
ComputeLocalToWorldTransform()and manipulating transformations with theomni.isaac.core.utils.transformationslibrary.Wrapping prims with the classes found in
omni.isaac.core.prims, which allows a powerful set of APIs to be used.GeomPrimwas used for collisions,RigidPrimfor rigid body attributes, andXFormPrimto get and set poses.Creating custom randomization functions, which allows you to randomize (1) the pose of a prim and (2) the force apply it to a prim to keep it in motion.
Applying these randomization functions with OV Replicator after randomizing (1) the properties of sphere lights in the scene, (2) the material properties of distractor shapes, and (3) the texture files of background dome lights.
Switching to a new writer to output data suitable for training a CenterPose Model.
How to set up S3 credentials to directly write data to an S3 bucket.
Next Steps#
The generated synthetic data can now be used to train a 6D pose estimation model, such as DOPE or CenterPose.