Object Detection Synthetic Data Generation#
The omni.replicator.object (ORO) is a no-code-change-required extension that generates synthetic data for model training that can be used on a range of tasks from retail object detection to robotics. The extension can be run from the UI or the isaac-sim container.
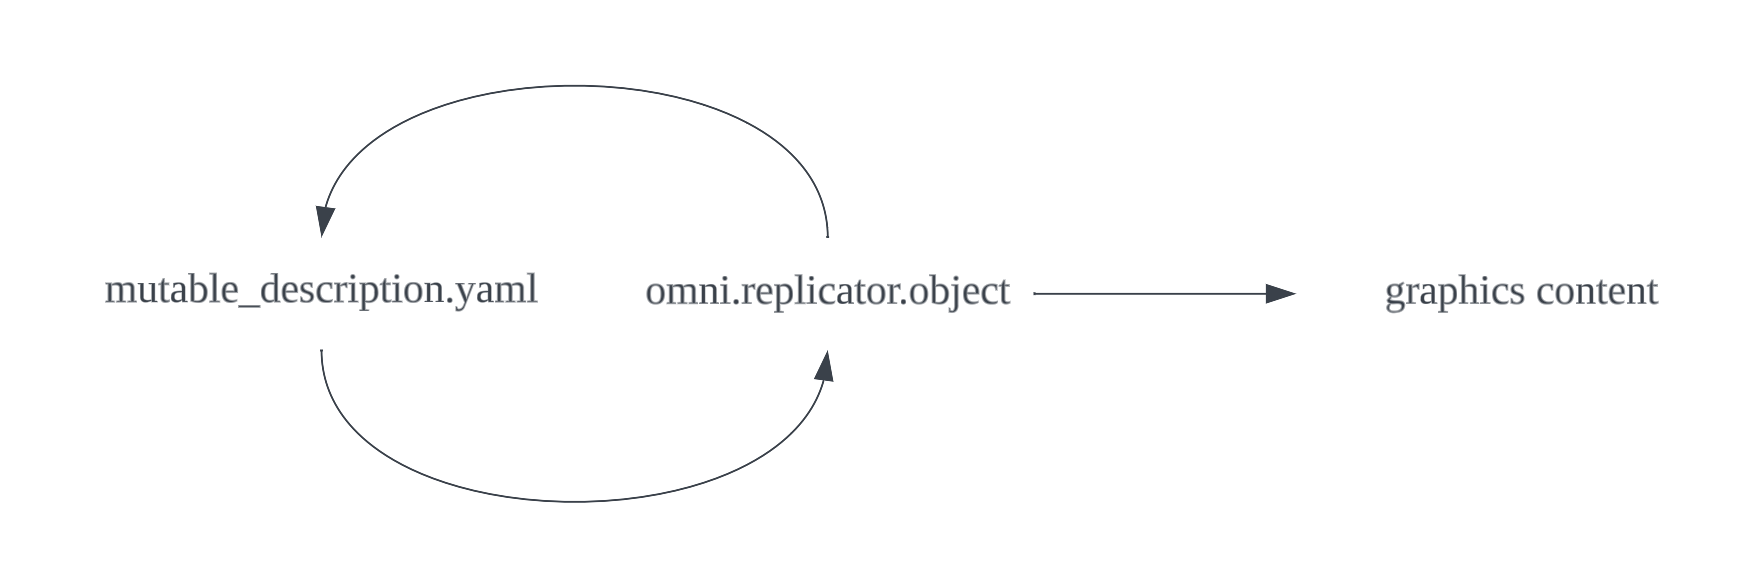
It takes a YAML description file that describes a mutable scene, or a hierarchy of such stacked description files as input, and outputs a description file along with graphics content including RGB, 2D/3D bounding boxes, and segmentation masks.
Value of the ORO Extension#
Training deep learning models with synthetic data is in high demand, while 3D software that is used to generate synthetic data often take a long time to learn, including stages such as getting familiar with UI panels. ORO aims at providing you an easy way to compose scenes that are uniquely domain randomized. For example, atypical user for this product is a data scientist without experience in using 3D modeling software, such as Maya and 3ds Max.
In a domain randomization scenario, rather than the actual detailed content in the 3D scene, a data scientist often focuses more on the rules that governs how the scene is randomized, and the relationship among these randomized rules. ORO provides a set of tools, using macros, to abstractly, intuitively, and compactly describe a randomized 3D scene.
End-to-end Pipeline#
An end-to-end pipeline is made up of groupings of the larger steps that go into using ORO.
Acquire Graphics Resources
To compose a randomized scene, ORO requires imported 3D models to be in USD format. Common 3D formats such as Wavefront OBJ can be converted to USD using asset converter.
Compose a Description File
The specifications of a description file is described in detail in this multi-page documentation. It’s recommended that you start with the video guides in best practices.
Generate Synthetic Data
Follow the guidelines below to run ORO.
Train a CV Model; Deployment and Real-World Application
An example notebook showing steps to train an object detection model on the synthetic images created via ORO will be available in TAO 6.0.
Run from the UI#
You can install Isaac Sim 4.2.0 from Omniverse Launcher.
In Omniverse Isaac Sim 4.2.0 , enable
omni.replicator.objectfrom Windows > Extension manager.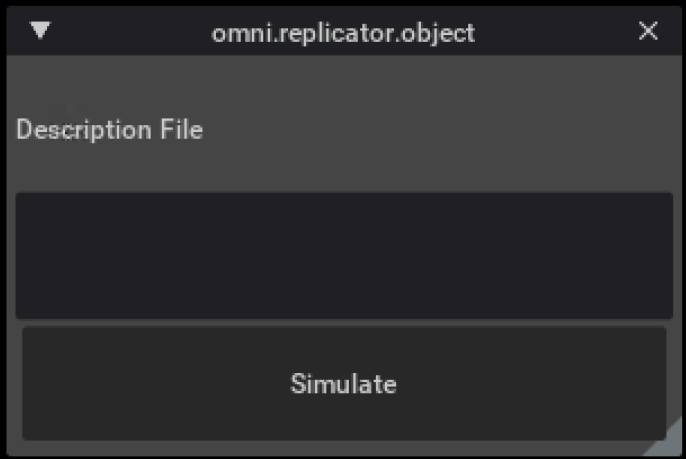
Click on the folder icon or the Visual Studio Code icon on the right side of the opened extension panel:
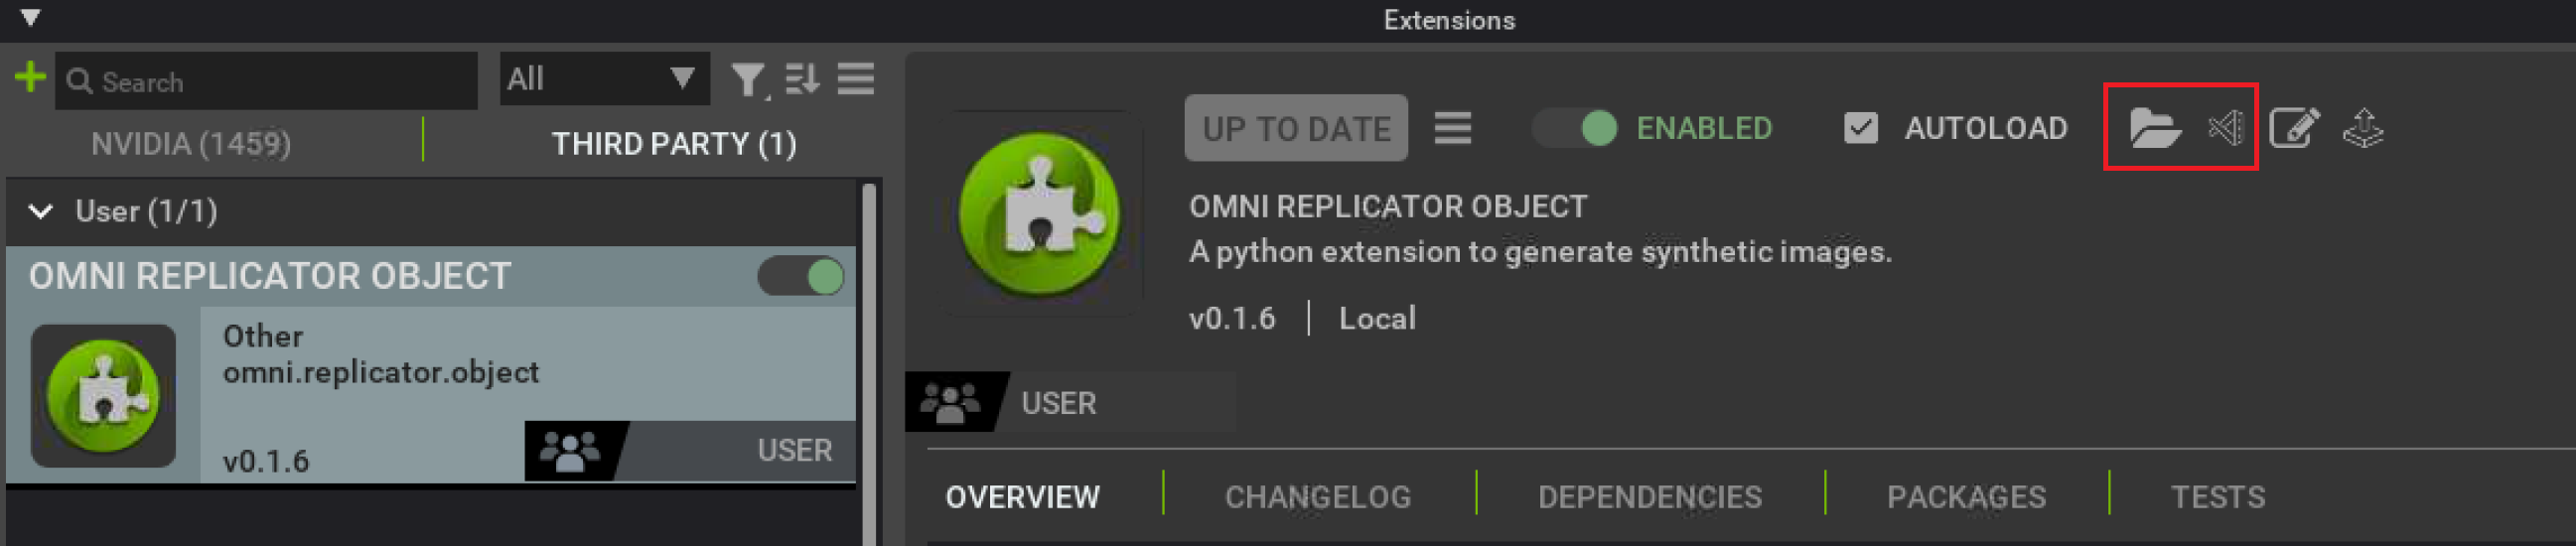
The root folder of the extension opens.
Under
PATH_TO_EXTENSION/omni/replicator/object/configsthere are many description files in YAML format. It’s recommended that you start withdemo_kaleidoscope.yaml. Go toglobal.yamland updateoutput_pathto any local folder where you can store the simulation output.
Note
Select description files from the dropdown below the Simulate button. When the extension is loaded, all .yaml files in the configs folder will have their names included in this list.
Placeholders in description files
Note
Some example description files have placeholders. For example, in global.yaml, replace OUTPUT_PATH with a valid path. In demo_bottle.yaml, replace PATH_TO_LABEL_IMAGES with a folder that contains JPEG images. For tutorial_harmonizer_permutate.yaml, demo_macro.yaml, tutorial_macro.yaml, tutorial_scene_graph.yaml and tutorial_scene_graph_randomized.yaml to run, replace PATH_TO_ORO in global.yaml with the absolute path of data/oro_tutorial_models/oro.usd in the extension’s root folder. In doc_observatory.yaml, replace PATH_TO_OBSERVATORY_SCOPE with the absolute path of data/oro_tutorial_models/observatory_scope.usd; replace PATH_TO_OBSERVATORY_BASE with the absolute path of data/oro_tutorial_models/observatory_base.usd; and replace PATH_TO_OBSERVATORY_SHAFT with the absolute path of data/oro_tutorial_models/observatory_shaft.usd. To make demo_bin_pack.yaml, demo_bins_of_bins_rack_2_layers.yaml, demo_bins_of_bins_rack.yaml, demo_bins_of_bins.yaml, demo_shader_attributes_diffuse.yaml, demo_table.yaml and demo_transform_operator.yaml work, replace PATH_TO_BOXES with a folder containing usd files of boxes (or other USDs) in global.yaml. You may need to adjust the scale if things are not showing up correctly, because different USD files have different sizes.
Select
demo_kaleidoscopefrom the dropdown box;demo_kaleidoscopewill appear in the Description File text box. You may also use the full absolute pathPATH_TO_EXTENSION/omni/replicator/object/configs/demo_kaleidoscope.yamlto load a description file.Click Simulate to start the simulation. The progress bar will show the simulation progress.
Note
In the above and following content, PATH_TO_EXTENSION varies, for example:
- For Isaac on Windows it is something like USERNAME\AppData\Local\ov\pkg\isaac-sim-4.2.0\extscache\omni.replicator.object-0.3.8\omni\replicator\object\configs\demo_kaleidoscope.yaml
- For Isaac on Linux it is something like USERNAME/.local/share/ov/pkg/isaac-sim-4.2.0/extscache/omni.replicator.object-0.3.8/omni/replicator/object/configs/demo_kaleidoscope.yaml
Run from Docker#
To install the Isaac Sim Docker container, visit Container Deployment.
To run the Isaac Sim Docker container:
docker run --gpus device=0 --entrypoint /bin/bash -v LOCAL_PATH:/tmp --network host -it ISAAC_SIM_DOCKER_CONTAINER_URL
Accordingly, update global.yaml to have output_path to be any folder under /tmp.
For example, to launch the simulation with demo_kaleidoscope:
bash isaac-sim.sh --no-window --enable omni.replicator.object --allow-root --/log/file=/tmp/omni.replicator.object.log --/log/level=warn --/windowless=True --/config/file=PATH_TO_EXTENSION/omni/replicator/object/configs/demo_kaleidoscope.yaml
/tmp/omni.replicator.object.log contains the messages from execution as well as from the extension. You can search the messages from the extension by filtering the file with METROPERF.
To refer to resources residing in the Nucleus server, before launching simulation, run:
export OMNI_USER='$omni-api-token' (as is)
export OMNI_PASS='<API_TOKEN>' (substitute the API token from the nucleus server)
Expected Output#
After the simulation, the output is stored in output_path. The output content is determined by the output switches setting.
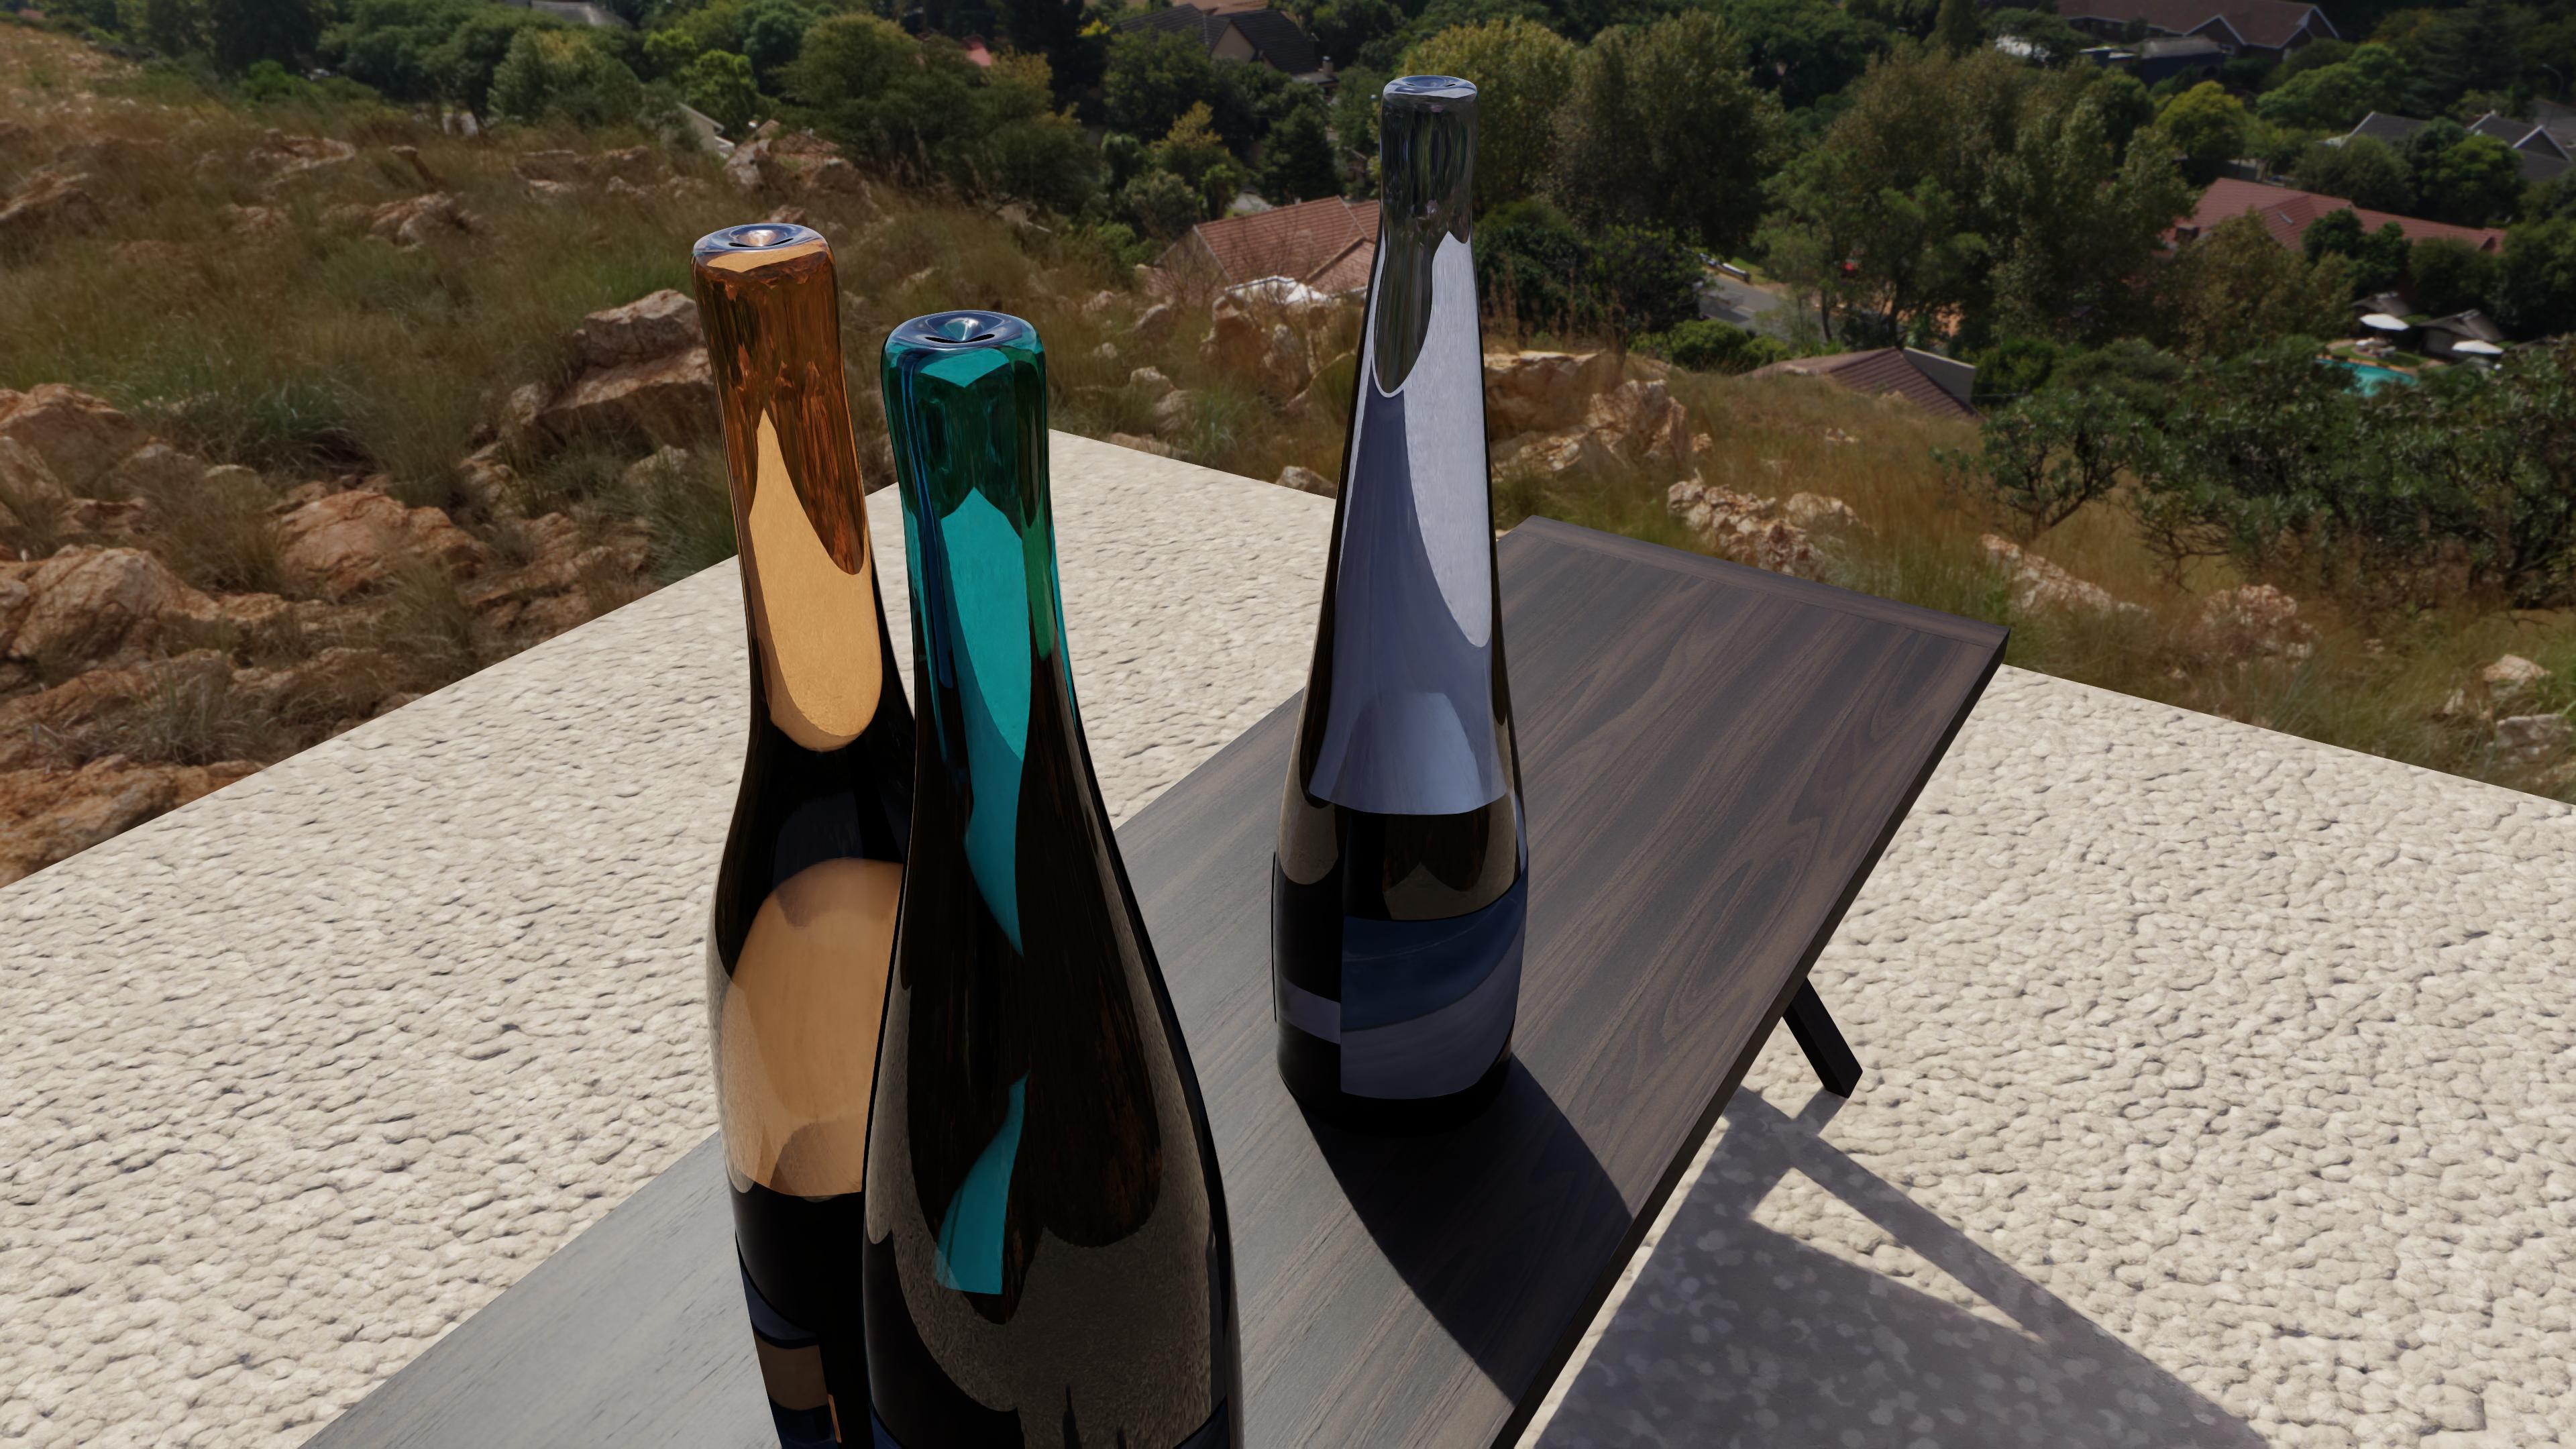
For example, the image output of demo_bottle is:
While the segmentation output is:

The 2D bounding box is:
bottle_0 0 -1.0 0 1028 333 1362 2159 0 0 0 0 0 0 0
bottle_1 0 -1.0 0 1895 112 2277 1694 0 0 0 0 0 0 0
bottle_2 0 -1.0 0 1281 462 1854 2159 0 0 0 0 0 0 0
in which the 4 positive numbers indicate x_min, x_max, y_min, y_max. The number -1 is where the occlusion rate should be, but because a bottle is transparent, it is -1 here.
As another example, the image output of demo_kaleidoscope is:

While the segmentation output is:

Concepts#
Description File
The description file is a YAML file that has a main key named omni.replicator.object.
The description file consists of key-value pairs. Each key-value pair is a Mutable, a Harmonizer, or a Setting.
The description file generates frames as specified. Each frame the scene is randomized, graphics content is captured, and output to disk. Settings describe how the scene is configured and how data is output. For example, you can set the number of frames to output, whether or not to output 2D bounding boxes, or set the gravity and friction of physics simulation.
The description file populates the scene with objects that are called mutables.
Mutables randomize every frame. Sometimes you might want to constrain how they randomize. For example, to know how other mutables are randomizing and randomize correspondingly. To do so, define harmonizers.
Example Minimal Description File Definition
omni.replicator.object:
   version: 0.2.3
   num_frames: 3
   output_path: OUTPUT_PATH
   screen_height: 1080
   screen_width: 1920
   seed: 0
Simulation Workflow
Every time a simulation is launched, an initialization stage happens in the beginning, and a per-frame simulation stage happens every frame.
In the initialization stage, the description file is parsed by a description parser. Symbols are created for every mutable attribute that requires a resolution to get its actual value. These symbols will resolve to actual values when they are used to interact with the USD scene once, after they are initialized; and also in every per-frame simulation.
Each time a symbol is resolved, the dependent symbols of it are also recursively resolved. If an unresolved harmonized mutable attribute is met, the parser enters AWAITING_HARMONIZATION status, and then the harmonizers harmonizes (collect information from the pitch attribute and randomize), and propagate output back to harmonized mutable attributes. After all harmonized mutable attributes are resolved, the parser will be out of AWAITING_HARMONIZATION status.
After this, the resolved values are used to update the USD scene. If gravity is turned on, physics is resolved so that objects move away from each other when they overlap or drop onto a surface (for more details, see physics simulation explained). And graphics content is captured. Eventually, the state of the scene in this frame is recorded and saved, such that later on, it can be restored or inspected.
Scene Restoration
To support multiple-sampling for pretrained models:
In the output content, you can use the output saved from logging of a specific frame to generate the exact same graphics content as when this frame was generated. Or you can slightly modify it to have something different but everything else is the same.
Best Practices#
Here are some step-by-step video guides on how to compose a description file that generates a scene that has a table with randomized objects dropping onto it.
This is a guide on how you can run ORO.
This is a guide on how to plan the distribution of graphics assets before composing a description file.
This is a guide on how to compose a description file.
Note
It is good to check whether the YAML text is formatted correctly in the description (for example, indentation). If you meet an error mapping values are not allowed here it may be due to a formatting problem.
Catalog#
Conventions in the linked catalog files:
Type in the tables indicates the expected data types. Where a type is expected, a macro string can be used for later evaluation of that specific type. For example, if you expect int in a value, you can either give an int or something like $[index]. See Macro for details.
Within a mutable, aside from these options, you can also specify a Mutable Attribute to evaluate to this type.
And numeric means literal or evaluated float or int.
3rd-party Libraries Used#
py3dbp (modified), MIT License PyYaml, MIT License trimesh, MIT License regex, Apache License