OmniGraph: Effort Sensor Node#
Learning Objectives#
This tutorial details how to read joint effort using the included Omniverse Isaac Sim OmniGraph nodes. After this tutorial, you will understand how to attach the effort sensor to a simple joint and print out its effort readings using OmniGraph.
10-15 Minute Tutorial
Getting Started#
Prerequisites
Review the GUI Tutorial series, specifically OmniGraph, prior to beginning this tutorial.
Adding the Simple Articulation#
Begin by adding a Simple Articulation to the scene. The articulation file can be accessed via a Omniverse Nucleus Server in the content window. Connecting to this server allows allows you to access the library of Omniverse Isaac Sim robots, sensors, and environments.
After connecting to the server,
Navigate to localhost/NVIDIA/Assets/Isaac/4.2/Isaac/Robots/Simple/ using the Content browser.
Drag simple_articulation.usd onto the World prim in the Stage UI window on the right hand side to add an instance into the environment.
To drive the revolute joint, in the Stage window, select the RevoluteJoint prim at /World/simple_articulation/Arm/RevoluteJoint, and scroll down to Drive in the Property window. Set the target velocity to 90 deg/s, and stiffness to 0.
The following video summarizes the above steps:
Note
The server shown in these steps has been connected to in Isaac Sim First Run.
Adding the Effort Sensor#
Omnigraph Setup The read effort node will create an effort sensor for the desired joint and output the joint effort with the following steps:
Create the new action graph by navigating to Window > Visual Scripting > Action Graph, and selecting New Action Graph in the new tab that opens.
Now add the following nodes to the graph, and set their properties as follows:
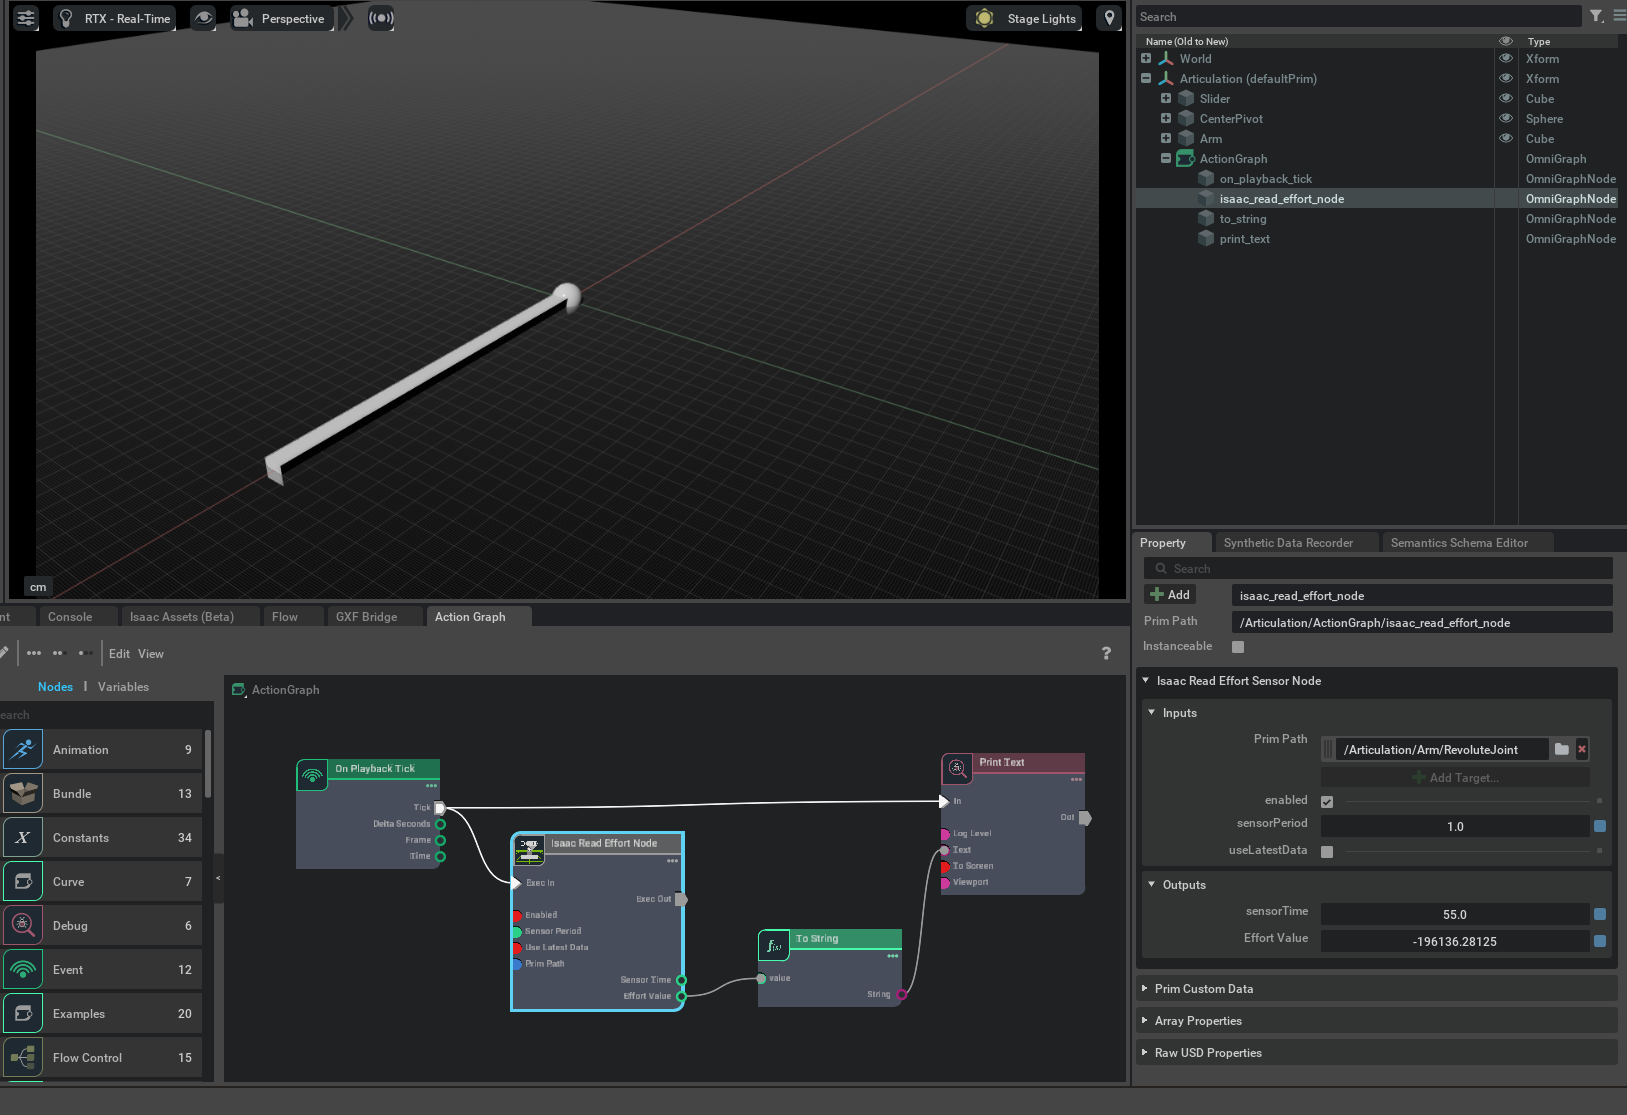
On Playback Tick node executes the graph nodes every simulation timestep.
Isaac Read Effort Node to get the Effort readings. In the Property tab, set Effort Prim to the exact joint of measurement. For example /World/simple_articulation/Arm/RevoluteJoint in
simple_articulation.usd.To String node to convert the effort sensor readings to string format.
Print Text node to print the string readings. In the Property tab, you can optionally set Log Level to Warning so that messages are visible in the terminal/console by default.
Note
Remember to configure the joints to the correct axis to get the expected readings!
This video below shows the process of adding the read effort node in Omnigraph:
Summary#
In this tutorial, we introduced the Isaac Read Effort Node and its functionality.
Further Reading#
To learn more about collecting LIDAR data: Using Sensors: LIDAR To learn about the IMU sensor, see Using Sensors: IMU