Building Your First Mod for the RTX Remix Sample#
This tutorial provides a practical approach to building a mod for the RTX Remix Sample Application.
To create any mod you’ll want to follow these recommended steps. We’ll go through each of them specifically for the Sample Application, but for reference, they are each thoroughly documented here:
1. Install the RTX Remix Runtime#
For this tutorial, the RTX Remix Runtime bundled with the RTX Remix Toolkit will be used. Therefore, proceed directly to Step 2.
2. Install the RTX Remix Toolkit#
The RTX Remix Toolkit can be installed most conveniently by downloading the latest version from the NVIDIA App. Visit the website to download the installer.
After installing the NVIDIA App, launch it and install the RTX Remix application.
Important
If the RTX Remix application is not available for installation, the system may not meet the minimum system requirements.
If the hardware meets the requirements but the application is still unavailable, ensure that the latest drivers are installed.
3. Setup the RTX Remix Runtime for the Sample Application#
With both the RTX Remix Runtime and the RTX Remix Toolkit installed, the RTX Remix Runtime can now be set up for the Sample Application.
Locate the RTX Remix Toolkit installation directory. This can be done by opening the RTX Remix Toolkit and clicking the
Show Install Directorybutton on the home screen.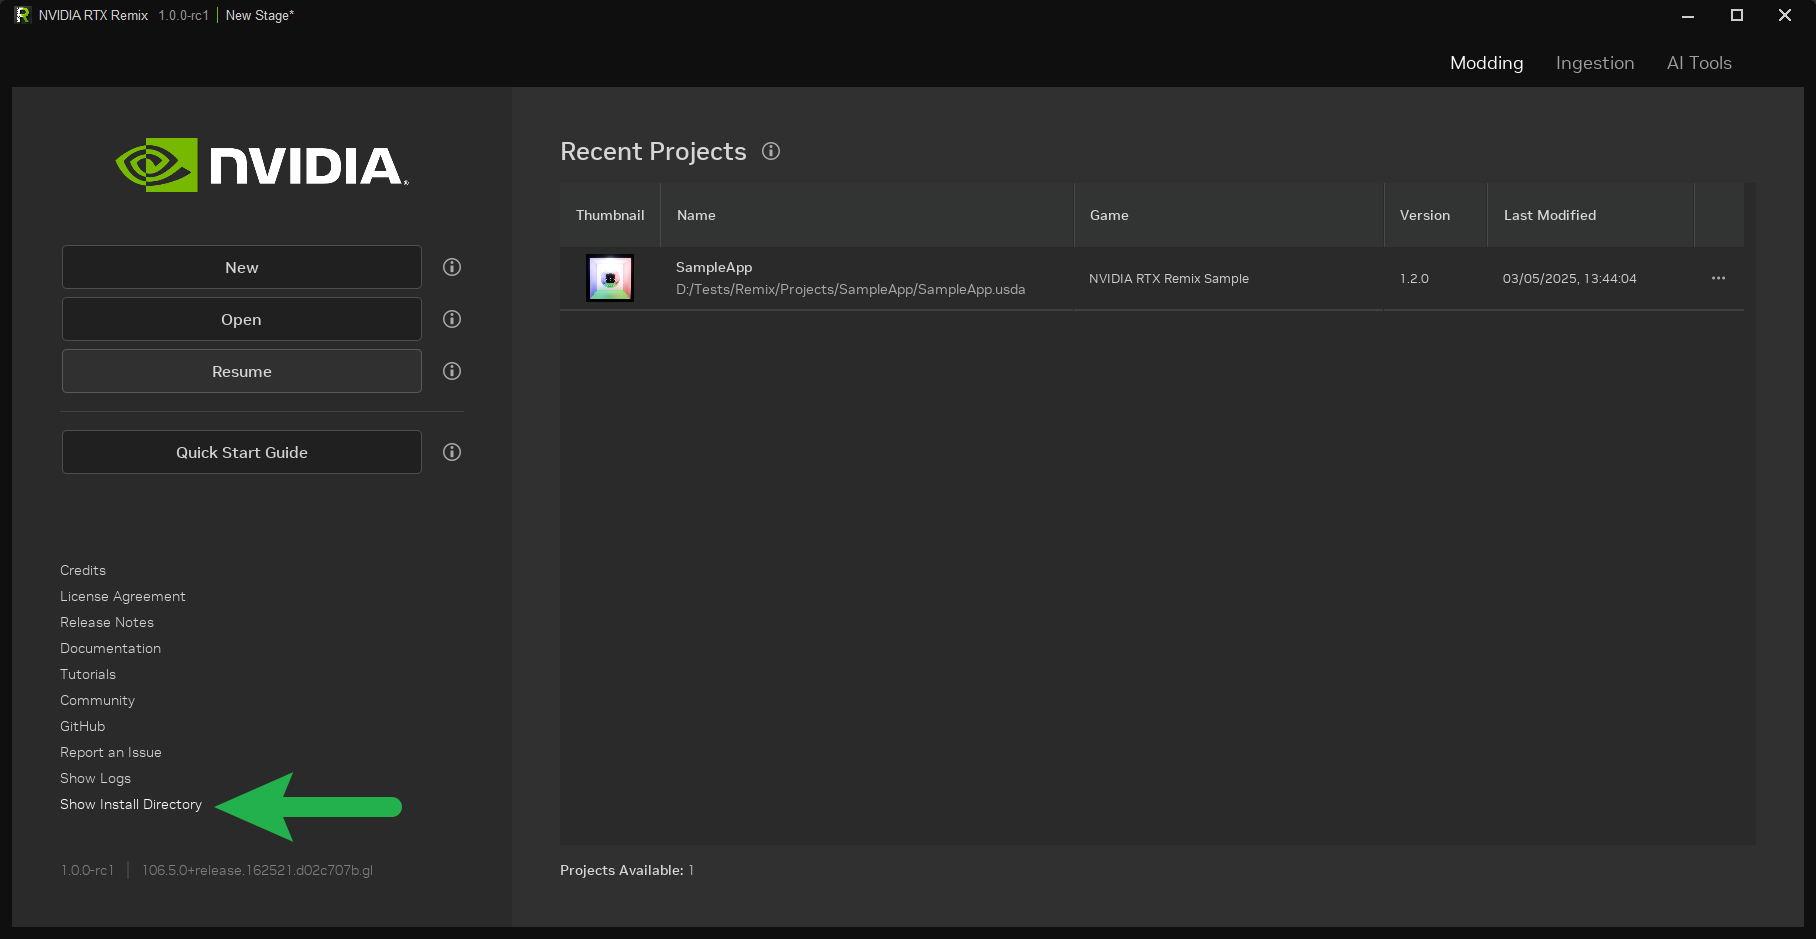
Navigate to the
<INSTALL_DIRECTORY>\deps\remix_runtimedirectory. It contains two subdirectories:runtimeandsample.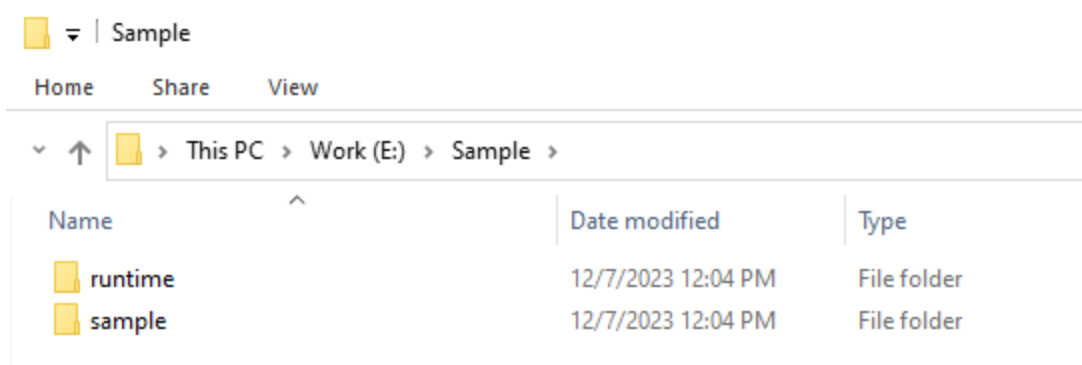
Move both directories out of the toolkit installation directory to a location of your choice. (In these screenshots, we use E:/Sample)
Install the RTX Remix Runtime by copying the contents of the
runtimedirectory into thesampledirectory.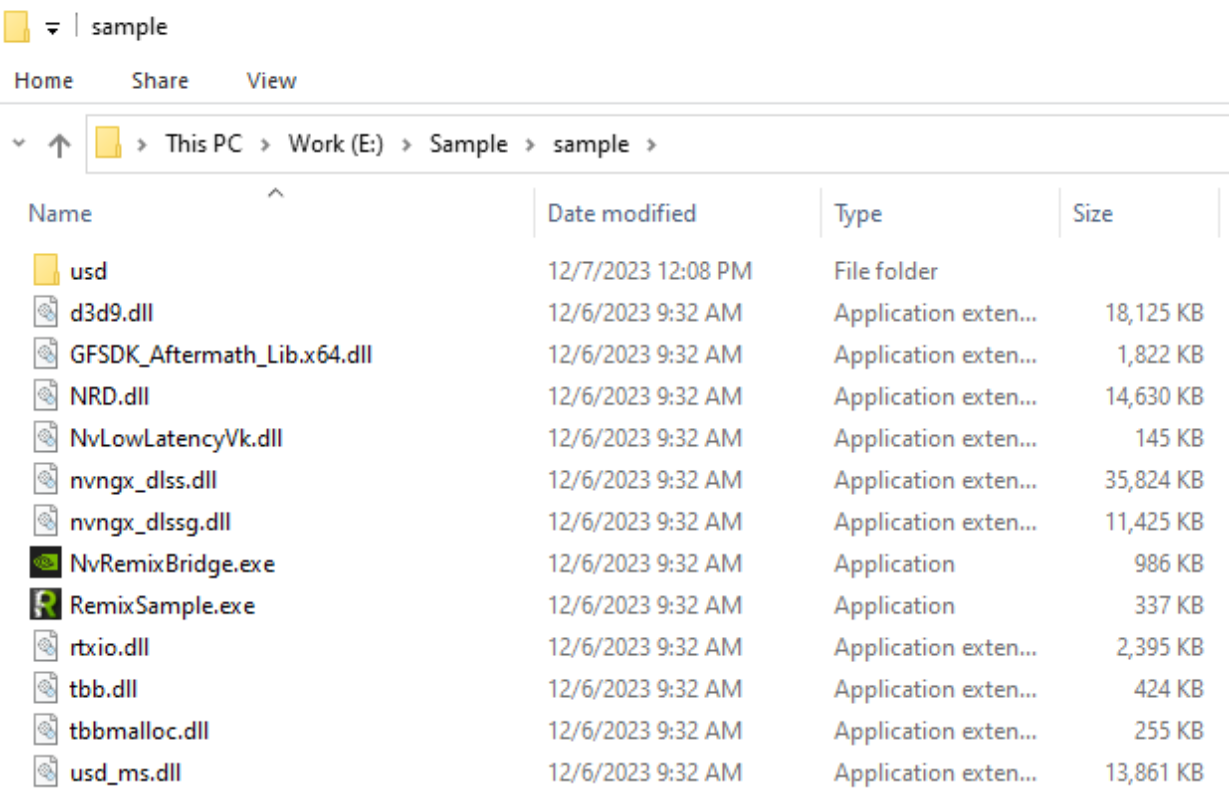
The RTX Remix Sample Application can now be launched by double-clicking the
RemixSample.exefile. The following window should appear: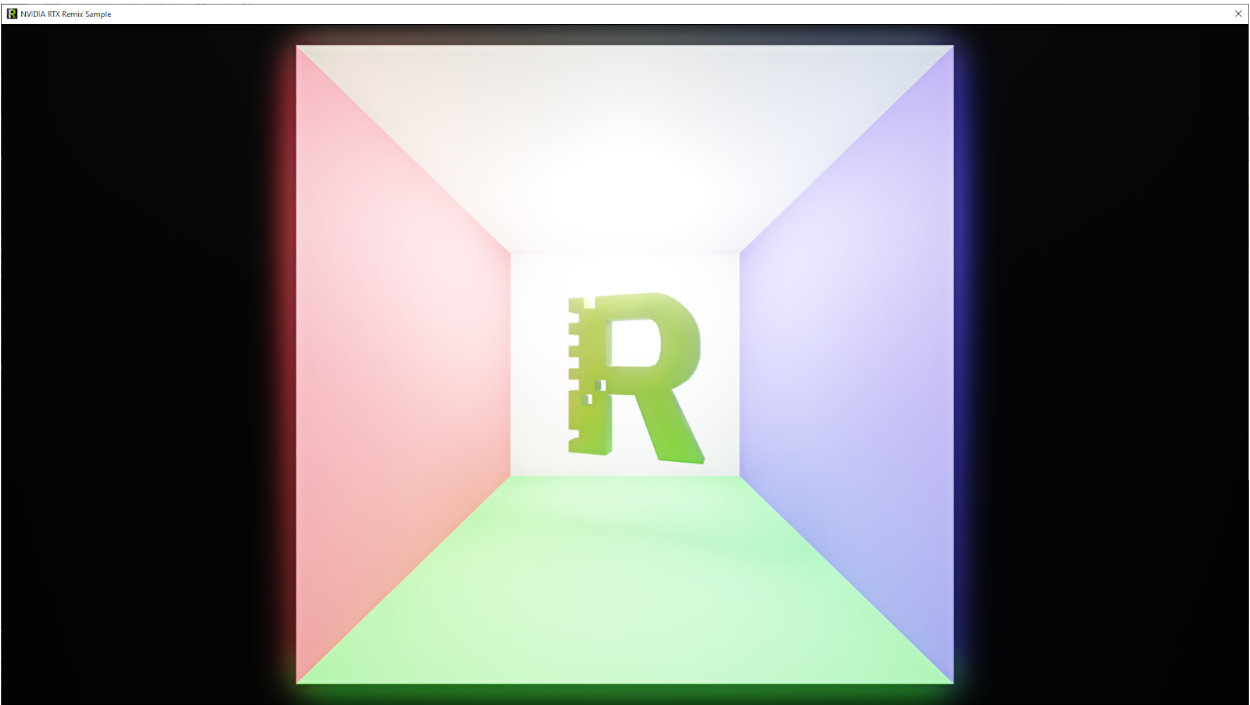
Since the Sample Application is simple and lacks UI Textures, texture tagging can be skipped.
Proceed to capturing the first scene.
Open the RTX Remix “Graphics Settings Menu” by pressing
Alt+X. Then, open theDeveloper Settings Menuby clicking the button labeled “Developer Settings Menu.”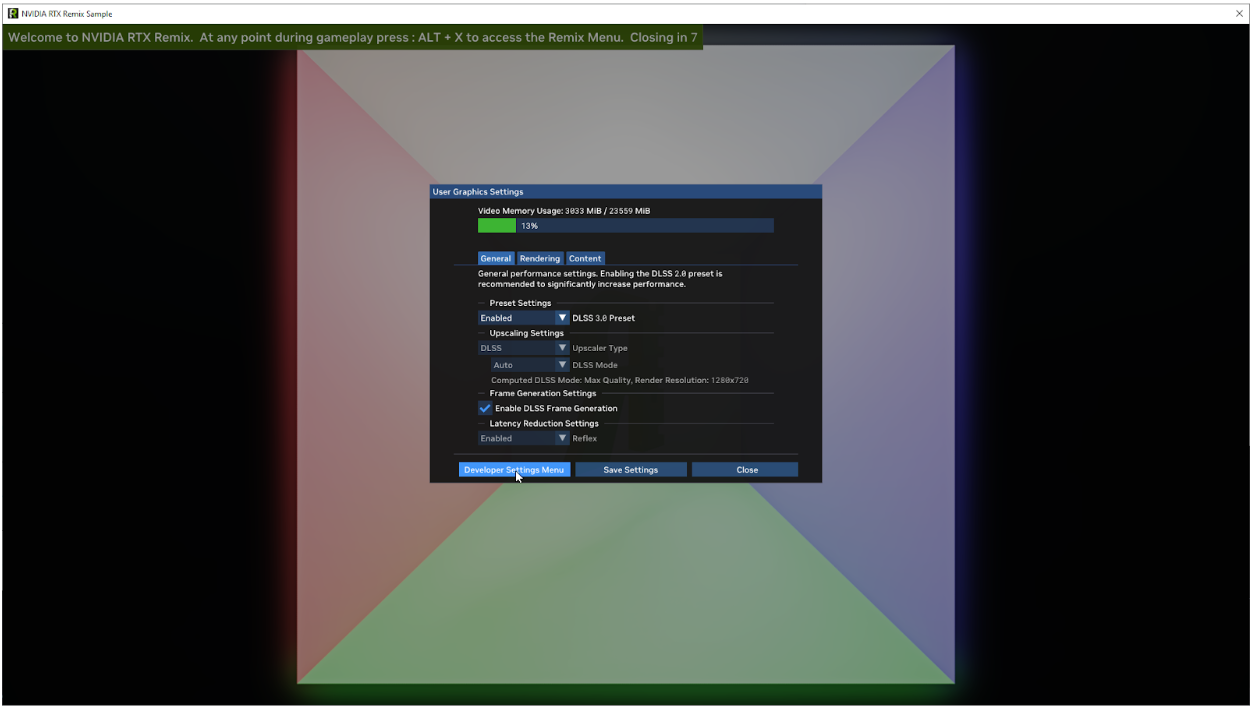
In the “Developer Settings Menu,” click the
Enhancements Tabto display the “Enhancements” settings, which include capture settings.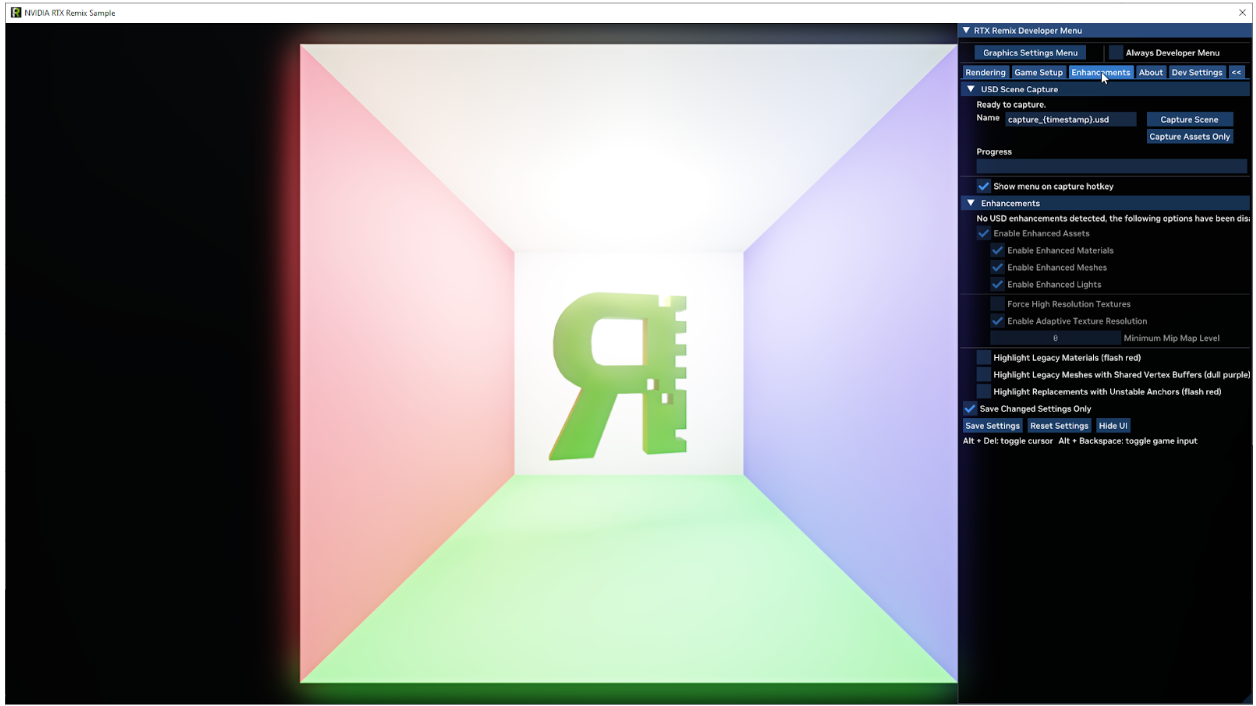
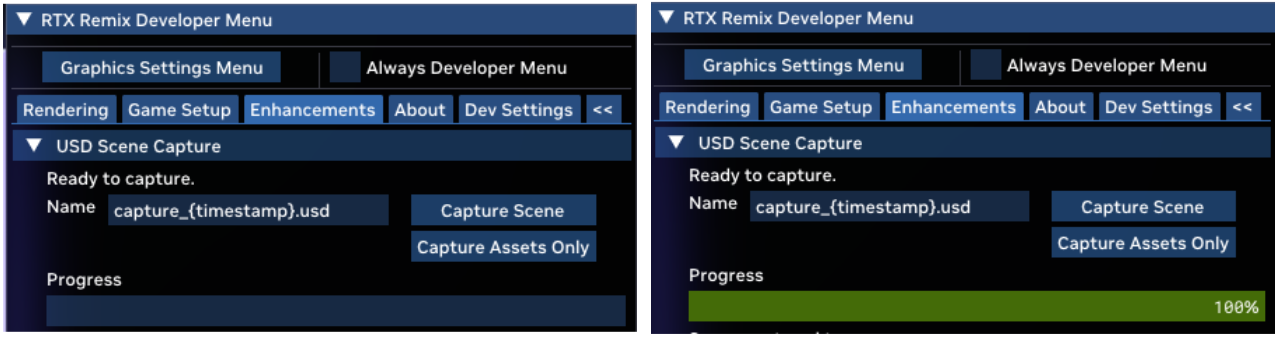
After disabling enhancements, a name can be specified for the capture. Then, click the
Capture Scenebutton.This action captures the current frame and saves a USD file containing all data to disk. The progress bar indicates the capture progress. Once it reaches 100%, setting up the RTX Remix Toolkit project can begin.
4. Create a Project for the Sample Application Mod#
With the Sample Application captured, a project for the Sample Application mod can be created.
Launch the RTX Remix Toolkit from the NVIDIA App. After the app starts, click the
Newbutton to open the Project Creation Wizard.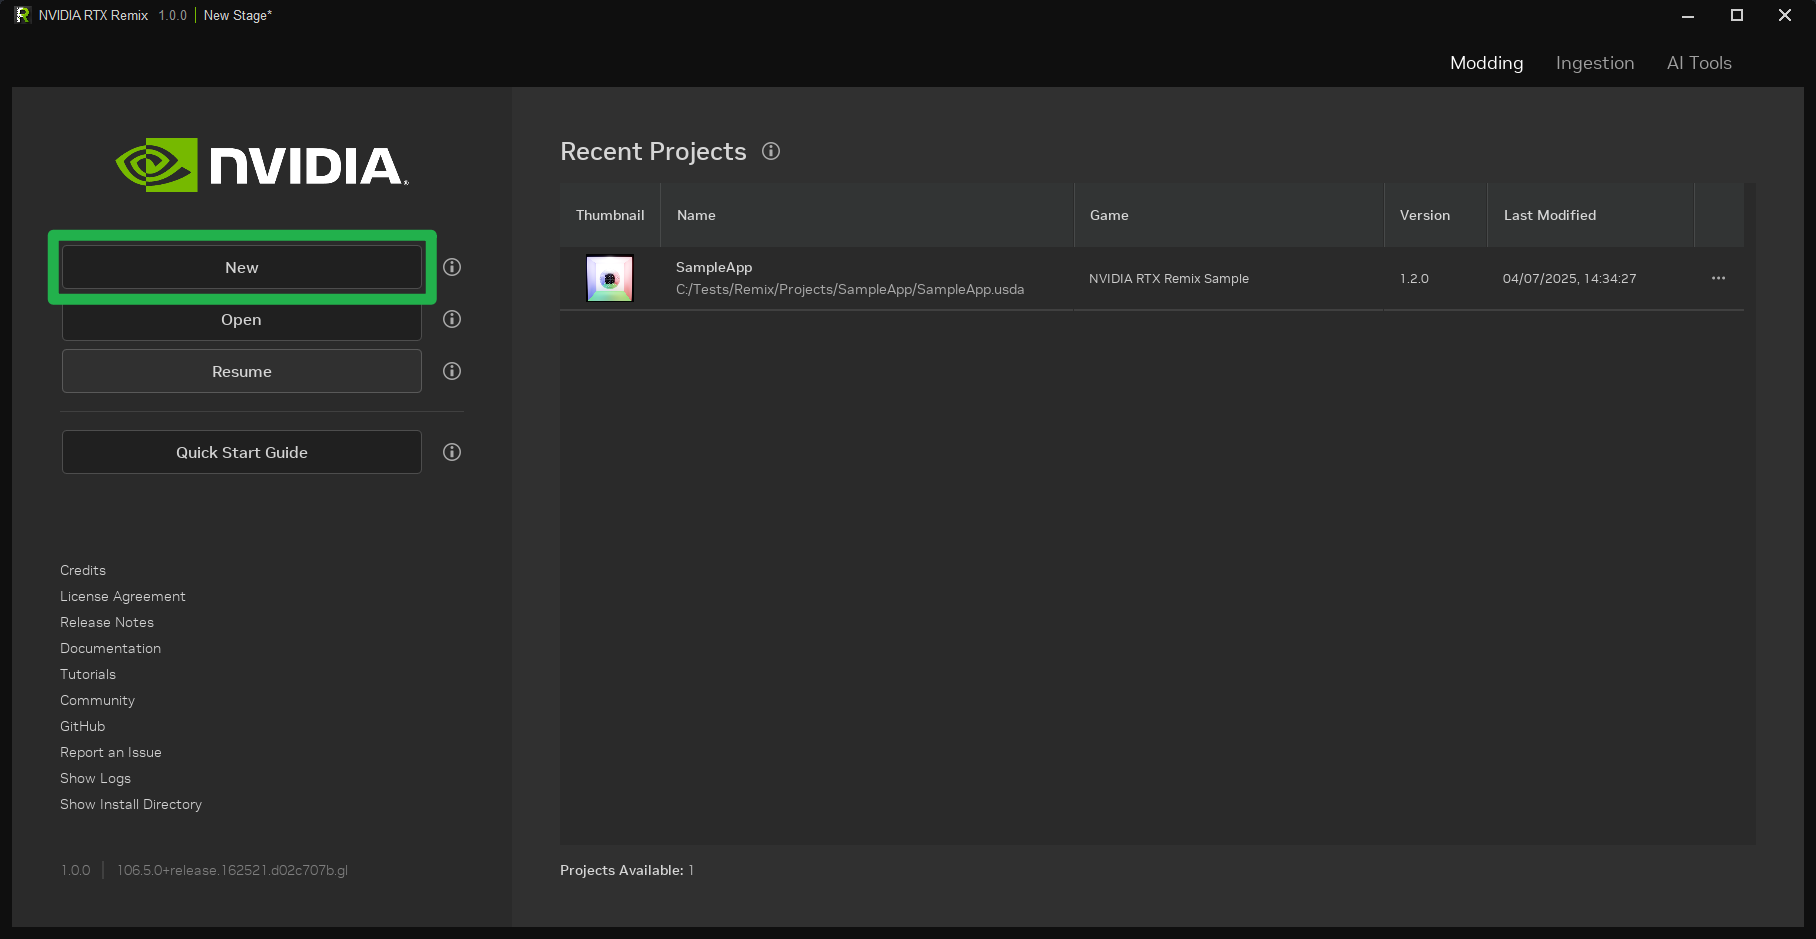
In the “RTX Remix Project Wizard,” select the
Createbutton to begin creating a new project.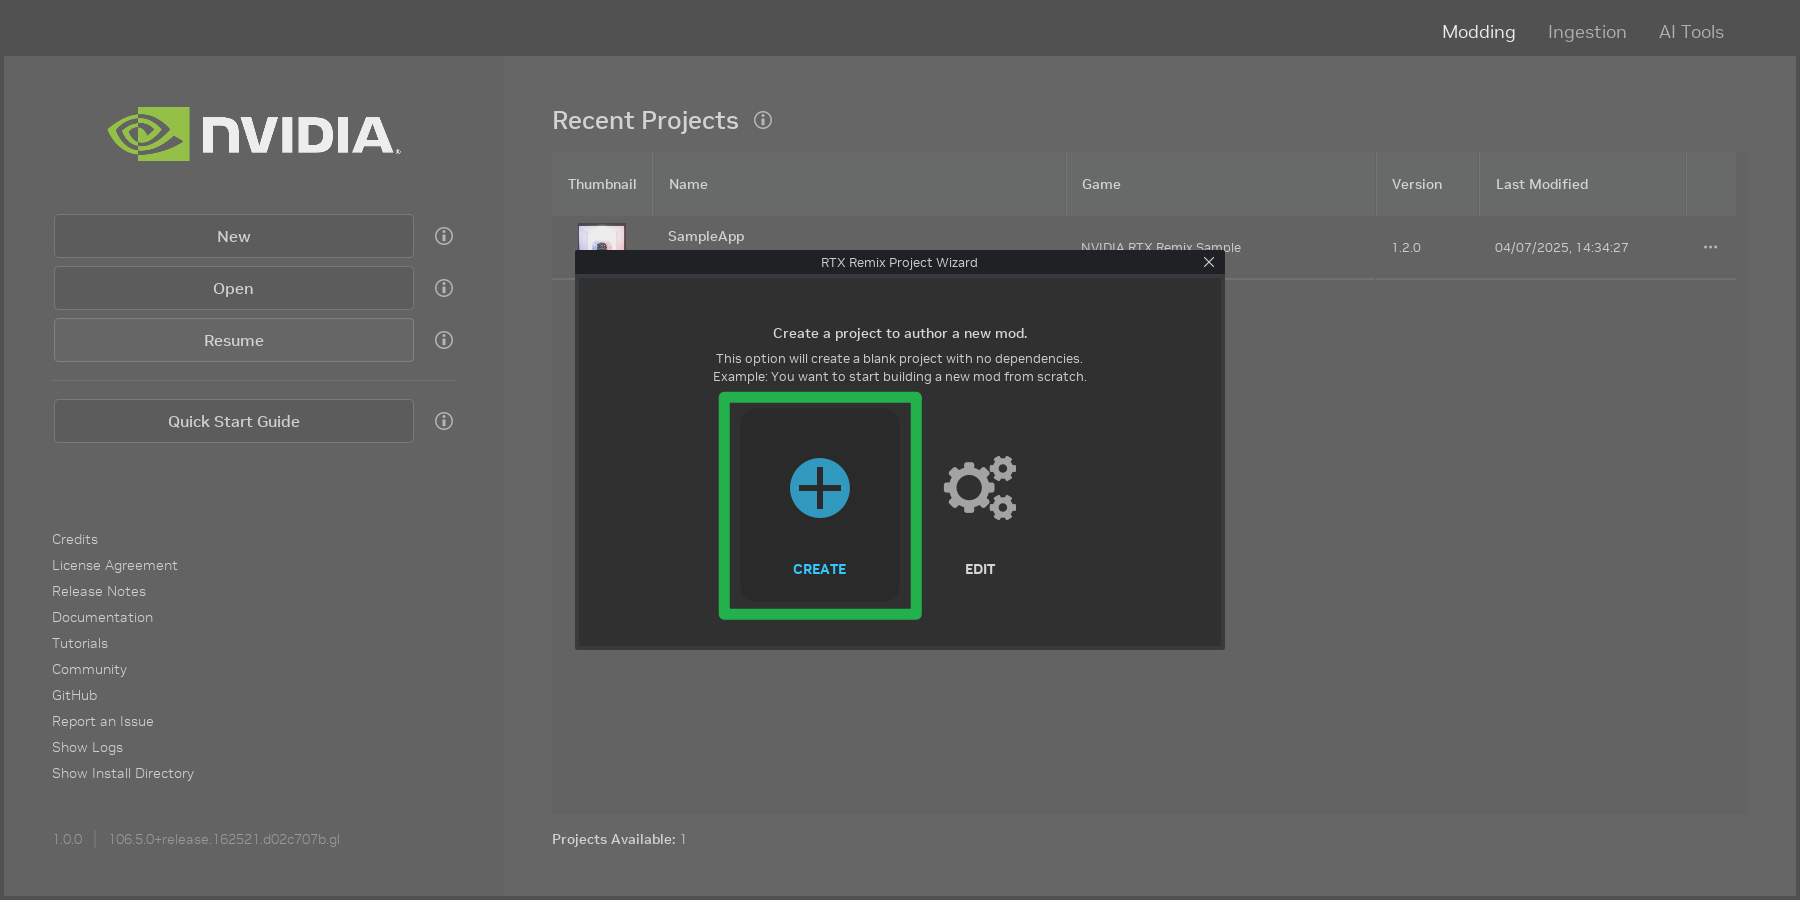
Click the Browse
 button for the
 Project File Locationfield to select a file path for the mod.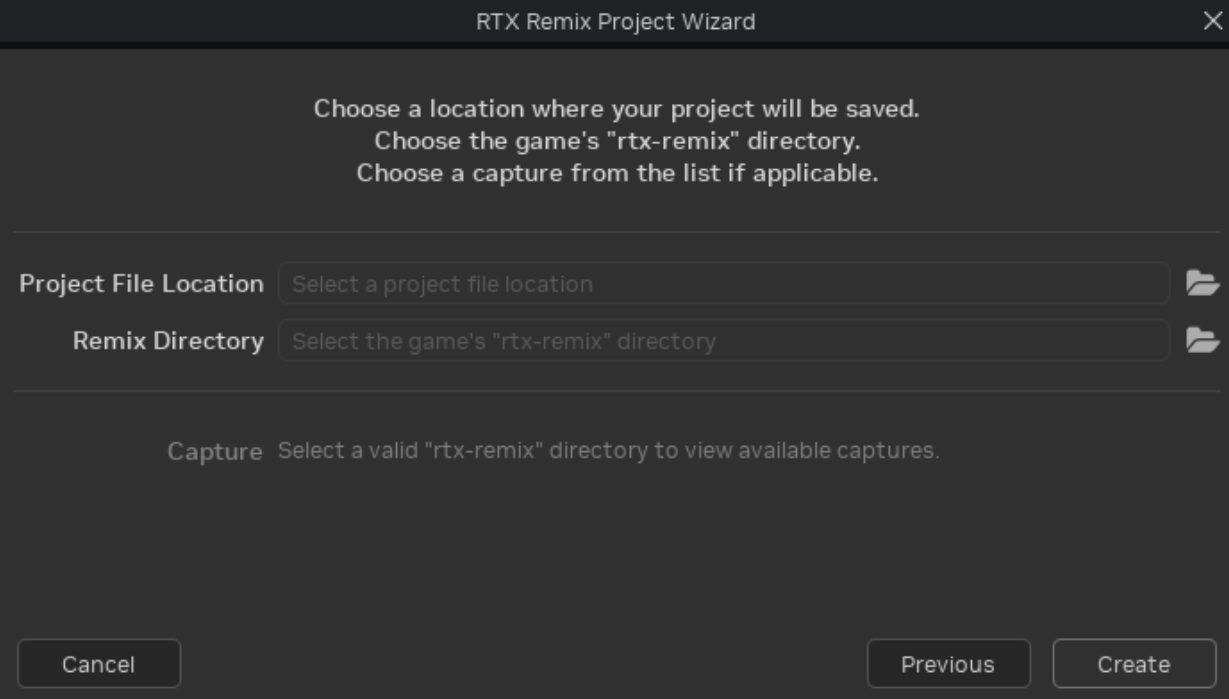
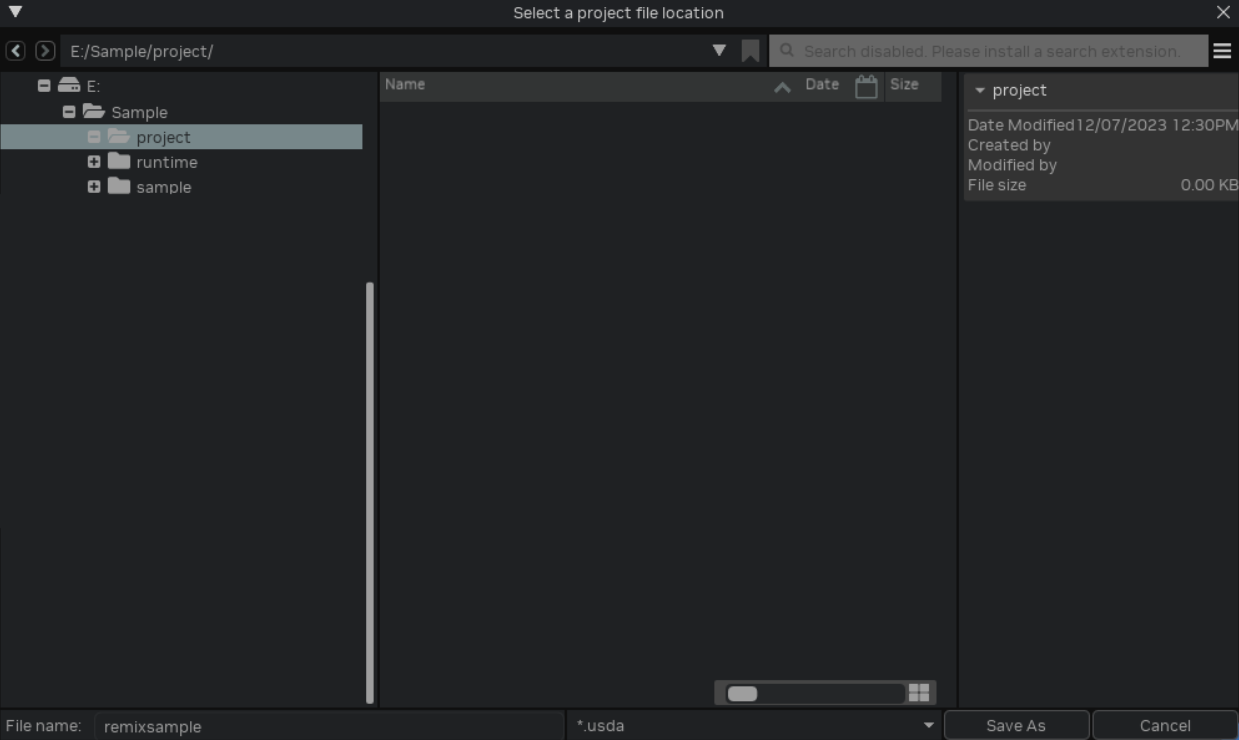
In the file browser, create a new directory for the project using the context menu (right-click menu). Then, define a file name for the project layer and select the USDA file type.
Saving the project layer as a USDA file is recommended, as file readability is more important than performance in this scenario.
Any errors detected in the selected file path will be displayed in the dialog box.
See also
Now would be a good time to read through the Best Practices section of the documentation.
The Choosing Project Directories section contains valuable information about where to place project directory created in this step.
Next, click the Browse
button for the Remix Directoryfield.Select the
rtx-remixdirectory created earlier during the Sample Application capture.Refer back to step 3 to locate the Sample Application directory. The
rtx-remixdirectory is located inside thesampledirectory.With the project file location and remix directory configured, select the previously captured scene and click the
Createbutton.Note
A prompt will appear, requesting permission for the RTX Remix Toolkit to perform an action as administrator. This permission is necessary to symlink the project into the game.
For more information on why this permission is required, refer to the following article from Microsoft.
An RTX Remix Project is now created and ready for authoring.
5. Ingest and Replace Assets#
With a project created, asset replacement in the mod can begin.
Let’s replace the RTX Remix ![]() mesh with an updated asset.
mesh with an updated asset.
The following disco ball asset can be used for testing: SM_Prop_Discoball
Before the asset can be used in the mod, it must be ingested. Navigate to the
Ingesttab.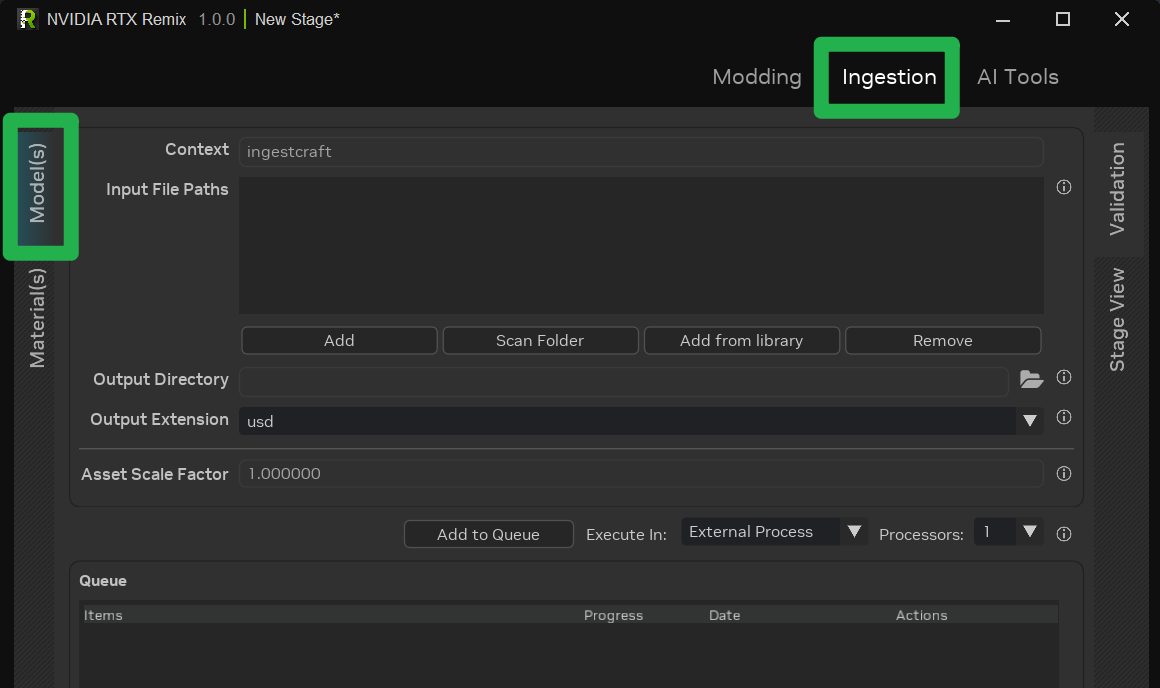
Drag and drop the downloaded asset (or any other desired asset) into the
Input File Pathsarea.Click the
Add to Queuebutton to add the asset to the ingestion queue. The process is complete when the asset has a progress of 100% and the progress bar turns green.Tip
The ingested asset output directory can be configured. However, a default output directory is provided.
If the output directory is not configured manually, the ingested asset is placed in the following directory:
<PROJECT_DIRECTORY>\assets\ingested.With the asset ingested, it’s time to replace the captured asset. Return to the
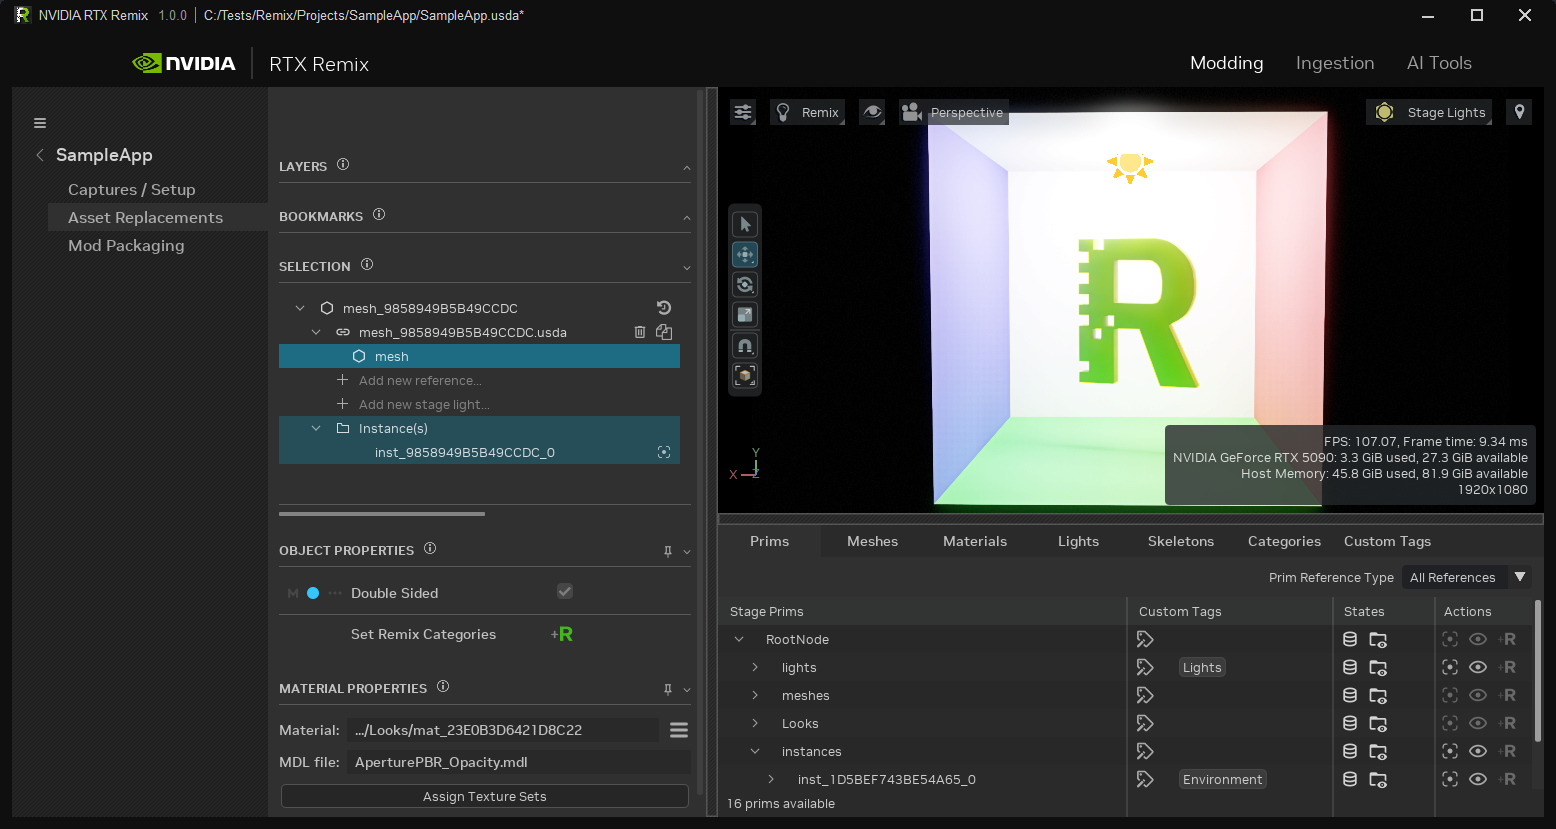
Moddingtab.Select the asset to be replaced. In this case, select the RTX Remix
 mesh in the viewport.
After selecting the asset, ensure that the reference is selected in the “Selection” panel. Then, click the Browse
button in the Object Propertiespanel to select the newly ingested asset.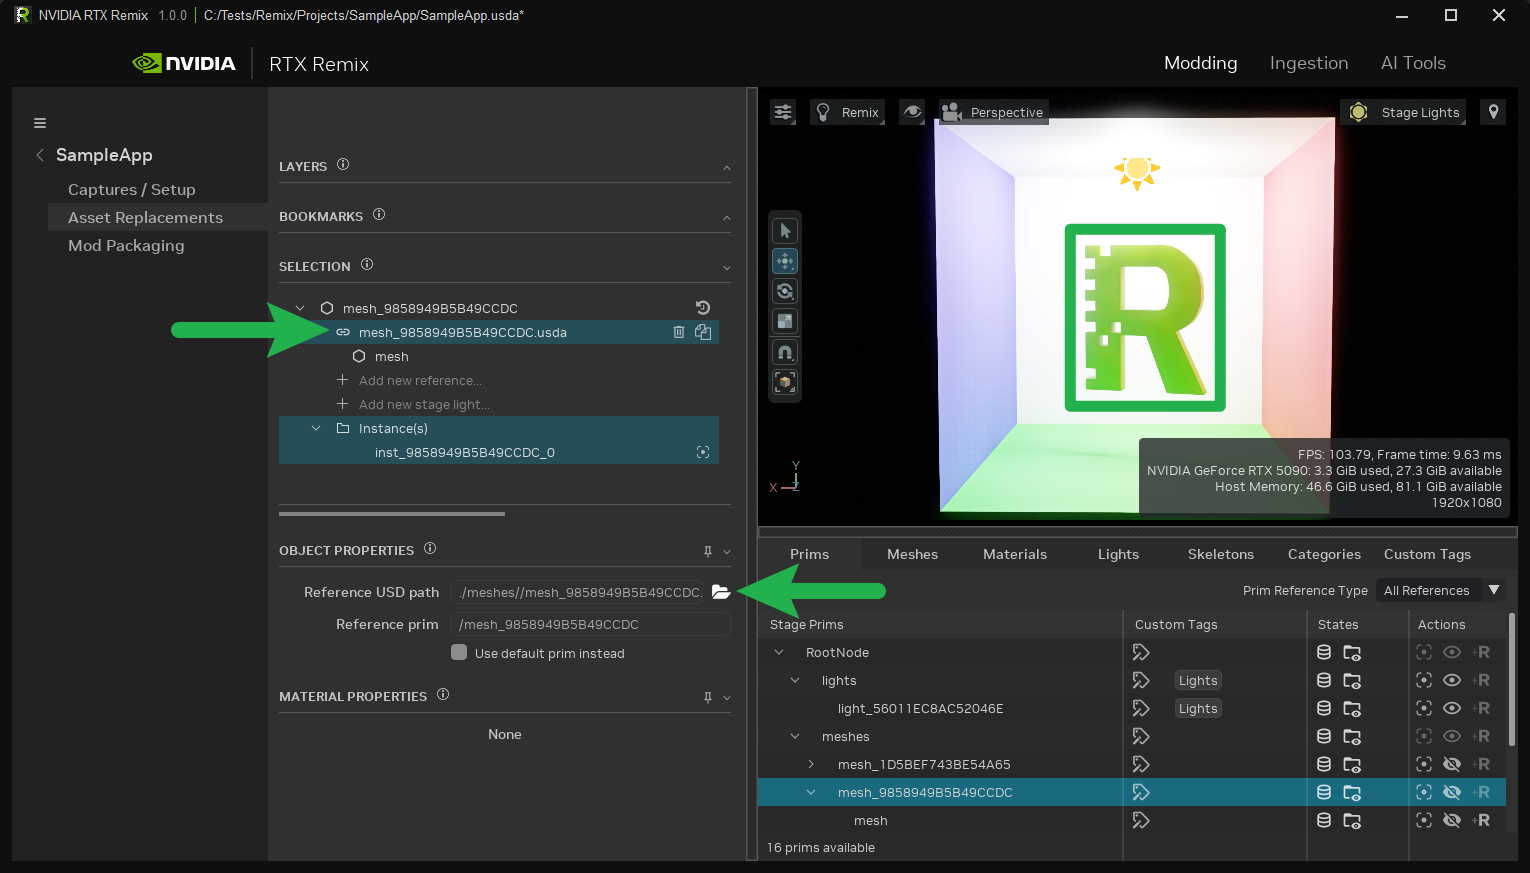
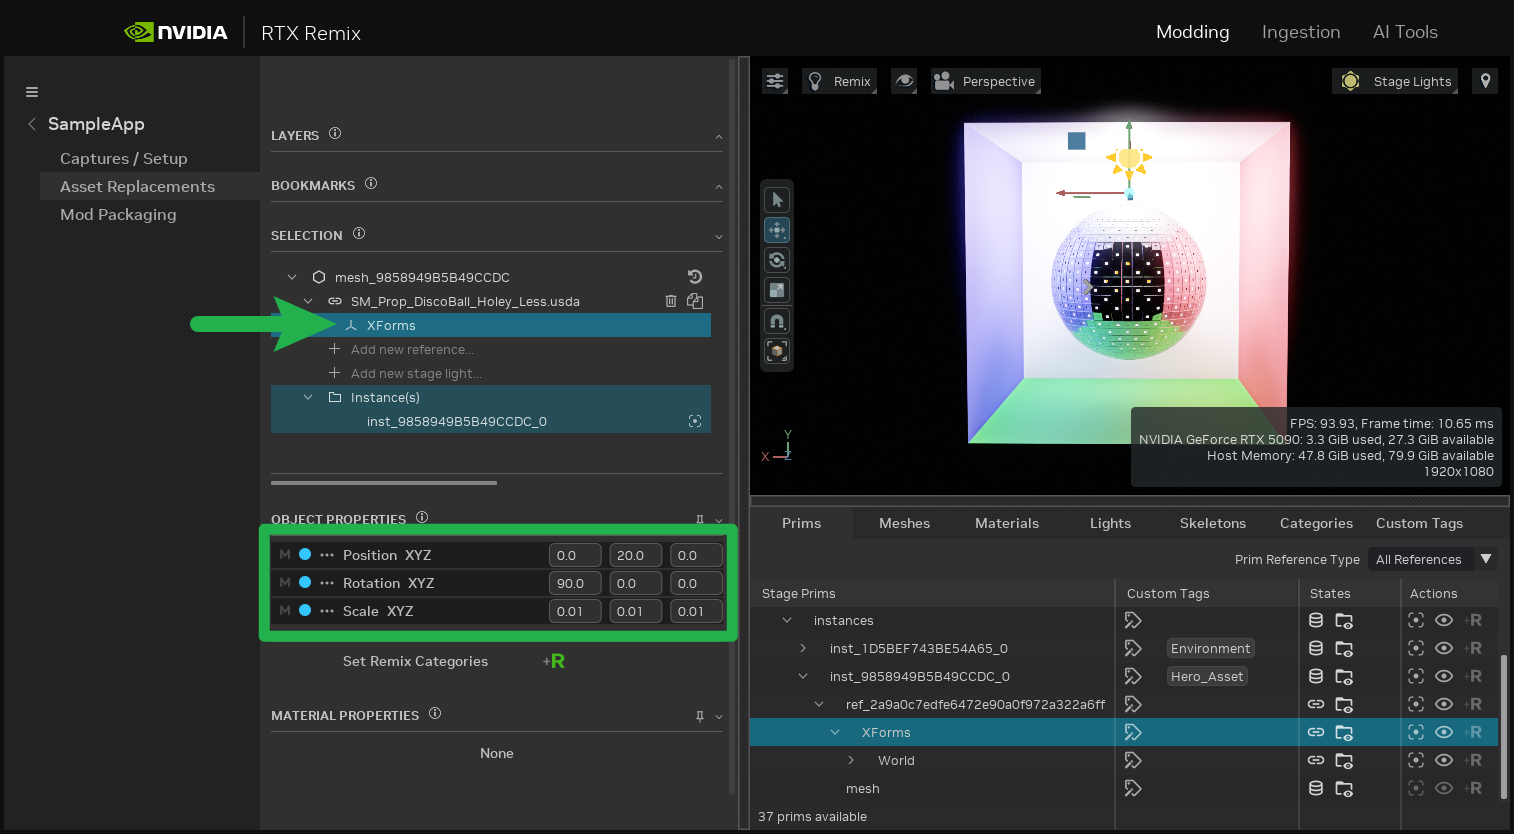
After replacing the asset, transform it (translate, rotate, and scale) as needed to match the original asset. Use the
Object Propertiespanel to perform these transformations.The new asset should now be visible in the viewport.
To view the changes in-game, save the mod (
CTRL+S) and launch theRemixSample.exeexecutable.The updated asset should now appear in the game.
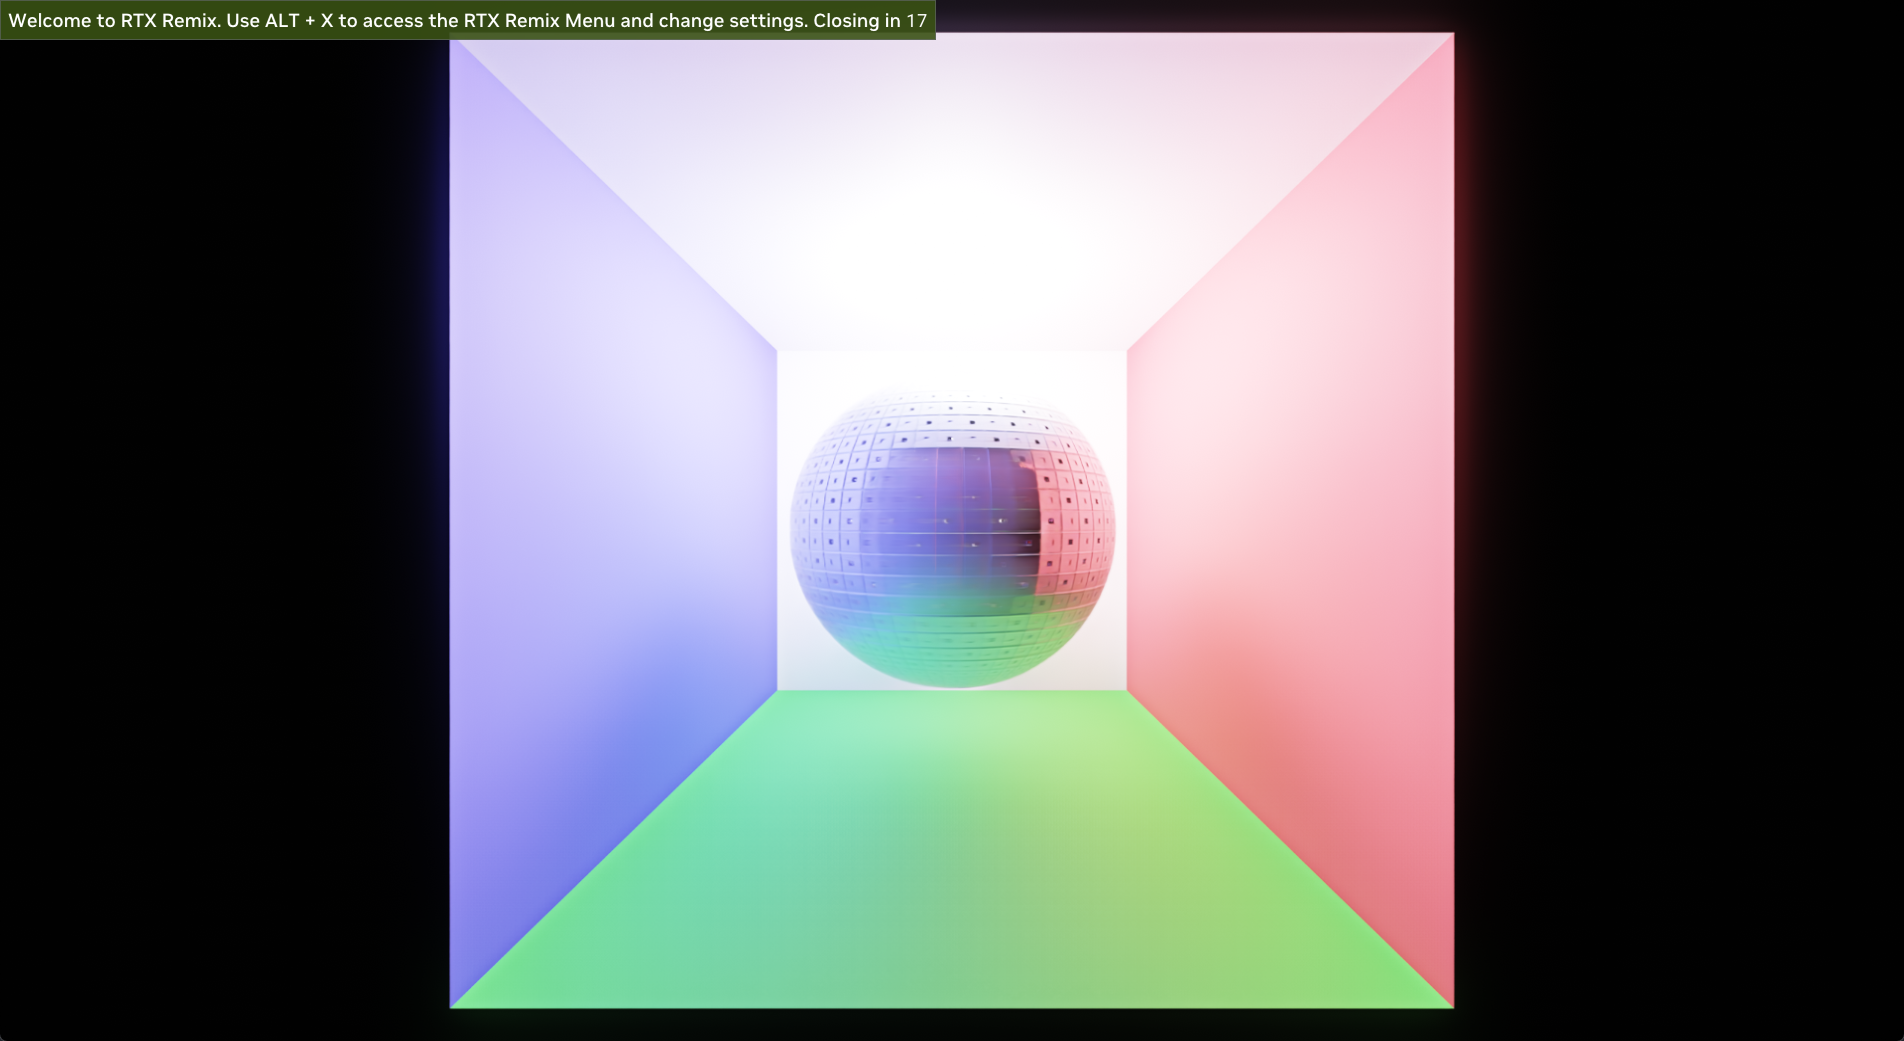
Congratulations! Your first RTX Remix mod was successfully created.
Need to leave feedback about the RTX Remix Documentation? Click here