Onshape importer#
About#
The Onshape importer Extension is used to import Assemblies from Onshape Documents.
Onshape is a web-based CAD platform that combines CAD, built-in data management, real-time collaboration tools, and business analytics.
This extension can be enabled from the Extension Manager by searching for omni.importer.onshape.
To open the importer, go to the top menu bar and click File > Import from Onshape. Once you are authenticated with the Onshape application, It will bring up a list of your personal documents, sorted by the last time they were modified.
Note
Currently only assembly types are supported. If you want to import a single part, you can create an assembly and place the part at the origin.
Onshape Authentication#
There are two possible ways to authenticate with the Onshape Service, OAuth and by API Keys.
OAuth#
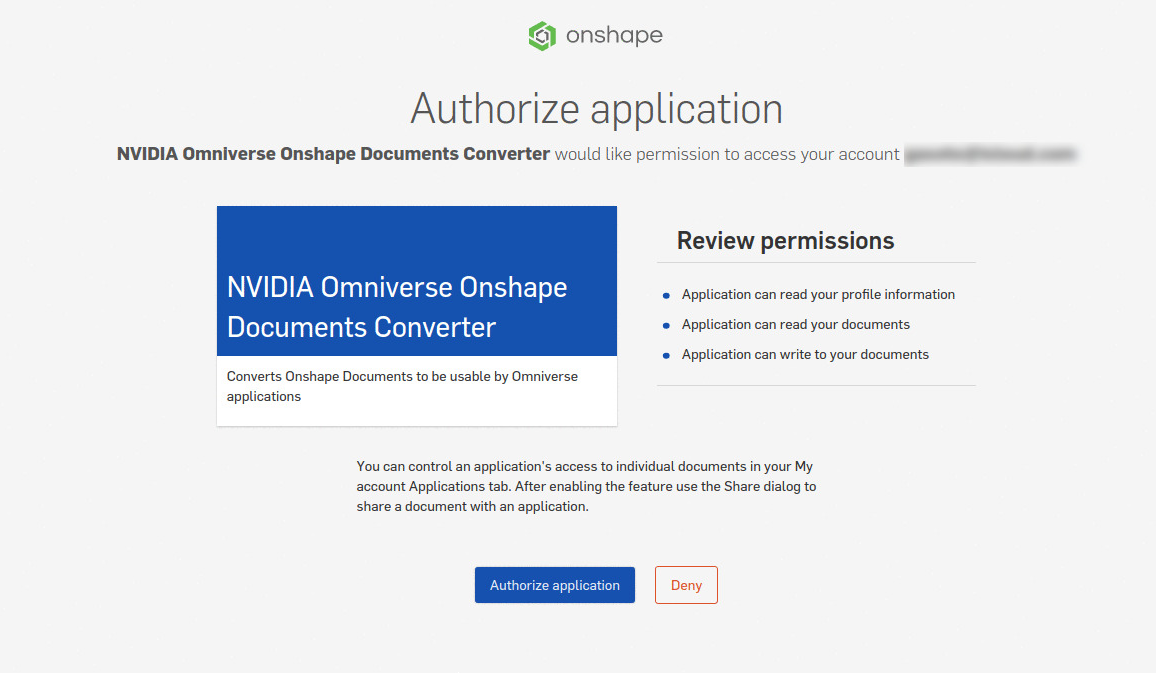
This is the default authentication Method. To use Oauth, on the first time the importer is used, it will open a browser with the Onshape Login, and request permission to access your account information. This permission needs to be granted only on first use.
Once the user is authenticated, the system will not prompt for password again until Isaac Sim is restarted.
API Keys#
The API Keys authentication is an alternative method to authenticate the user account. This method needs to be used when running Isaac Sim in a container or headless, as those cannot open a browser to authenticate using OAuth.
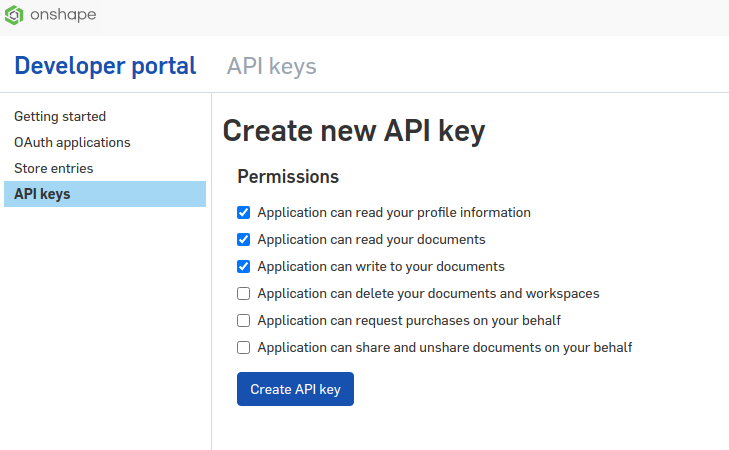
First, you need to create an API Key at https://dev-portal.onshape.com/keys. Select the options that allow Read/Write permissions to documents, and to read profile information.
Once the key is created, copy the access and secret key, then, open the preferences and set the keys Edit > Preferences > Onshape Importer.
Now restart your Omniverse application, and when using the Onshape Importer again, it will use the stored Access and Secret keys.
User Interface#
Search Window#
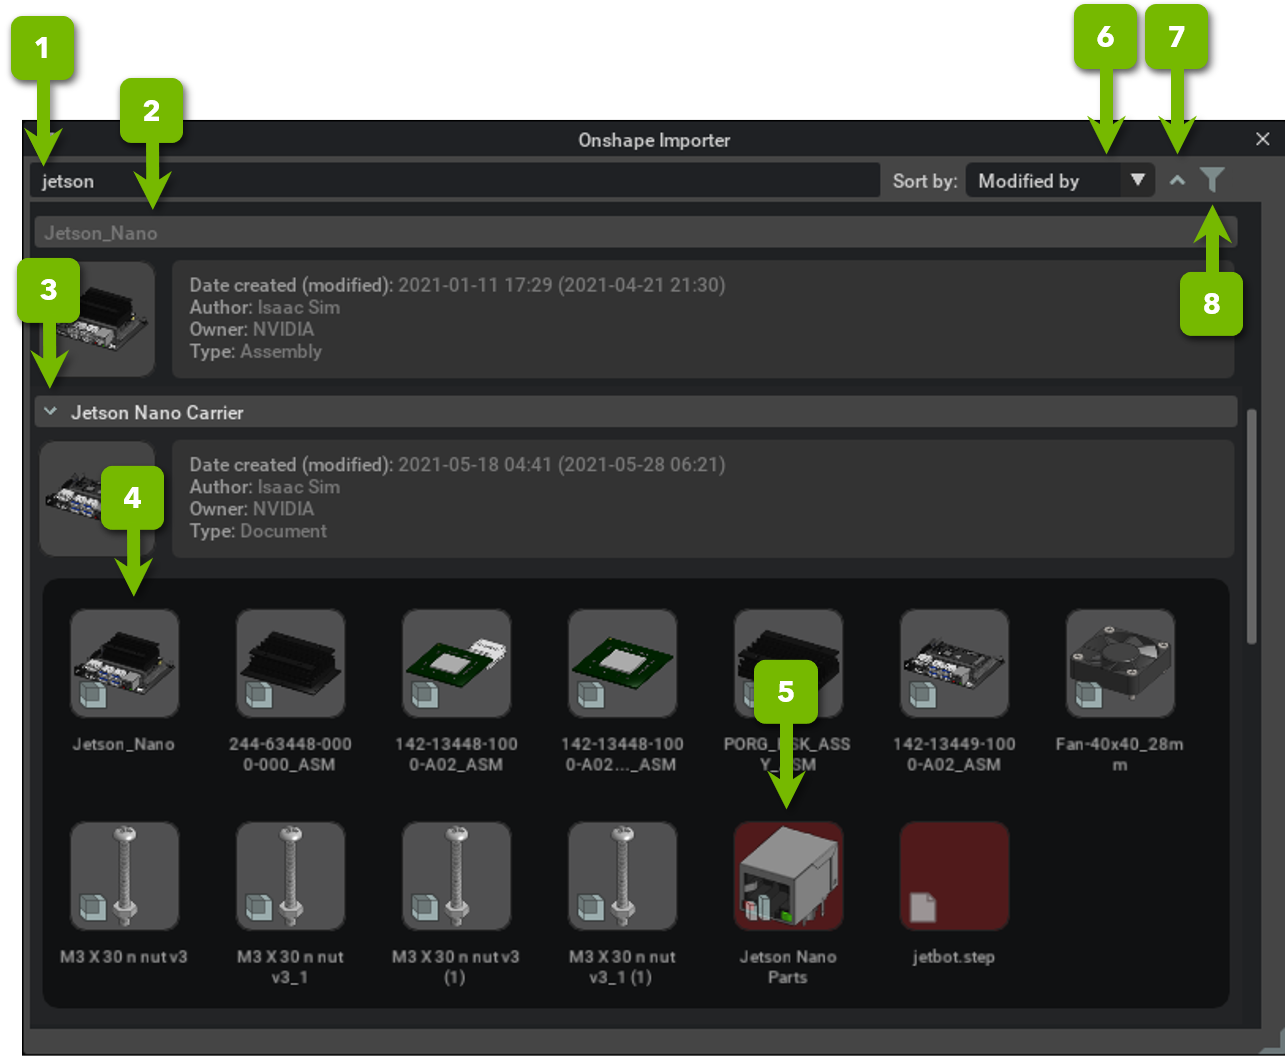
Ref # |
Option |
Result |
|---|---|---|
1 |
Search |
Search Bar. Type your document name or URL for search.
|
2 |
Search Results |
Panel with search results. Each row is a document. If the document contains a single assembly, double-clicking the row will start importing the Assembly.
|
3 |
Document Assemblies List |
When the document contains multiple assemblies, the button shows a list with all assemblies that can be imported.
|
4 |
Assembly Card |
Double clicking the assembly card begins importing the assembly
|
5 |
Assembly Card (disabled) |
Assembly cards that are unsupported will show with red background
|
6 |
Sort by |
field to use when sorting search results
|
7 |
Sort order |
Sort by Ascending/Descending on the sort field
|
8 |
Search Filter |
Filters the search results based on the selected option
|
Note
If you don’t have access to the document in the URL, it may freeze load until an error appears.
Assembly View#

Ref # |
Option |
Result |
|---|---|---|
1 |
Reference Assembly |
Displays the Name of the selected assembly and the number of parts being imported. When the Assembly document is loading, a loading icon will display next to the assembly Title.
|
2 |
Configuration Panel |
If the Assembly contains configurations, they will show on this panel. Changing the options will trigger a reload and re-import of the assembly. It will not trigger re-importing of body parts.
|
3 |
Loading Bar |
Shows the status of the import of parts.
|
4 |
Parts List |
Shows the list of parts loaded with the assembly. Can be sorted by Import status, Name, Material and Mass
|
5 |
Material Column |
Shows the material part and allows editing it when the user is authorized to do so in the document.
|
6 |
Mass Column |
Shows the Part Mass property. Onshape Requires a Material to be assigned for mass properties to be computed. The tooltip includes center of mass and inertia properties.
|
7 |
Tessellation Column |
Shows the summarized tessellation properties for the part. Clicking it enables editing its values and reimports the given part.
|
Preferences#

General |
Description |
|---|---|
Use Open Stage folder for Imported Assembly |
When selected, importing on a stage that is saved to a file will import on the same directory as the stage, otherwise will use the default Import Folder.
|
Default Import Folder |
Default Import location
|
Rig Physics When Importing |
When selected, it will use Mates options to configure physics for the assembly
|
Filter Unsupported elements |
When selected, it will hide all cards of unsupported types.
|
Tessellation |
Description |
|---|---|
Chord Tolerance (m) |
Chord tolerance (in meters). This specifies the limit on the maximum deviation of a tessellation chord from the true surface/edge.
|
Angle Tolerance (d) |
This specifies the limit on the sum of the angular deviations of a tessellation chord from the tangent vectors at two chord endpoints. The specified value must be less than 90 degrees.
|
Max Cord (m) |
Max facet width. This specifies the limit on the size of any side of a tessellation facet.
|
Authentication |
Description |
|---|---|
Base Url |
Default namespace to be used. Only makes a difference when using API authentication
|
Auth Url |
Auth URL to be used. Only makes a difference when using API authentication
|
Token Url |
Token URL to be used. Only makes a difference when using API authentication
|
Use API Authentication |
When selected, Importer will attempt to authenticate using the API Key/Secret pair.
|
API Key |
API Key to be used
|
API Secret |
API Secret to be used
|
Import Onshape Assemblies#
Searching for the assembly#
Once the assembly search window is open, you can type in the name of the assembly you want to locate. It loads the results in batches of 20 items. Scrolling down the search results will automatically load further results that match the search criteria. You can change the search to public documents and other criteria by filter Icon, and select the filter type. You can change the sort direction by clicking the Up/Down arrow buttons.
Once the desired document is located, if it’s an assembly type, double-click it and it will import the assembly. If it’s a document that contains multiple assemblies inside, click on the title card, and it will show a list of the available assemblies. Double-click the desired assembly, and it will start importing it.
Note
The Assembly will be imported on a final folder and added as a payload to the currently open stage. The final folder will be either on a determined default import folder, or at the same location of the currently open stage, depending on the preferences set up.
Part properties#
Note
Part properties can be changed for single elements, or for multiple elements when selecting them on the list. You can also use a property from a given item and apply it to selected by right-clicking the property and select Apply this <property> to selected parts.
Material#
The physical material the part is made of. This property is used to compute the mass properties for the part and is required for accurate physics simulation. If none is selected the part will load, but will be displayed in Yellow on the parts list. If the material or mass properties failed to load for some reason. the warning icon will display the error message, which can also be collected in the runtime logs.
To change the material, click on the drop down menu, which will use the Onshape Material Libraries to select which material to be used. This is a interface for basic material changes, but custom mass properties can also be defined directly in your Onshape document.
Tessellation#
The quality used to convert the solid surfaces in triangle meshes can be tweaked by the following parameters:
Chord Tolerance: Chord tolerance (in meters). This specifies the limit on the maximum deviation of a tessellation chord from the true surface/edge.
Angle Tolerance: This specifies the limit on the sum of the angular deviations of a tessellation chord from the tangent vectors at two chord endpoints. The specified value must be less than 90 degrees.
Max Chord: Max facet width. This specifies the limit on the size of any side of a tessellation facet.
To change the parameters, click on the tessellation properties dropdown menu, and drag the sliders or double click them to type in the value. You can change the default values when importing a new asset through the Preferences panel.

Note
If a part fails to be imported, it will be displayed in Red on the parts list, and the error message can be collected from the error Icon or in the runtime logs.
Configuring Mates for Physics#
The Onshape Importer Uses the Assembly mates to set up joints in the assembly. For convenience, every mate scans up the assembly tree and stops at the top-most assembly that does not contain some joint mate, and uses it as a reference instead of the mated part.
The following Mates are supported:
Fixed Mates#
Group Mates: Group multiple parts that are fixed together at the top-most sub-assembly level
Fastened Mates: link two parts that are fixed together. It moves the child assembly as a sub-assembly from the parent.
Joint Mates#
For all Joint Mates, the importer collects the joint position and joint limits.
Revolute Joint Mate: Mates two bodies that rotate along a bound rotation axis
Slider Joint Mate: Mates two bodies that move linearly along a bound axis.
Cylindrical Joint Mate: A combination of a revolute and a slider joint mate. It is converted as such, with a proxy rigid body with negligible mass, no visual and no collision between the two joints.
Spherical Joint Mate: A combination of a two revolute mates with no limit, and a third revolute joint bounded from zero to up to 180 degrees that we call the spherical cone. It is converted as revolute, cone, revolute, with two proxy rigid bodies with negligible mass, no visual and no collision between the joints.
Preparing the Assembly for Physics Import#
To have the Assembly physics properly imported, there are a few guidelines to follow:
Group all Sub-Assemblies with no internal moving parts together: Groups are a convenient way to have all fixed body parts to be treated as a single rigid body by Onshape. Use that to simplify the process of creating mates instead of using fastened mates. Once mating is complete, you can suppress the group to simplify the USD generation
Sub-Assemblies with internal joints must be fastened: Sub-Assemblies that contain internal Joint Mates must have the part that is bound to components outside of the sub-assembly mated with a fastened mate.
Mates must follow Assembly hierarchy: Fastened Mates and Joint Mates must follow the assembly hierarchy. e.g. A sub-assembly part that is fastened to the main body in the assembly must be second in order on the Mate.
Assembly Must be at Zero Pose: The assembly will be treated as if it were in the zero position. Failure to put the assembly in the zero pose will not break the import, but the initial pose will be treated as zero for all purposes (e.g. the joint limits will be offset by the mate value).
Note
It is preferable to use assemblies, opposed to group mates for fixed parts. Any assembly that does not contain Joint mates and are fixed to a parent assembly part will be treated as a single body.
Post-Processing#
The imported asset will have the following file structure:
- Main import folder
- Materials
materials.usd
- Parts
all parts usds
Assembly.usd
Assembly_edit.usd
All parts will be imported into their own individual USDs inside the Parts folder, while the import will contain a single assembly file for the part imported. All import information will be authored on Assembly.usd, and it will be added as a sub-layer to Assembly_edit.usd. The file to be authored by the user and used as a reference on other stages should always be Assembly_edit.usd. This way, when importing the assembly again, all changes made by the user will be preserved once the base assembly is replaced.
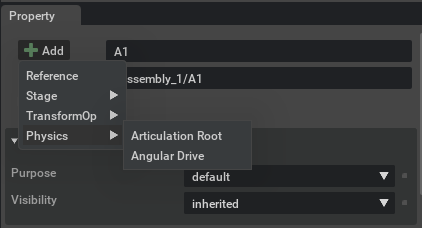
Add Joint Drives: Since the joint drive information is unavailable from Onshape Models, this needs to be added to all driven joints post-importing. Select the desired joint, and on the Properties panel click in Add->Physics->Joint Drive.
(Optional) Modify Collision Shapes: By default, every part imported with physics is given a Convex Hull Approximation. This can be changed depending on the application (e.g. Wheels need to be a cylinder primitive instead of a mesh approximation to ensure smooth rolling simulation)
(Optional) Fix Assembly Base: By default, no part is fixed after imported. You can select the assembly base prim, and add a Fixed joint to the world space by right-clicking it on the stage menu, then Create->Physics->Join->Fixed Joint.
(Optional) Simplify Assembly Tree: You can simplify the assembly tree by using the Mesh Merge Tool. This operation does not create the physics collision and mass properties on the merged mesh, needing to be added later to the mesh once the original tree is removed from the rigid body.
Tutorials & Examples#
The following tutorials and examples showcase how to best use this extension: