Curve Authoring
The curve manipulator allows you to create 3d curves in your scene.
The curve is a “proxy” Xform prim on a sublayer of session layer for each Control Vertex (CV) on the UsdGeomBasisCurves.
The proxy prims and original CVs (“points” attribute) are synced with each other (i.e. move one changes the other).
This way, Kit’s transform manipulator can be used to manipulate CVs without any special code path.
Getting Started
To start using the toolset, the Curve Manipulators extension must be enabled in Window->Extensions.
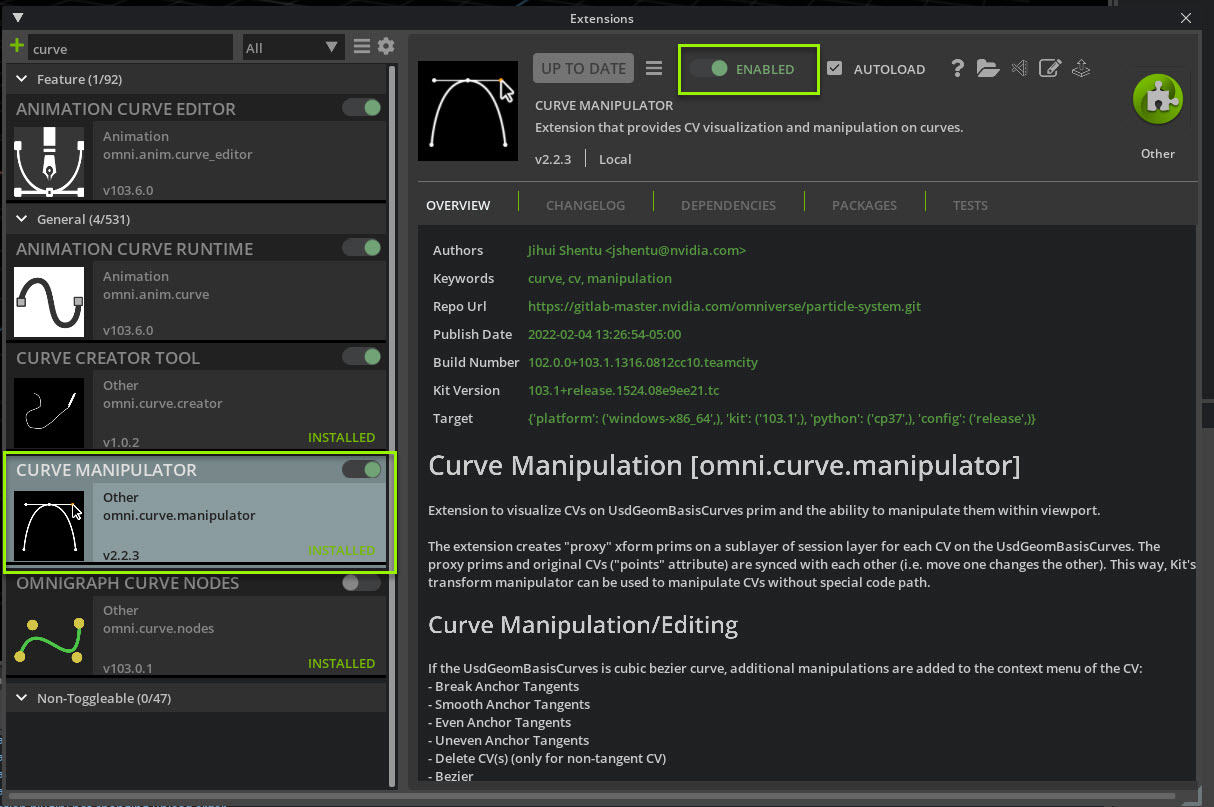
This will enable both the Curve Manipulator and the Curve Creator Tool extensions.
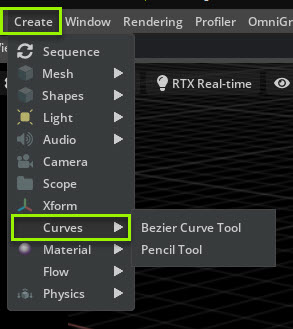
The Curve Creation options will now appear in the Create => BasisCurves menu as the Bezier Curve Tool and the Pencil Tool options.
Bezier Curve Tool

You can create a Bezier Curve (backed by UsdGeomBasisCurve) from scratch by going to Create -> BasisCurves -> Bezier Curve Tool.
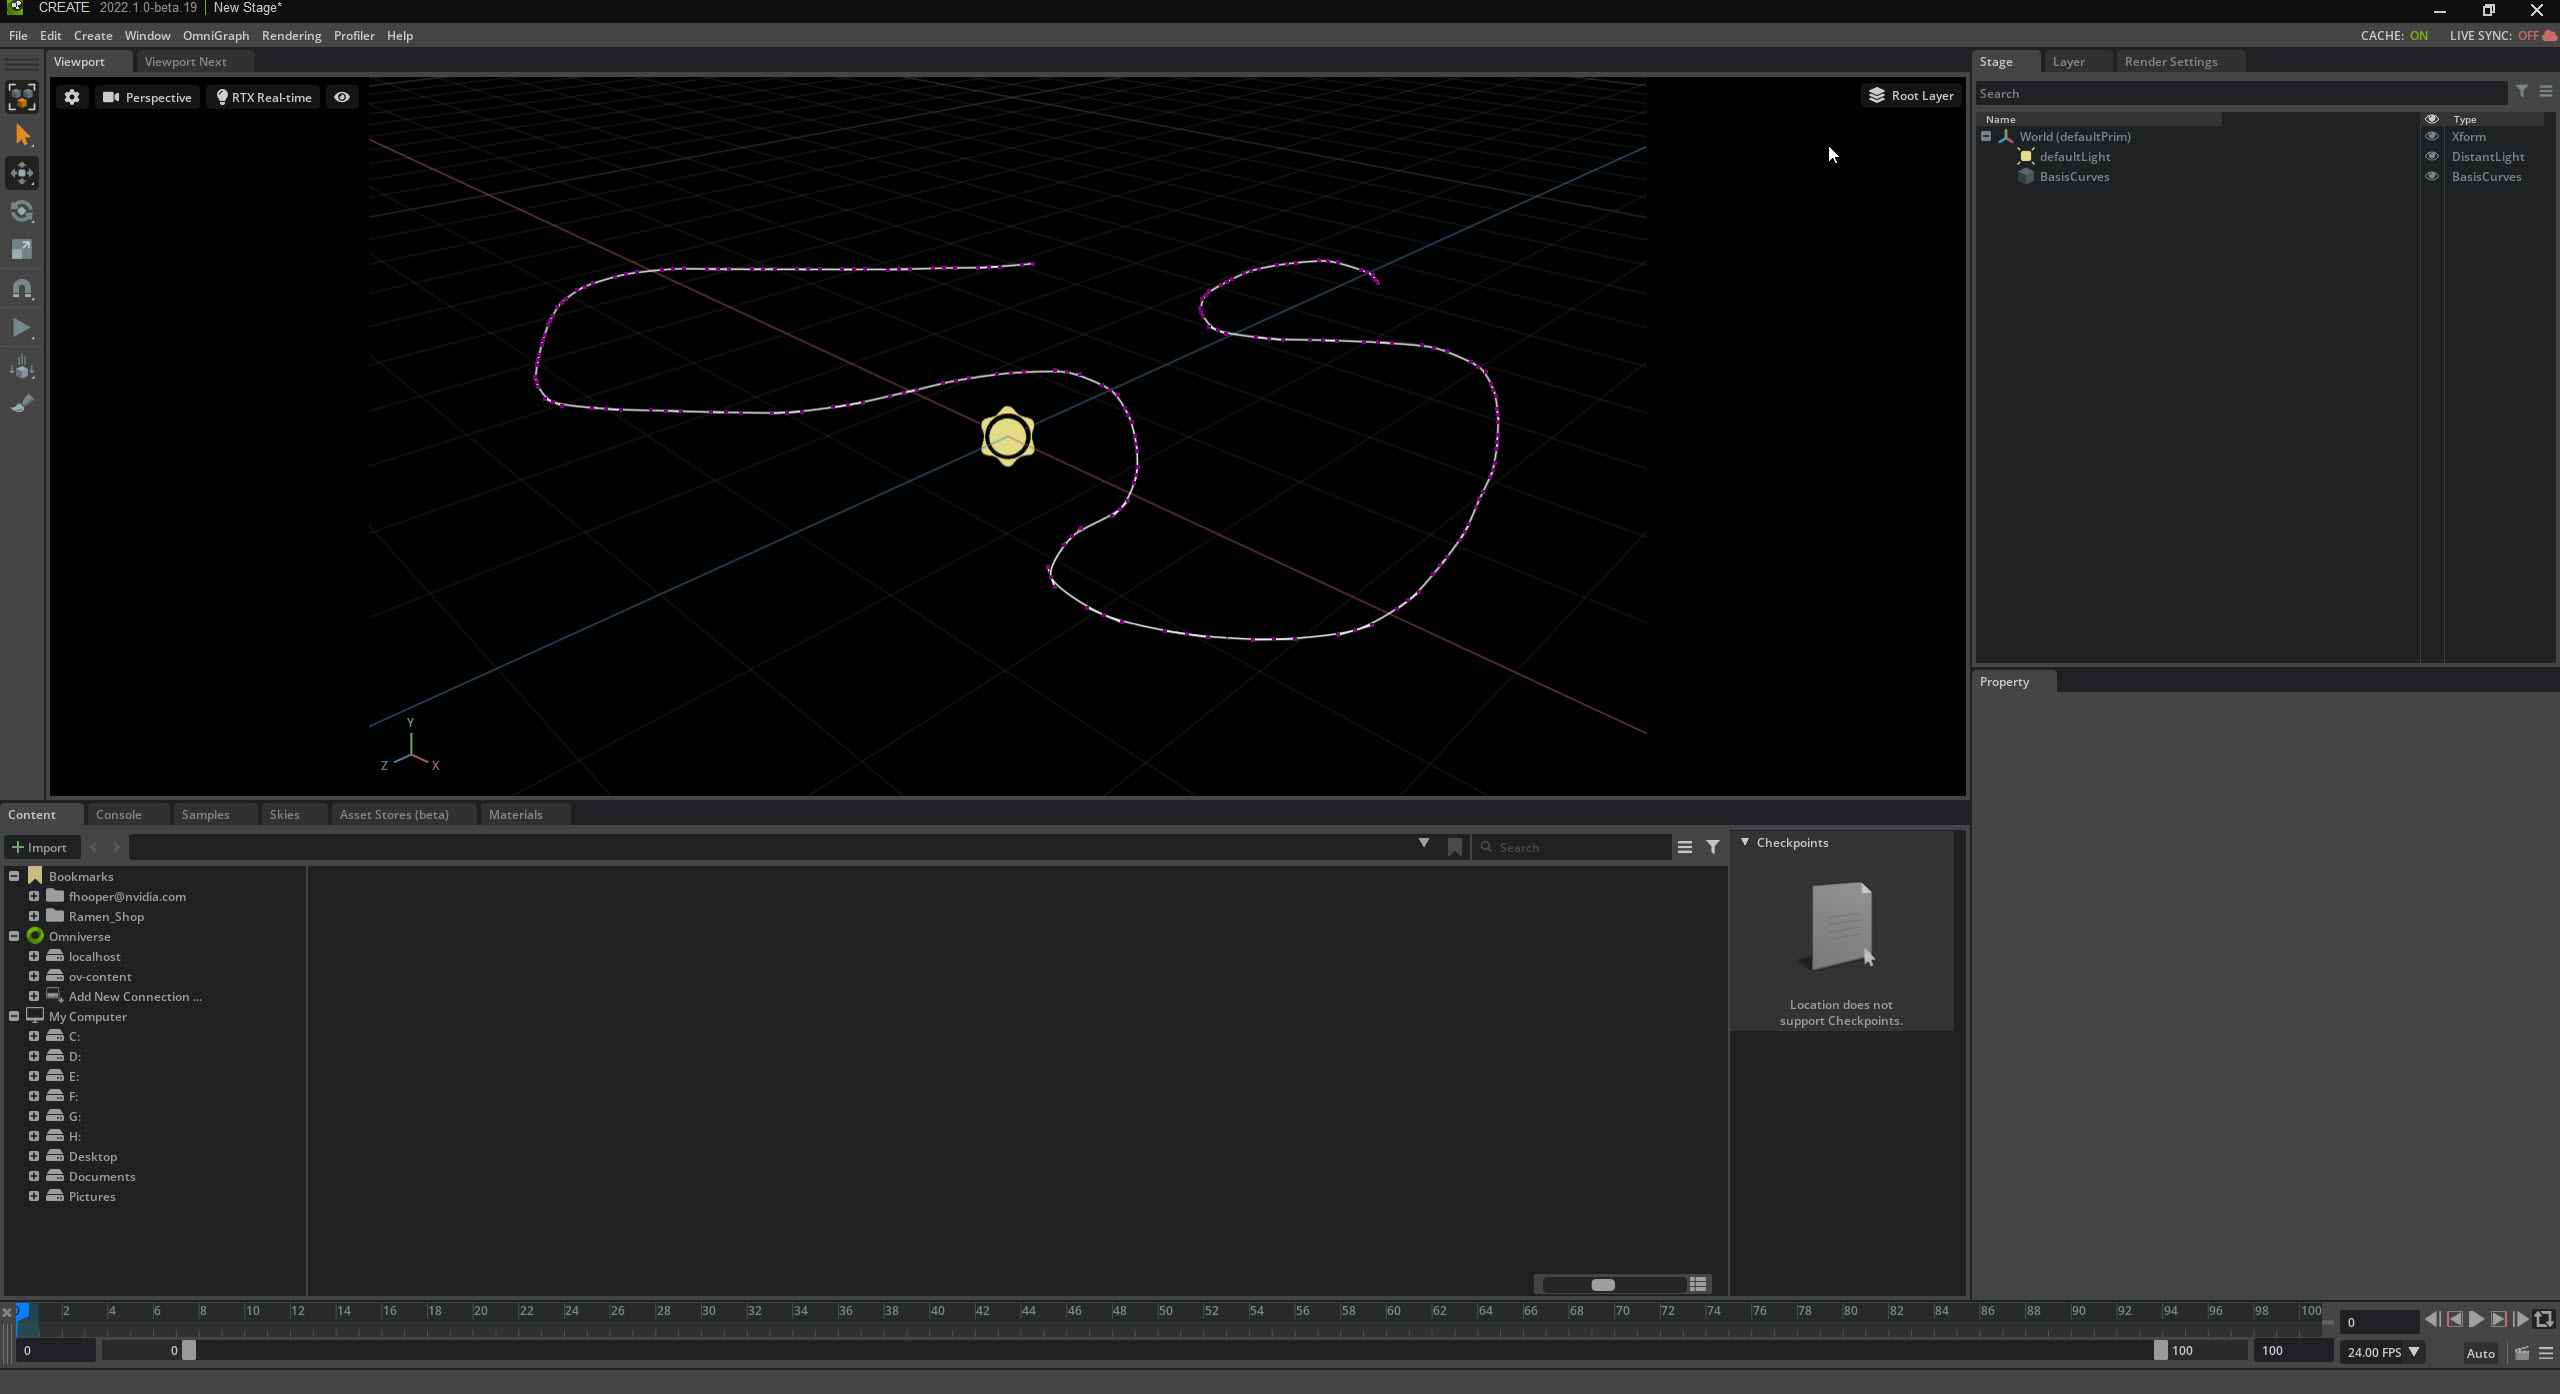
Then Shift click on your scene in the viewport to create your curve. Each click will create another CV in your curve.
Press Enter or Right click and choose Stop Editing Control Vertices to complete your curve creation.
It will create a UsdGeomBasisCurve, set it to Bezier and enter curve editing mode.
Note
a Bezier Tool help box will appear in the top middle of the viewport when you click on Create -> BasisCurves -> Bezier Curve Tool.
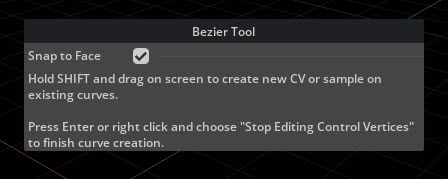
Note
Enable snap if you want the curve to follow any geometry you might have in your scene.
Pencil Tool
You can create a freehand Curve from scratch by going to Create -> BasisCurves -> Pencil Tool.
A Pencil Tool Settings window will appear
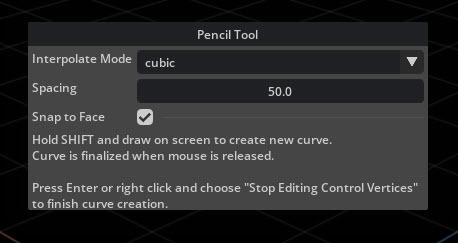
Pencil Tool Settings |
Description |
|---|---|
Interpolate Method |
Cubic: Pencil tool will create a Bezier curve
Linear: Pencil tool will create a linear curve
|
Spacing |
The distance in units between control vertices on the curve
|
Then Shift click drag on your scene in the viewport to create your curve. the curve will be created when the mouse is released.
Note
Enable snap if you want the pencil tool’s curve to follow any geometry you might have in your scene.
Curve Editing
Enable Edit Control Vertices
To edit a curve you need to have Edit Control Vertices enabled and select a CV.
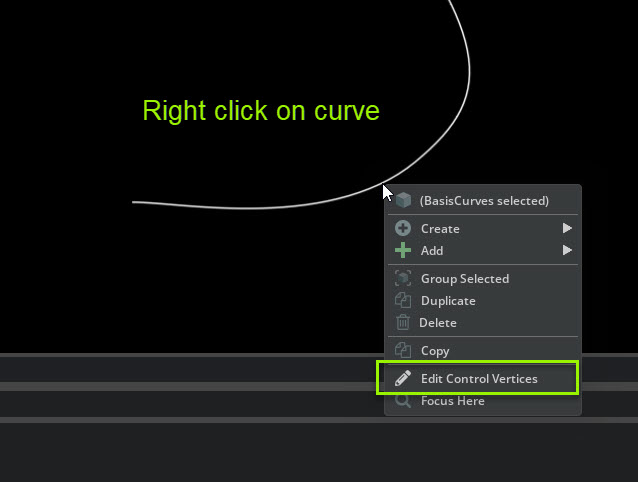
There are three ways to enable Edit control vertices.
Right click on the Curve and Select Edit Control Verices from the menu.
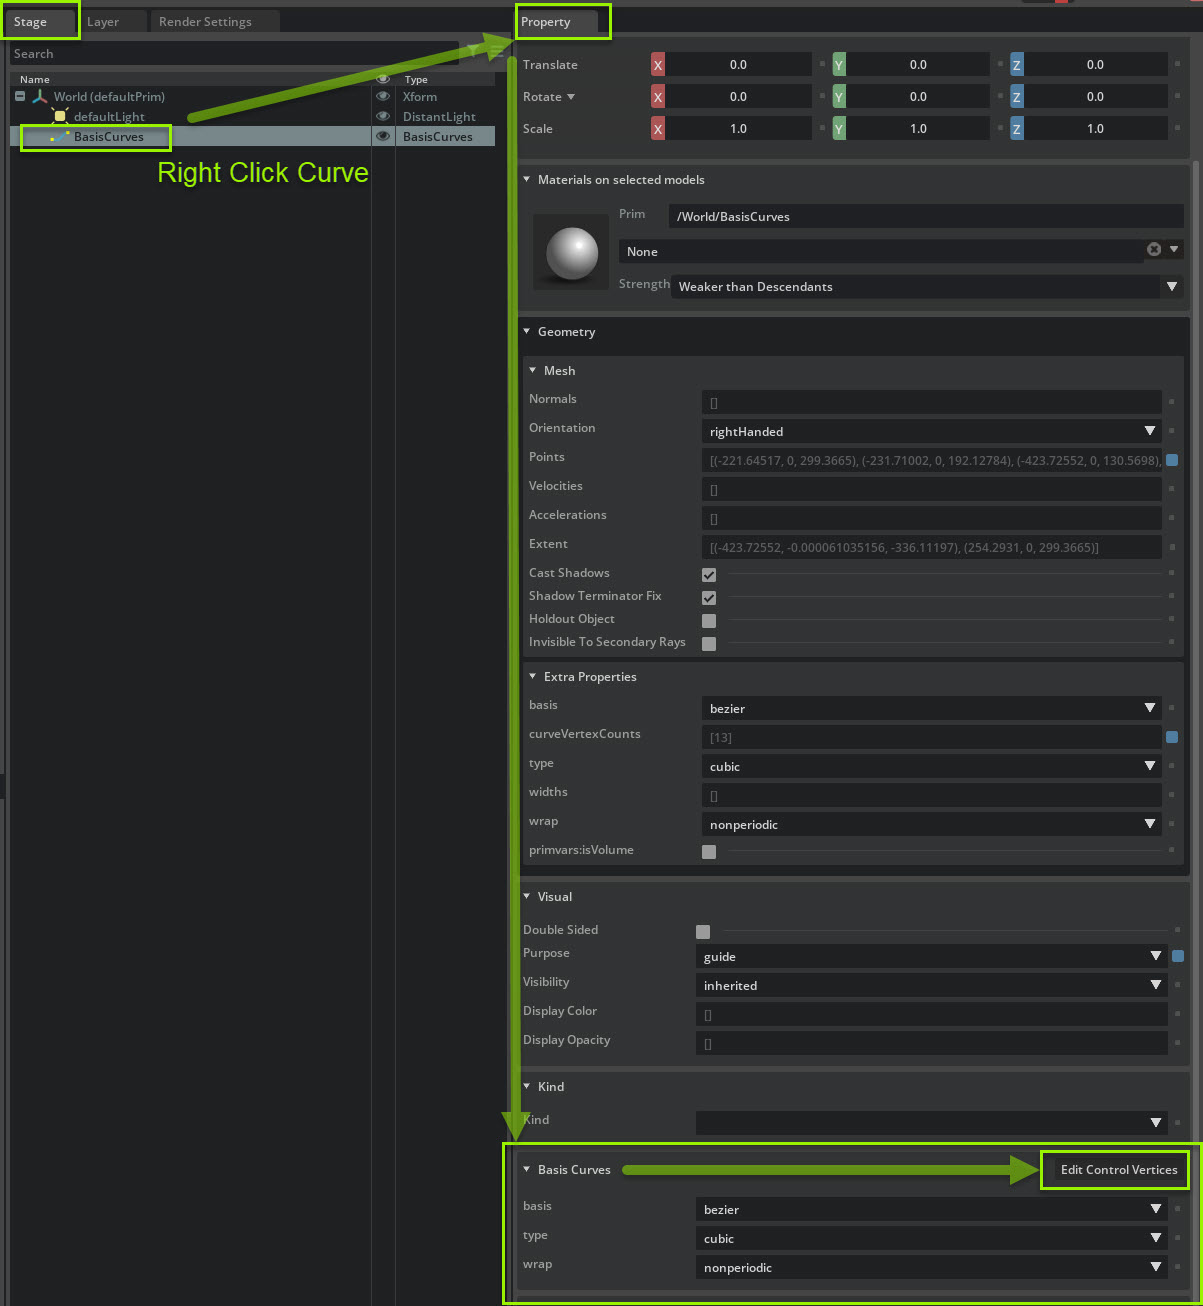
Right click on the Curve in the Stage and select Edit Control vertices.

Select the Curve and in Property -> Basis Curves click on the Edit control vertices button.
Editing a Curve
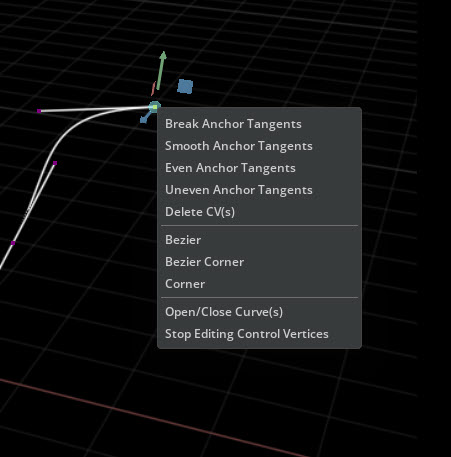
After enabling the CVs you then Right click (RCL) the curve in the stage to get an editing menu.
If the UsdGeomBasisCurves is Bezier curve, additional manipulations are added to the context menu of the CV.
Press Enter or Right click and choose Stop Editing Control Vertices to apply your changes.
Curve Editing |
Description |
|---|---|
Break Anchor Tangents |
Break anchor tangents will break the tangents of the CV to make sharper corners if you choose
You can control each Tangent independent of the other
|
Smooth Anchor Tangents |
Smoothing unbreak a tangent and will allow the anchor tangents to move together
|
Even Anchor Tangents |
This will even out the anchor tangents size
|
Uneven Anchor Tangents |
This will cause the tangents to be uneven
|
Delete CV(s) |
This will remove the selected CV. Only for non-tangent CV
|
Bezier |
Bezier will transform a CV into a Bezier CV if it is not a Bezier CV
It will use the connecting points to create the CV and tangents
|
Bezier Corner |
This will create a sharp corner CV with Tangent handles
|
Corner |
This will create a sharp corner CV without Tangent handles
|
Open/Close Curves |
If the curve is an opened, this option will close the curve
if the curve is closed, this option will open the curve at its ending CV
|
Manipulating a Curve
Depending on the state of the curves, manipulating the anchor and tangents will behave accordingly.
To transform a CV, Select the CV and use whichever transform manipulator you need from the sidebar. Transform, rotate, scale .
Scale or rotate the anchor CV affects its tangents CVs. Use the scale or Rotate manipulator to do this.
Multiple CVs across multiple UsdGeomBasisCurves can be manipulated at the same time.
Adding and Appending Control Vertices
To add a CV along existing Bezier Curve, hold SHIFT during curve editing mode to sample a point along the curve, and click to insert a new CV while keeping original shape of the curve.
To append a CV to the end of existing Bezier Curve, hold SHIFT during curve editing mode and click (or click and drag to create tangents) on empty space to append new CV.
Note
If the Perspective camera or a user defined camera is selected, the new point is sampled on the floor plane (XZ for Y-up stage and XY for Z-up stage).
Note
If a built-in orthographic camera (Top, Front, Right) is selected, the point is sampled on the corresponding plane. If mouse ray doesn’t not hit the desired plane, no CV will be added.
Press Enter or right click and choose Stop Editing Control Vertices to exit Curve Editing mode.
Note
you can also exit editing by selecting anything else in Stage window. This help box will appear

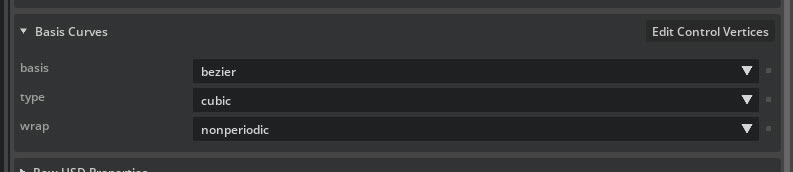
Curve Property Window
After selecting a curve this parameters window will appear in Property -> Basis Curves
Basis Curves Property |
Description |
|---|---|
Edit Control Vertices |
This button allows you to enable a selected curve to be edited.
|
The Basis specifies the vstep and matrix used for cubic interpolation.
Note
the ‘hermite’ and ‘power’ token have been removed. We’ve provided USDGeoHermiteCurves as an alternative for the ‘hermite’ curves.
Basis Curves Basis |
Description |
|---|---|
Bezier |
Bezier Method
|
bspline |
bspline Method
|
catmulrom |
catmulrom Method
|
The type section determines how the curve will be interpolated between CVs.
Basis Curves type |
Description |
|---|---|
Cubic |
Cubic curves use a basis matrix with four vertices to interpolate a segment
|
linear |
Linear curves interpolate linearly between two vertices.
|
The wrap section determines how the curve will create its wrap.
Basis Curves wrap |
Description |
|---|---|
non periodic |
this is the normal non looped curve.
|
periodic |
The curve when rendered will repeat the initial vertices (dependent on the vstep) to close the curve.
|
pinned |
If wrap is set to pinned, phantom points maybe created to ensure that the curve interpolation startes at P[0] and ends at P[N-1].
|