Using Event Source Nodes
Note
This document contains features from OmniGraph version 2023.1.0.
In this tutorial, we explore the use of Event Nodes in Action Graph using various approaches.
Note
While you use Omniverse USD Composer in this tutorial, you can follow similar steps to achieve the same results in other Omniverse Apps.
Before You Begin
While this is an introductory-level tutorial on OmniGraph, we recommend you complete Introduction to OmniGraph first. That tutorial provides more detailed information about some of the same steps that you complete here.
What Are Event Source Nodes?
Action graphs are event driven, which means that each chain of nodes must start with an Event Source Node. Each Event Source Node can be thought of as an entry point of the Action Graph.
Event Source nodes are named with an On prefix; they never have an input Execution Attribute, and always have at least one output Execution Attribute.
Event Source Nodes |
|---|
Note
Read more about Event Source Nodes in the developer documentation.
Prepare the Stage
All of our examples start with the same setup:
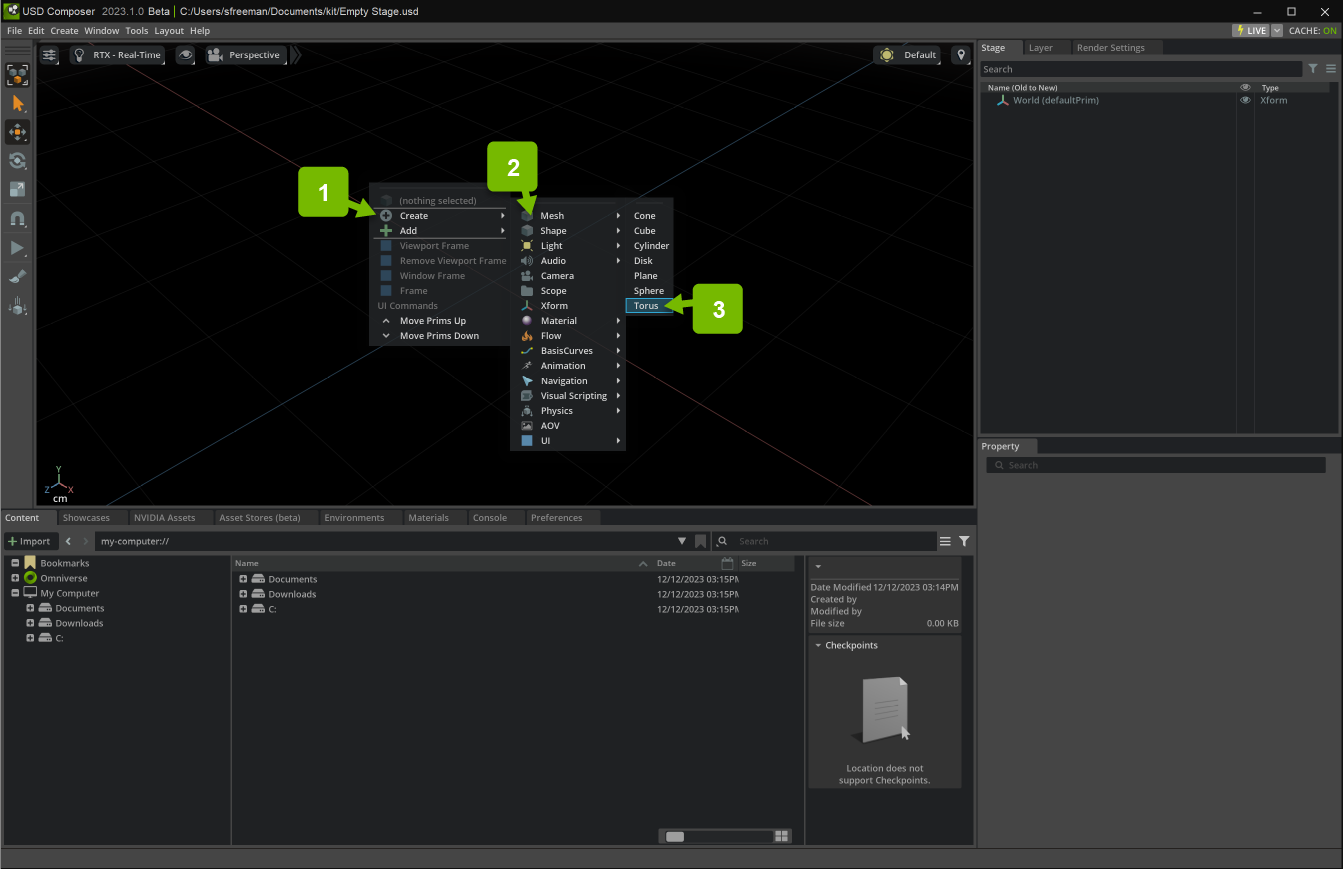
First, add a torus to the stage:
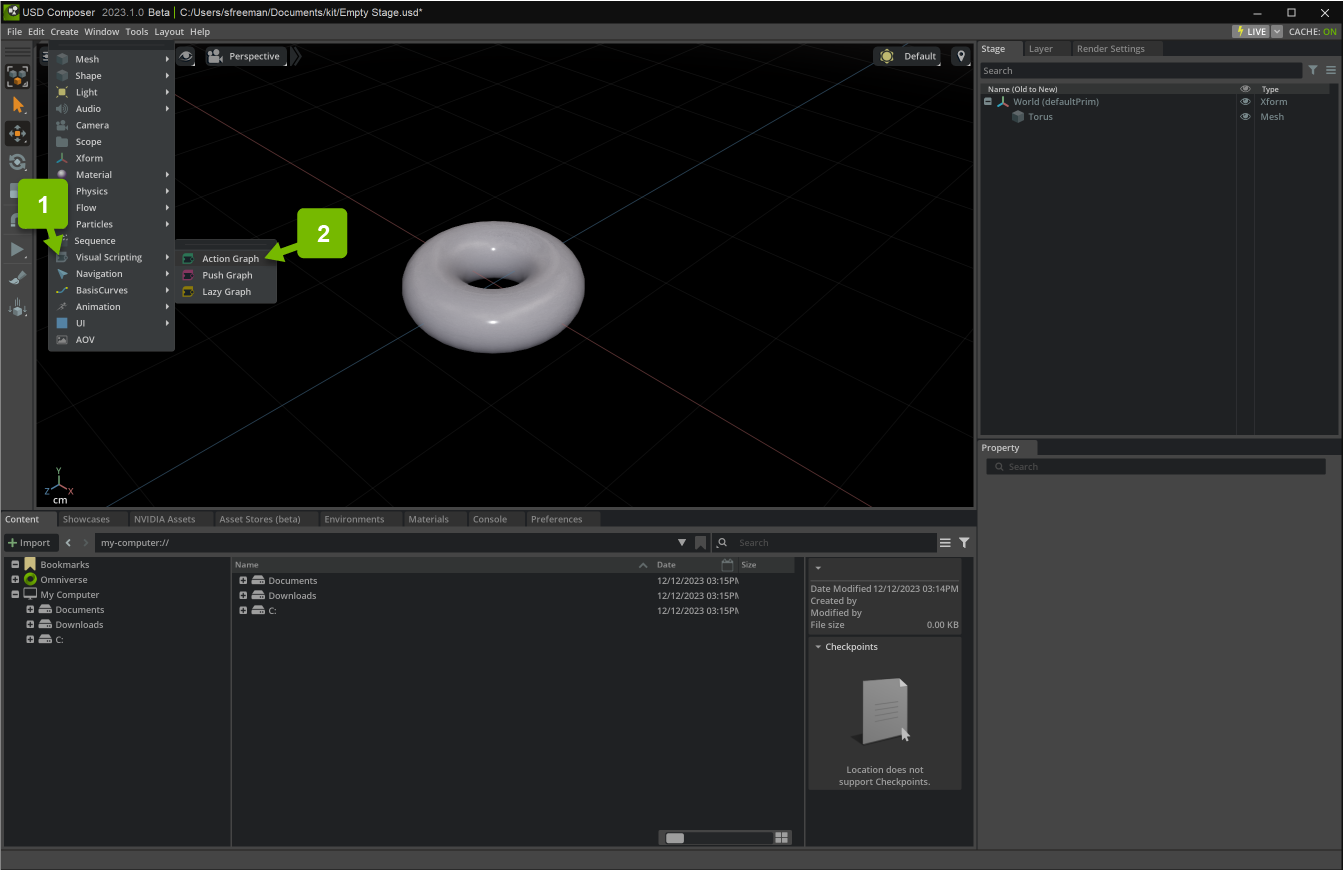
Next add a new Action Graph:
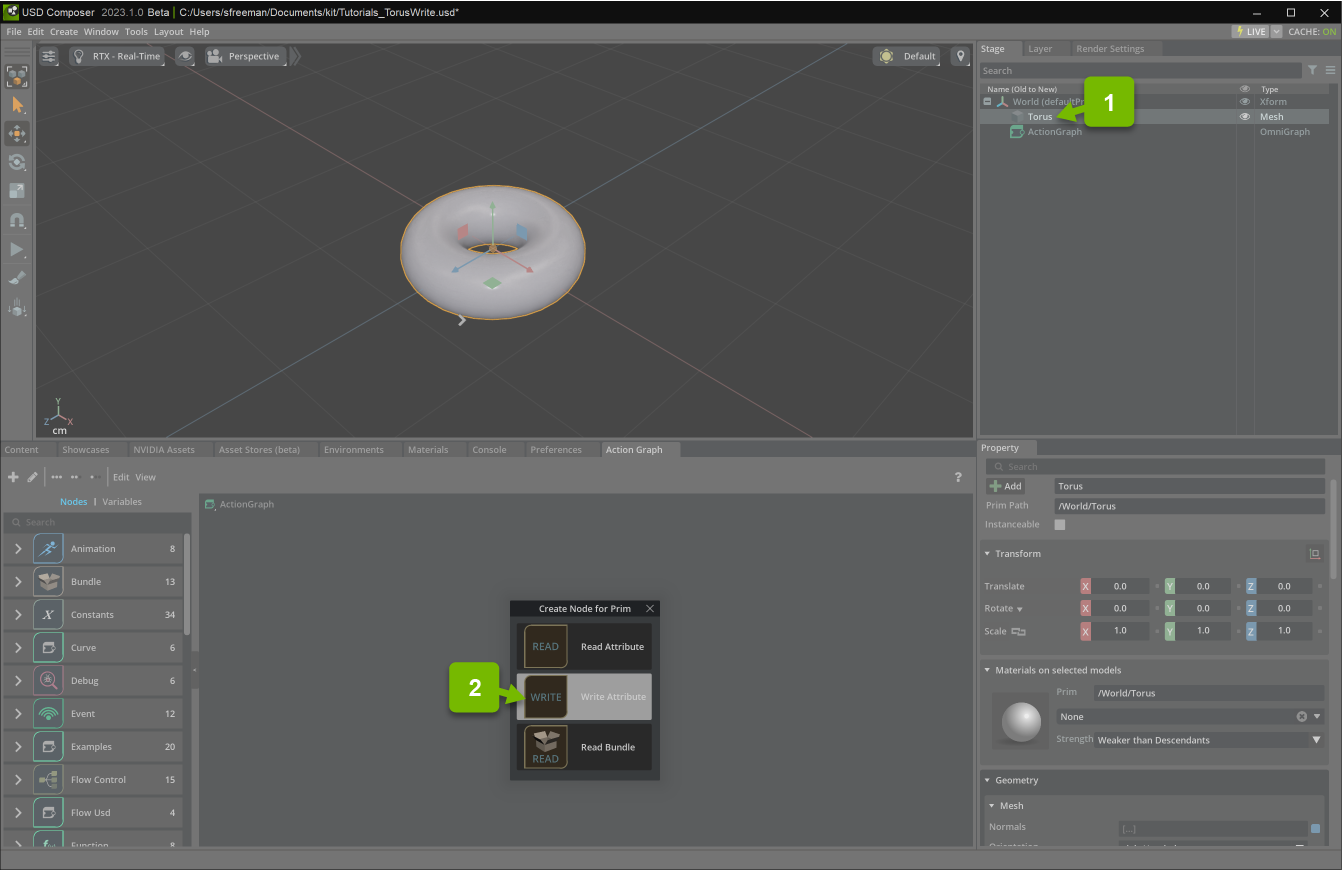
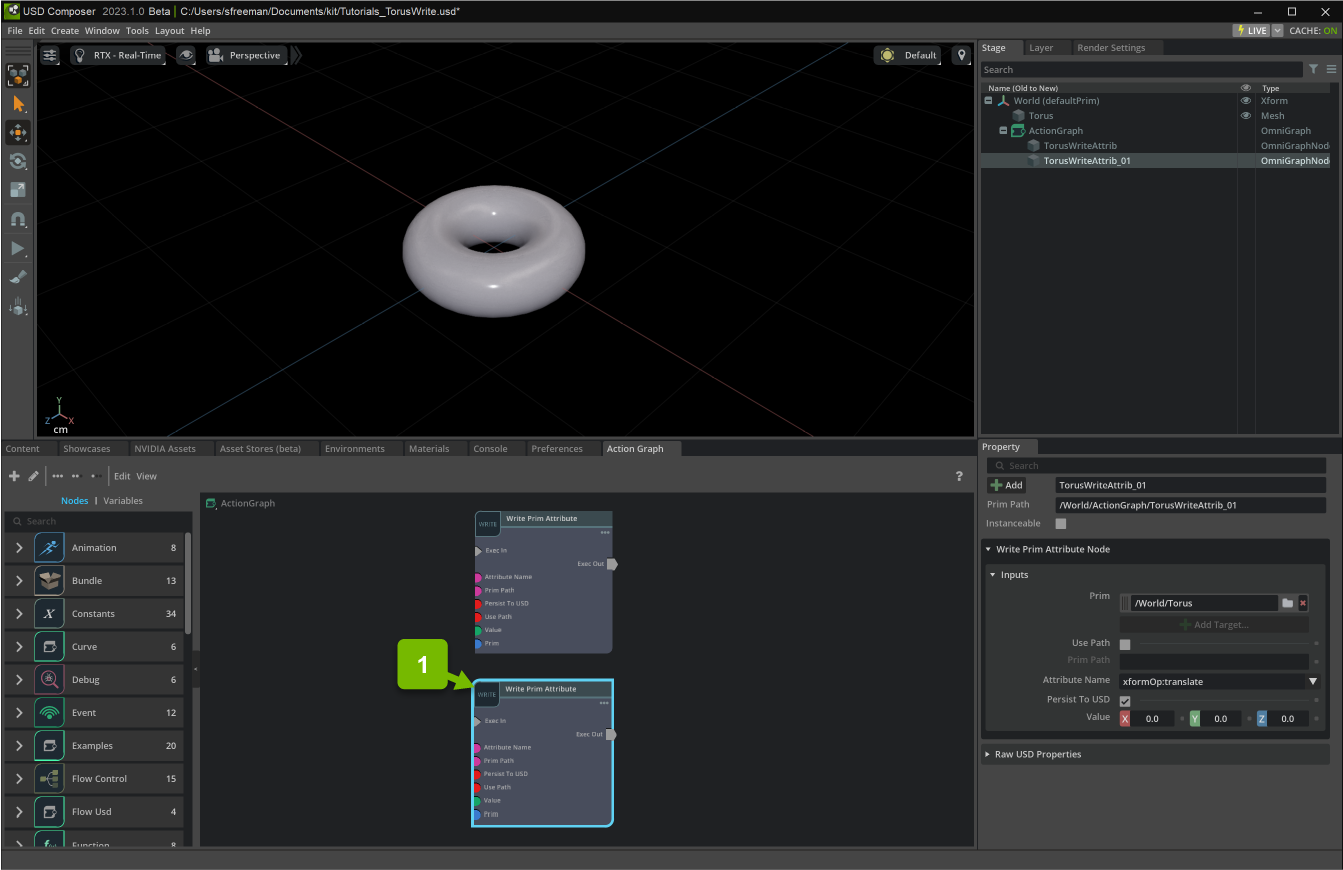
Drag your torus to the graph editor and create a WritePrimAttribute node:
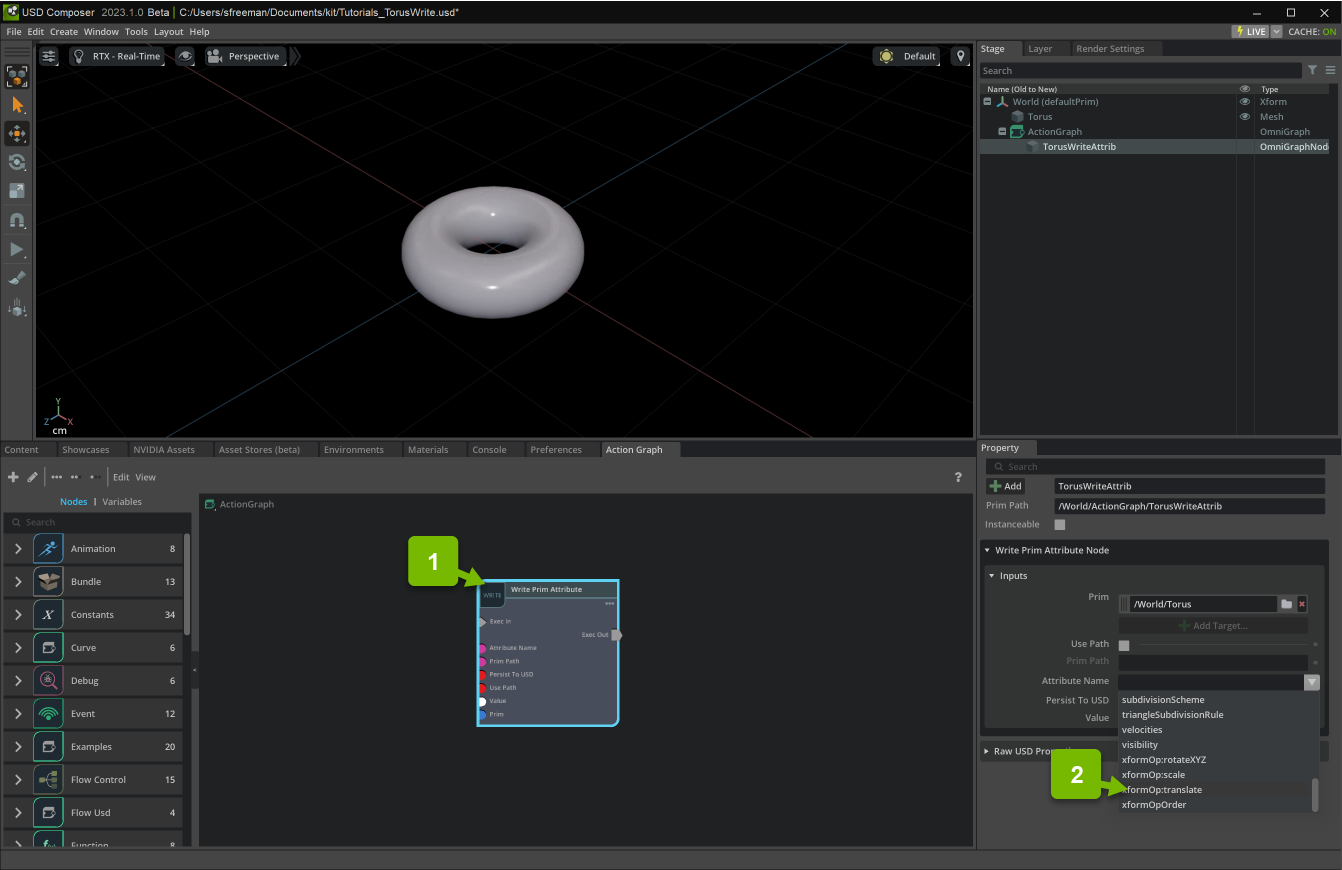
Set the WritePrimAttribute node’s name attribute to xformOp:translate and the value attribute to (0.0, 20.0, 0.0):
Duplicate that node with Ctrl+D so that there are two WritePrimAttribute nodes. Set the new node’s value attribute to (0.0, 0.0, 0.0):
Note
You may need to reset the name attribute to xformOp:translate after you duplicate.
Example 1: On Stage Event
For this example we are going change the value of the torus when the graph starts playing, then reset it when it stops.
- The On Stage Event node allows you to send an execution signal based on certain stage events:
Saved: USD file saved.
Selection Changed: USD Prim selection has changed.
Hierarchy Changed: USD stage hierarchy has changed, e.g. a prim is added, deleted or moved.
OmniGraph Start Play: OmniGraph started
OmniGraph Stop Play: OmniGraph stopped
Simulation Start Play: Simulation started
Simulation Stop Play: Simulation stopped
Animation Start Play: Animation playback has started
Animation Stop Play: Animation playback has stopped
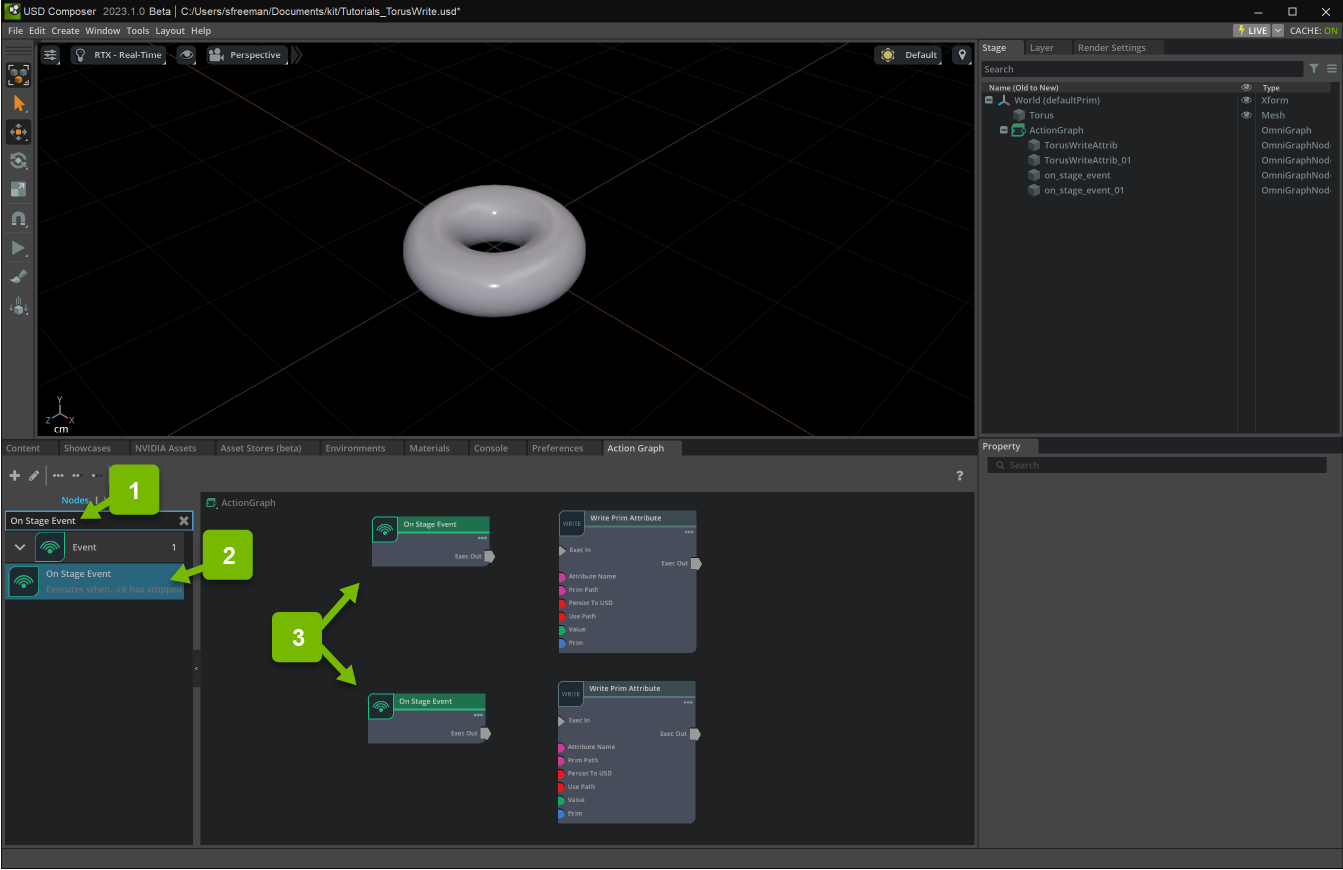
First, create two OnStageEvent nodes:
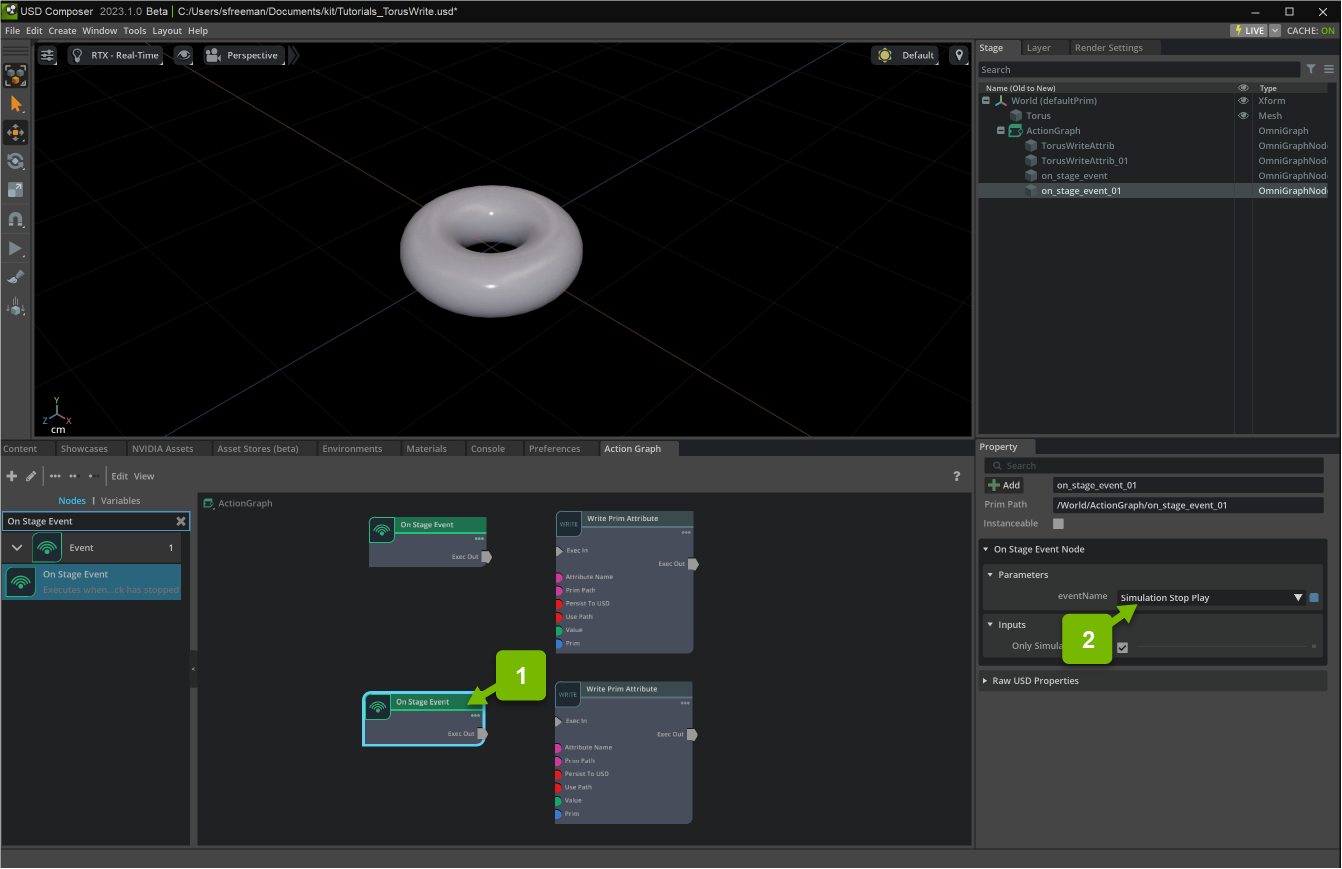
Set one OnStageEvent nodes eventName attribute to OmniGraph Start Play, and the other to OmniGraph Stop Play:
Connect each WritePrimAttribute node to the OnStageEvent nodes by dragging the Exec Out pin to the Exec In pin:
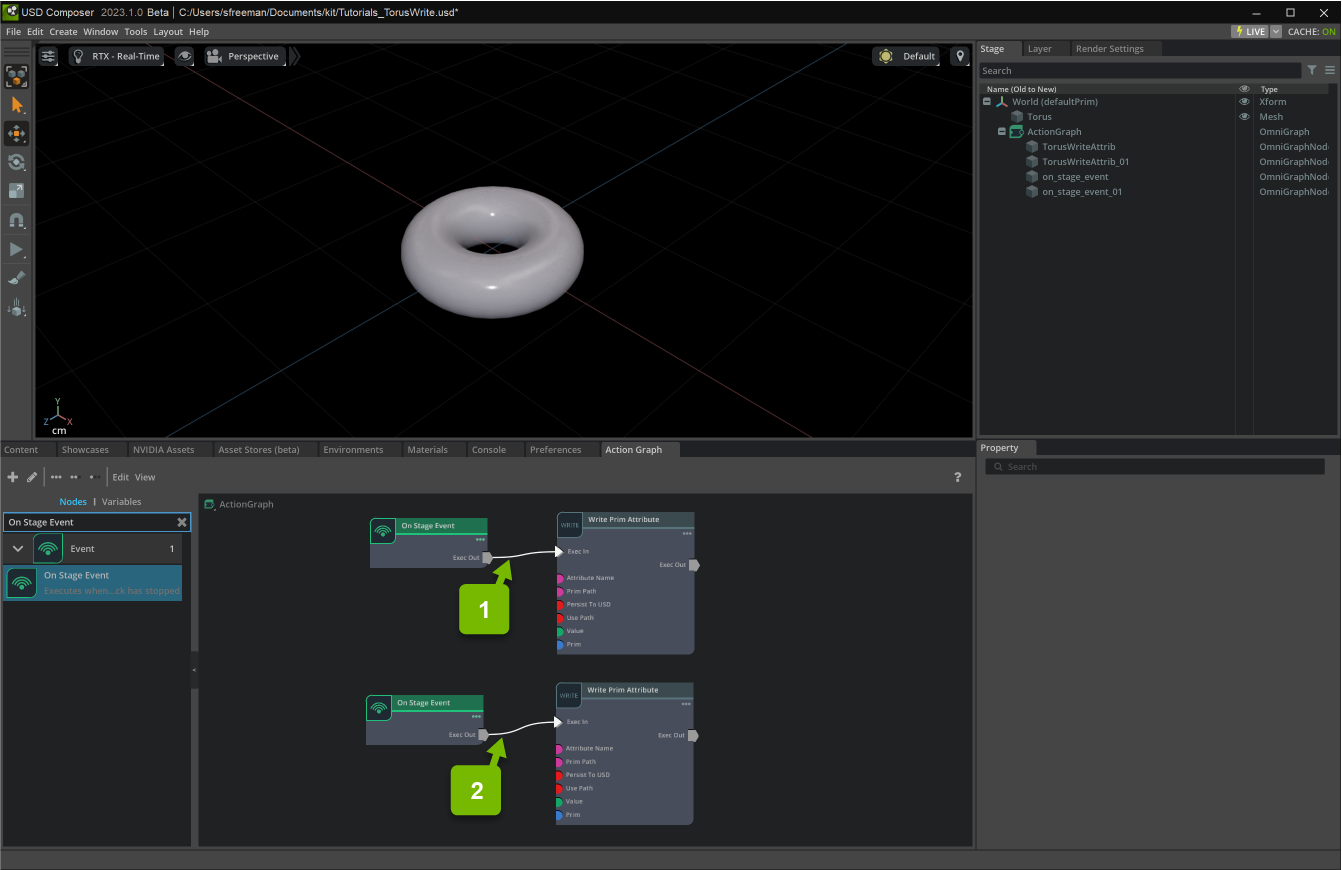
When you press the play button, the torus translates to (0.0, 20.0, 0.0), and returns to (0.0, 0.0, 0.0) when stopped.
This is a very useful setup for ensuring an attribute is set to a specific value when the graph starts or stops executing.
Example 2: On Keyboard Input
In this example, we move a mesh in response to a key press.
The On Keyboard Input event node fires when a keyboard event occurs.
First, create an OnKeyboardInput node, set the keyIn attribute to J:

Connect the first WritePrimAttribute node’s Exec In pin to the OnKeyboardInput Pressed pin, and the second WritePrimAttribute node’s Exec In to the OnKeyboardInput Released pin:
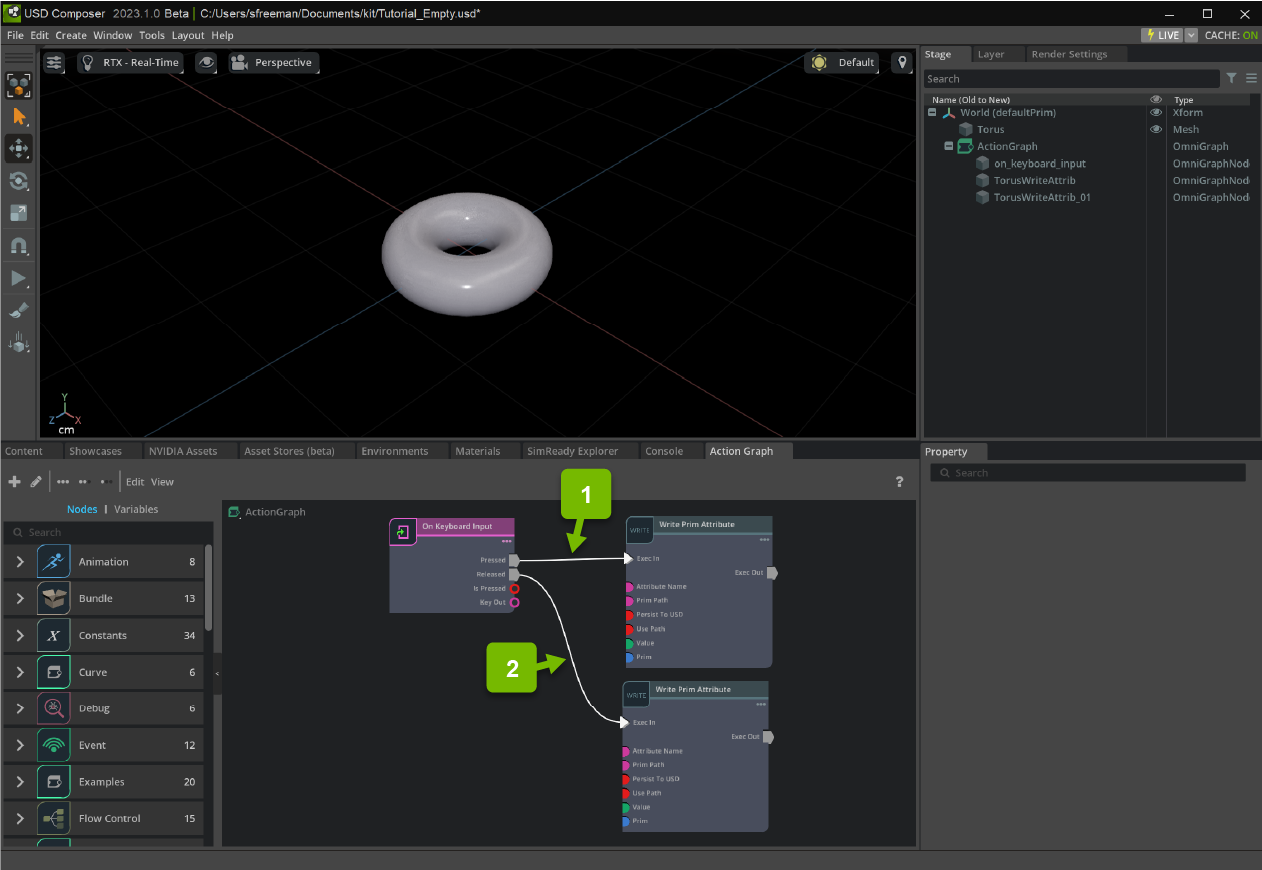
Now, press Play. When the J key is pressed, the torus moves to (0.0, 20.0, 0.0), and returns to the origin when released.
Example 3: On Message Bus Event
In this example, we move a mesh in response to a signal sent from a script.
The On Message Bus Event is an event node which fires when the specified event is popped from the Application Message Bus, either from a script or from a SendMessageBusEvent node.
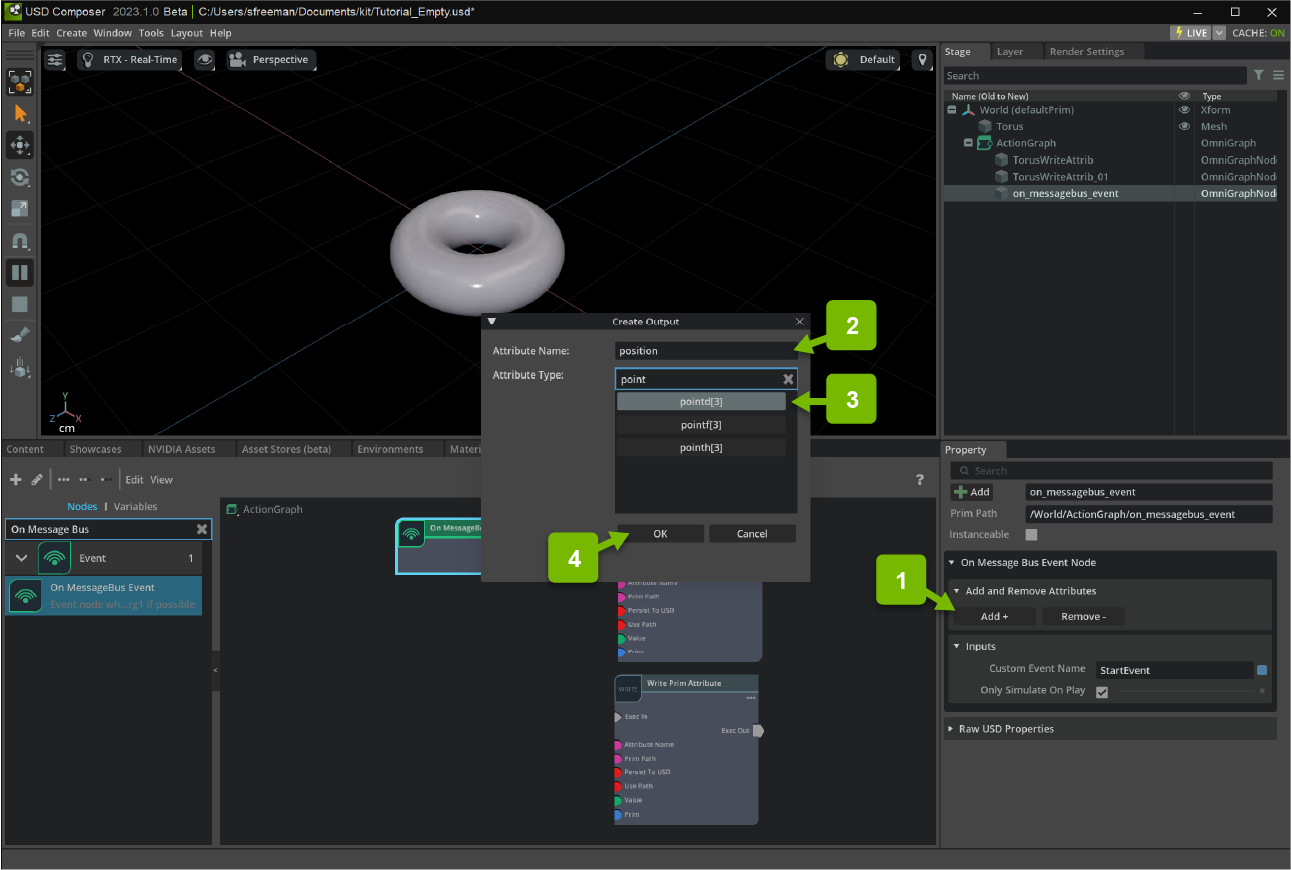
First, create a OnMessageBusEvent node and set the eventName attribute to StartEvent:
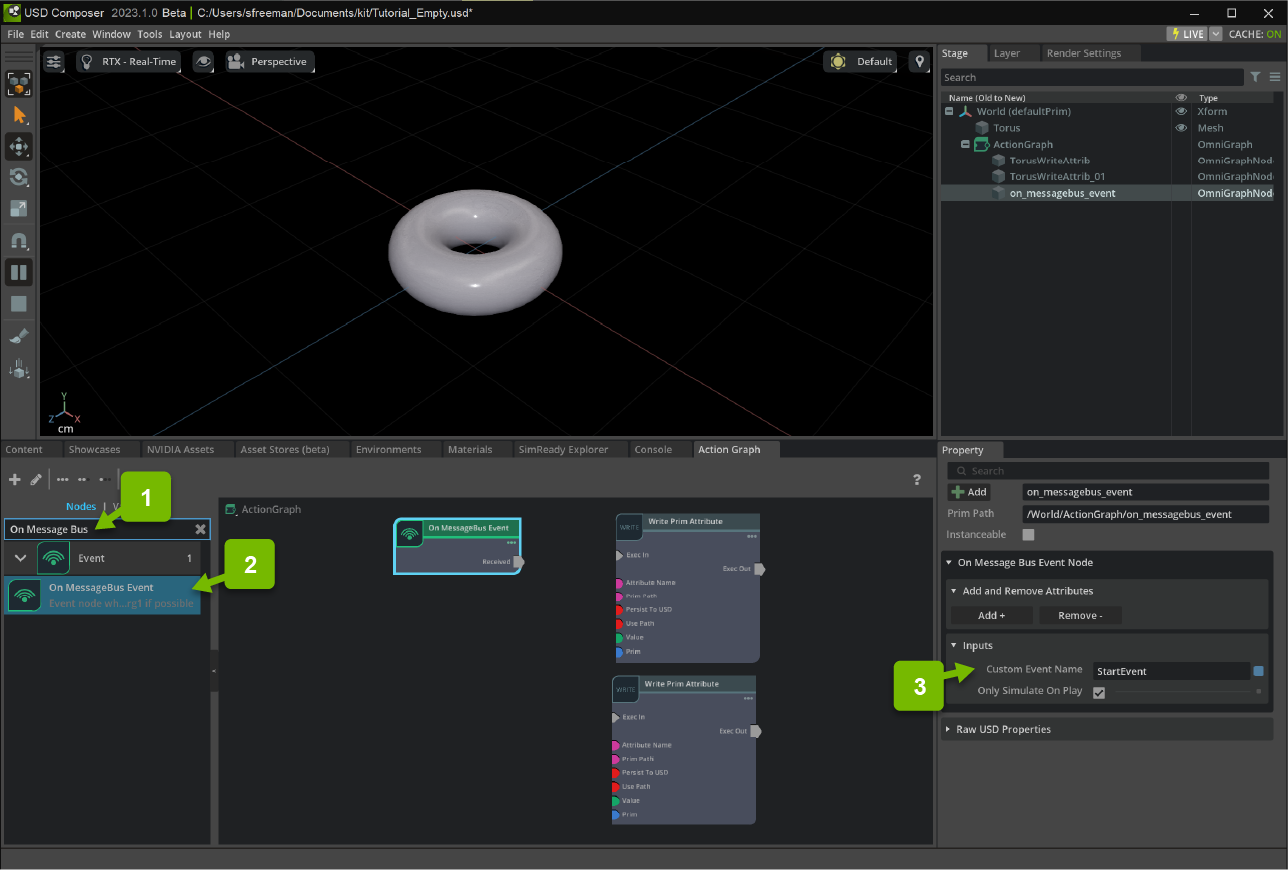
Next, create a new pointd[3] attribute called position using the Add + button:
Now, duplicate the OnMessageBusEvent node using Ctrl+D and change the eventName attribute to EndEvent:
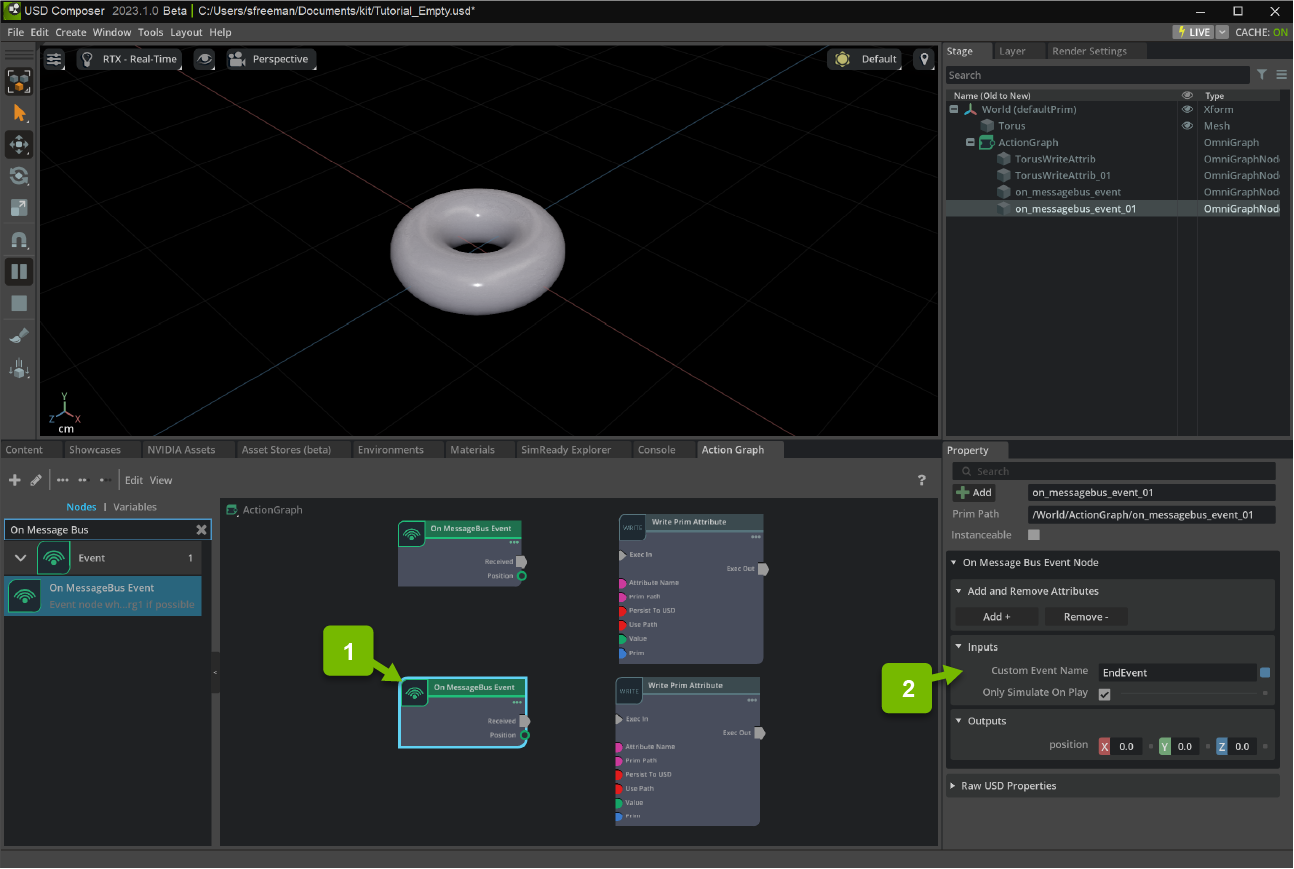
Connect the respective WritePrimAttribute node’s Exec In pin to the OnMessageBusEvent Received pin, and the OnMessageBusEvent position output to the WritePrimAttribute value input:
Press play to begin executing your graph.
Then, in a Script Editor, and copy and run the following code:
import carb.events
import omni.kit.app

msg = carb.events.type_from_string("StartEvent")
omni.kit.app.get_app().get_message_bus_event_stream().push(msg, payload={ "position": (0.0, 20.0, 0.0) })
The torus now moves to (0.0, 20.0, 0.0)! To return to the origin, you can run:
import carb.events
import omni.kit.app

msg = carb.events.type_from_string("EndEvent")
omni.kit.app.get_app().get_message_bus_event_stream().push(msg, payload={ "position": (0.0, 0.0, 0.0) })