Using Variant Nodes
Note
This document contains features from OmniGraph version 2023.2.1.
In this tutorial, we explore the use of Variant Nodes in Action Graph.
Note
While you use Omniverse USD Composer in this tutorial, you can follow similar steps to achieve the same results in other Omniverse Apps.
Before You Begin
While this is an introductory-level tutorial on OmniGraph, we recommend you complete Introduction to OmniGraph and Using Event Source Nodes first. Those tutorials provide more detailed information about some of the same steps that you complete here.
What Are Variants?
Variants are a USD concept that allows users to select between different variations of attribute values on the same Prim.
OmniGraph contains a variety of nodes that interact with this structure and allows users to set the values in real time.
Variant Nodes |
|---|
Prepare the Stage
All of our examples start with the same setup:
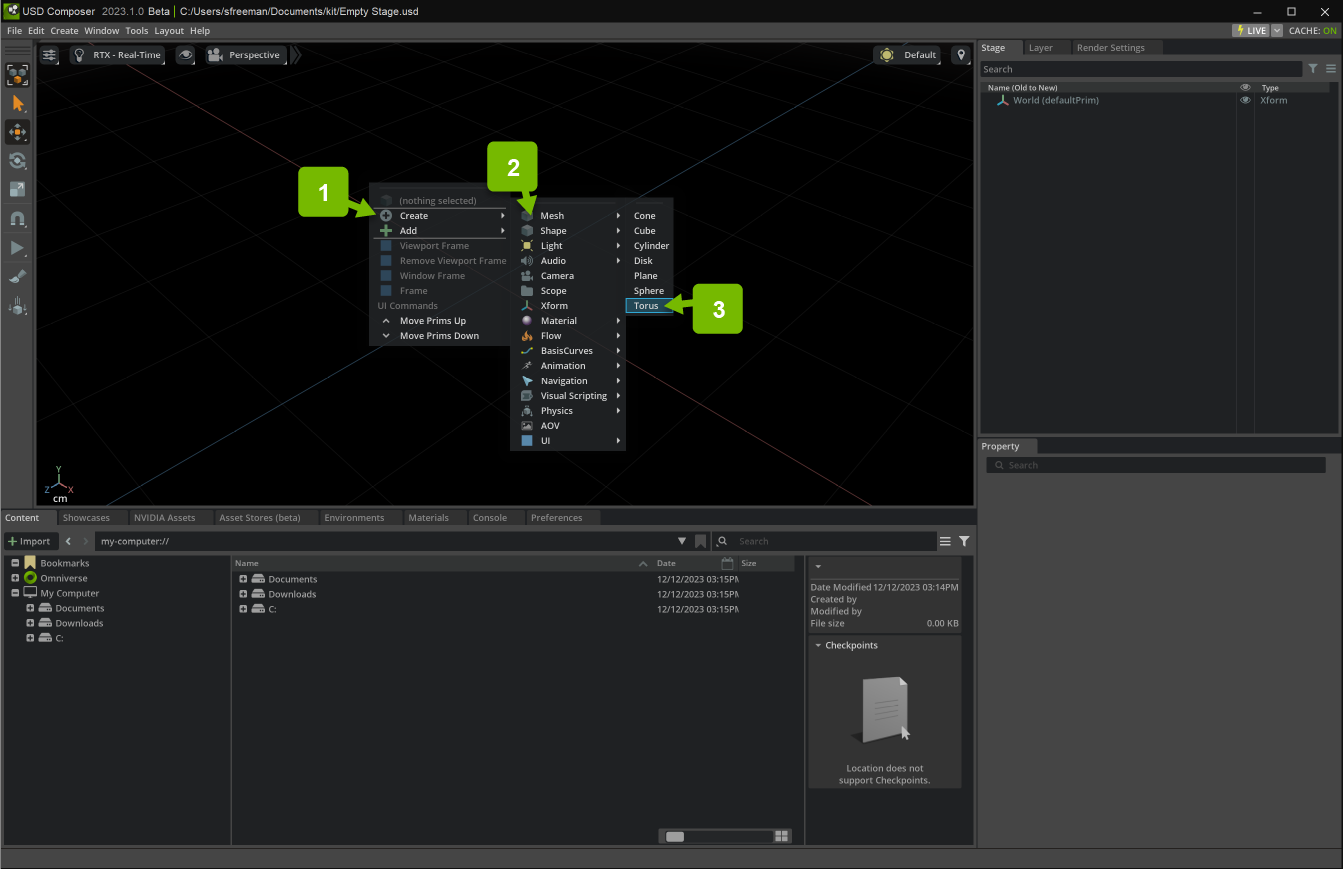
First, add a torus to the stage:
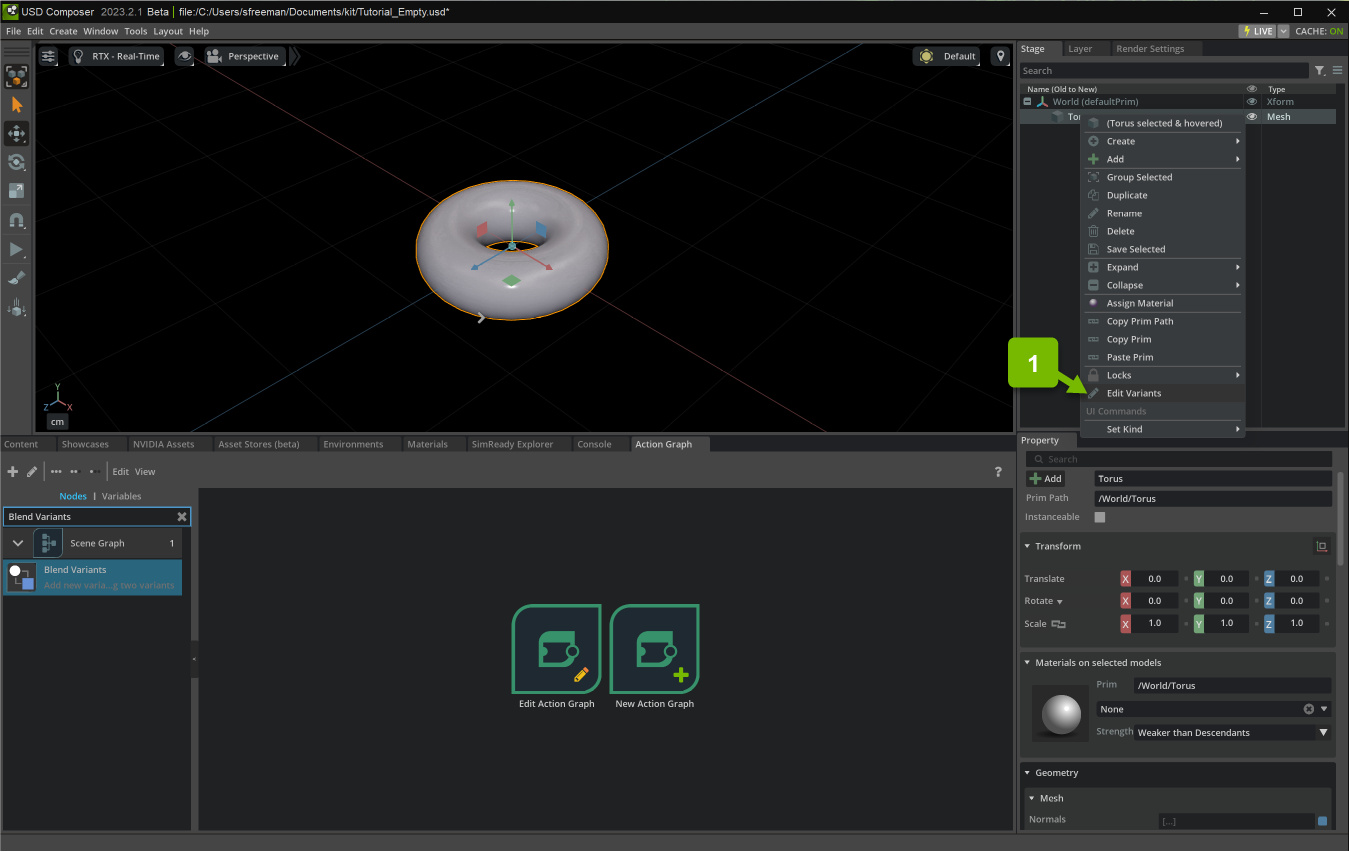
Next, we need to add some variants to our geometry. Open the Variant Editor by right-clicking on the mesh in the Stage and selecting Edit Variants:
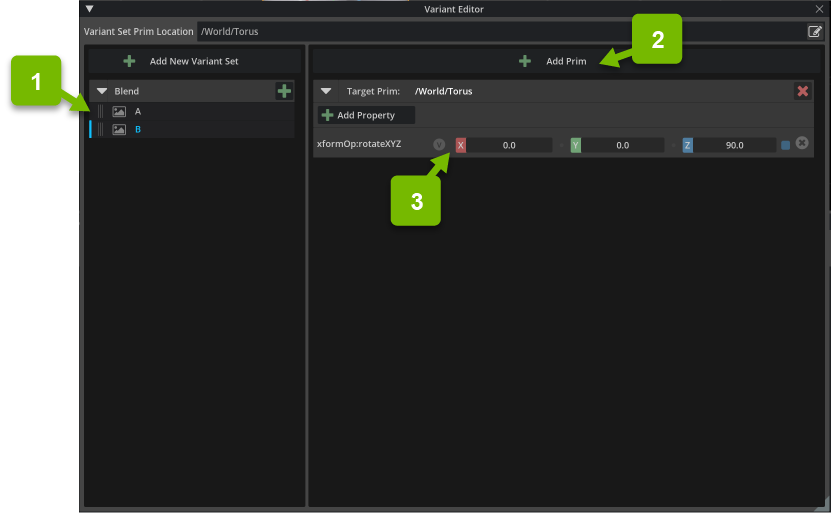
Add a new variantSet called Blend, and variants A & B. Add our torus to each variant, and set xformOp:rotateXYZ to (90, 0, 0) in variant A and (0, 0, 90) in variant B. You may need to clear the local values by clicking the orange L to the left of the value.
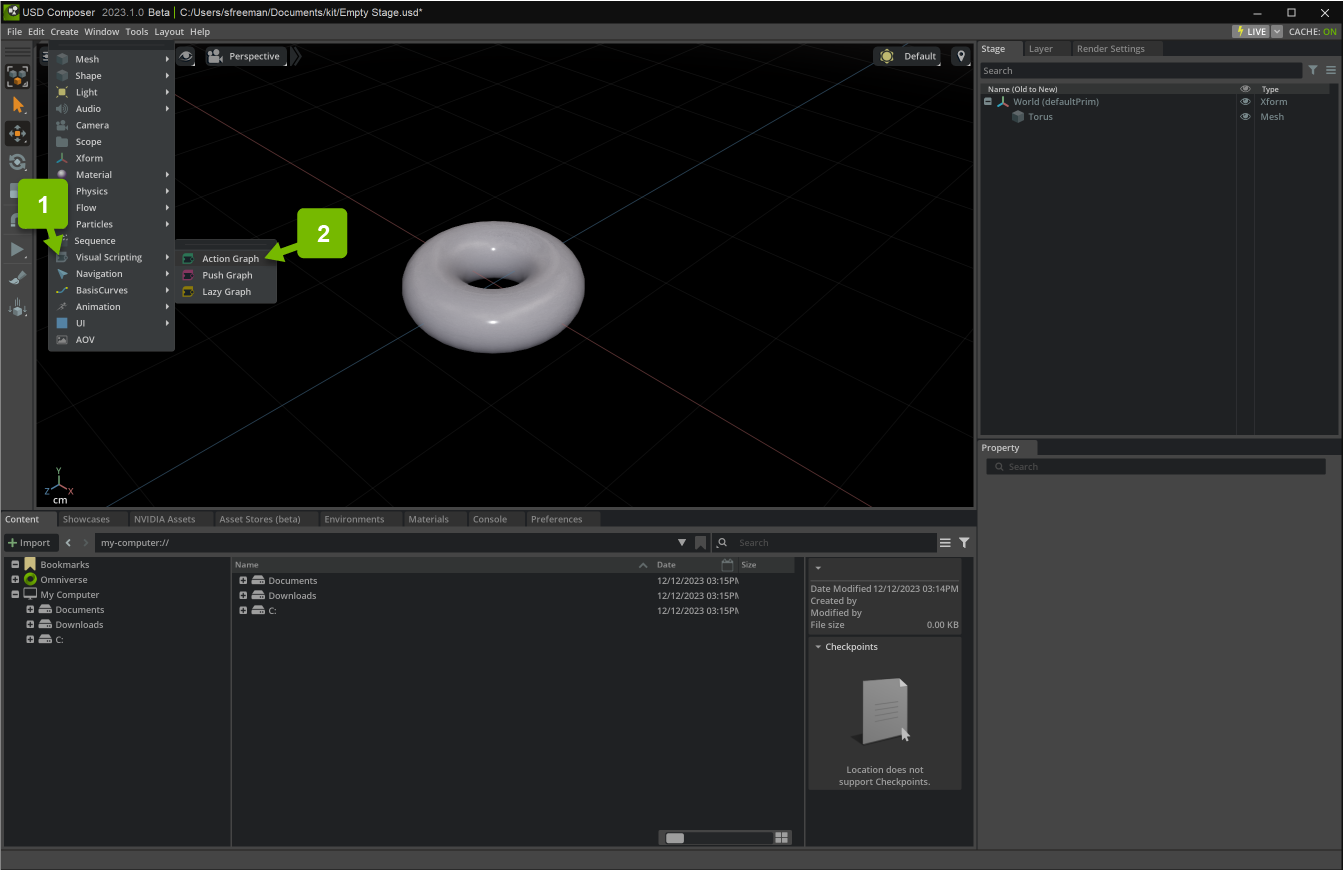
Next add a new Action Graph:
Lastly, create an OnKeyboardInput node, set the keyIn attribute to J:

Example 1: Blend Variant
In this example, we blend the value from one variant to another based on a keyboard input.
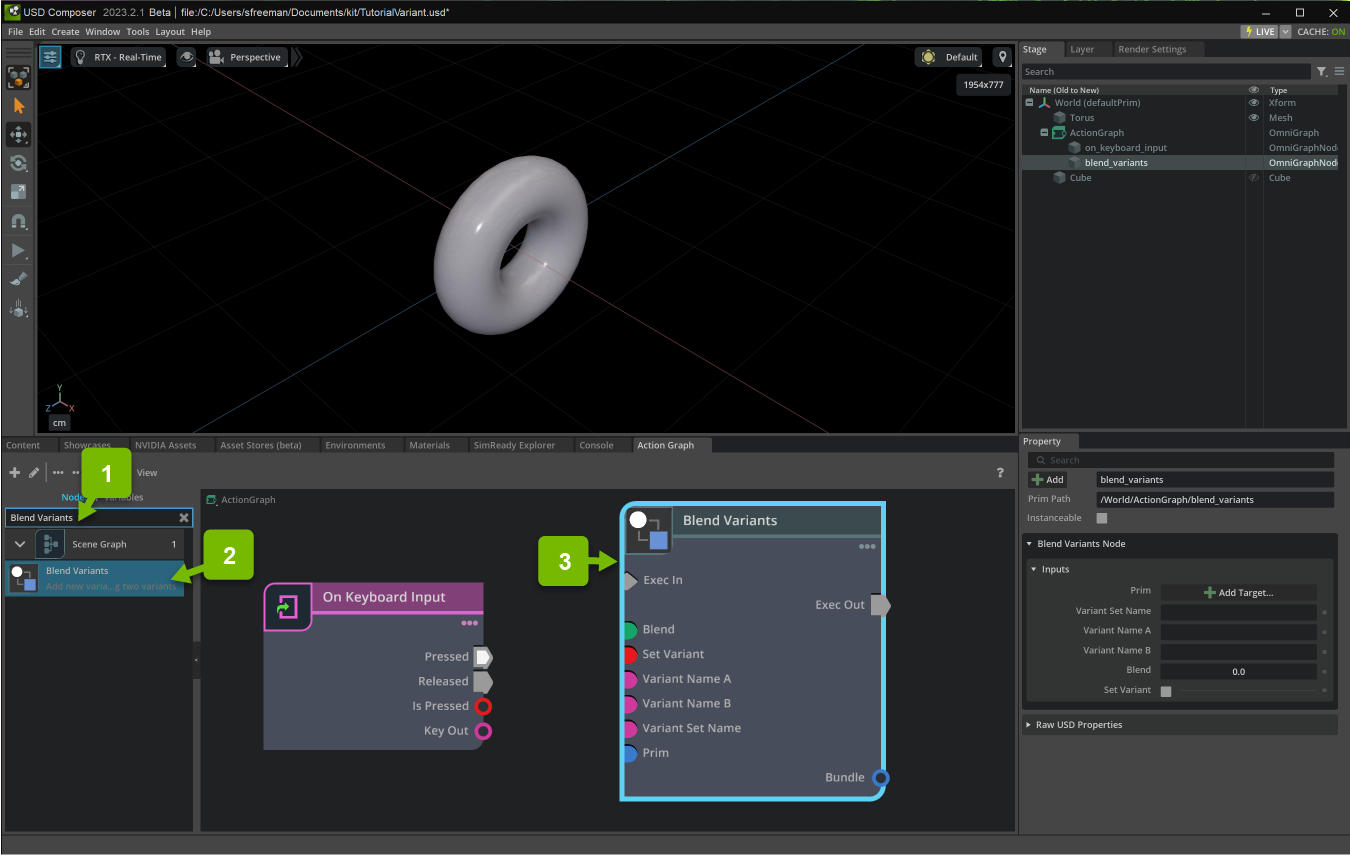
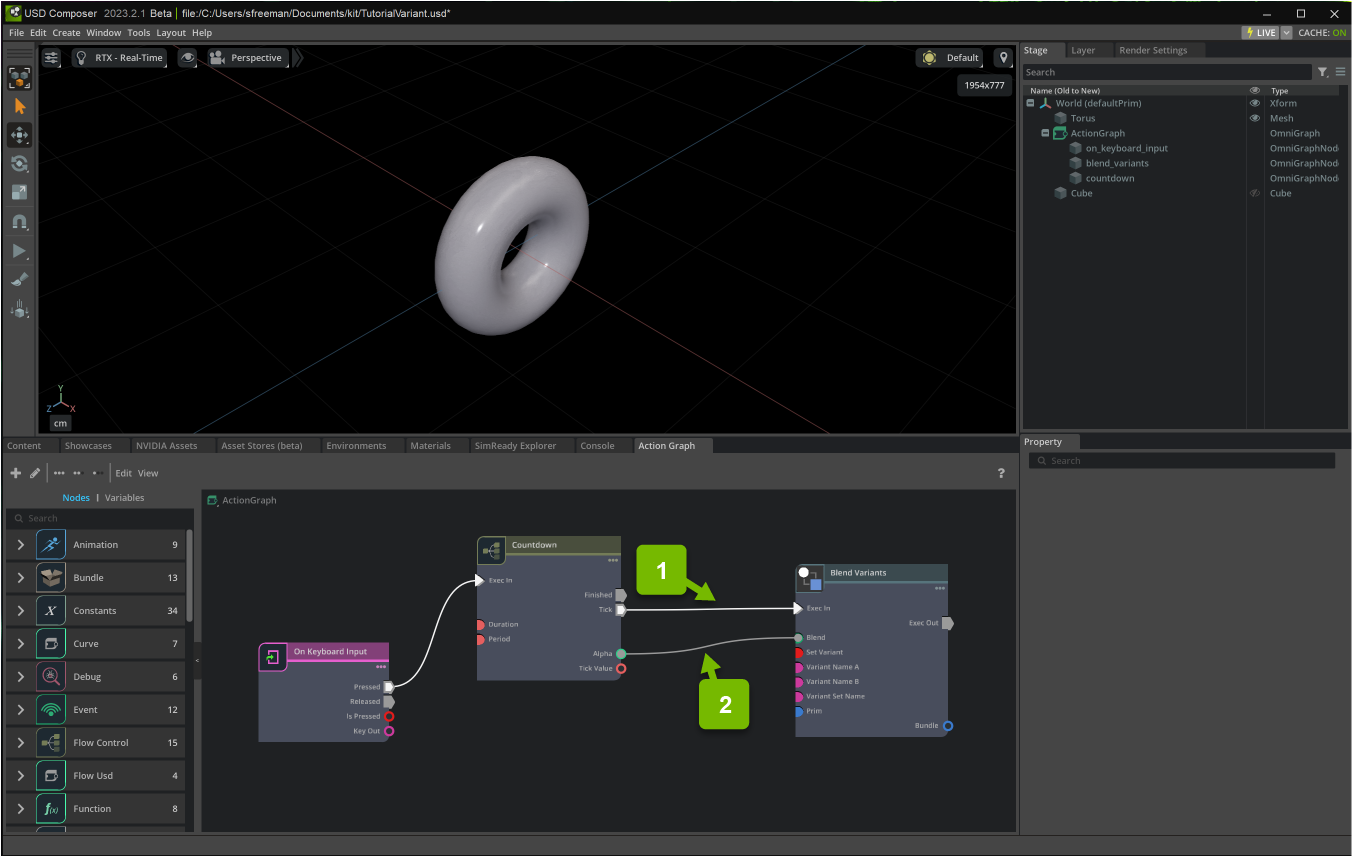
The Blend Variants is a variant node that allows blending of the values from one variant in a variantSet to another.
First, create a BlendVariants node:
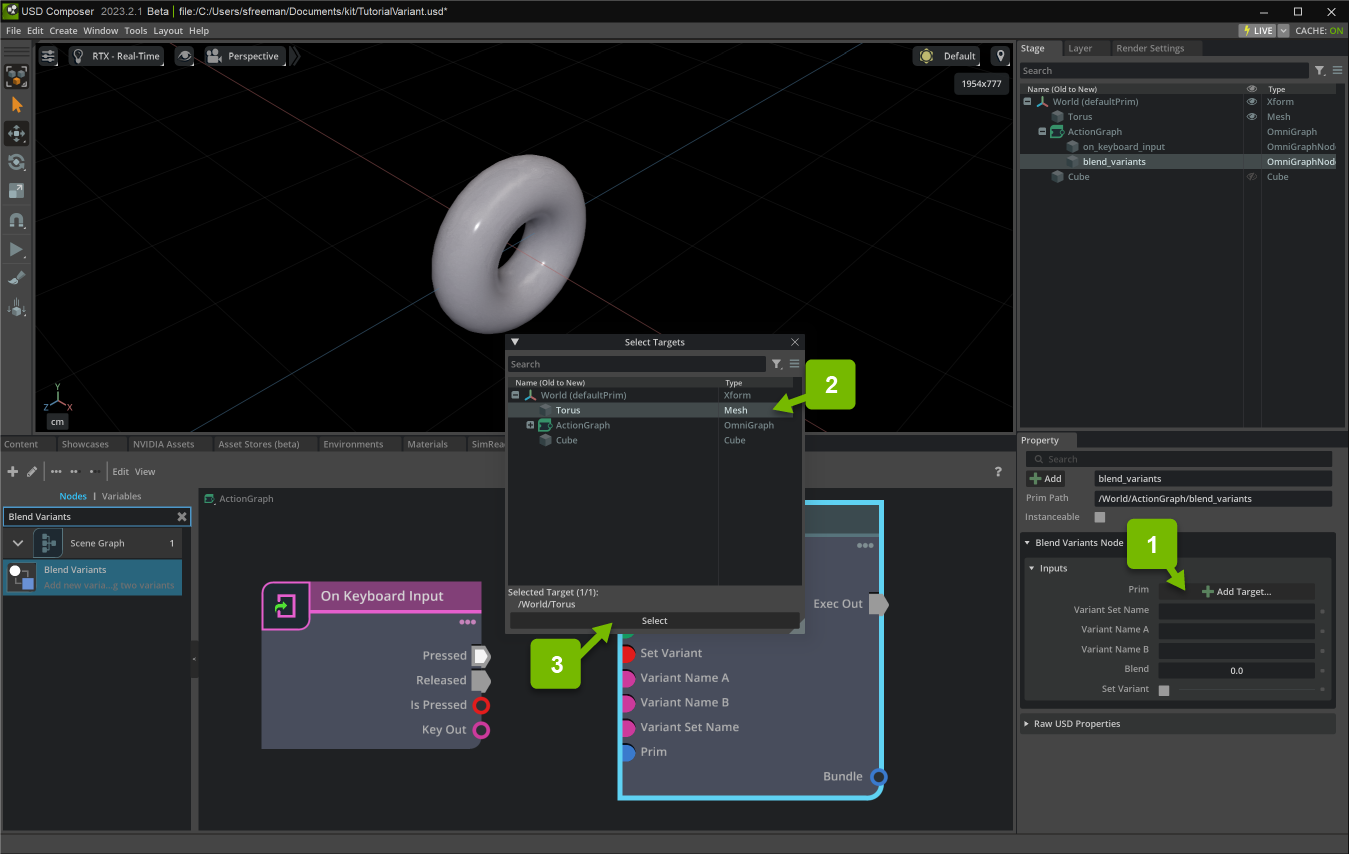
Select our torus, and target it from the BlendVariants node’s prim input. This exposes the available variantSets and variants on the torus:
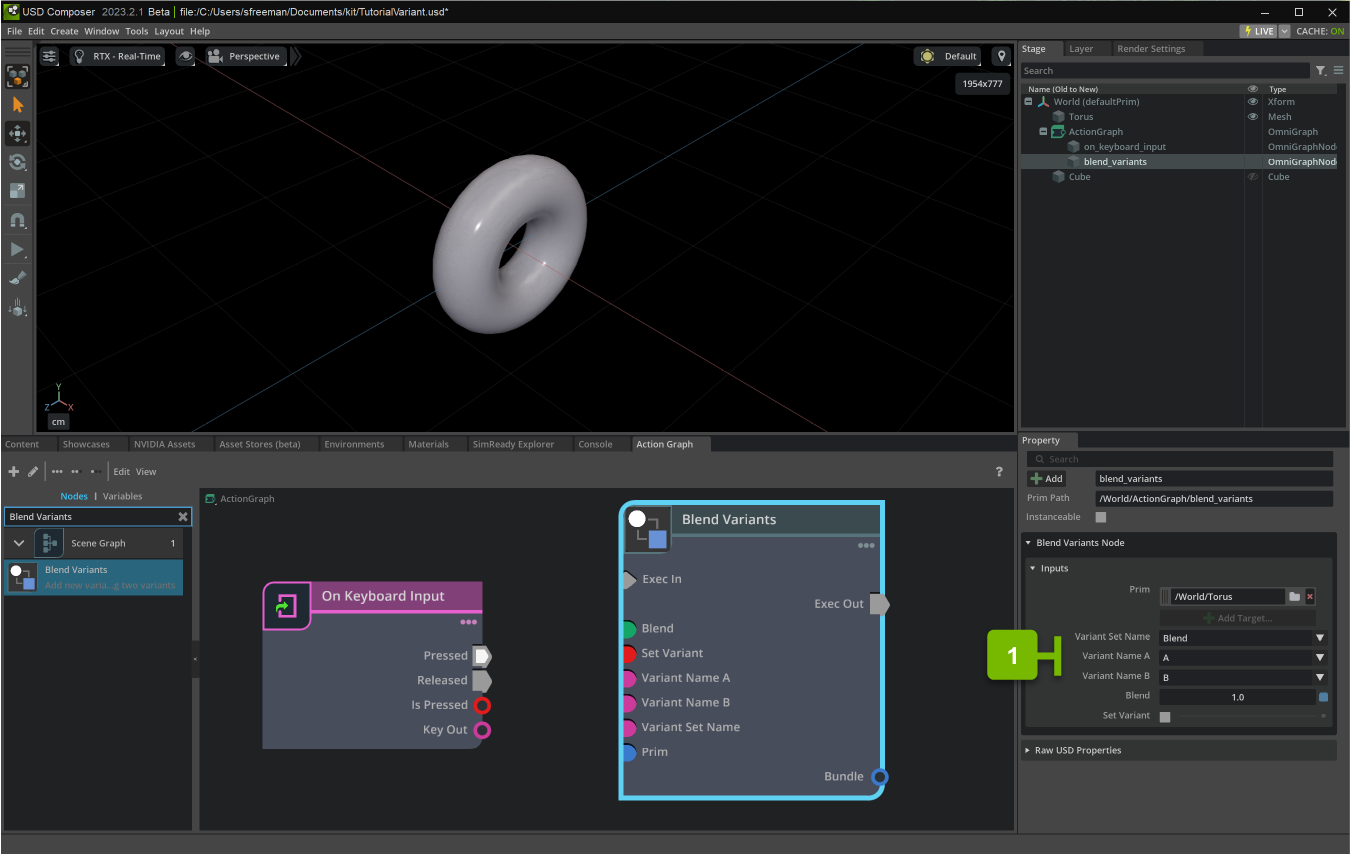
Set variantSet to Blend, variantA to A and variantB to B:
Next create a Countdown node, and connect it’s Exec In input to the Pressed output of the OnKeyboardInput node. Set the Duration to 30:
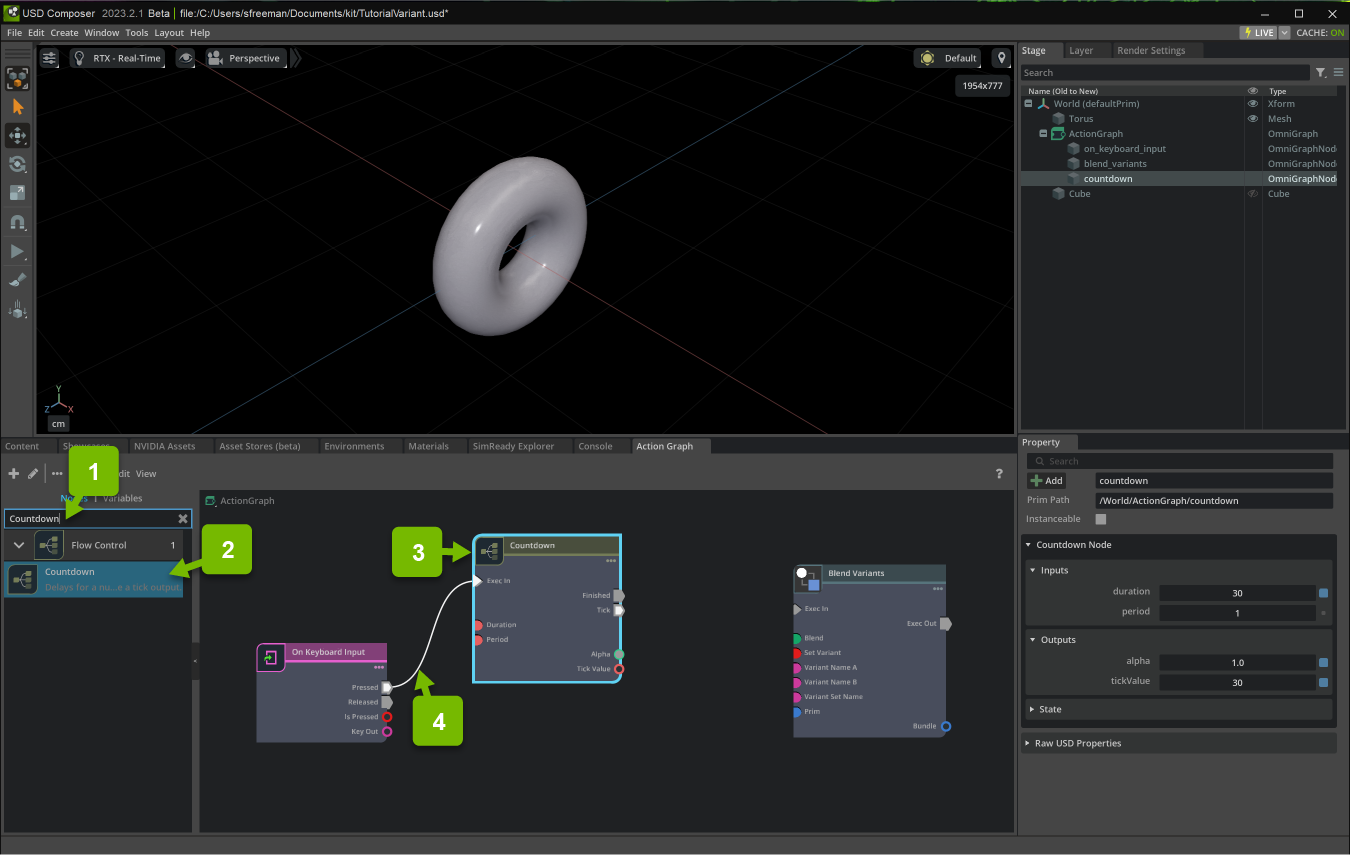
Afterwards, connect the Tick output of the Countdown node to the Exec In of the BlendVariants and the Alpha output of the Countdown node to the Blend input of the BlendVariants node.
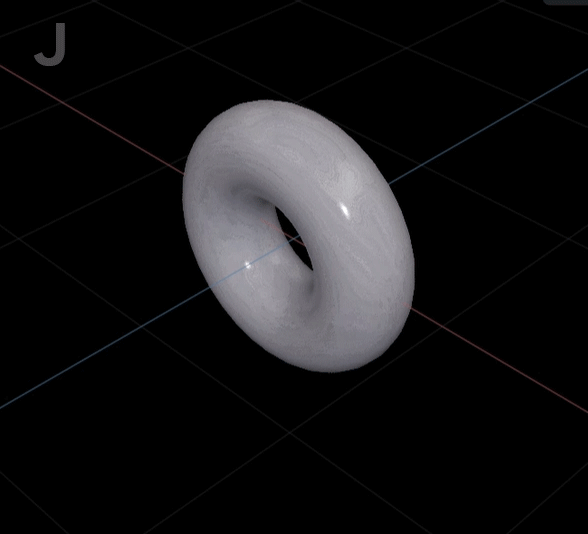
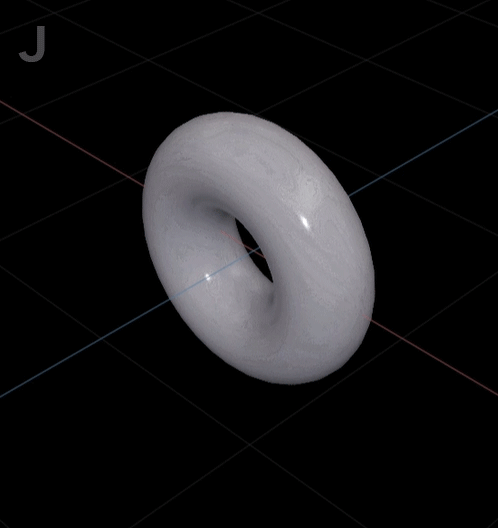
Now, if you press Play and toggle the J key, you see that the torus blends from one variant to the other, but only in one direction:
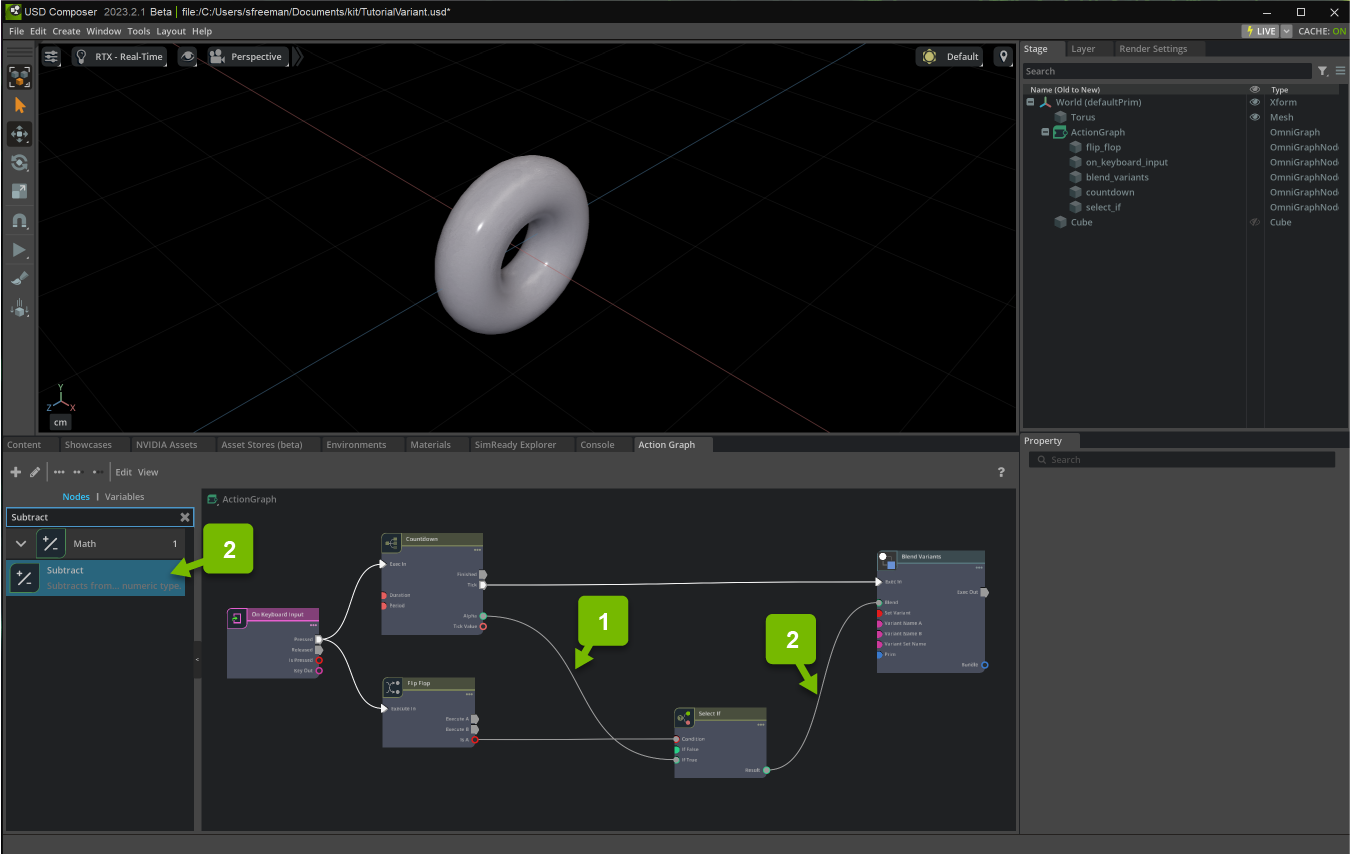
Now let’s make this a little smoother. Create a FlipFlop node, and connect it’s Execute In input to the Pressed output of the OnKeyboardInput node:
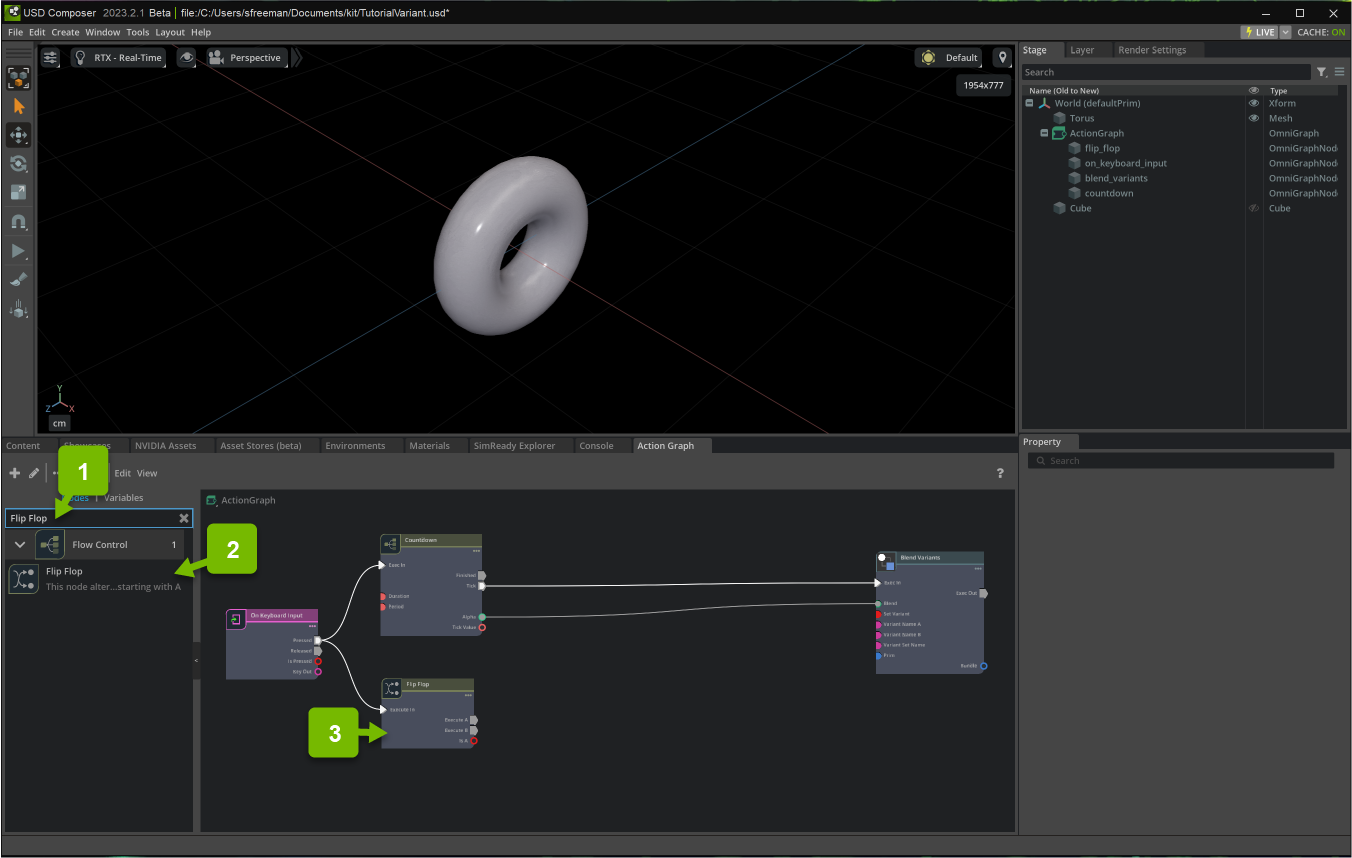
Next, create a SelectIf node, and connect the Is A output of the FlipFlop to the Condition input:
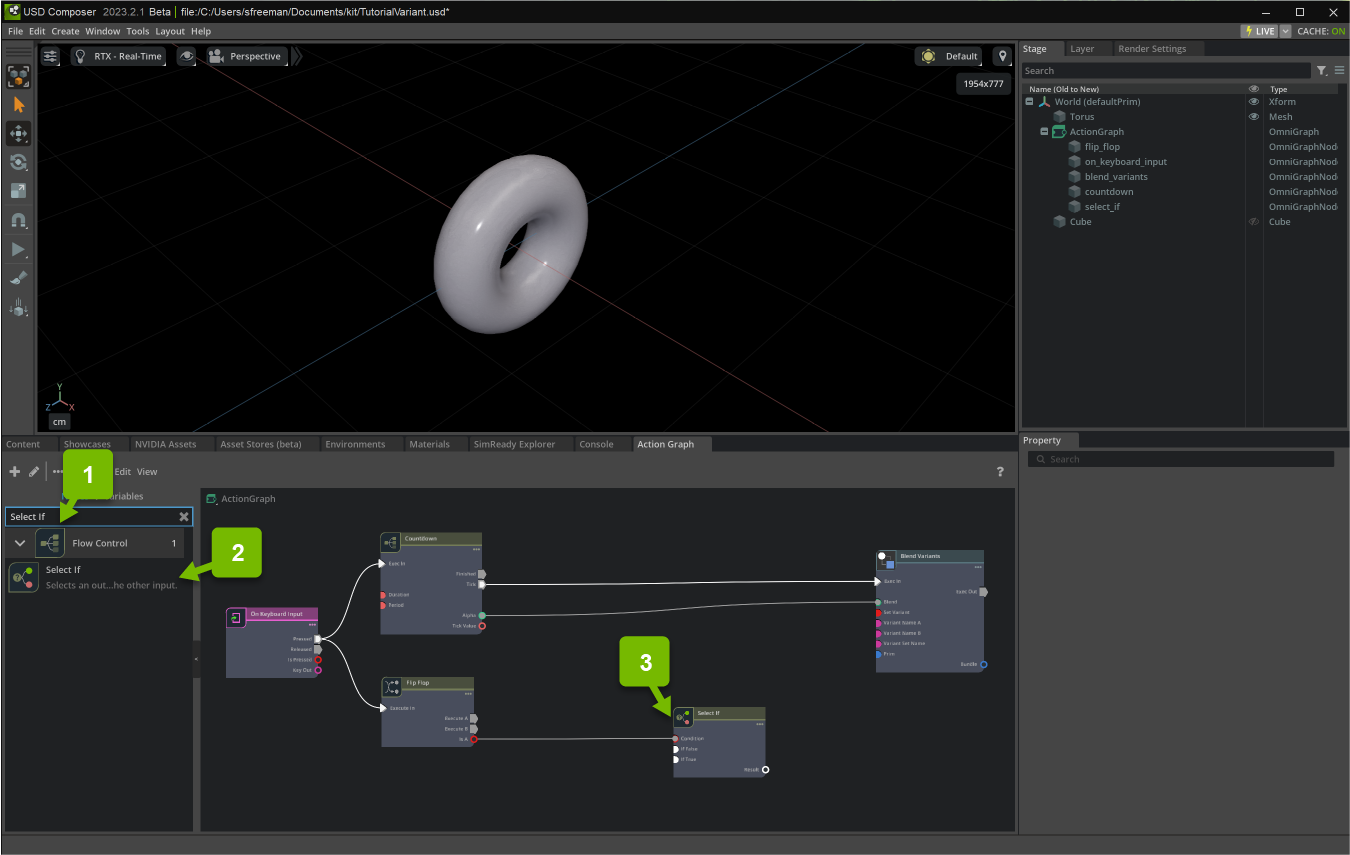
Replace the connection from Alpha to Blend with the Result output of the SelectIf node:
Create a Subtract node. Promote the A input to a double type by right-clicking the attribute and selecting Convert to Type > double and set to 1.0.
Connect Alpha to both the B input of the Subtract node and the ifTrue input of the SelectIf node:
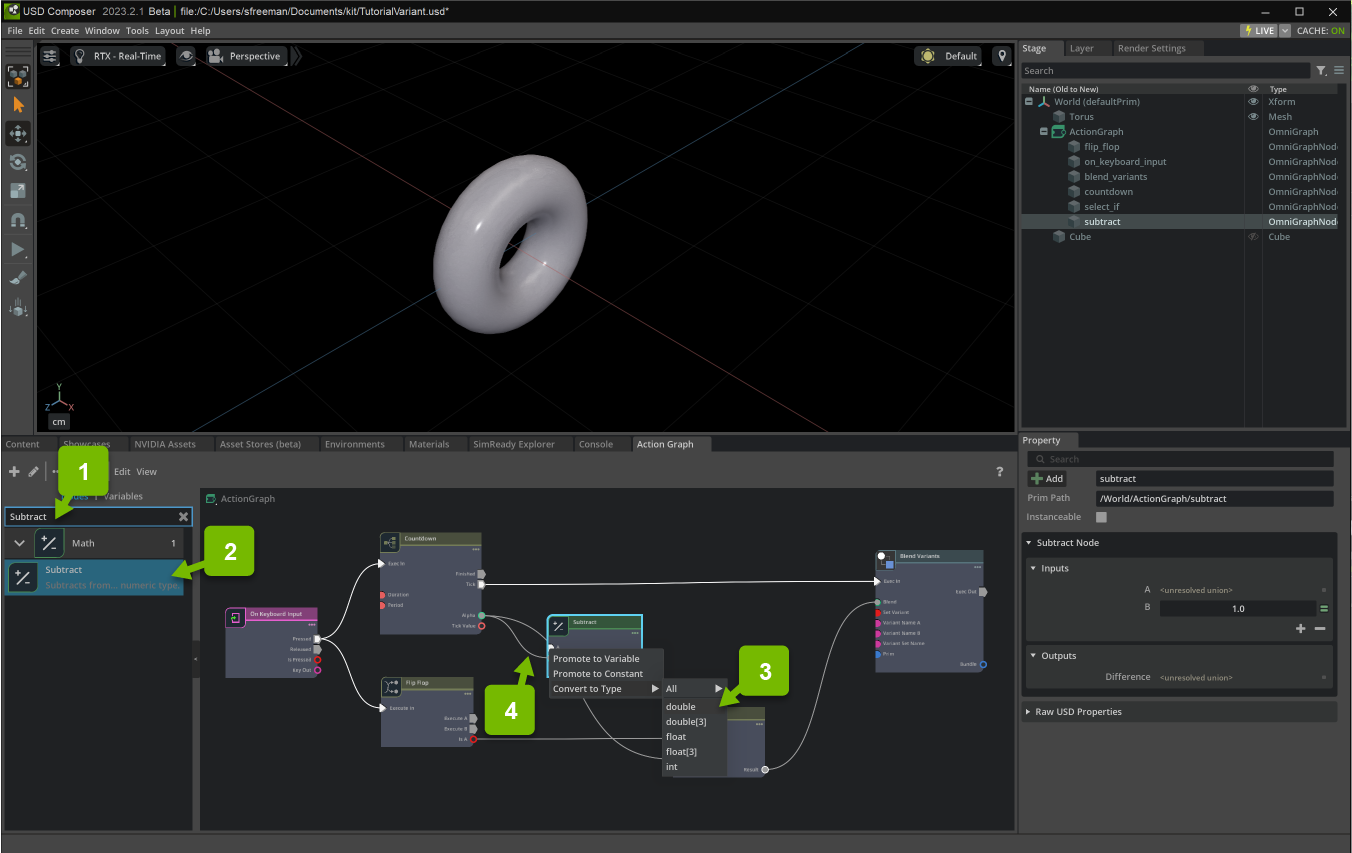
Finally, connect the Difference output of the Subtract node to the ifFalse input of the SelectIf node:
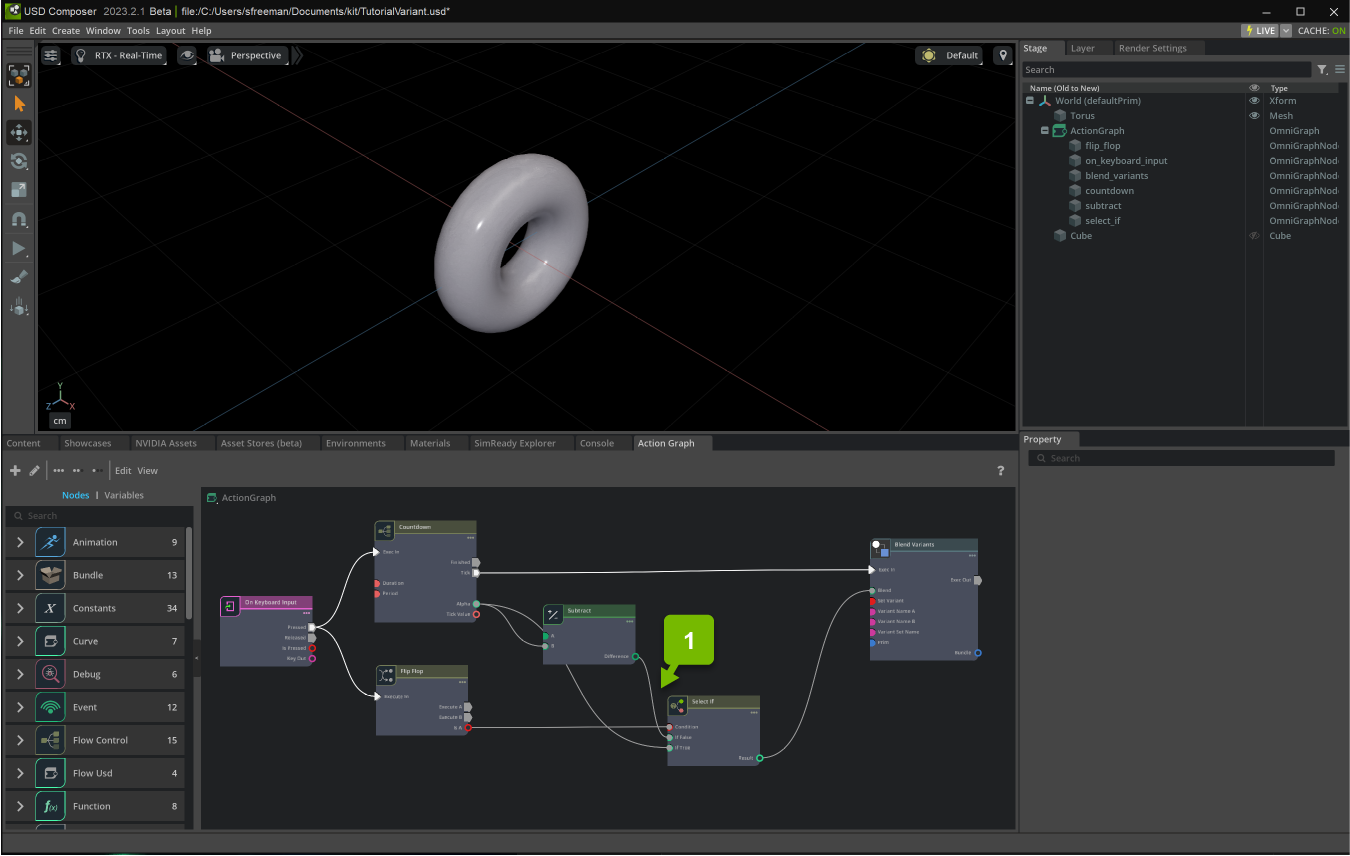
Now when Play is pressed, the SelectIf node chooses between the Alpha generated in the Countdown node and its complement:
Note
The setVariant attribute, if enabled, changes the USD variant of the node if the blend value is 0.0 or 1.0. This could be expensive, which is why by default it is false on the BlendVariants node.