Post-Processing#
Post Processing effects allow real-time manipulation of the rendered image in a variety of ways.
Tone Mapping#
Setting |
Effect |
|---|---|
Tone Mapping Operator |
Tone Mapping Operator selector.
|
|
Leaves the radiance values unchanged, skipping any exposure adjustment.
|
|
(Off): Applies the exposure adjustments but leaves the tone values otherwise unchanged.
|
|
Operator based on Erik Reinhard’s tone mapping work.
|
|
Variation of the operator based on Erik Reinhard’s tone mapping work.
|
|
John Hable’s ALU approximation of Jim Heji’s operator.
|
|
John Hable’s Uncharted 2 filmic tone map.
|
|
Operator based on the Academy Color Encoding System.
|
|
Reinhard-based operator that matches the operator used by NVIDIA Iray by default.
|
cm^2 Factor |
Use this factor to adjust for scene units being different from centimeters.
|
Camera Exposure |
Camera exposure time in seconds.
|
Film ISO |
Simulates the effect on exposure of a camera’s ISO setting.
|
F-stop |
Simulates the effect on exposure of a camera’s f-stop aperture.
|
White Point |
A color mapped to white on the output.
|
sRGB To Gamma Conversion |
Available with Linear/Reinhard/Modified Reinhard/HejiHableAlu/HableUc2 Tone Mapping.
|
Tone Mapping Color Space |
Tone Mapping Color Space selector.
|
Wrap Value |
Offset
|
Dither Strength |
Removes banding artifacts in final images.
|
Modified Reinhard Settings |
Effect |
|---|---|
Max White Luminance |
Maximum HDR luminance value that will map to 1.0 post tonemap.
|
HableUC2 Settings |
Effect |
|---|---|
White Scale Value |
Maximum white value that will map to 1.0 post tonemap.
|
Iray |
Effect |
|---|---|
Crush Blacks |
When the upper part of the dynamic range becomes compressed it naturally loses some
of its former contrast, and one often desires to regain some “punch” in the image
by using the Crush Blacks parameter. When 0, the lower intensity range is linear,
but when raised towards 1, a strong “toe” region is added to the transfer curve so
that low intensities get pushed more towards black, but in a gentle fashion.
|
Burn Highlights |
Burn Highlights can be considered the parameter defining how much “over exposure”
is allowed. As it is decreased from 1 towards 0, high intensities will be more and
more “compressed” to lower intensities. When it is 0, the compression curve is
asymptotic, i.e. an infinite input value maps to white output value,
i.e. over-exposure is no longer possible. A good default value is 0.5.
|
Burn Highlights per Component |
Specifies how the Burn Highlights parameter is applied to the different color
components. By default it is applied separately to all channels, which can lead to
saturation loss though. Disabling the parameter applies the Burn Highlights to the
luminance, keeping the output color as close as possible to the input color.
|
Burn Highlights Max Component |
When not using ‘Burn Highlights per Component’, if ‘Burn Highlights Max Component’
is enabled, the maximum value across the R, G and B channels is used in the Burn
Highlights computation. Otherwise the overall luminance is used.
|
Saturation |
Compressing bright color components inherently moves them towards a less saturated
color. Sometimes, very strong compressions can leave the image in an unappealingly
de-saturated state. The saturation parameter allows an artistic control over the
final image saturation. 1.0 is the standard “unmodified” saturation, higher
increases and lower decreases saturation.
|
OpenColorIO#
OpenColorIO (OCIO) is a comprehensive color management solution supporting consistent and accurate color representation across different devices and views. It is compatible with the Academy Color Encoding System (ACES), which is a standard for high-fidelity color imaging. OCIO also supports many popular LUT (Look-Up Table) formats, making it versatile for different production needs, and enables users to create their own color spaces and transformations, allowing for a highly customizable color management pipeline.
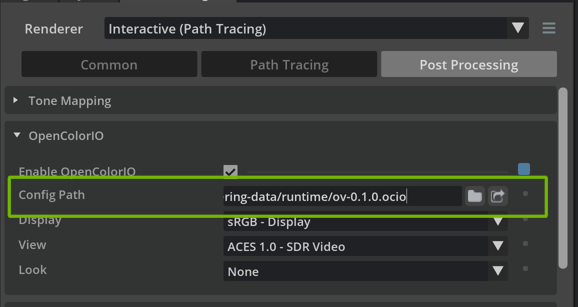
RTX ships with a default configuration that specifies a simple sRGB pipeline, since RTX currently only supports linear Rec.709 as the rendering color space. To use your own OCIO config, simply set the Config Path setting to point to your configuration. Note that this must currently exist on the same filesystem as the running application. For information about authoring configuration files, please see the OpenColorIO documentation.

Setting |
Effect |
|---|---|
Enable OpenColorIO |
Enable color management based on OpenColorIO.
|
Config Path |
The path to an OpenColorIO configuration file.
|
Display |
Display device that this image is presented on. Examples: ‘sRGB’ for artist workstations, ‘DCIP3’ for screening room projectors.
|
View |
View for this Display Device. Examples: ‘Film’ for final projected result, ‘Log’ for log-space pixel values, ‘Raw’ for data.
|
Look |
Artistic image modification in a specified image state.
|
Using LUTs with OpenColorIO#
OpenColorIO supports many LUT formats with its FileTransform, such as .3dl, .cube, .itx, .ccc and many more.
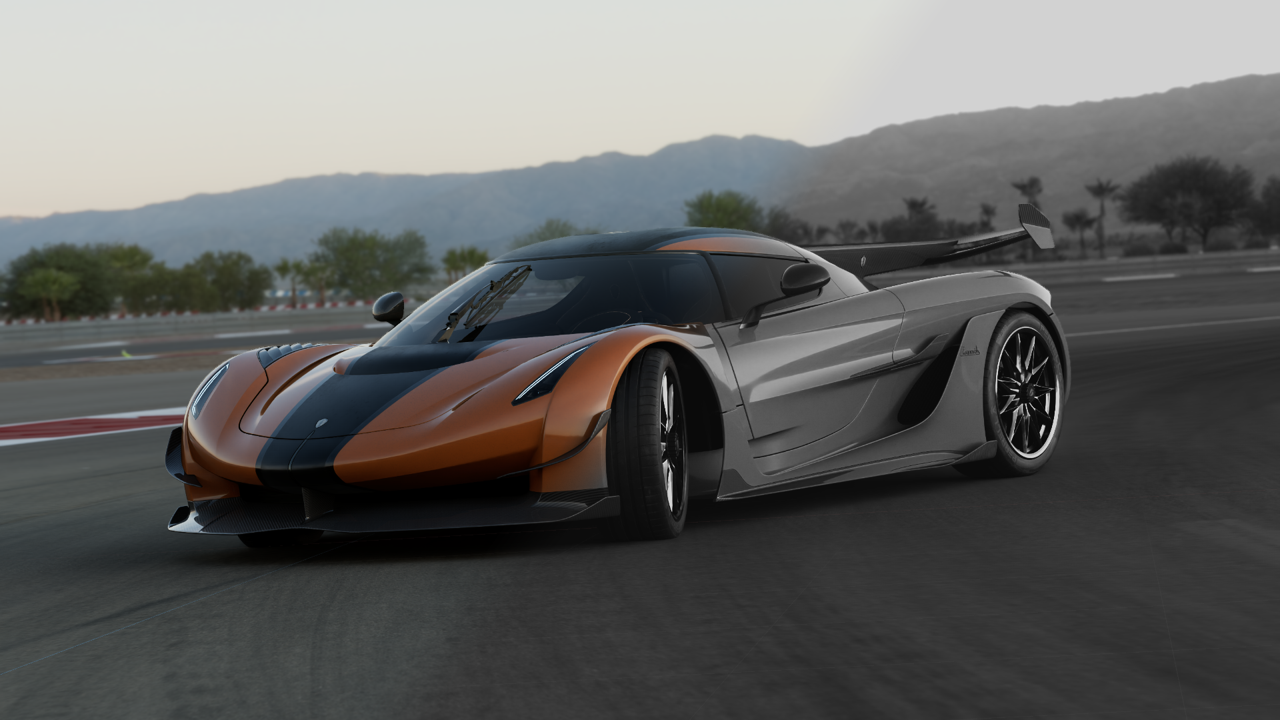
A LUT can be used by specifying a custom configuration. The easiest way to do this is to copy the built-in ov-0.1.0.ocio and edit to to add new Looks for the desired LUTs. For example, assuming the existence of a grey.cube LUT placed alongside the custom configuration that converts to a black and white image in linear Rec.709 space, the LUT can be specified like the example shown below:
51looks:
52- !<Look>
53name: grey
54process_space: scene_linear
55transform: !<FileTransform>
56      src: grey.cube
57
58
59- !<Look>
60name: ACES 1.3 Reference Gamut Compression
61process_space: ACES2065-1

Using a LUT to transform the color image to black and white#
Auto Exposure#
Setting |
Effect |
|---|---|
Auto Exposure |
Enables a histogram-based automatic exposure compensation.
|
Histogram Filter |
Select a method to filter the histogram. Options are Median and Average.
|
Adaptation Speed |
How fast automatic exposure compensation adapts to changes in overall light intensity.
|
White Point Scale |
Controls how bright of an image the auto-exposure should aim for. Lower values result in brighter images, higher values result in darker images.
|
Exposure Value Clamping |
Clamps the exposure to a range within a specified minimum and maximum Exposure Value.
|
Color Correction#
Setting |
Effect |
|---|---|
Color Correction |
Enable color correction.
|
Mode |
Choose between ACES (Pre-Tone mapping) or Standard (Post-Tone mapping) mode.
|
Output Color Space |
Defines the color space used as output of Color Correction.
sRGB Linear: scene linear space
AcesCG: ACES CG color space
|
Saturation |
Higher values increase color saturation while lowering desaturates.
|
Contrast |
Higher values increase the contrast of darks/lights and colors.
|
Gamma |
Gamma value in inverse gamma curve applied before output.
|
Gain |
A factor applied to the color values.
|
Offset |
An offset applied to the color values.
|
Color Grading#
Setting |
Effect |
|---|---|
Color Grading |
Enables Color Grading effects.
|
Mode |
Choose between ACES (Pre-Tonemap) or Standard (Post-Tonemap) Mode.
|
Output Color Space |
Defines the color space used as output of Color Grading.
sRGB Linear: scene linear space
AcesCG: ACES CG color space
|
Black Point |
Defines the Black Point value.
|
White Point |
Defines the White Point value.
|
Contrast |
Higher values increase the contrast of darks/lights and colors.
|
Lift |
Color is multiplied by (Lift - Gain) and later Lift is added back.
|
Gain |
Color is multiplied by (Lift - Gain) and later Lift is added back.
|
Multiply |
A factor applied to the color values.
|
Offset |
Color offset: an offset applied to the color values.
|
Gamma |
Gamma value in inverse gamma curve applied before output.
|
Compositing#
Setting |
Effect |
|---|---|
Compositing |
Enables Compositing.
|
Composite in Editor |
Enables alpha compositing with a backplate texture, instead of
outputting the rendered image with an alpha channel for compositing externally,
either by saving to EXR images or outputting the rendered image to a Cloud XR stream.
|
Output Alpha in Composite Image |
Outputs the matte compositing alpha in the composited image. Only activates when not compositing in editor.
|
Output Black Background in Composited Image |
Outputs a black background in the composited image. Only activates when not compositing in editor.
|
Multiply Color Value by Alpha in Composited Image |
When enabled, the RGB color will be RGB * alpha.
|
Lens Distortion |
Enables distortion of the rendered image using a set of lens distortion and undistortion maps.
Each of these should refer to a <UDIM> EXR texture set, containing one image for each
of the discrete focal length values specified in the array of float settings under
/rtx/post/lensDistortion/lensFocalLengthArray (not currently exposed).
|
|
<UDIM> EXR texture path to store the distortion maps for specified focal lengths.
|
|
<UDIM> EXR texture path to store the un-distortion maps for specified focal lengths.
|
Matte Object#

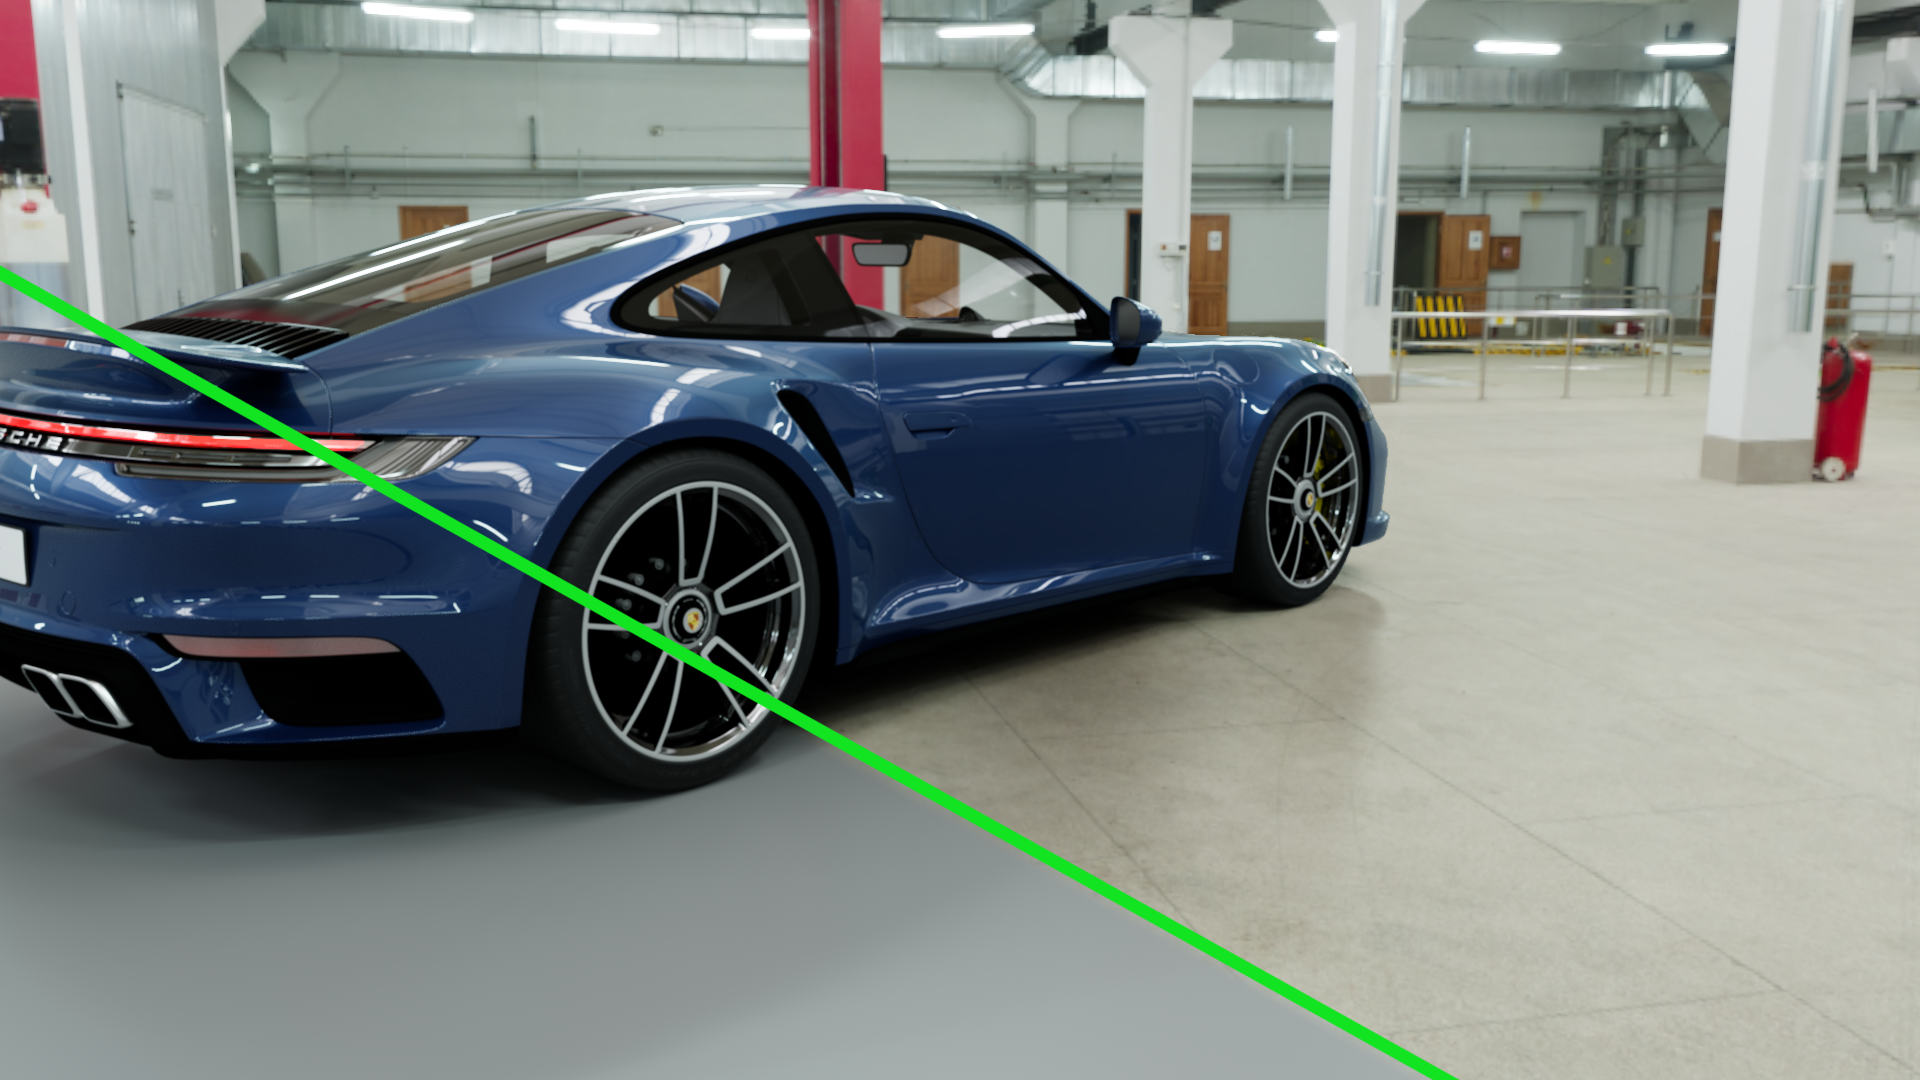
The Matte Object post-process allows rendering invisible objects which still receive shadows and secondary illumination (reflections, AO, global illumination), usually used in combination with a textured domelight or a backplate.
The post-process must be enabled to render matte objects. For a mesh geometry to be rendered as a matte object, its Matte Object flag must be enabled.
Setting |
Effect |
|---|---|
Matte Object |
Allows rendering invisible objects which still receive shadows and secondary illumination (reflections, AO, global illumination), usually used in combination with a domelight or a backplate.
|
Shadow Catcher |
Treats all matte objects as shadow catchers. Matte objects receives only shadow and not reflections or GI, which improves rendering performance.
|
Matte Object Fade Out |
To allow matte object gradually blend into the background.
|
Matte Object Composite Shift |
Manually bias the matte object compositing so that it blends into the background better.
|
Matte Object Composite Contrast |
Manually increase the contrast of matte shadow.
|
Chromatic Aberration#
Setting |
Effect |
|---|---|
Chromatic Aberration |
Enable chromatic aberration
|
Strength Red |
The strength of the distortion applied on the Red channel.
|
Strength Green |
The strength of the distortion applied on the Green channel.
|
Strength Blue |
The strength of the distortion applied on the Blue channel.
|
Algorithm Red |
Selects between Radial and Barrel distortion for the Red channel.
|
Algorithm Green |
Selects between Radial and Barrel distortion for the Green channel.
|
Algorithm Blue |
Selects between Radial and Barrel distortion for the Blue channel.
|
Use Lanczos Sampler |
Use a Lanczos sampler when sampling the input image being distorted.
|
Depth of Field#
Setting |
Effect |
|---|---|
Depth of Field Camera Overrides |
Overrides settings on the camera and uses Dept-of-Field settings below for ALL cameras.
|
Enable DOF |
Enables Depth of Field. If disabled, camera parameters affecting Depth of Field are ignored.
|
Subject Distance |
Objects at this distance from the camera will be in focus.
|
Focal Length (mm) |
The focal length of the lens (in mm). The focal length divided by the f-stop is the aperture diameter.
|
F-stop |
F-stop (aperture) of the lens. Lower f-stop numbers decrease the distance range from the Subject Distance where objects remain in focus.
|
Anisotropy |
Anisotropy of the lens. A value of -0.5 simulates the depth of field of an anamorphic lens.
|
Note
The depth of field effect for the RTX - Real-Time mode is an approximation of the one achieved with the RTX - Interactive mode and may not match the later. Also, Depth of Field is not supported for cameras with a cameraProjectionType set to OmniDirectionalStereo. See Camera - Lens Calibration for more details on projection types.
Motion Blur#
Setting |
Effect |
|---|---|
Motion Blur |
Enable post-processing motion blur effect
|
Blur Diameter Fraction |
The fraction of the largest screen dimension to use as the maximum motion blur diameter.
|
Exposure Time Fraction |
Exposure time fraction in frames (1.0 = one frame duration) to sample.
|
Number of Samples |
Number of samples to use in the filter. A higher number improves quality at the cost of performance.
|
FFT Bloom#
Setting |
Effect |
|---|---|
FFT Bloom |
Enables FFT bloom effect
|
Scale |
Overall intensity of the bloom effect.
|
Cutoff Point |
A cutoff color value to tune the radiance range for which Bloom will have any effect. Values below the Cutoff Point will not contribute to Bloom.
|
Cutoff Fuzziness |
If greater than 0, defines the width of a ‘fuzzy cutoff’ region around the Cutoff Point values. Instead of a sharp cutoff, a smooth transition between 0 and the original values is used.
|
Energy Constrained |
Constrains the total light energy generated by bloom.
|
Physical Settings |
Enables a more physically accurate bloom model.
|
Physical Settings |
Effect |
|---|---|
Blades |
The number of physical blades of a simulated camera diaphragm causing the bloom effect.
|
Aperture Rotation |
Rotation of the camera diaphragm.
|
Sensor Diagonal |
Diagonal of the simulated sensor.
|
Sensor Aspect Ratio |
Aspect ratio of the simulated sensor, results in the bloom effect stretching in one direction.
|
F-stop |
Increases/Decreases the sharpness of the bloom effect.
|
Focal Length (mm) |
Focal length of the lens modeled to simulate the bloom effect.
|
Non-Physical Settings |
Effect |
|---|---|
Halo Radius |
Controls the size of each RGB component of the halo flare effect.
|
Halo Flare Falloff |
Controls the falloff of each RGB component of the halo flare effect.
|
Halo Flare Weight |
Controls the intensity of the halo flare effect.
|
Anisotropic Flare Falloff X/Y |
Controls the falloff of each RGB component of the anisotropic flare effect in the X/Y direction.
|
Anisotropic Flare Weight |
Control the intensity of the anisotropic flare effect.
|
Isotropic Flare Falloff |
Controls the falloff of each RGB component of the isotropic flare effect.
|
Isotropic Flare Weight |
Control the intensity of the isotropic flare effect.
|
TV Noise & Film Grain#
Setting |
Effect |
|---|---|
TV Noise & Film Grain |
Enables a TV Noise and Film Grain effects
|
Scanlines |
Emulates a Scanline Distortion typical of old televisions.
|
|
How wide the Scanline distortion will be.
|
Scroll Bug |
Emulates sliding typical on old televisions.
|
Vignetting |
Blurred darkening around the screen edges.
|
|
Controls the size of vignette region.
|
|
Controls the intensity of the vignette.
|
|
Enables a slight flicker effect on the vignette.
|
Ghost Flickering |
Introduces a blurred flicker to help emulate an old television.
|
Wavy Distortion |
Introduces a Random Wave Flicker to emulate an old television.
|
Vertical Lines |
Introduces random vertical lines to emulate an old television.
|
Random Splotches |
Introduces random splotches typical of old dirty television.
|
Film Grain |
Enables a film grain effect to emulate the graininess in high speed (ISO) film.
|
|
The intensity of the film grain effect.
|
|
The amount of color offset each grain will be allowed to use.
|
|
The amount of offset in luminance each grain will be allowed to use.
|
|
The size of the film grains.
|
ReShade#
ReShade post-processing are supported. A collection of freely ReShade shaders available online and can be downloaded from https://github.com/crosire/reshade-shaders/tree/master For more information about ReShade visit https://reshade.me/
Setting |
Effect |
|---|---|
Preset File Path |
The path to a preset.init file containing the Reshade preset to use.
|
Effect Search Directory Path |
The path to a directory containing the Reshade files that the preset can reference.
|
Texture Search Directory Path |
The path to a directory containing the Reshade texture files that the preset can reference.
|