Omniverse Materials Workflows#
The following guides provides practical examples for creating materials with NVIDIA MDL. Each section demonstrates common workflows, from basic property definition to complex layering techniques. The examples include complete code snippets and expected visual results.
Topics covered:
Basic material setup Physical property configuration Texture mapping Material layering Performance optimization
Overview#
Applying Materials#
In order to assign a material to an object, the material must be added to your stage. This can be accomplished several ways. Using drag and drop, you can drag your material to an empty part of the Viewport or to the Stage panel. If you wish to use one of the Omniverse materials, you can use the Create menu.
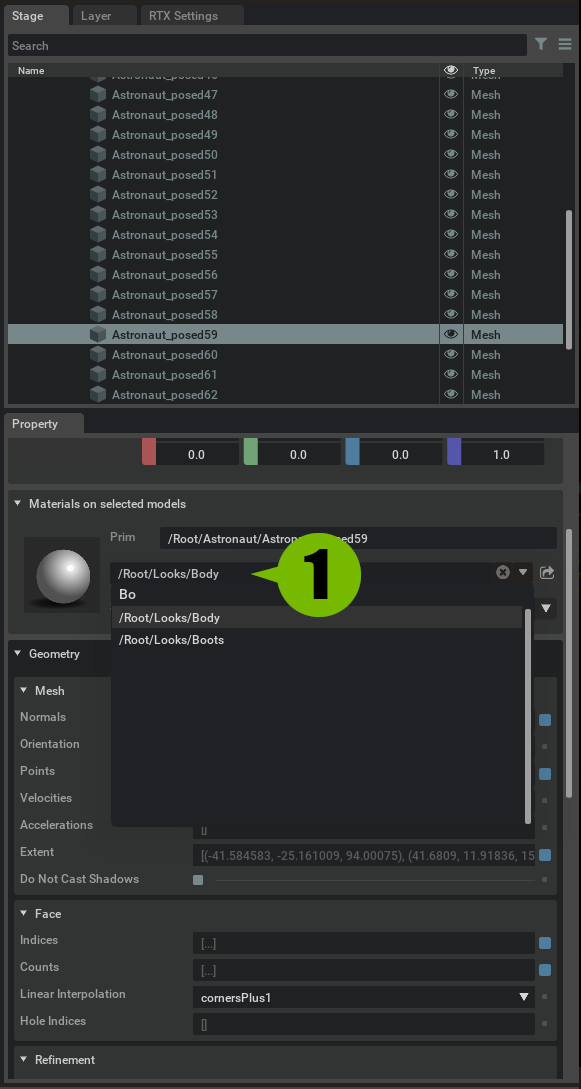
Once a material is in the scene, the material can be assigned to any location. With your object or scene location selected, you can assign the material by going to the Details panel and selecting your material in the dropdown under Materials on selected models. If a scene has multiple materials, a searchable list box will open so you can select the appropriate material to assign. You can scroll through the list of materials or type the name or partial name of your material.
Apply a Material to a Mesh#
Select the mesh you want to apply a material to.
In the Details panel look for the heading Materials on selected models
In the dropdown under that heading select the material you wish to apply.
At this point your material is applied to the selected mesh and adjustment of the material inputs should present themselves as changes occur.
Search Material List#
Sometimes the dropdown list can become exhaustive in length, a search widget found at the top of the dropdown can help alleviate this issue.
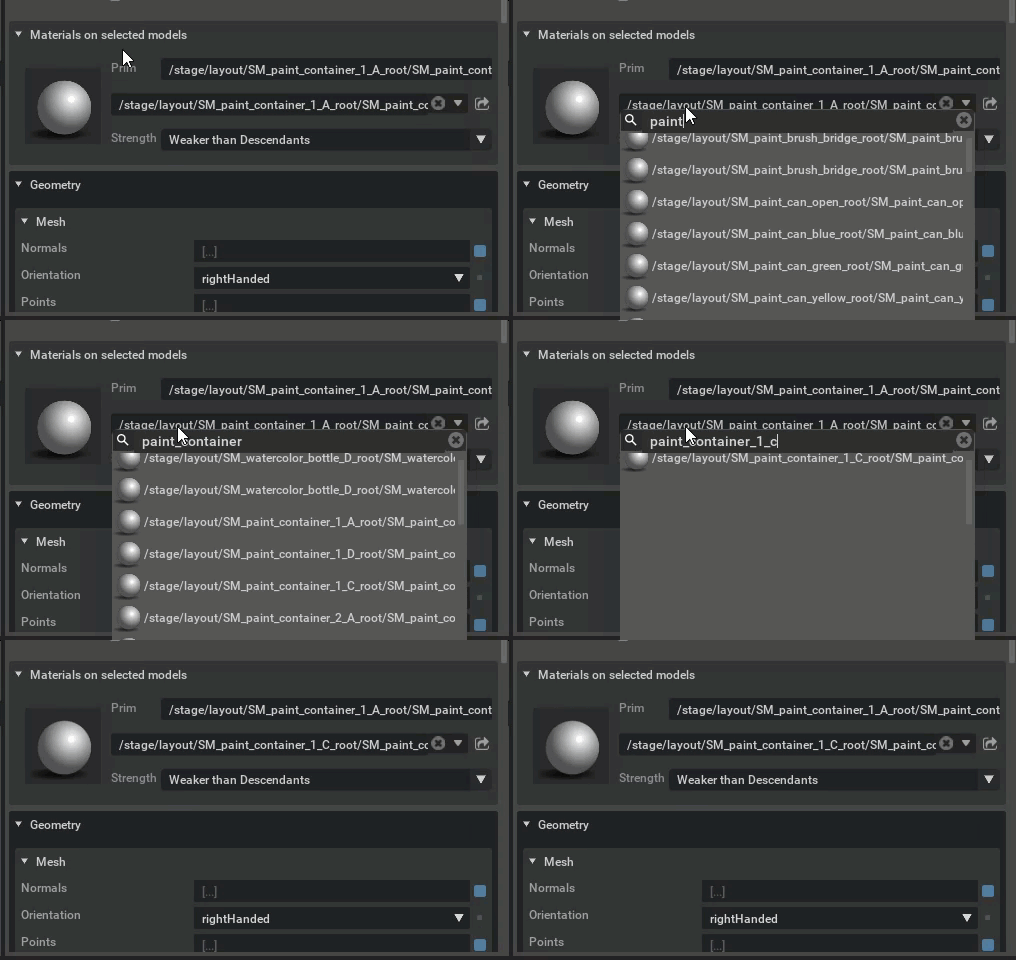
While the menu is dropped down:
Select the Search bar at the top of the drop-down panel.
Type a character string in the Material Name field.
Select the appropriate material.
Drag and Drop Assignment#
In Omniverse USD Composer, materials can be dragged from the stage and dropped onto assets or prims based on the selection mode you are in.
If you have Object Selection Mode enabled, dragging a material from the stage onto an object will replace the material of ALL prims that make up the selected asset.
If you have Prim Selection Mode enabled, dragging a material from the stage to an object will replace the prim where the material is dropped.
Creating Materials#
Materials can be easily created in Omniverse USD Composer using the Create > Materials menu.
Creating materials can be done in 2 common ways:
Create a material on a mesh : This method is used to create a material in your scene AND apply it to selected mesh(es).
Create a material in a scene : This method simply creates a material inside the scene’s look folder but does NOT apply it to a mesh.
Note
If your model does not have UVs, you will need to enable World Space UV to display textures.
Create Material on Mesh#
For a quick easy way to apply a new material to your mesh you can create and automatically apply the material by simply selecting a mesh or several meshes before creating a new material.
Select the mesh you want to apply a material to.
Select Create > Material > Omni PBR, Omni Glass, etc.
In the Status Bar (bottom right of screen), you will likely see a 0% bar for a few moments. Wait until it completes and disappears to confirm it is fully loaded.
In the Stage window, Select the Looks folder and Find the shader you selected (ie: Omni PBR). Feel free to rename this as desired.
If the material is fully loaded, you should see inputs for the material in the Details panel.
At this point your material is applied to the selected mesh and adjustment of the inputs should present themselves as changes occur.
Create Material in Scene#
There are times when you may want to pre-build a series of MDLs and you do not want to select the meshes each time as a needed step. In this case, you can simply create the materials first, fill them in, and later apply the materials to selected objects.
Deselect all by left clicking a blank area in either the Stage or the Viewport.
Select Create > Material > Omni PBR
In the Status Bar (bottom right of screen), you will likely see a 0% bar for a few moments. Wait until it completes and disappears to confirm it is fully loaded.
In the Stage window, Select the Looks folder and Find the shader you selected (ie: Omni PBR). Feel free to rename this as desired.
If the material is fully loaded, you should see inputs for the material in the Details panel.
You can now fill in the materials input properties as needed to set it to your desired materials look however it has not been applied yet and will not display.
Material Selection#
As materials are an intricate part of the visual process, Omniverse USD Composer has several selection methods for working with Materials.
Looks#
Whenever a material is added to a scene, it will be stored in a Looks directory in your Stage. This is where all material references are shown and managed.
Note
When a USD is nested, it will carry its Looks folder with it. Therefore it is possible to have several looks folders in a stage. One looks folder for each imported USD is possible.
Scene Material Quick Linking#

With an asset selected, Click the arrow to right of material input to “jump” to the bound material.
Tip
You can click the shader ball in lieu of the Arrow for quicker navigation!
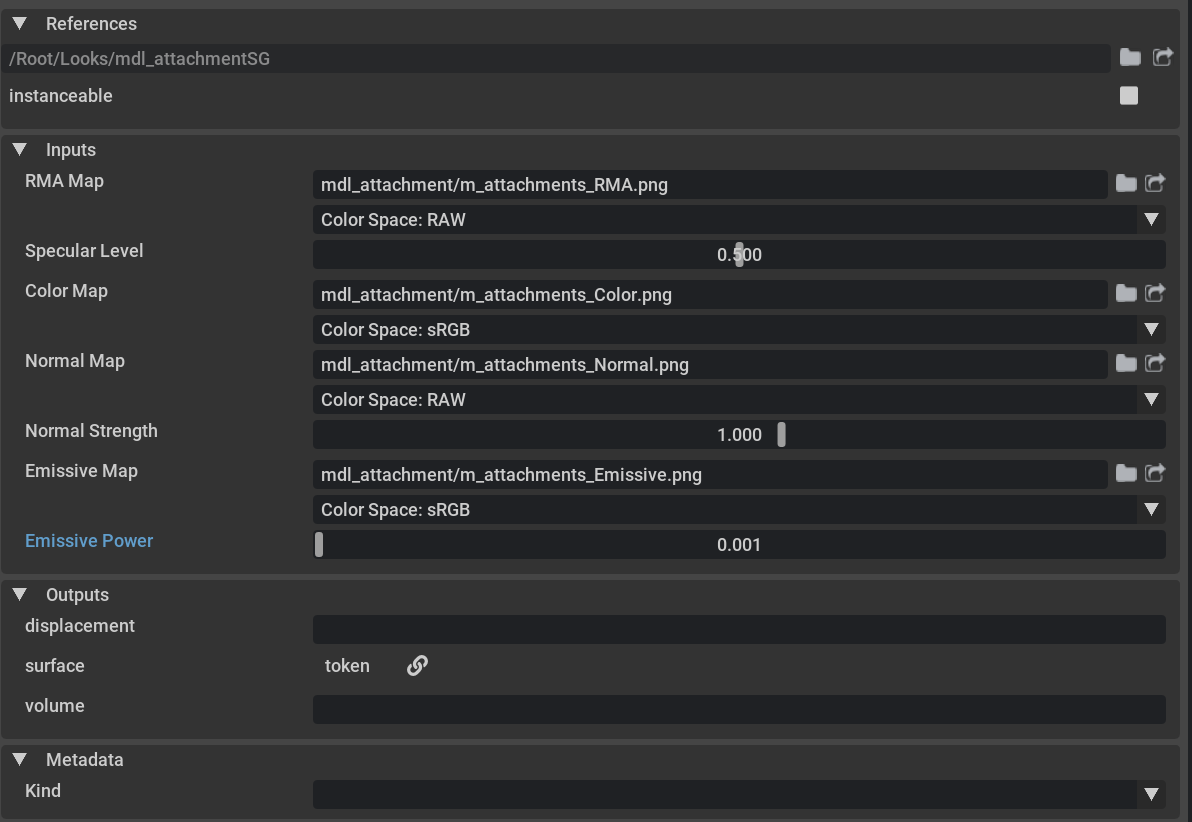
Users now can easily edit the attached material.
Finding Objects attached to a Material#
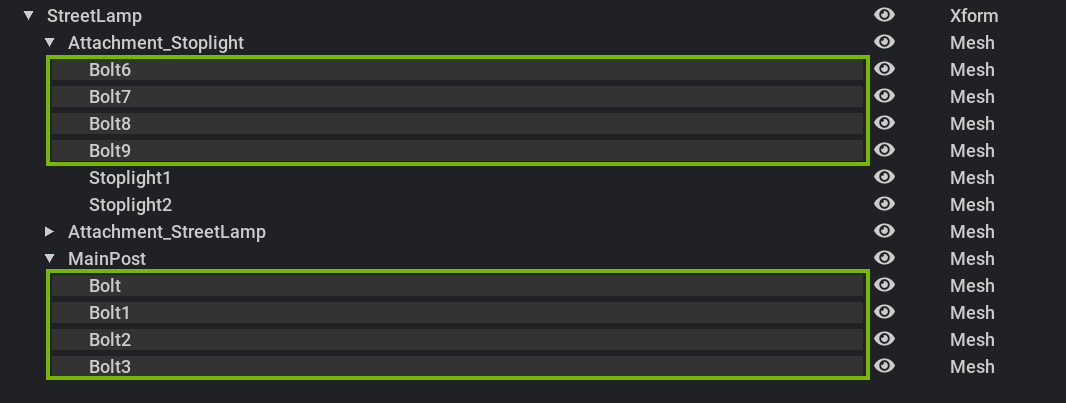
Selecting all objects bound with a specific material in your current scene can be quite useful at times.
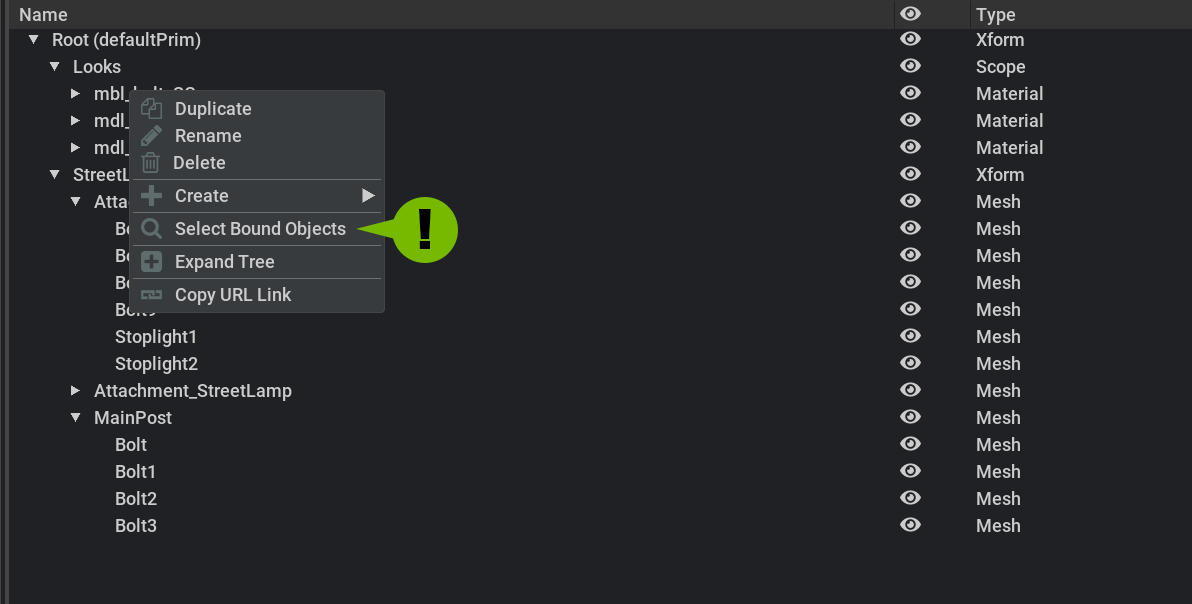
In the Stage, Right Click on a material and choose Select Bound Objects.
Material Swap#
Allows you quickly swap one material for another while maintaining any USD connections for the target material.

Choose a Target Material#
To use the material swap tool, simply select a material you wish to replace in your content browser, then while highlighted, select User Selected. The Material to replace input window should now reflect the path to the material you expect to replace.
Choose a Source Material#
Next, choose a material in your browser you wish to use to replace. Click User Selected again to populate the input with the path to the source material.
Swap#
Once swapped, the target material should now have the same properties and settings as the source material. Any assets using this material will be updated.
UDIM Support#
Overview#
Omniverse USD Composer has UDIM support done in a way that is both convenient and powerful. By using the standard naming conventions used in a typical UDIM scenario, you simply replace the UDIM number with <UDIM> on ANY texture file input to invoke UDIM support.
Using UDIMs in Omniverse USD Composer (Video)#
Drag and Drop assignment of UDIM sequences#
By default, file sequences of UDIM textures are displayed in the Content Browser as discreet file names and thumbnails. UDIM sequences can be displayed compactly through the Options dialog. Enabling Display UDIM Sequence displays the sequence as a single file name with the UDIM tile numbers replaced with the UDIM token. Dragging and dropping the sequence to a texture parameter on a material inserts the sequence into the material.

To open Options, click the 3 lines in the upper right of the Content Browser. Display UDIM Sequence is persistant and will save with your configuration.
Manually replacing the UDIM frame number with the UDIM token is still applicable to any MDL parameter texture input.
Example UDIM Sequence#
If you have a sequence of textures slated for use in a UDIM prepared mesh like this…
my_texture.1001.png
my_texture.1002.png
my_texture.1003.png
Simply replace the number with <UDIM> in any MDL texture input dialogue.
my_texture.<UDIM>.png
Note
Using UDIMs instead of multiple material assignments can benefit larger scenes/meshes by easing the assignment of a multitude of textures by its naturally automated process.
Primvars#
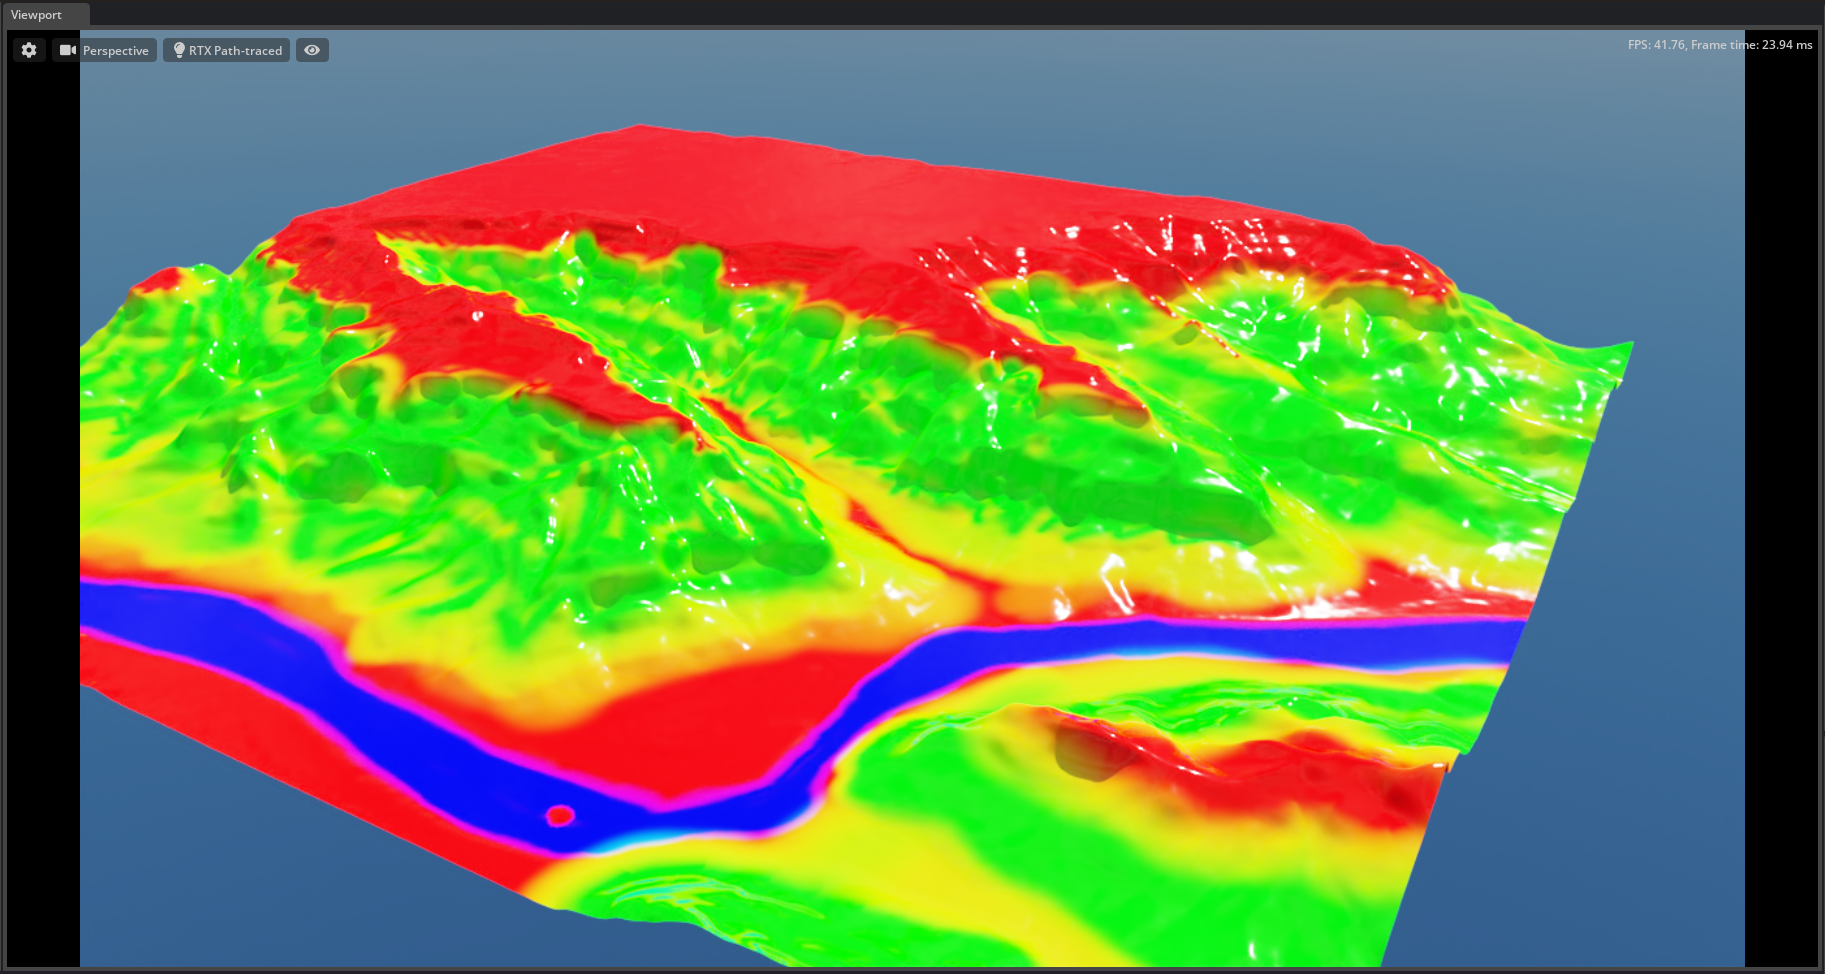
Primvars are additional data attached to a geometric object. The data is defined as a USD token and value pair and can be accessed using an MDL data_lookup node in the Material Editor. The data can then be used to drive shading parameters for rendering.
Expanding Your Library#
You can expand your library of MDLs by writing your own custom MDLs and importing them. You can also use Substance Designer to develop MDLs using a visual interface.
For more information on Writing your Own MDLs
NVIDIA MDL Language Specification
For more information on Substance Designer and MDL
MDL in Substance (Video)#
These videos show how to begin your journey into creating MDL files in Substance Designer. Once created they can then be used in Omniverse USD Composer by copying the created MDL into your Omniverse Server.
Part 1
Part 2