


Import Data#
Kit-CAE imports native scientific data as lightweight payloads. The source file remains the source of truth and its arrays are read when a visualization or analysis requests them.
Import a Dataset#
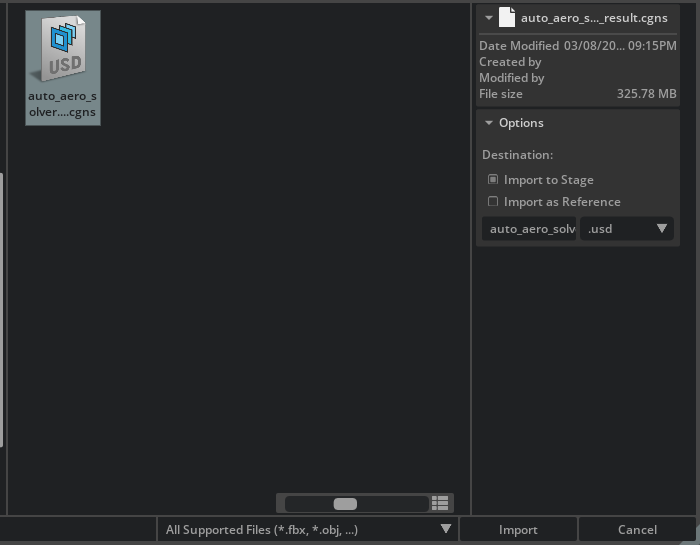
Select File > Import and browse to the data file.
Select the file and enable Import to Stage.
Select Import.
The importer adds a root prim to the current stage. Data is not visible until you create a source or visualization operator.
Supported Formats#
CGNS (
.cgns): Structured and unstructured meshes with their field data.EDEM (
.dem): Particle simulation data.EnSight Gold (
.case,.encas): Mesh and field data, including time-varying and polyhedral results.Eclipse reservoir (
.egrid,.grdecl,.data,.init,.unrst): Reservoir grids and result properties.NanoVDB (
.nvdb): Sparse volume data.NumPy (
.npz,.npy): Point clouds and arrays from Python or AI workflows.OpenFOAM (
.foam): OpenFOAM cases without an intermediate conversion.VTK (
.vtk,.vti,.vtr,.vts,.vtp,.vtu): Structured and unstructured VTK datasets.
These readers are available in the standard omni.cae.kit app. VTK files do not require a separate app variant.
Time Series#
Kit-CAE 3.0 moves time-series controls from the import dialog to the imported payload’s Properties panel. Select the imported root prim and expand CAE File Format Time.
Choose Source according to the meaning of the values stored in the file. Use Scale, rather than another source, to control how those values map to the timeline. Kit-CAE maps each sample with mapped seconds = source value * Scale + Offset. The stage converts those seconds to timeline time codes using its Time Codes Per Second value. With the default value of 60, one second spans 60 timeline time codes.
TimeStep: Choose this for an ordered series without usable physical-time or iteration metadata, or when saved samples have a known fixed interval. It uses the saved-sample index
0, 1, 2, ..., not the solver’s internal step number. Set Scale to the seconds between saved samples, or to a convenient uniform spacing when that interval is unknown. A Scale of0.002maps the first three samples to seconds0, 0.002, 0.004, or time codes0, 0.12, 0.24at 60 time codes per second.TimeValue: Choose this when the file stores physical simulation times. It preserves irregular spacing between samples. Set Scale to convert the stored unit to seconds:
1for seconds,0.001for milliseconds, or86400for days. Stored values0, 0.5, 1.0in seconds map to time codes0, 30, 60when Scale is1.IterationValue: Choose this when the file stores solver iteration counters and iteration-based placement is meaningful, typically for steady-state or pseudo-time results. Iteration counts are not physical time and may skip values. Set Scale to seconds per iteration when that relationship is known, or choose a convenient spacing for an iteration-derived timeline. Iterations
0, 100, 200with a Scale of0.001map to time codes0, 6, 12.
For every source, Offset shifts the complete sequence in seconds without changing its spacing. At 60 time codes per second, an Offset of 10 adds 600 time codes to every sample. Changing Source does not create missing metadata. When a file does not provide the selected physical-time or iteration values, Kit-CAE falls back to TimeStep.
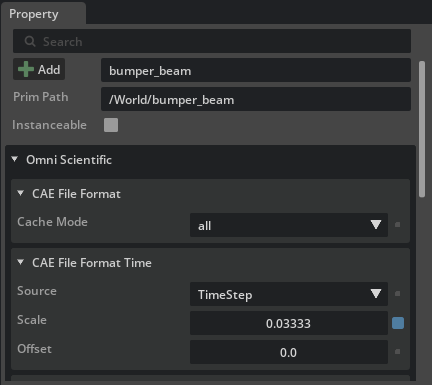
Changing these properties reloads the payload with the new mapping. For a hands-on time-series workflow, see Time-Varying Structural Analysis.
Multiple Files#
You can select several files in the import dialog. Kit-CAE creates one imported root for each file. Import related solver outputs separately when each file needs its own time mapping or stage placement.
Units and Orientation#
Kit-CAE stages use centimeters and Z-up by default. The importer does not rescale or reorient native coordinates. Transform an imported root when its source data uses different units or another up axis.
Try It: Import the Vehicle Dataset#
Use the sample downloaded in Get Started.
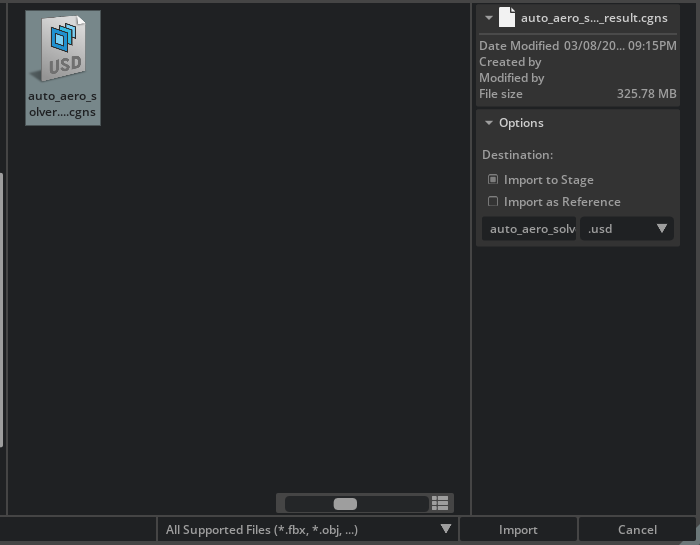
Select File > Import and open:
{path to}/kit_cae_user_guide_data/main_guide/auto_aero_solver_result.cgnsEnable Import to Stage, then select Import.
In the Stage panel, expand the new
auto_aero_solver_resultroot. LocateBase > Fluid_Domainand its surface, volume, coordinates, andFlowSolutionprims.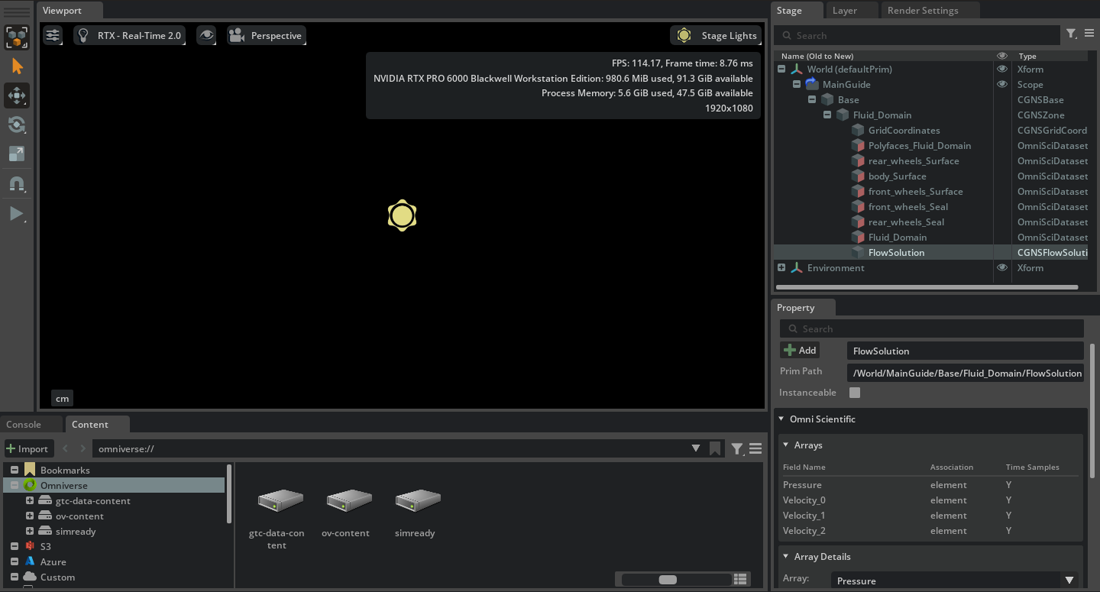
The Stage light is visible in the Viewport by default. Press Shift+L to toggle its visibility if it obscures a result.
Nothing appears in the Viewport yet. Continue to Try It: Explore the Vehicle Dataset to inspect its arrays.