Time-Varying Structural Analysis#
This example uses an explicit dynamics crash simulation of a bumper beam under impact loading to demonstrate time-varying structural data in Kit-CAE. The dataset contains 51 time steps of a deforming shell mesh with plastic strain and contact pressure fields stored in EnSight format.

Note
This example requires sample data. If you have not already downloaded it, see Examples for the download link.
Dataset#
The dataset is a bumper beam impact simulation solved with an explicit dynamics solver. The original results were converted to EnSight Gold binary format.
File |
Format |
Field |
Description |
|---|---|---|---|
|
EnSight Gold |
PlasticStrain |
Maximum plastic strain across all 5 through-thickness integration layers (element) |
|
EnSight Gold |
PlasticStrainUpper |
Plastic strain at the upper surface, integration layer 5 (element) |
|
EnSight Gold |
PlasticStrainLower |
Plastic strain at the lower surface, integration layer 1 (element) |
|
EnSight Gold |
ContactPressure |
Contact pressure at mesh nodes (node) |
Mesh: ~13,500 nodes, mixed quad4 and tria3 shell elements, deforming geometry per frame
Time: 51 time steps
Import the Dataset#
Note
This walkthrough assumes you have already built Kit-CAE. If not, see Get Started for setup instructions.
Launch Kit-CAE.
On Linux:
./repo.sh launch -n omni.cae.kit
On Windows:
repo.bat launch -n omni.cae.kit
Click File > Import and navigate to:
{path to}/kit_cae_example_data/01_time-varying-structuralSelect
bumper_beam.case. In the import options on the right side of the dialog, set Scale to 2.Setting Scale to 2 spaces each of the 51 time steps two frames apart on the timeline (102 frames total). This leaves room for interpolated intermediate frames, which you enable in a later section.
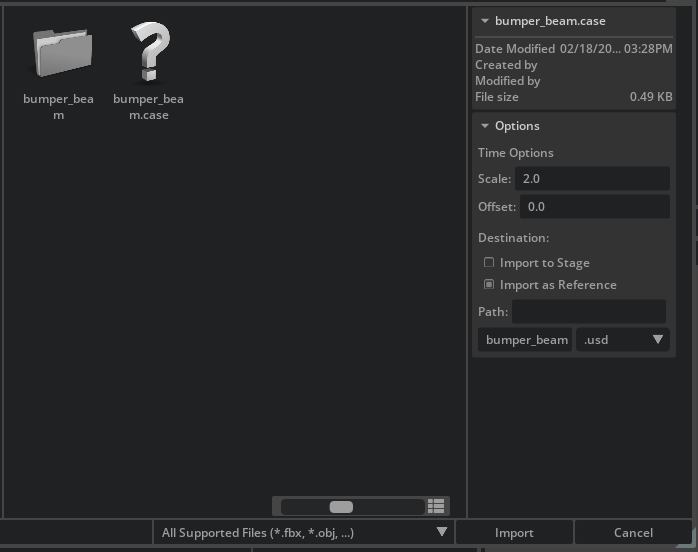
Click Import.
A new
bumper_beam_caseprim appears in the Stage panel under/World. Nothing is visible in the viewport yet.
Visualize the Deforming Mesh#
With the dataset imported, create a surface representation to see the geometry and watch it deform across time steps.
In the Stage panel, expand
bumper_beam_caseuntil you reach thebumper_beamdataset prim.Right-click
bumper_beamand select Create > CAE Operations > Faces.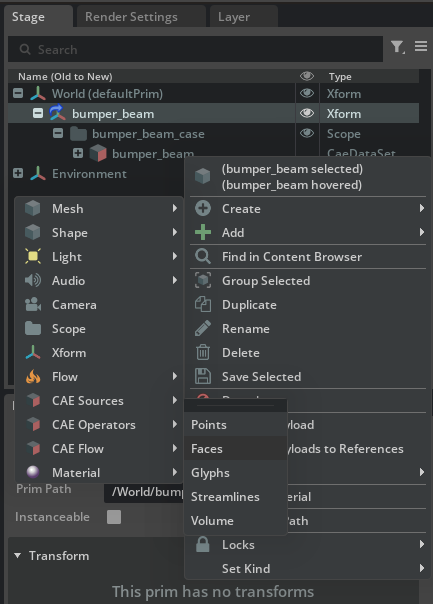
A new prim (
/World/CAE/Faces_bumper_beam) appears in the Stage panel, and a gray mesh of the bumper beam and pole collider appears in the viewport.Press the Play button on the left sidebar (or press Space) to animate the simulation. You can also drag the timeline at the bottom of the window to scrub through individual frames.

Note
The first time you play or scrub through a transient dataset, each frame must be cached before it will play back smoothly in the viewport. Scrubbing the full timeline is the most efficient way to build this cache. Subsequent playback will be smooth.
Tip
Press G to toggle the viewport grid on and off.
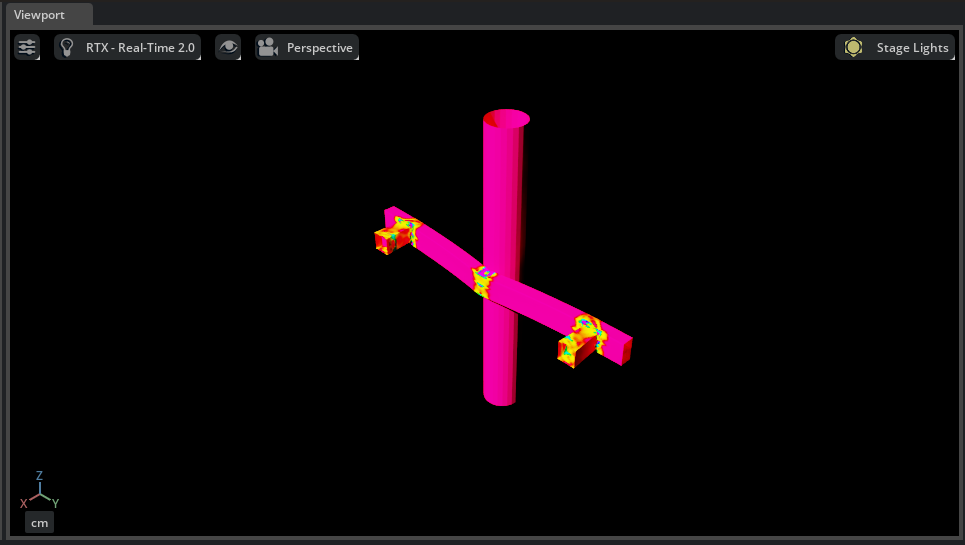
Visualize Plastic Strain#
Color the mesh by a field variable to see how strain concentrates during impact.
Select a Color Field#
Select
/World/CAE/Faces_bumper_beamin the Stage panel.In the Property panel, scroll to the CAE section. Under Colors [Field Selection], click Add Target.
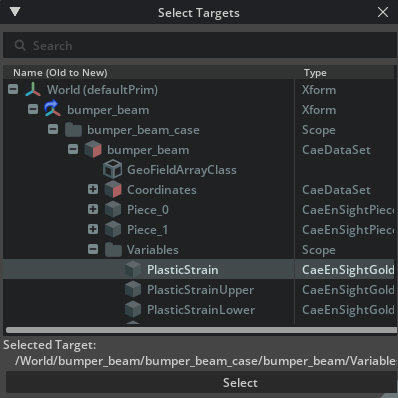
In the popup, navigate to
bumper_beam>Variables>PlasticStrainand click Select.
Scrubbing the timeline or pressing Play now displays the mesh colored by plastic strain. The default color range covers the full data extent.

Explore the Data with CAE Insights#
In the Stage panel, expand the dataset prim to
/World/bumper_beam_case/bumper_beam/Variables/PlasticStrainand select it.In the Property panel, scroll down to the Cae Insights section and click Refresh. At the first frame the beam has not yet deformed, so all strain values are zero.

Drag the timeline to the final frame, then click Refresh again.

The histogram now shows the full range of strain values. Most values are concentrated near the low end of the range. Set the minimum to 0.005 and the maximum to 0.065 to exclude zeros and focus on where strain is present.

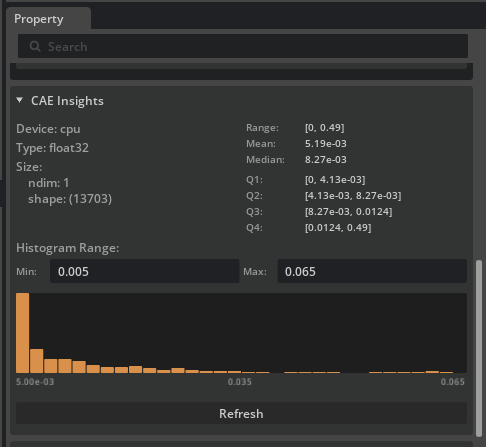
The narrowed view confirms that meaningful strain data falls roughly between 0 and 0.065. Use this as a guide when setting the color range in the next subsection.
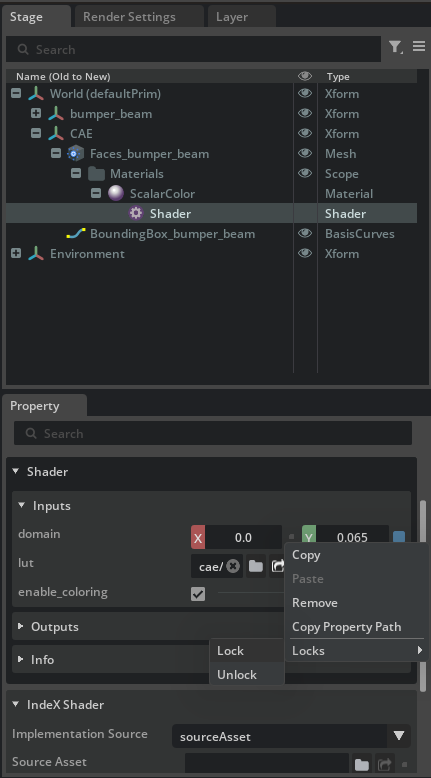
Adjust the Color Range#
The Insights panel shows that meaningful strain values fall between 0 and roughly 0.065. Narrowing the color range to this interval makes strain concentrations easier to see.
Navigate to
/World/CAE/Faces_bumper_beam>Materials>ScalarColor>Shaderin the Stage panel.In the Property panel, set the domain fields to 0 (min) and 0.065 (max).
To keep this range fixed across all time steps, right-click the domain fields, select Locks, then select Lock.
Tip
To change the colormap, click the folder icon next to the lut field in the same Shader properties.
Temporal Interpolation#
The dataset contains 51 time steps at 2 ms intervals. Because you set Scale to 2 during import, each step occupies two frames on the timeline. Enabling temporal interpolation fills in the intermediate frames, producing smoother animation at effective 1 ms resolution.
Select
/World/CAE/Faces_bumper_beamin the Stage panel.In the Property panel, click the + icon in the top-left corner. Navigate to CAE and select Operator Temporal.

Scroll to the newly added Operator [Temporal] section and check Enable Field Interpolation.

Scrub the timeline or press Play to see the smoother motion as Kit-CAE interpolates between the original time steps.