Color Mapping and Rendering#
Kit-CAE operators that produce visual output support scalar coloring through field selection, colormaps, and property locking.
Field Selection#
Each operator that supports coloring has a Colors [Field Selection] section in the Property panel. To color a visualization:
Select the operator prim in the Stage panel.
In the Property panel, scroll to Colors [Field Selection] and click Add Target.
Navigate to the desired field in the dataset and click Select.

Kit-CAE supports three coloring modes depending on the field shape:
Single-component field (shape N,1): Colors directly by the scalar value. For example pressure or temperature at each point/cell.
Three-component field (shape N,3): Colors by the computed magnitude of the vector. For example, a velocity field with three components (x, y, z) at each point/cell is colored by the overall speed.
Three separate single-component fields: Select all three individually (for example, velocity_x, velocity_y, velocity_z). Hold Ctrl or Shift to multi-select. Kit-CAE interprets them together as a vector and colors by magnitude.
This selection is explicit; you control exactly which data drives the visualization.
Colormaps#
Kit-CAE includes several built-in colormaps: afmhot, cividis, gist_gray, and gist_rainbow (default). The location of the colormap and range settings depends on the operator type:
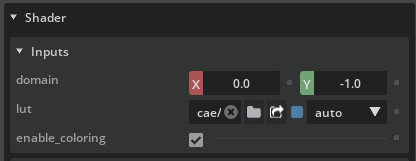
Faces, Streamlines, Points, Glyphs: Expand the operator prim in the Stage panel and navigate to Materials > ScalarColor > Shader. Set the domain fields to control the color range and use the lut field to select a different colormap.
Volume, Slice: Expand the operator prim and navigate to Material > Colormap. The color range and transfer function are configured here.

Color Map Range Behavior#
For time-varying data where field values change across time steps, the color map range can behave in different ways:
Clamp: Lock the range to the current values
Grow: Expand the range to include new values as time progresses
Do nothing: Leave the range unchanged
This is useful for animations where you want a stable color scale across all time steps. To manually specify ranges, go to the colormap and set the domain values directly.
Lock Mechanism#
Operator re-execution can reset property values (such as the color range) to auto-computed defaults. The lock mechanism prevents this:
Set the property to the desired value.
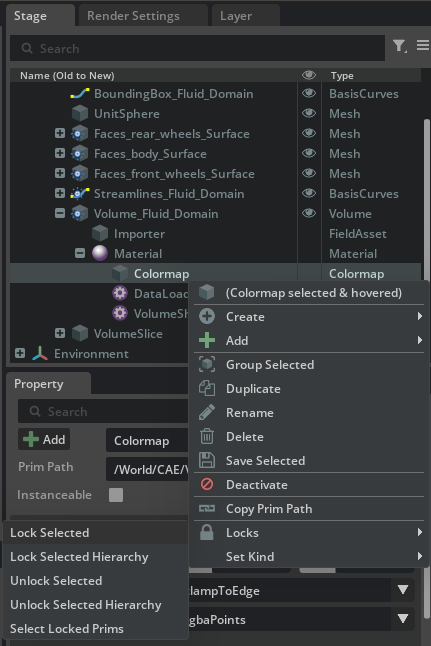
Right-click the property field, select Locks, then select Lock.
The locked value persists through operator re-execution.
To allow automatic updates again, right-click and select Locks > Unlock.
Shader Parameters#
Volume rendering and other operators use MDL shaders with parameters controlled through a separate API schema. This provides explicit control over rendering behavior. If a custom shader is applied, its properties may be named differently from the defaults.
For most use cases, the default shader parameters work well. Advanced users can explore the Raw Properties view in the Properties panel to see all shader parameters.

Try It: Tune the Color Mapping#
In the previous Try It you created Faces, Streamlines, a Volume, and a Volume Slice on the vehicle dataset. Now set colors and adjust ranges on each one.
Volume#
Hide
/World/CAE/Streamlines_Fluid_Domain,/World/CAE/VolumeSlice, and/World/CAE/UnitSphereby clicking the eye icon next to each prim in the Stage panel. Leave only the Volume and Faces visible.In the Stage panel, expand
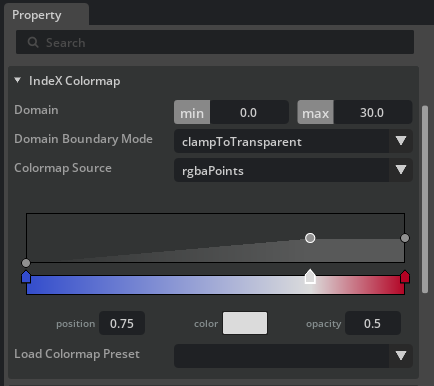
/World/CAE/Volume_Fluid_Domainand navigate to Material > Colormap.Set the color range to 0 (min) and 30 (max).
Set Domain Boundary Mode to clampToTransparent. This makes values outside the range fully transparent, keeping the visualization focused on the region of interest.
Adjust the transparency curve to control which values are opaque and which fade out.

Lock the Colormap by right-clicking the fields, selecting Locks, then Lock. This prevents future recomputes from resetting your settings.
Once you are satisfied with the volume coloring, hide the Volume operator.
Volume Slice#
Optionally hide
/World/CAE/Volume_Fluid_Domainto focus on the slice. Show/World/CAE/VolumeSliceby clicking its eye icon.Select the slice plane prim under the Volume Slice operator. Use the transform gizmo to position the plane through the vehicle.
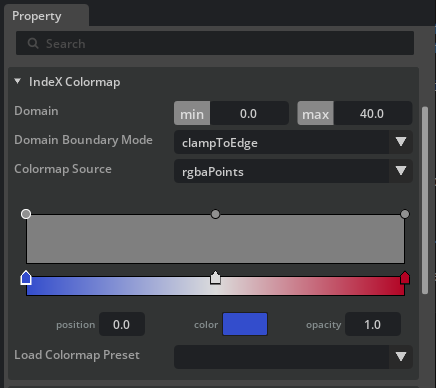
In the Stage panel, expand
/World/CAE/VolumeSliceand navigate to Material > Colormap.Set the color range to 0 (min) and 40 (max). Set Domain Boundary Mode to clampToEdge.

Tip
Translate the slice plane back and forth along an axis to see how the field values change across the domain.
Streamlines#
Hide all operators except
/World/CAE/Streamlines_Fluid_Domainand/World/CAE/UnitSphere. Show the Faces operators as well so you can see the vehicle body for context.Select
/World/CAE/Streamlines_Fluid_Domain. In the Property panel, scroll to Colors [Field Selection] and click Add Target. SelectPressurefromFlowSolutionto color by pressure, or shift-selectVelocity_0,Velocity_1, andVelocity_2to color by velocity magnitude.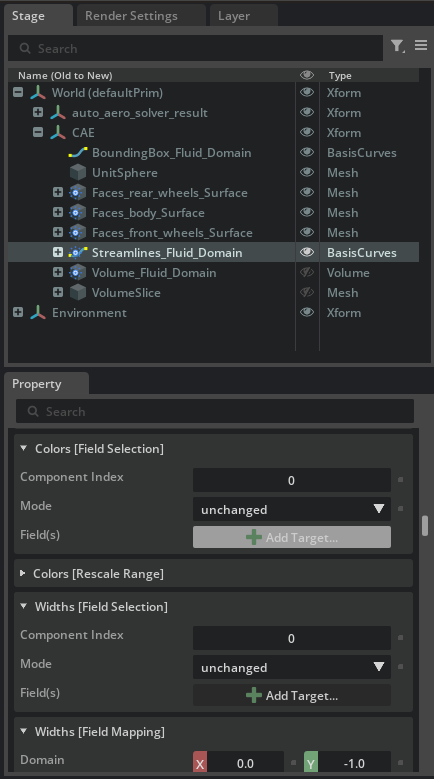
Expand
Streamlines_Fluid_Domainin the Stage panel and navigate to Materials > ScalarColor > Shader. Adjust the domain fields to set a meaningful color range. To try a different colormap, click the folder icon next to the lut field and browse the available options.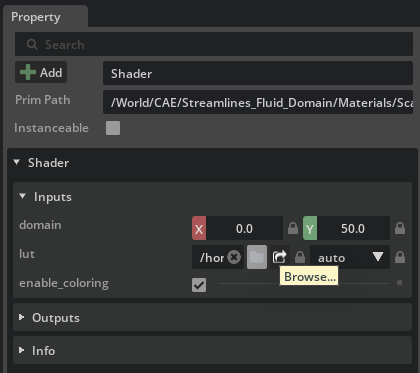
Lock the domain fields by right-clicking them, selecting Locks, then Lock. Streamlines recalculate every time you move the sphere; without locking, the color range resets on each update.
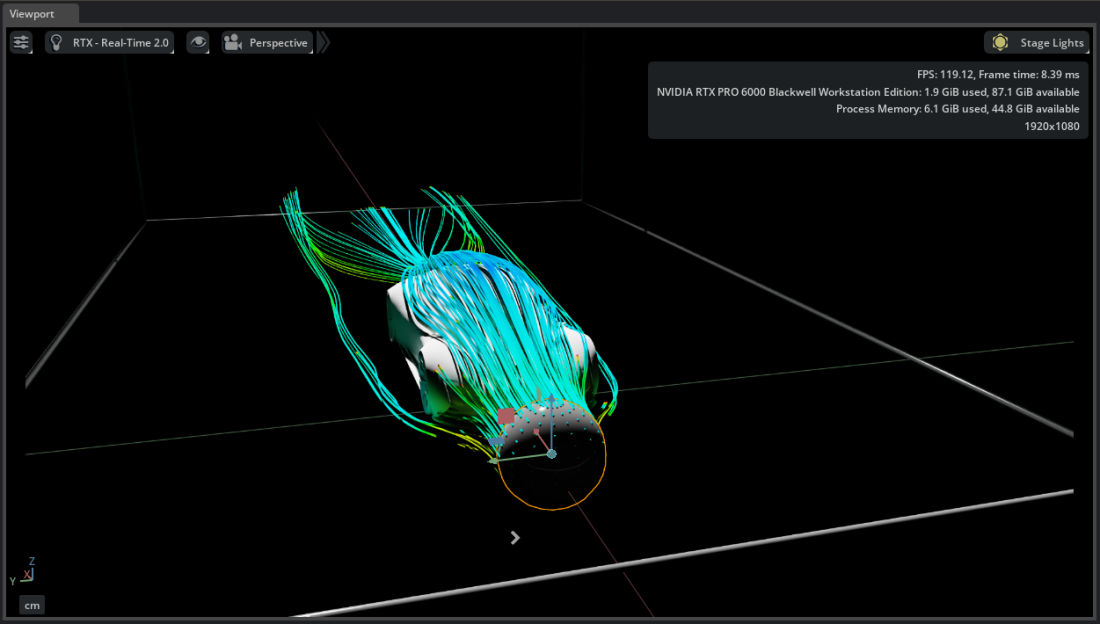
Tip
Select the UnitSphere and move it to a different position. The streamlines recompute from the new location, and the coloring updates accordingly. The streamlines follow the sphere; do not move the streamlines prim itself.