Part One: Review Your End Goal#
In Part One of this tutorial, you open a fully-implemented version of what you’re going to build. This will provide a road map for what you’re going to do in upcoming parts.
Load the OmniGraph Extensions#
Before you start, you must load the OmniGraph Extensions into Omniverse USD Composer.
Load the Action Graph Bundle#
First, load the Action Graph Bundle Extension into Omniverse USD Composer:
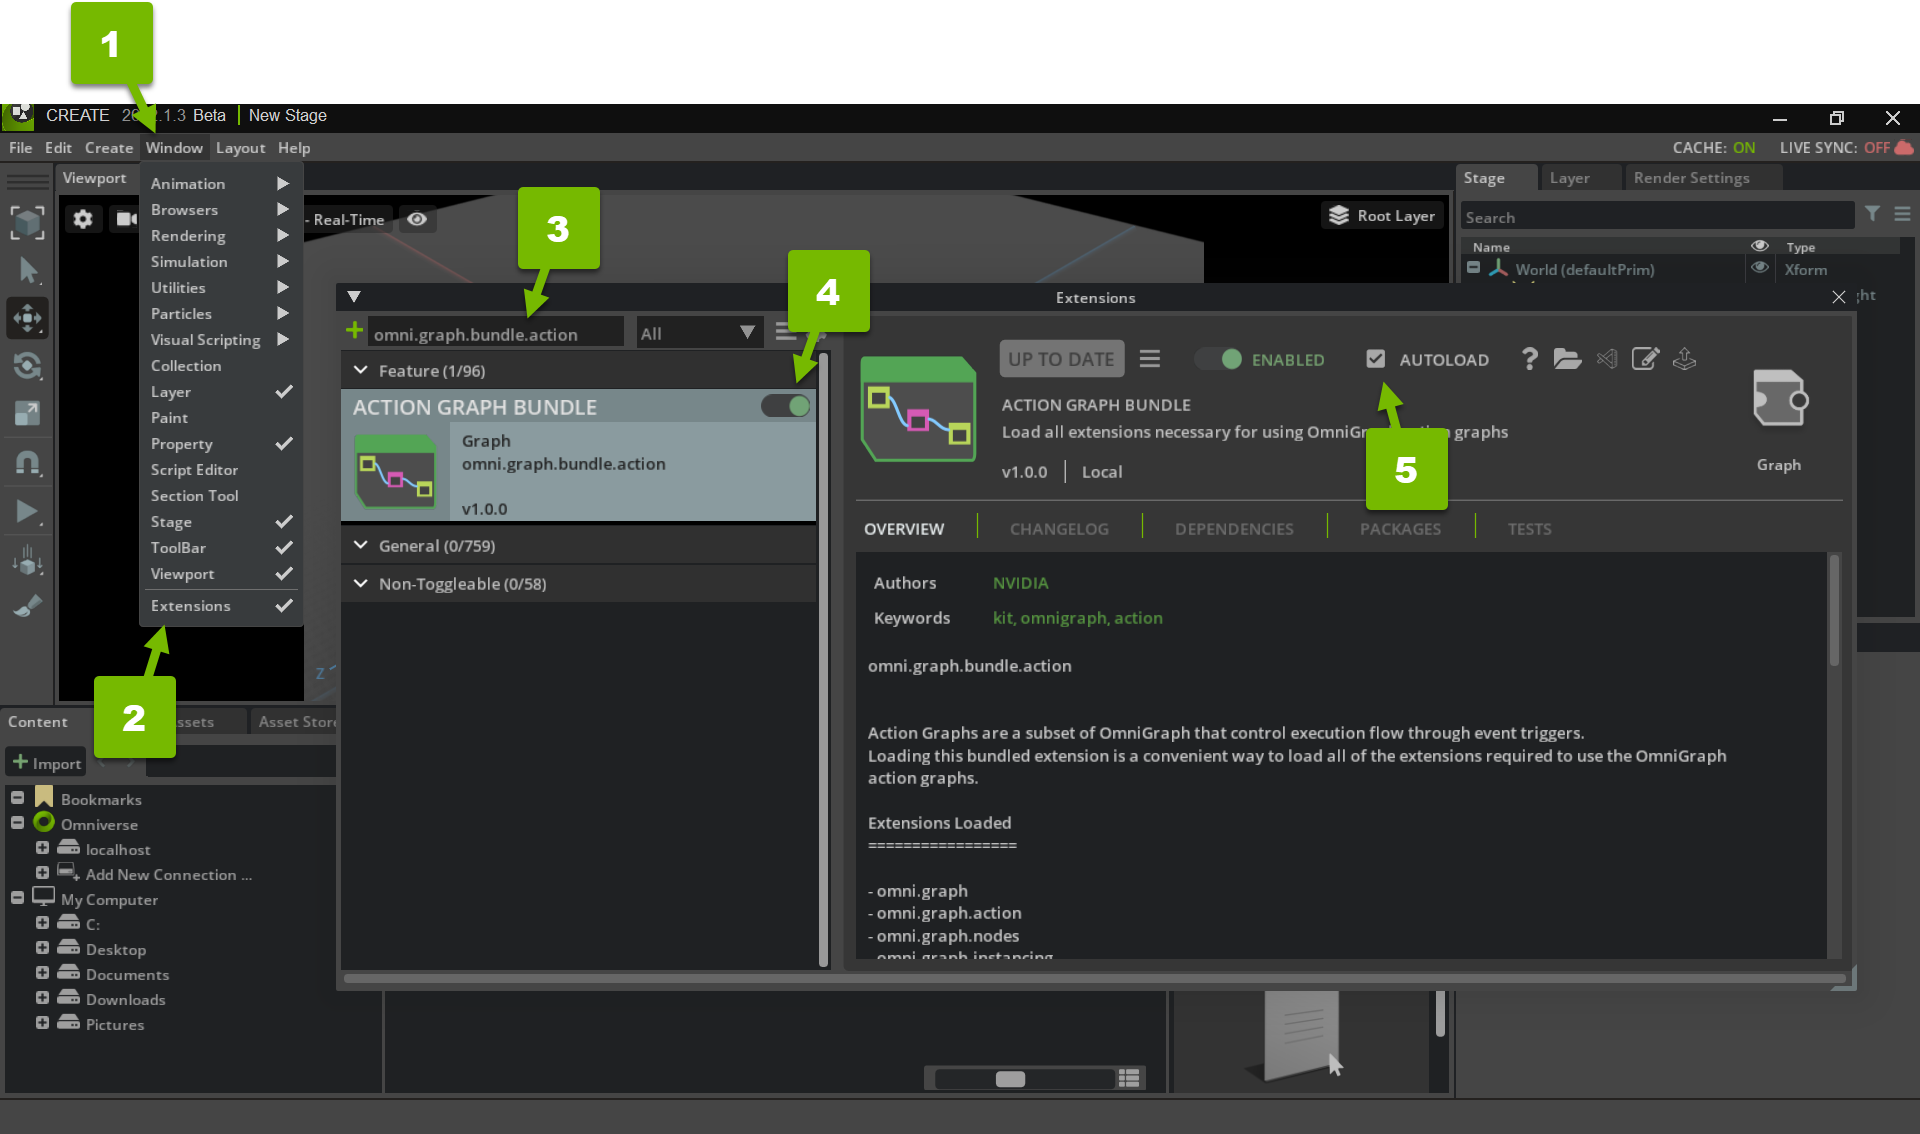
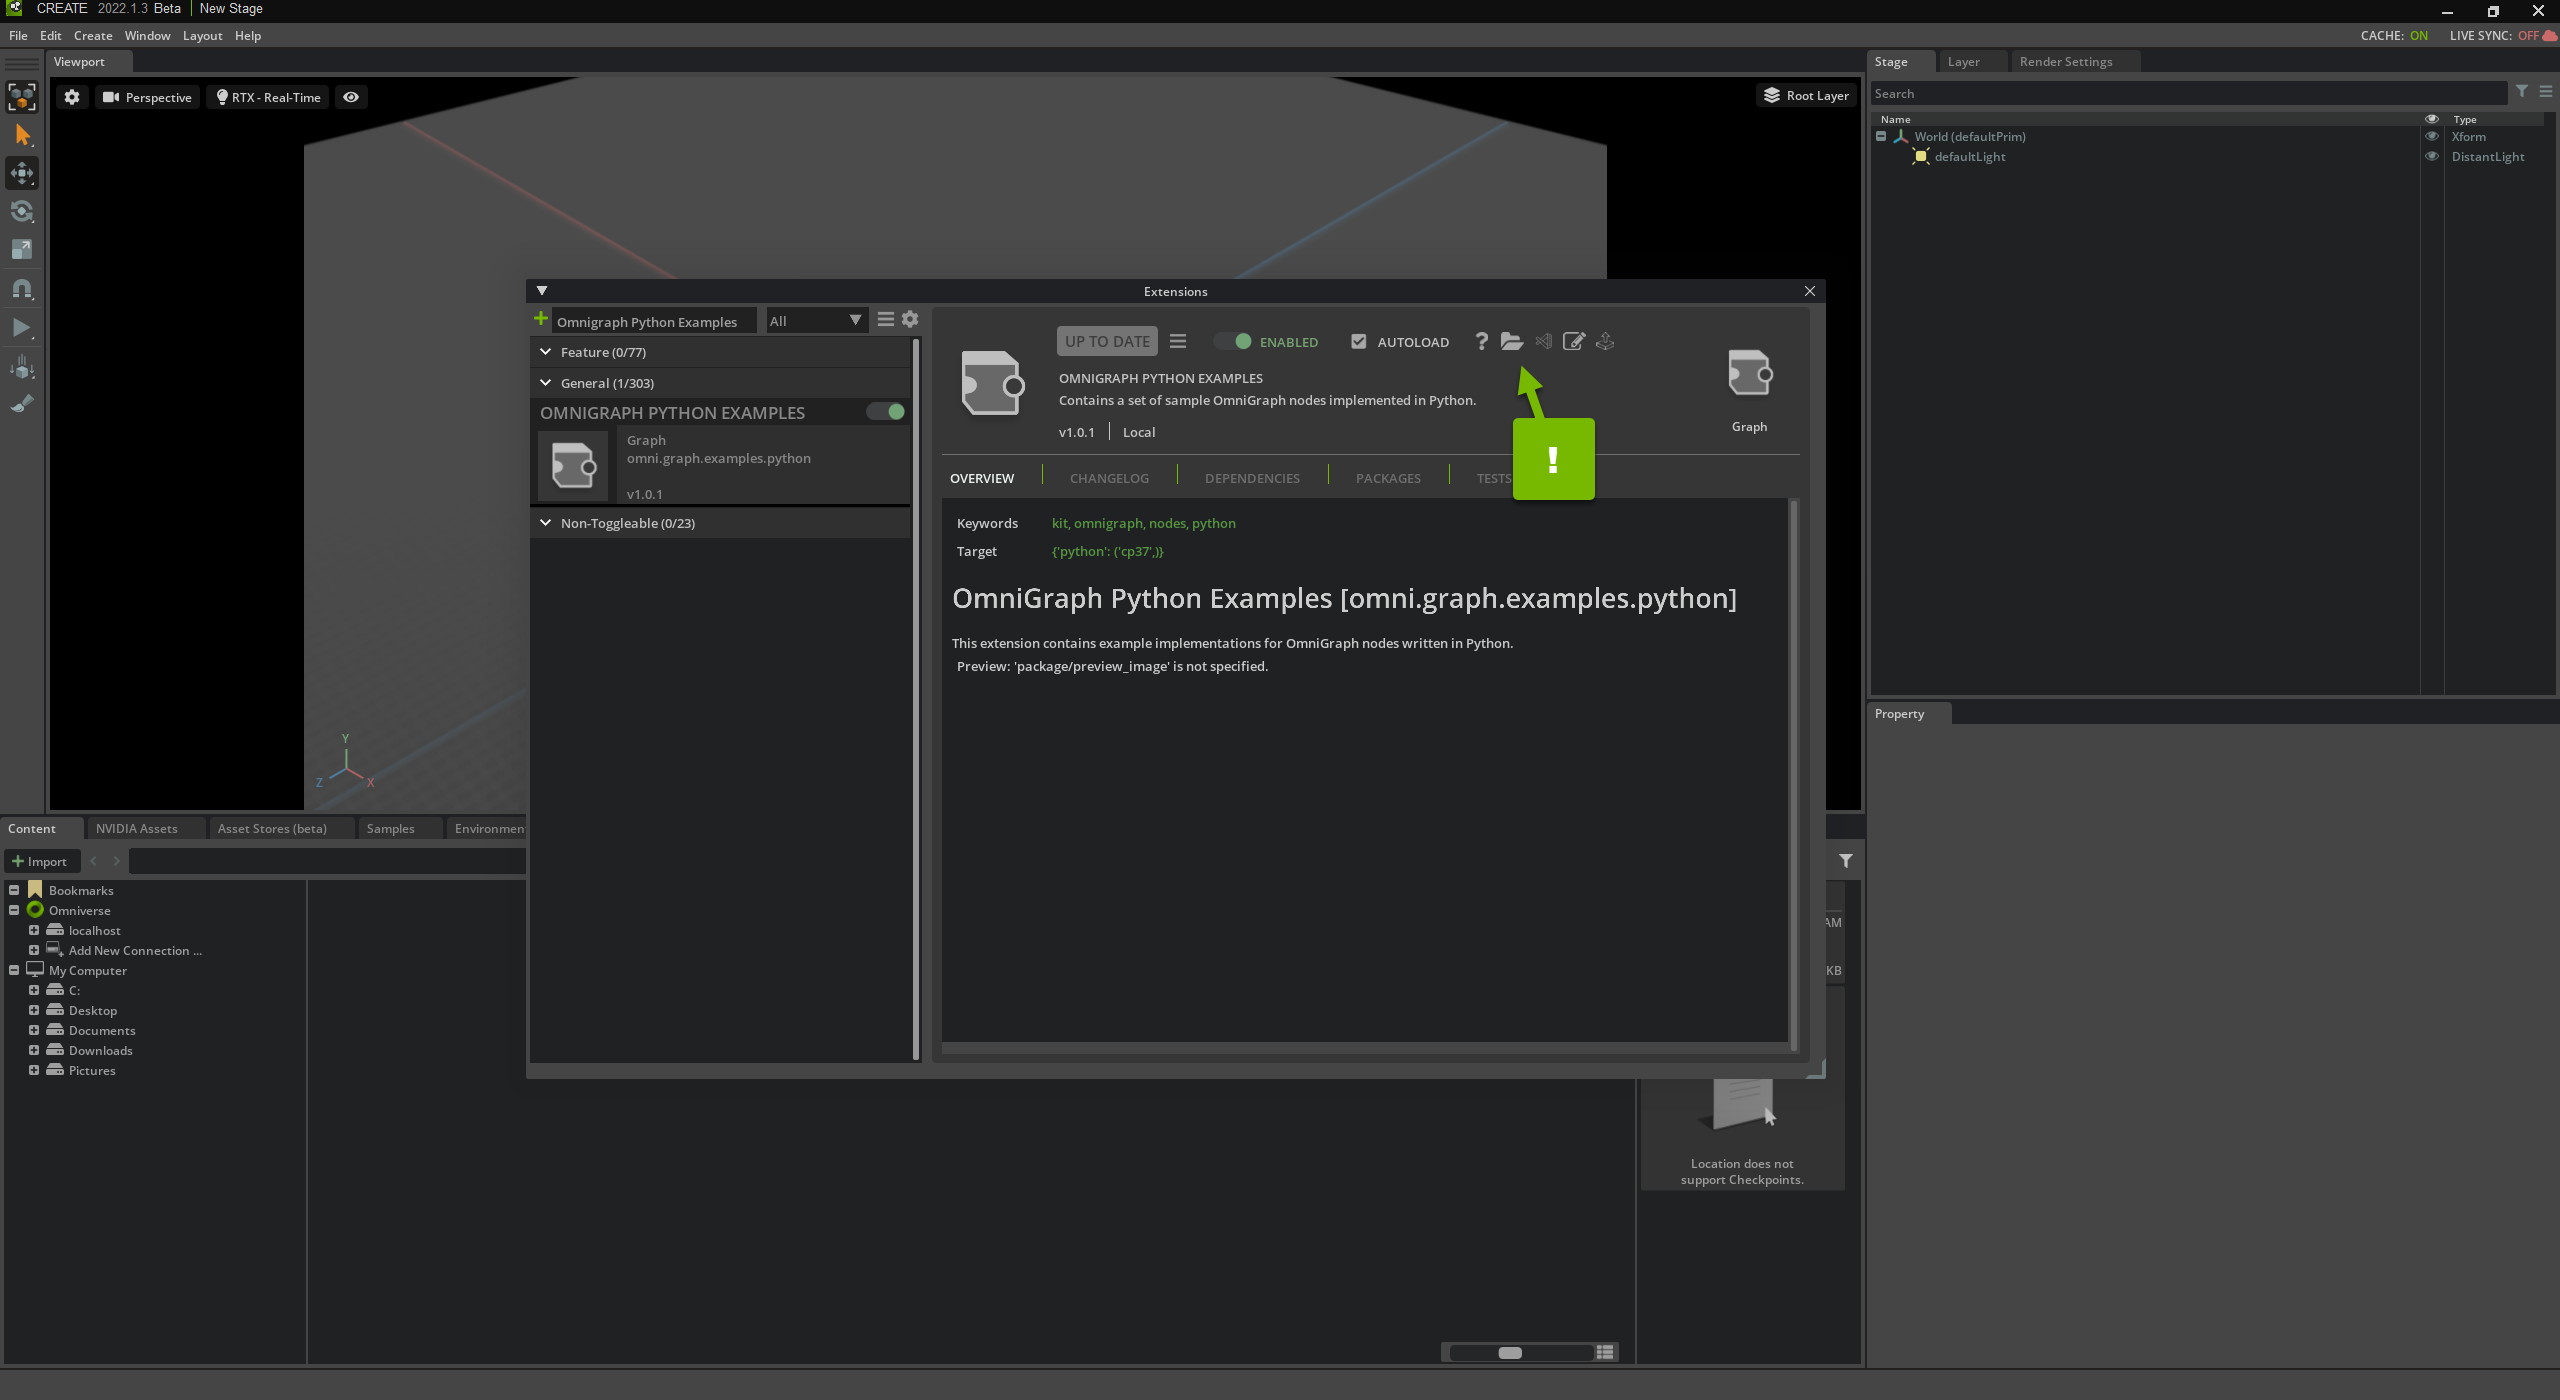
Load the Python Examples Extension#
Next, load the OmniGraph Python Examples Extension:

This Extension contains OmniGraph nodes built with our Python API. Later in this tutorial, you learn how to create custom nodes, like these.
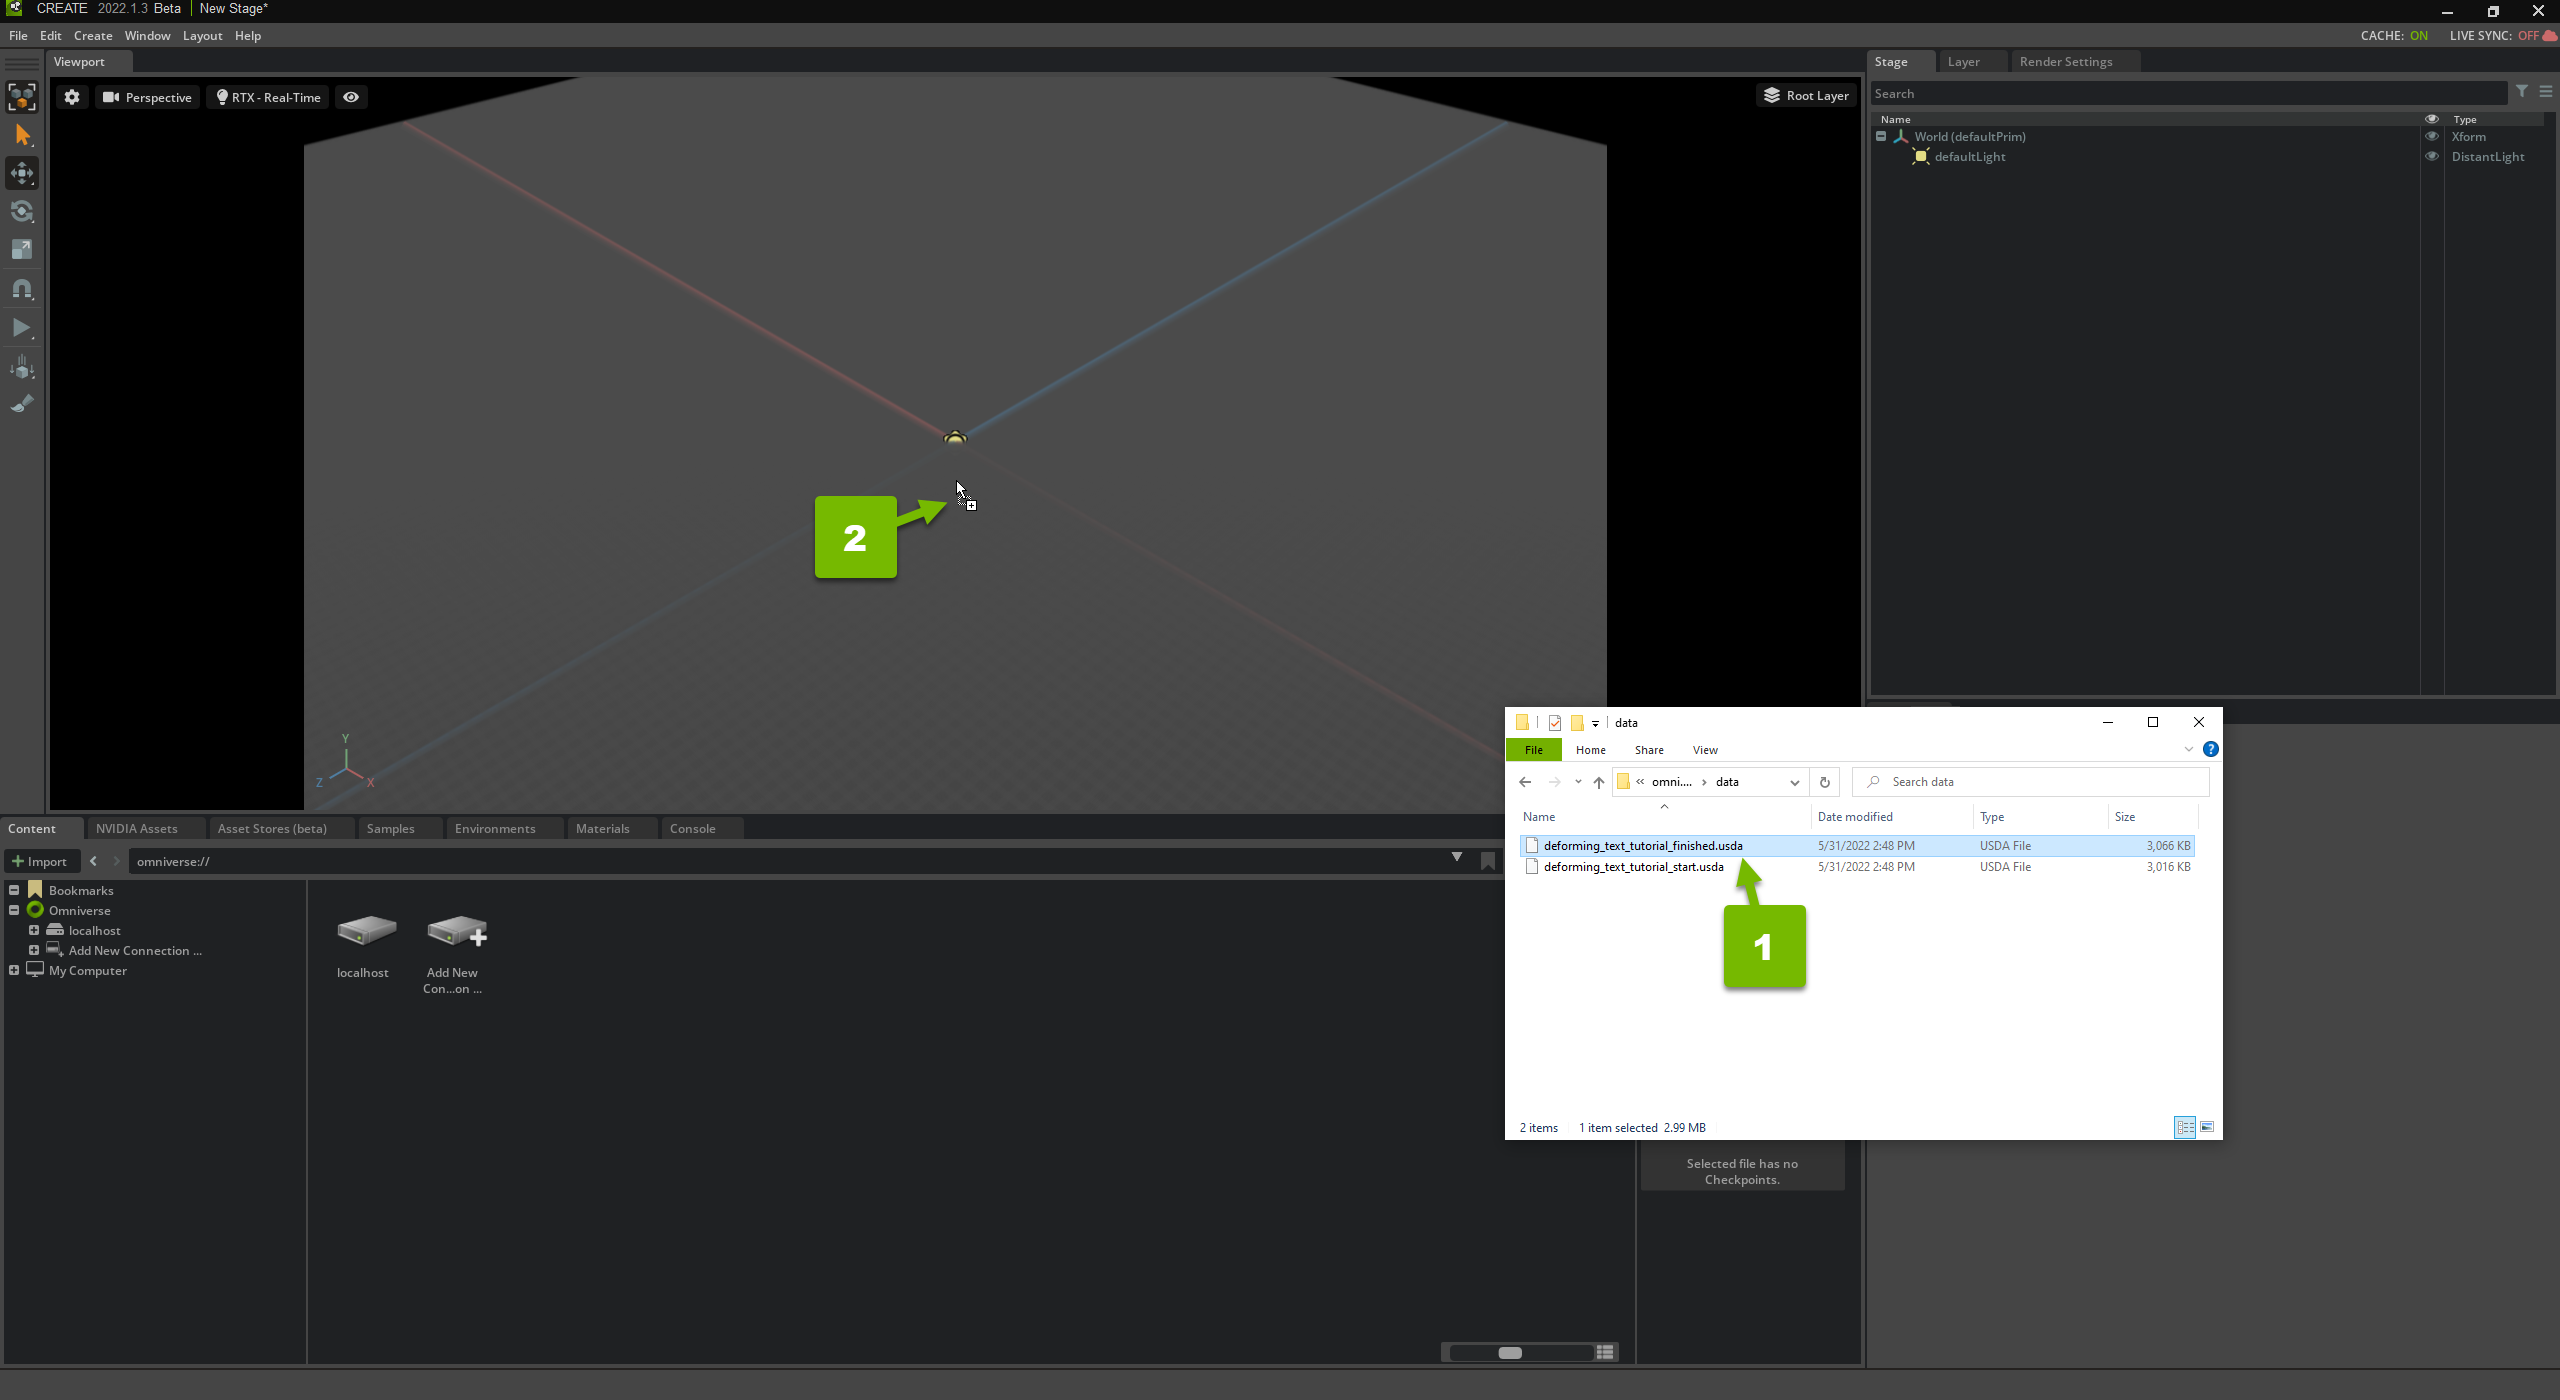
This Extension also includes a couple of files that you use throughout this tutorial:
deforming_text_tutorial_start.usda
deforming_text_tutorial_finished.usda
Find these by clicking the folder icon and navigating to the data folder from the document browser:
Review Your End Goal#
Before you build your Push Graph, it’s helpful to know the end goal you’re working toward.
Open the Finished Demo#
From the data folder in the document browser, drag deforming_text_tutorial_finished.usda into Omniverse USD Composer:
Note
You can also use the content browser in Omniverse USD Composer to find and load the file.
Now, you have a prebuilt scene with the multicolored word “OmniGraph”, a blue plane, and a green sphere.
Test the Animations#
Select the ball and drag the red arrow to move the green sphere in the positive direction of the x axis:

As you move the sphere, the plane deforms, the letters move up and down the z axis, and the colors change.
Open the Visual Scripting Editor#
In the Window menu, click Visual Scripting > Generic Graph:
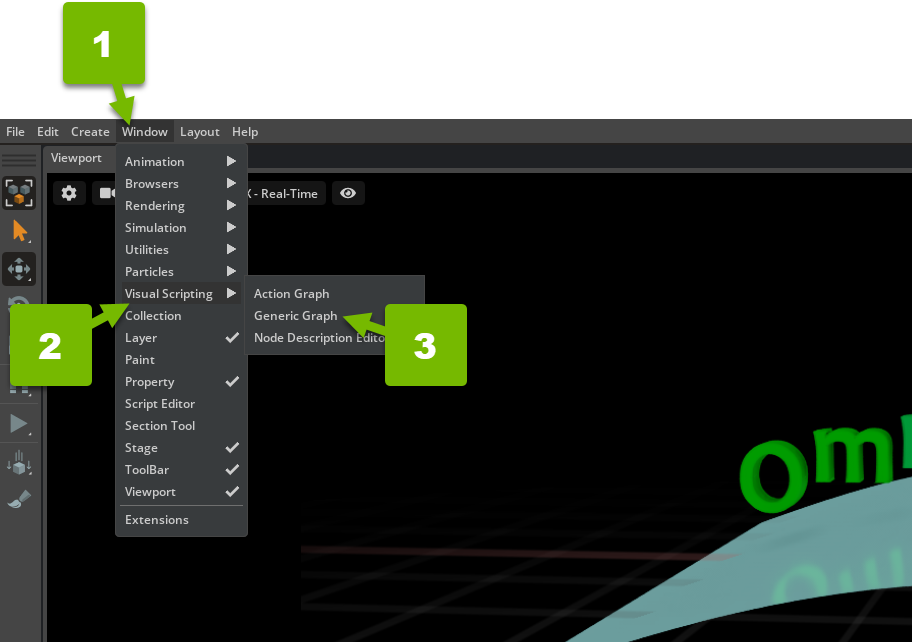
This opens the Push Graph editor panel.
Note
“Generic Graph” is another name for Push Graph.
Open the Existing Push Graph#
Select Edit Graph, and then select /World/PushGraph:

This opens the existing Push Graph in the visual scripting editor.
Zoom out to see the full graph:
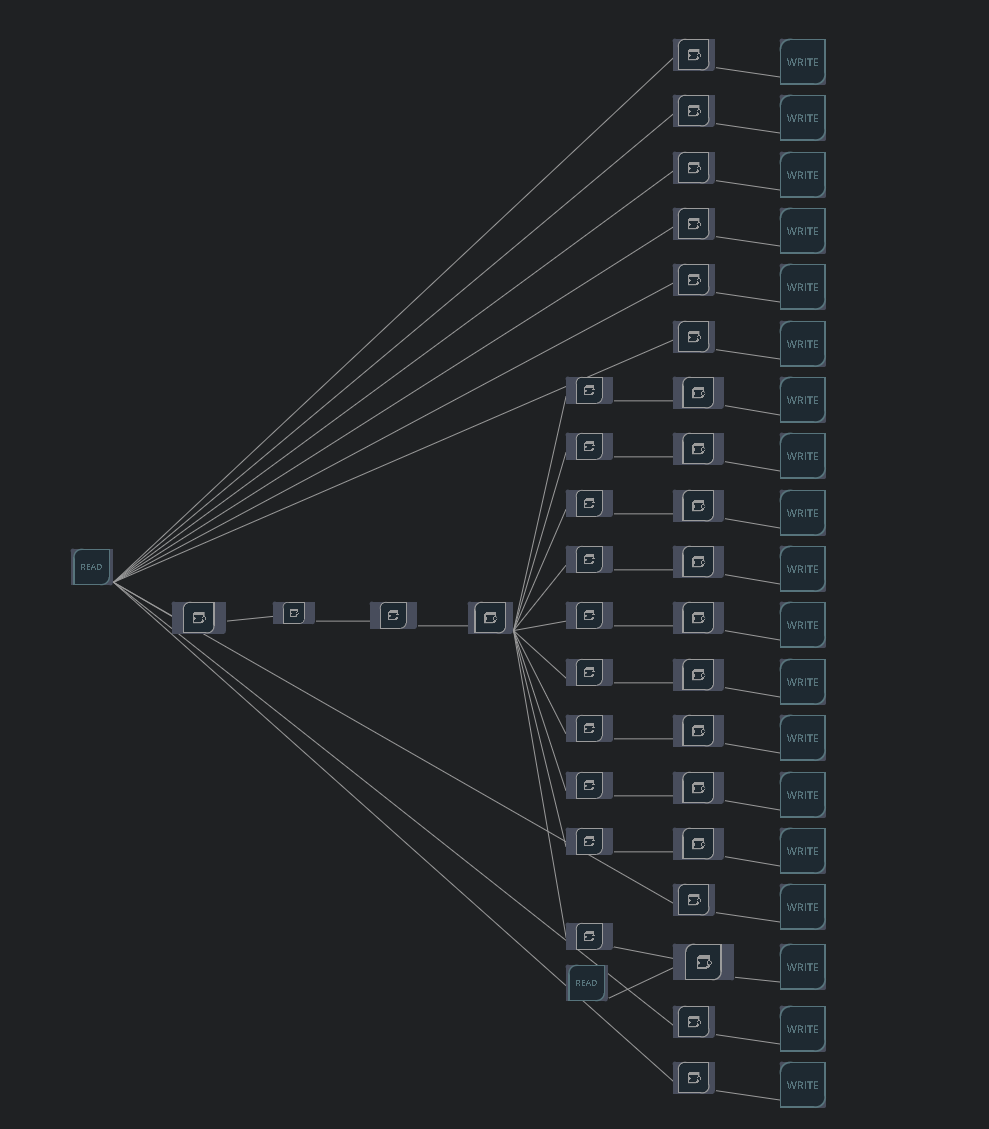
Learn How You Change a Prim’s Color#
To digest what is happening in this graph, zoom in to the left side to find the first Read Prim Local Transform node:
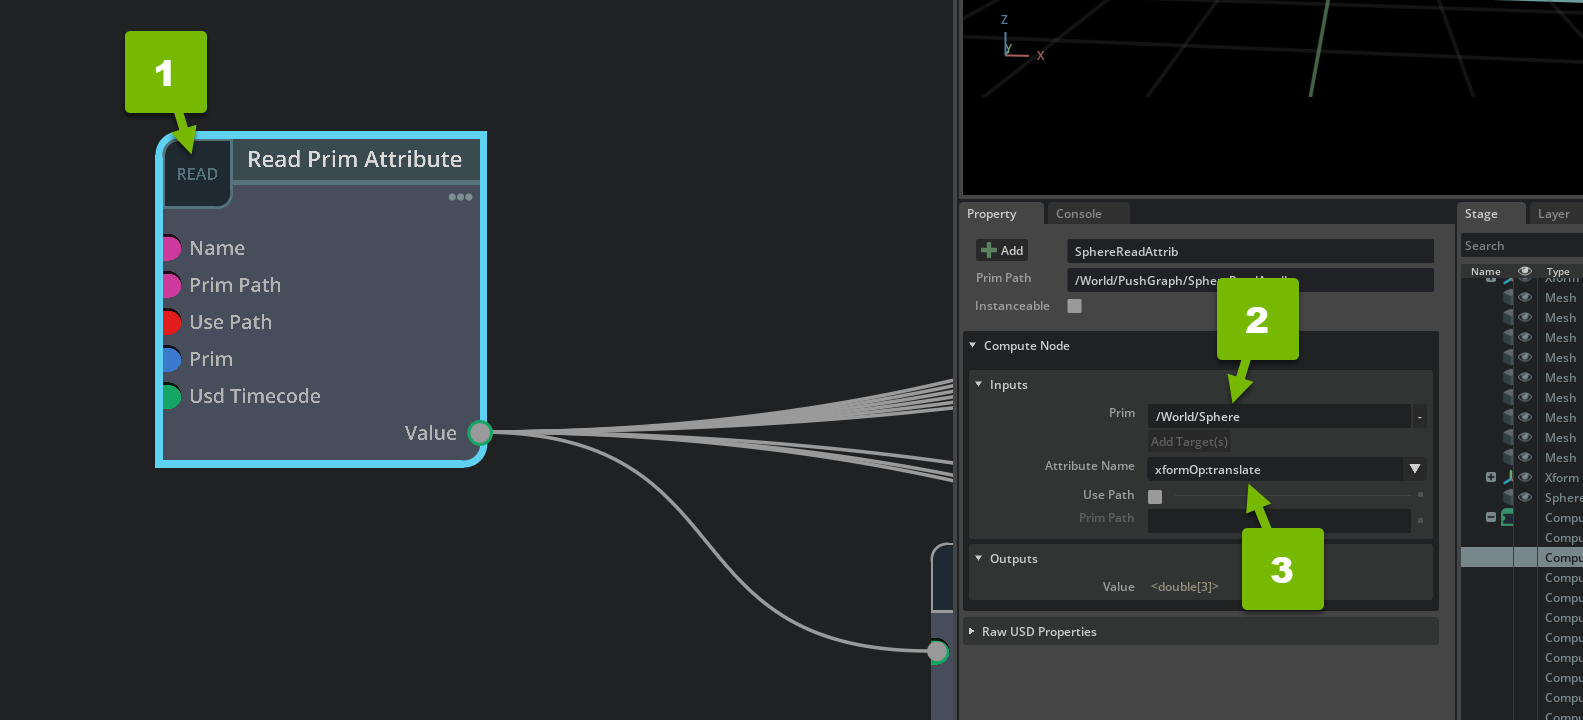
This node reads the Prim Transform and pipes it into a Get Translation node to extract the translation, or position, of the green sphere. From its Translation pin, the node sends its value to other nodes. There are two branches of output connections coming from the node, some that go up and some that do down.
Follow the topmost connection to a PositionToColor node:
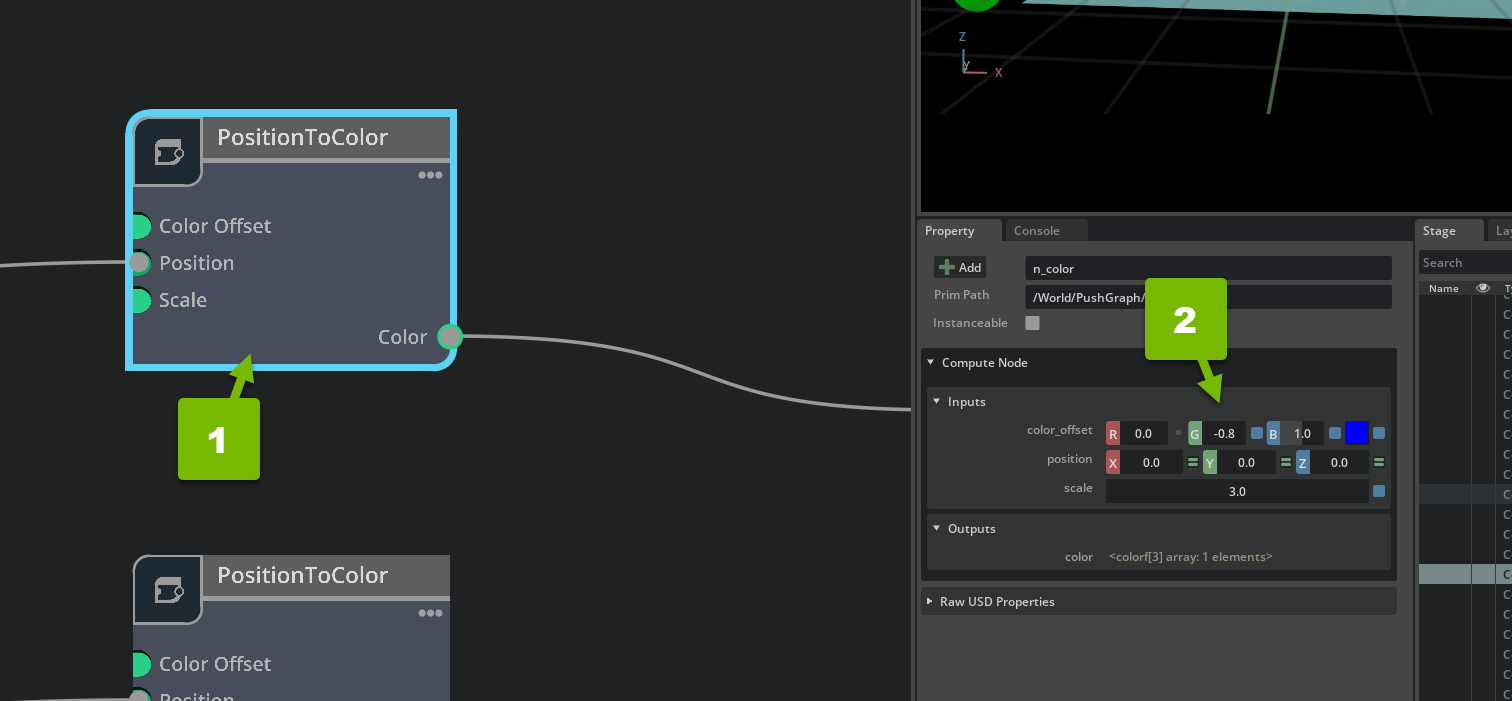
This takes position information from the Get Translation node and converts it to a color.
Note
If you search for PositionToColor in the node list, you’ll see that it’s part of the omni.graph.examples.python Extension you loaded earlier. Later, you learn how to build custom nodes like this.
Finally, follow the Color connection to the Write Prim Attribute node:

Here, the node accepts the color value in its Value pin and writes it to the primvars:displayColor attribute of the prim, the letter “n”. Looking through the Push Graph nodes, you’ll find similar logic for the other letters.
Learn How You Change a Prim’s Position#
Now, follow the output connection from the Get Translation node to the Decompose Double3 (Python) node:
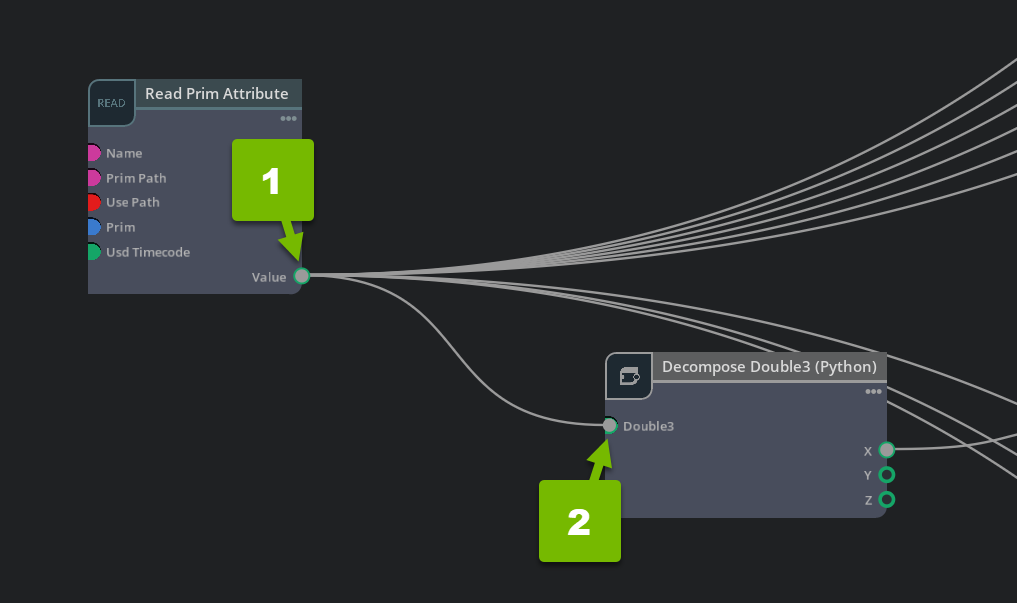
Remember that Get Translation reads the sphere’s translation. Decompose Double3 breaks up the position’s tuple implementation into its constituent parts and passes the x value to the next node.
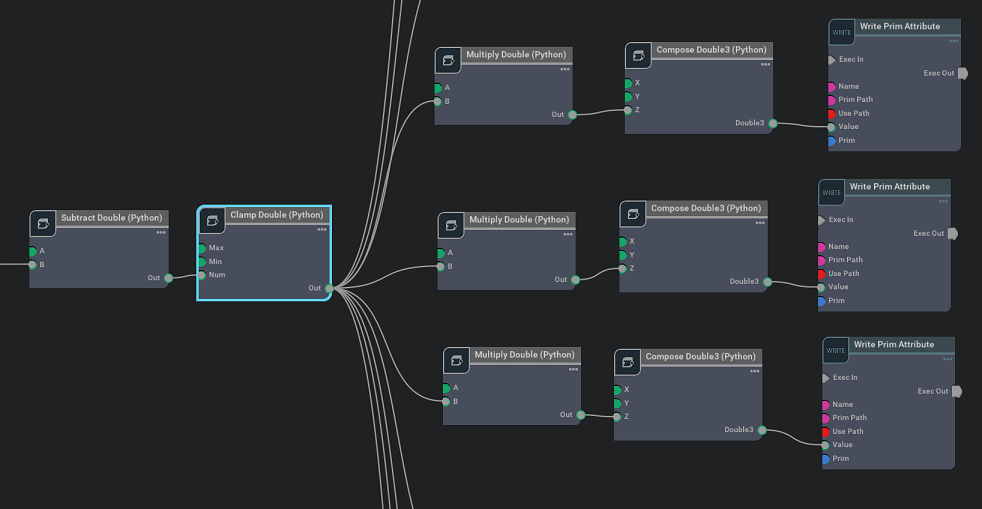
The following nodes perform calculations on the x coordinate of the sphere:
Find its absolute value.
Subtract it from a fixed value so that as you move the sphere towards
x = 0, the resultant value goes up. (You want the text to be lifted.)Clamp it to a lower bound so that the text doesn’t sink below 0 as you drag the sphere far away from the origin.
Multiply it by a constant amount. (the constant amount depends on the letter.)
Finally, the result is written to a prim:
Note
The Write Prim Attribute nodes have Persist to USD turned on. This means they are Authoring the value of the XformOp:translate property. Compare this to the nodes which are writing to primvars:displayColor. In that case, the nodes are only updating the Runtime value of the property, which does not get written back to USD.
In Part Two, you implement some of these behaviors in your own Push Graph.