Houdini Engine HDA Loader (Alpha)
Overview
Houdini Engine HDA Loader for Omniverse USD Composer allows you to run Houdini Digital Assets inside Omniverse USD Composer. For accessing Omniverse Nucleus and Omniverse features inside Houdini, please refer to Houdini Connector.
Requirements
Windows 10 or above
Omniverse USD Composer 2023 (Omniverse Kit 105) or above
SideFx Houdini Engine 19/19.5 license
Enable Houdini Engine Extension
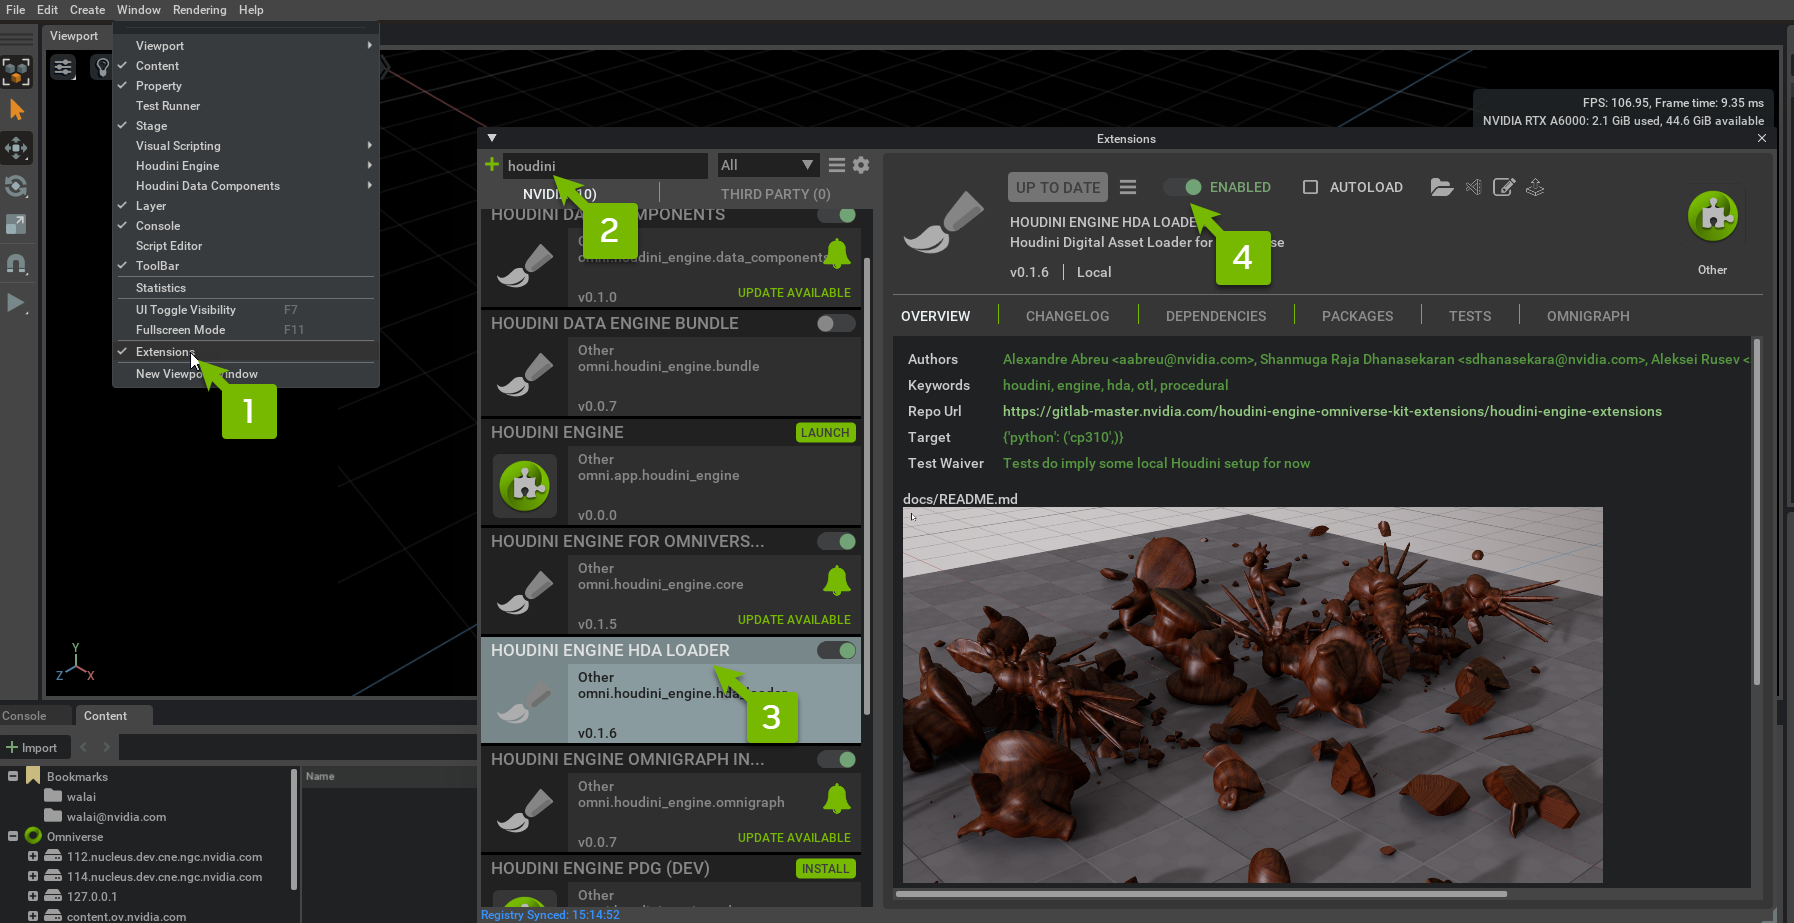
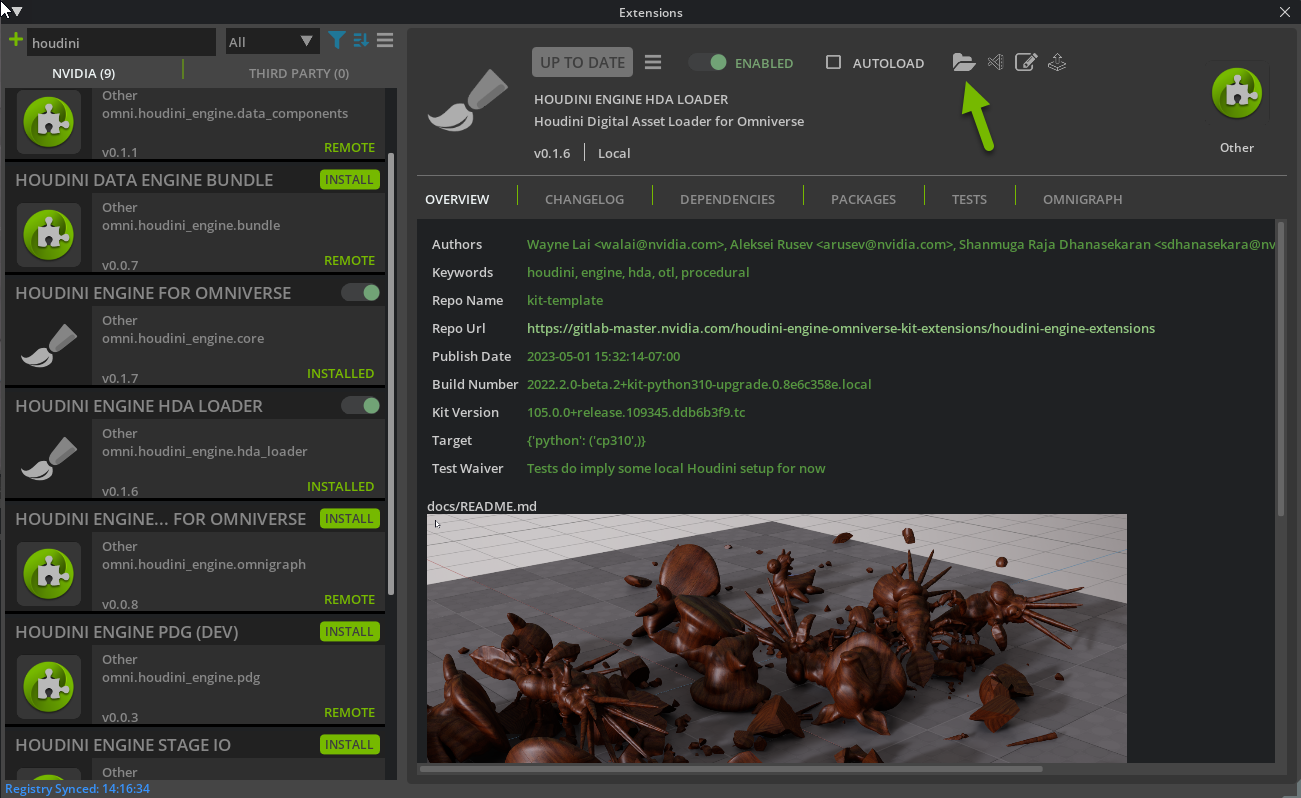
Launch Omniverse USD Composer. Click on Window > Extensions in the Main Menu.
Search for “Houdini” in the Extension Search Bar.
Select the HOUDINI ENGINE HDA LOADER Extension.
Enable the Extension.
Using Houdini Engine Extension
Launch Houdini Engine Extension
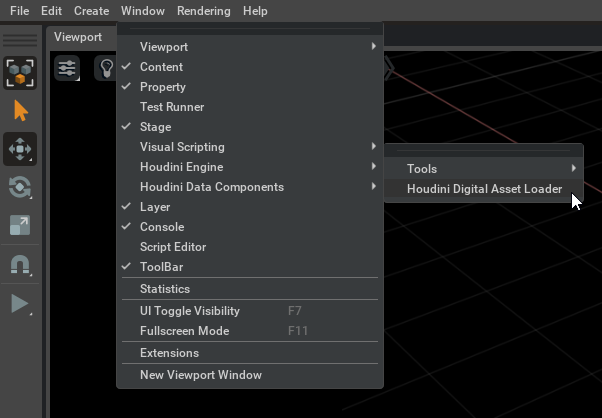
In the Main Menu, click on Window > Houdini Engine > Houdini Digital Asset Loader.
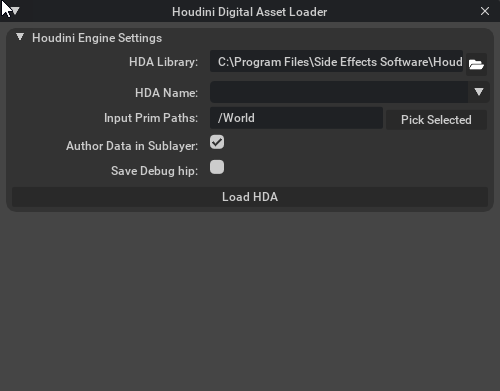
Basic Settings
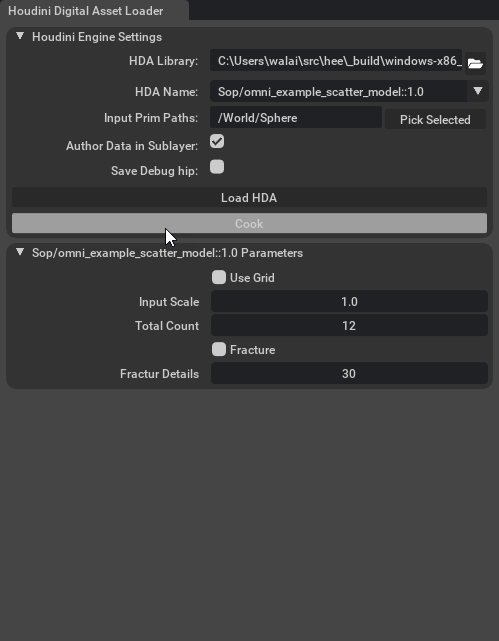
The Houdini Engine Extension window looks like the image below
Settings |
Description |
|---|---|
HDA Library |
The HDA files to install in the current Houdini Engine session - This can be a HDA file path or a directory that contains HDA files. omniverse:// path is not supported yet.
By default, we load all Houdini built-in HDAs under $HHotlsOPlibSop.hda
|
HDA Name |
The type name of the HDA to create and use. The dropdown menu has all the HDAs that have been installed to the current Houdini Engine session. |
Input Prim Paths |
The Prim paths of the geometries from Omniverse USD Composer to send to Houdini Engine session. For example: You have a stage of a city in Omniverse USD Composer, and you can just pass a building to the Houdini Engine session by specifying the building’s USD prim path.
Empty Input Prim Paths implies the HDA node has no input connector.
|
Author Data in Sublayer |
Store the HDA processed data/geometries in a new layer as a sublayer. Enabling this option allows you to turn on/off the HDA layer later - similar to Houdini’s bypass flag.
If this option is unchecked, the HDA processed data/geometries will be stored in the EditTargetLayer of the stage in Omniverse USD Composer. Note that UNDO HDA cook is not supported currently.
|
Save Debug hip |
Save a hip file after HDA cooked. Note this might increase the cook time. |
Load HDA |
Create a HDA node instance in current Houdini Engine session and populate the node parameters. |
HDA Parameters and Cook
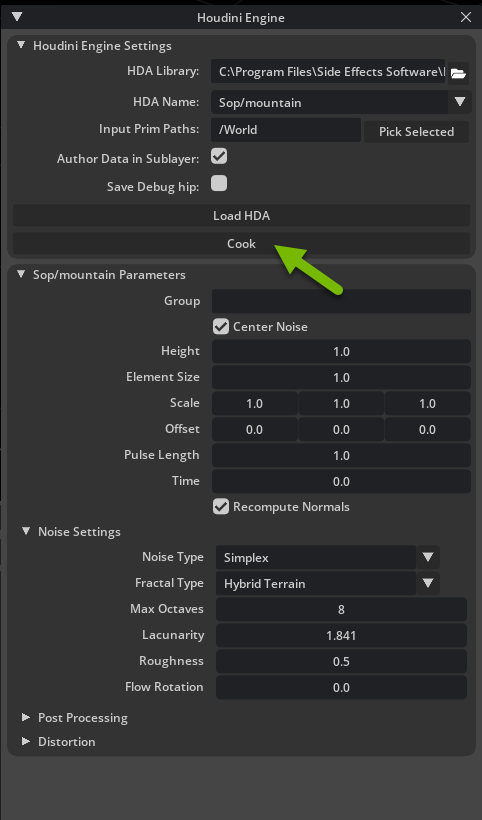
After clicking the Load HDA button. The node parameters will be populated. You can tune the parameters. Once you think the node ready to cook, you can hit the Cook button.
Scatter Models Example
Here we are going to use Scatter Models HDA as an example.
Scatter Model Example HDA
- Add example HDAs
data/hdas/examplesto your Houdini directory. For example, C:\Users\Tom\Documents\houdini19.5\otls\.The example HDAs can be found in your kit directory. Click the folder icon in Extension Window to find where the kit directory is.

- Launch Omniverse USD Composer and Launch a HDA Loader.Click on Window > Houdini Engine > Houdini Digital Asset Loader in Main Menu.
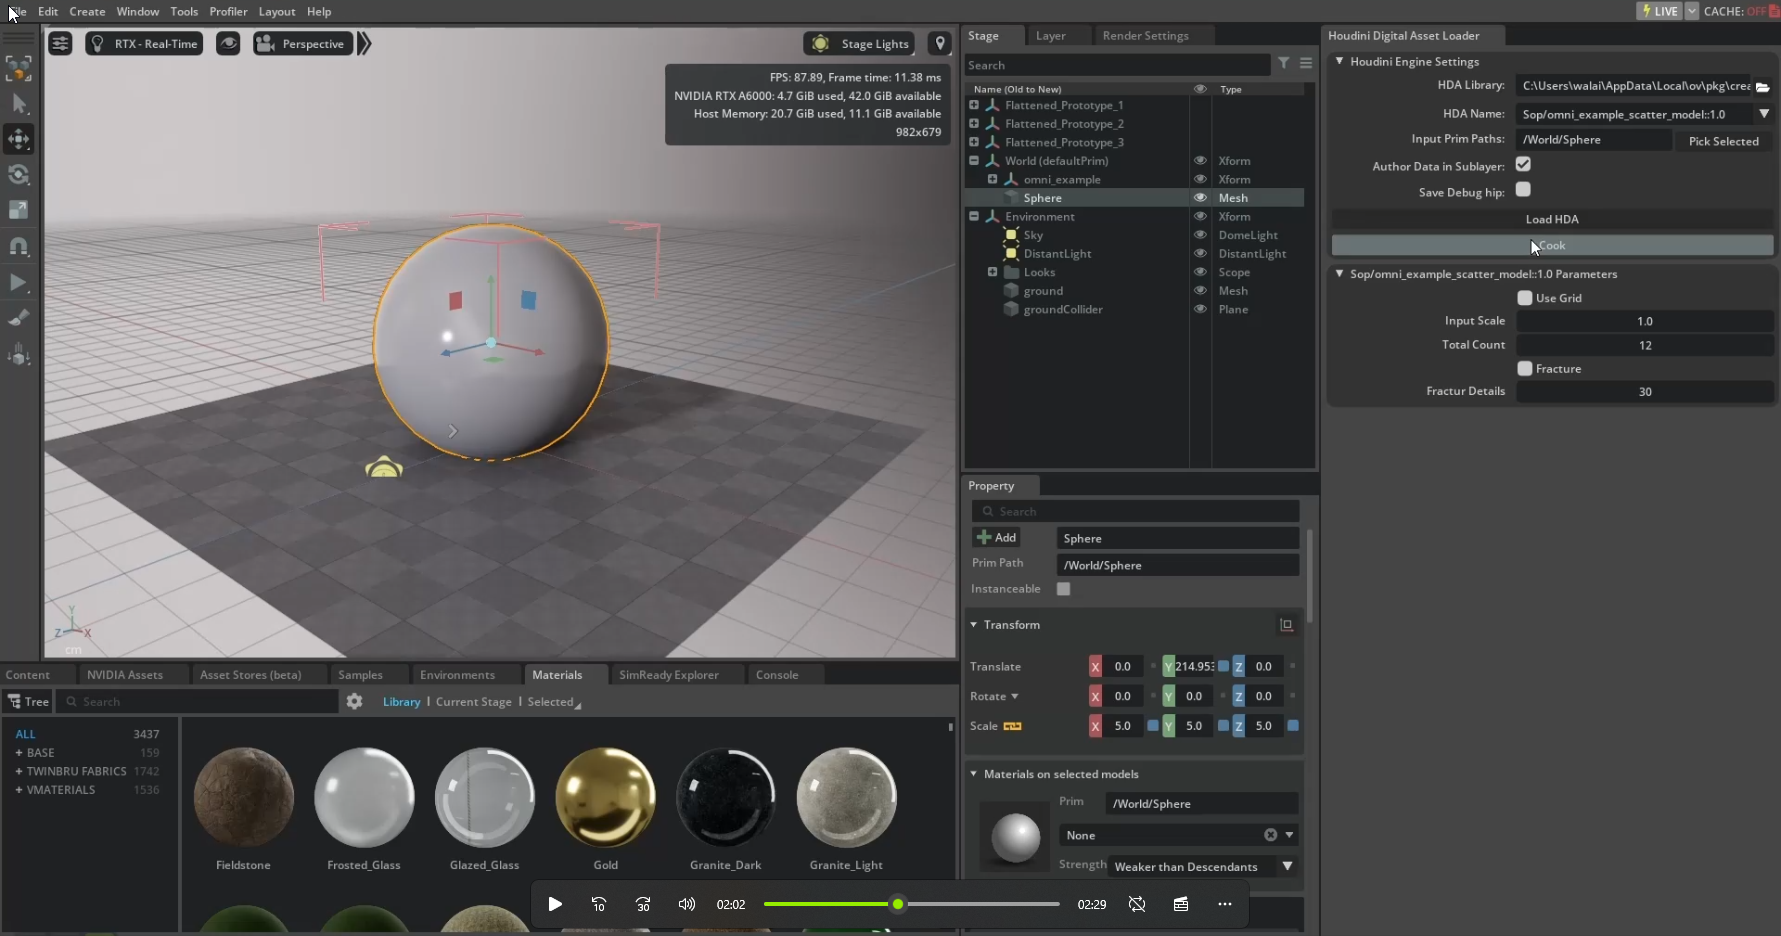
Create a simple geometry shape. A Sphere would work.
Change the HDA Library to the path you did on step 1 - for example, C:\Users\Tom\Documents\houdini19.5\otls\
Select HDA Name:
Sop/omni_example_scatter_model::1.0Input Prim Paths:
/World/Sphere(or the prim path you created in step 3.)Hit Load HDA button - Now a
Sop/omni_example_scatter_modelnode instance is created in the Houdini Engine session.
Hit Cook button
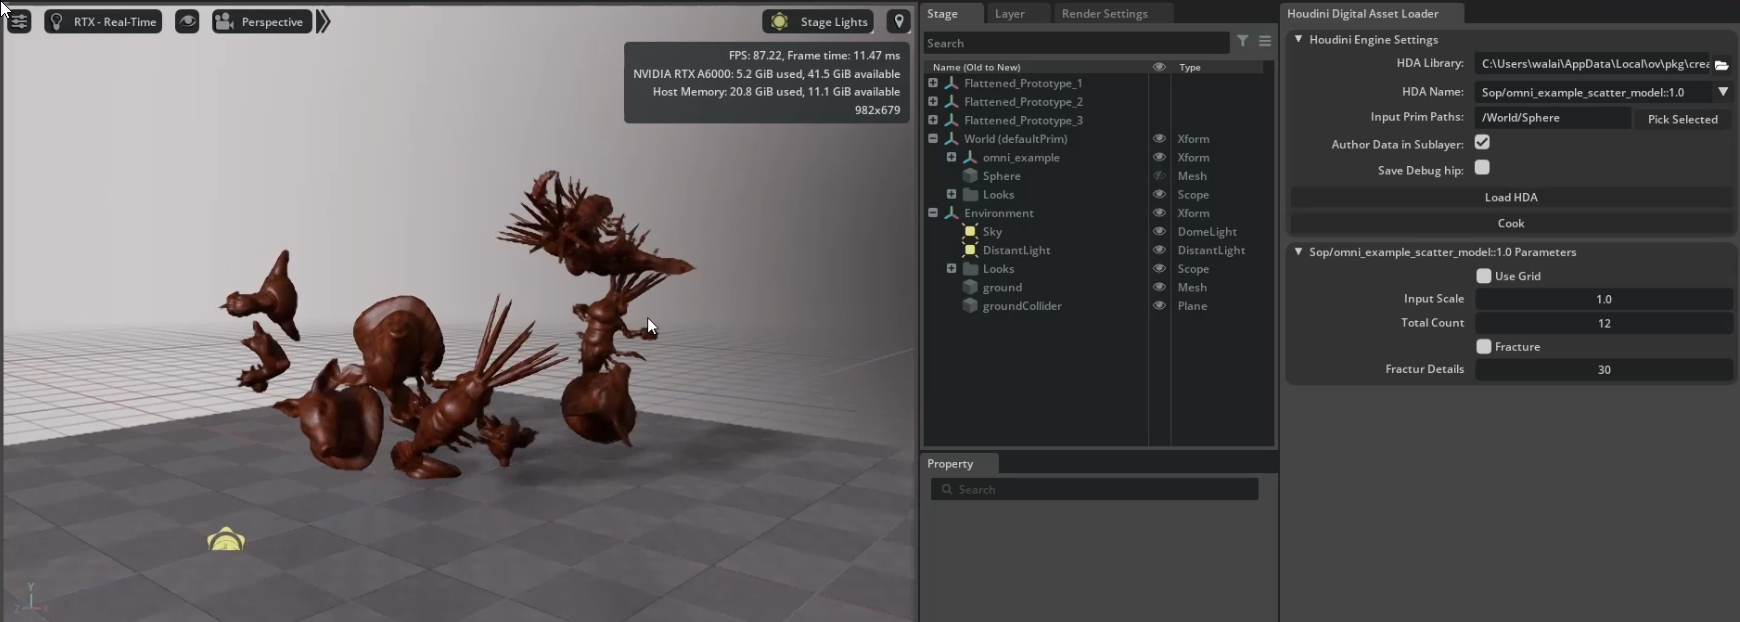
When cooking is done, you should see models being generated in Omniverse USD Composer.
Note
Change the visibility to invisible on /World/Sphere prim.
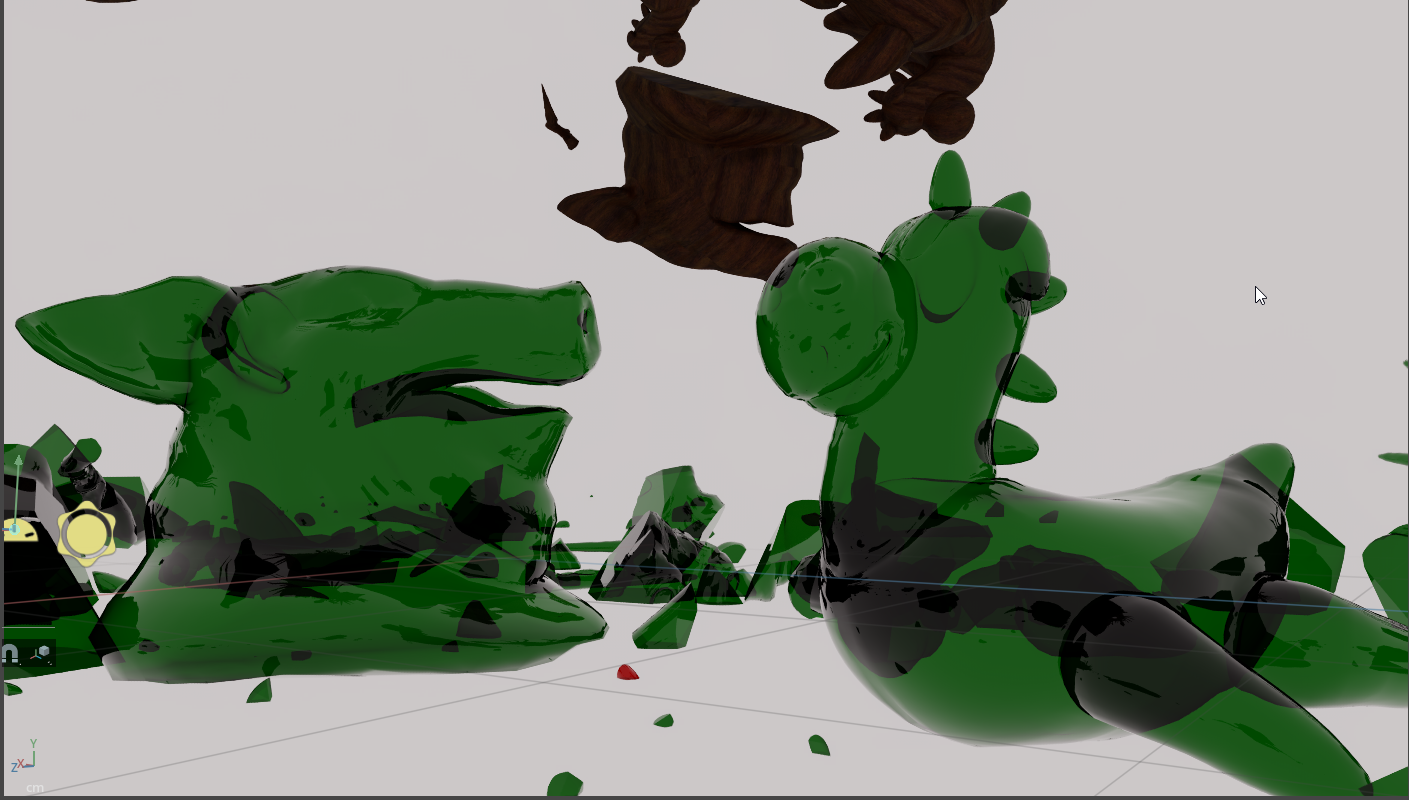
Fracture

Now we are going to fracture the models.
Toggle the Fracture parameter.
Hit Cook button.
Now the models are updated and fractured.
Add Physics
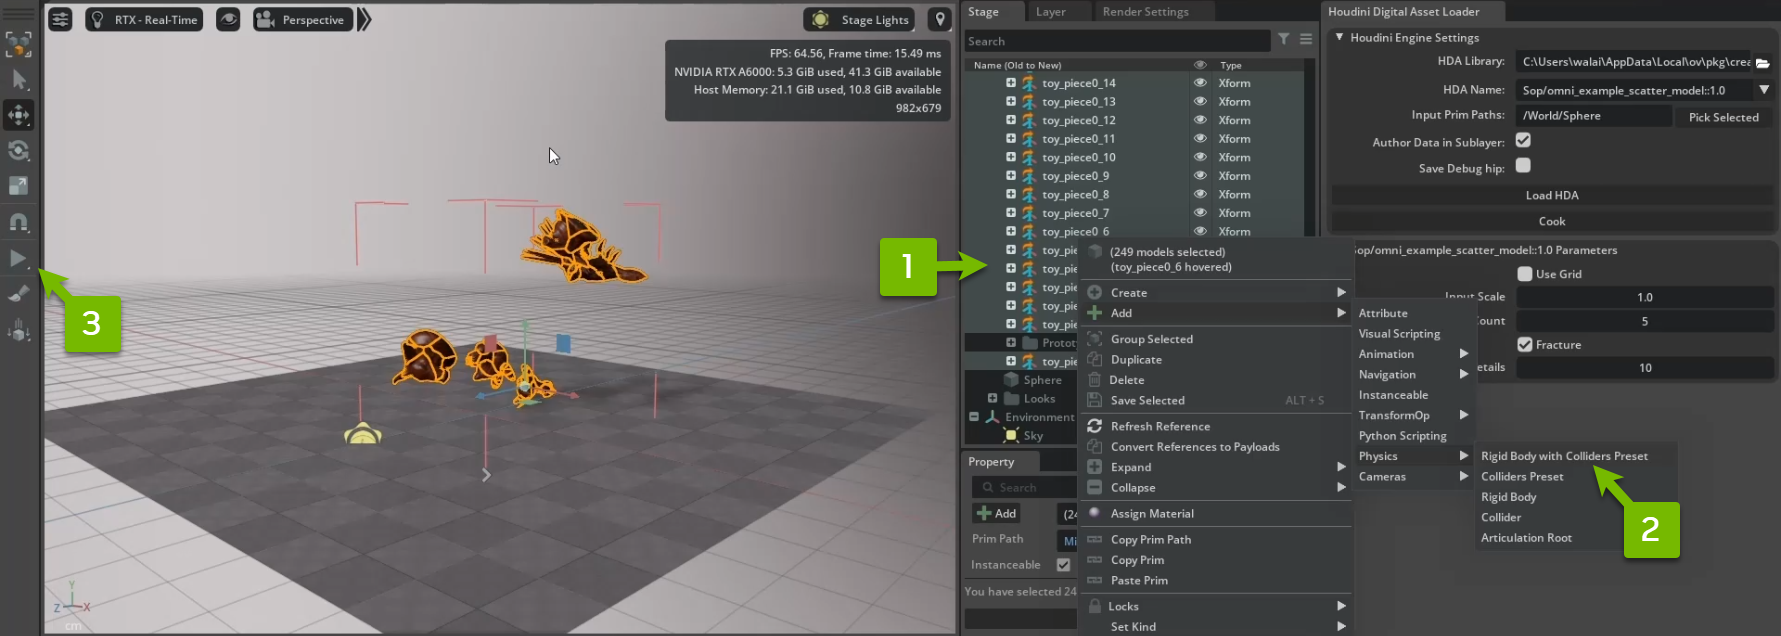
Now we are going to add physics properties to the models and run sinmulations.
Select all fractured models pieces.
Right click > Add > Physics > Rigid Body with Colliders Preset.
New you can hit the Play (SPACE) button on Omniverse USD Composer to run the Physics simulation.
Behind the scene - HDA Layers
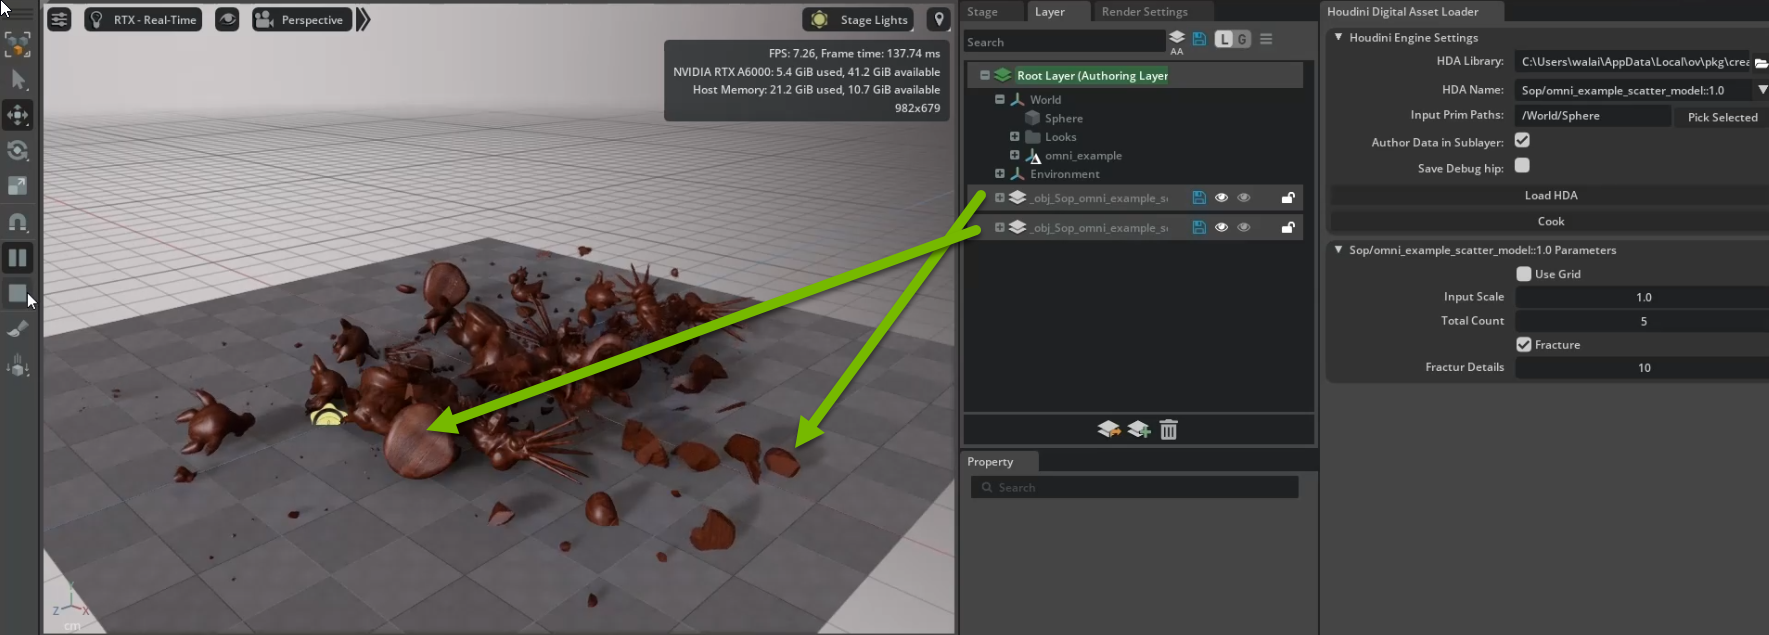
Each HDA instance stores its geometries in a USD layer.

Since each operation is stored in its own layer, we can mute the layer to see the stage as before HDA and after HDA. Also if you don’t like the cooking result, you can just remove the layer from the Stage’s sublayer paths.
Advanced Settings
There are two special parms that allow you to have more controls on how Houdini Engine for Omniverse USD Composer exports geometries. If your HDA has
A button parm called execute- Houdini Engine for USD Composer will press that button before start cooking. It is ideal if you want to run some pre-process before cooking the node.
A string parm called omni_usd_output_path - Houdini Engine will cook the node, then load the USD file which specified on that parm directly to Omniverse USD Composer, instead of loading the USD file that was converted from the HDA geometries.
By Combining these 2 parms together, you can have full control of how Houdini Engine for Omniverse USD Composer generates USD from Houdini. For example, You can have an execute button to writes out a USD file from the HDA and have the output USD path specified in omni_usd_output_path parm.
Known issues and limitations
We only support Sop level HDAs at this point. Houdini Engine doesn’t support LOP HDA yet. However, you can always wrap LOPs (or other operator types) in a SOP HDA.
Multi-parms is not supported yet. If your HDA has multi-parm, the cook will still work, but you won’t be able to set values on the multi-parms.
The memory usage can be huge - if you have heavy geometries. Keep monitoring your memory usage is recommended. Look for HARS.exe in your Windows Task Manager.