Animation Curve Editor#
Overview#
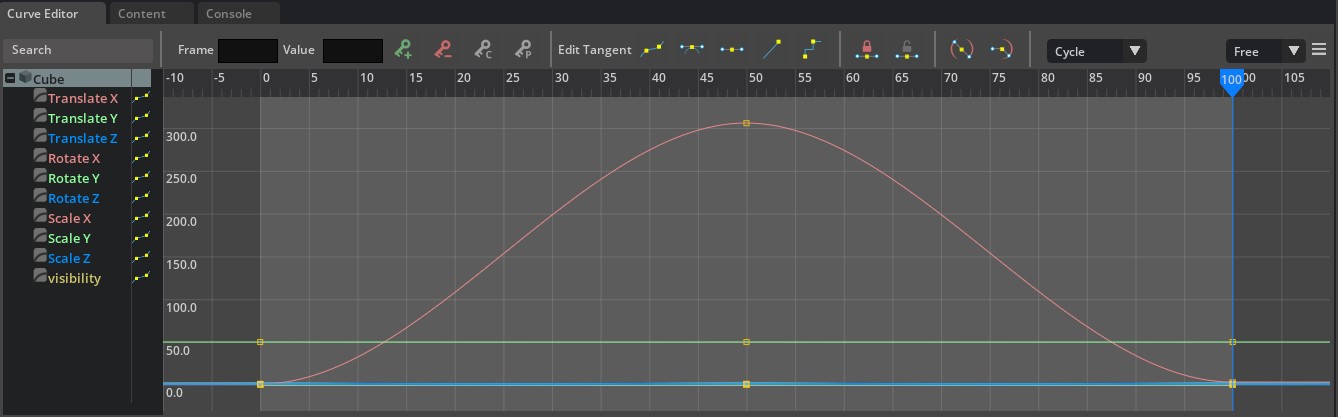
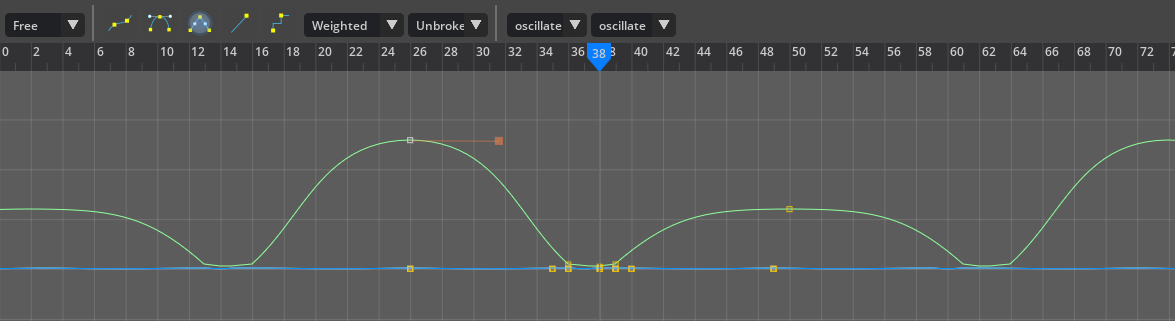
The curve editor is the place to edit and finesse your key frame animation. The curve between each key will define the motion between the two keys. These frames are referred to as “inbetweens” Edit the curve via the tangent controls to define it’s shape.
User Manual#
HotKey |
Result |
|---|---|
F |
Frame Selected - Frames the graph so the selected keys will be focused to use the full graph space available.
|
CTRL-F |
Frame All - Frames the graph so all keys are drawn within view.
|
CTRL-C |
Copies the selected key frames.
|
CTRL-V |
Pastes the keyframes.
|
DEL |
Deletes the Selected key(s).
|
ALT RMB |
Scale Graph - Holding ALT and clicking in the Graph with the Right Mouse Button will allow you the scale the graph and visual of the curve either vertically or Horizontally with the mouse axis.
|
Value fields#

Key “frame” field |
Indicates the frame the selected key is on. The user can move the key to another frame by entering a new key value in this field.
|
Key “Value” field |
Indicates the value of the currently selected key. You can enter a new value in this field to change the key to a specific value.
|
Add Key#
Adds transform (Translate,rotate,scale) and visibility keyframes.

Delete Key#
Removes the selected key from the curve.

Copy Key#
Allows you to copy a selected key - or group of selected keys from a curve.

Paste Key#
Pastes the previously copied keys onto the selected curve at the location of the timeslider (current frame). You can select a different curve from to paste too from the curve list in the editor. This can be done on the same prim or to apply the copied key to the curve of a different prim.

Edit Tangents#

Auto |
Autosolves the tangent angles for each key based on the previous and next key. The tangents will adjust as keys are moved.
|
Smooth |
Sets selected key to a smooth tangent which keeps a smooth curve - but does not change the tangent angles based on previous and next key.
|
Flat |
Flattens the tangent to a horizontal position.
|
Linear |
The tangent points directly at the adjacent key to create a linear motion where the distance between each frame is the same.
|
Stepped |
A stepped key will maintain the value of the key up until the next key. There is no transition or “inbetween” between the two key values.
|
Non-Weighted Tangent |
The tangent has a free length that the user can define.
|
Weighted Tangent |
A weighted tangent has a consistent length and is equidistant on both sides of the tangent.
|
Unbroken tangent |
Both tangents are locked to each other.
|
Broken Tangent |
Each of the two tangents for the key are independently controlled.
|
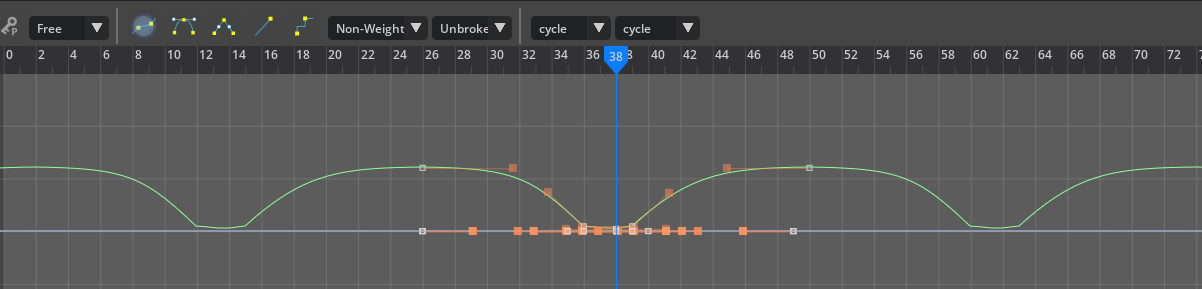
Infinity curves#

Infinite Animation curves enables the user to control how the motion of an object can loop infinitely. With options to cycle in place or cycle with relative offsets - Infinite curves offers great efficiency by eliminating time consuming manual keyframing of looping actions.
Note
The cycle options will be available in the curve editor menu only when keys are selected.
Cycle curve options#
Pre Infinity determines how the curves are executed before the keys on the curve.
Post Infinity determines how the curves are executed after the keys on the curve.
Constant#
New created animation Curves are set by default to Constant, meaning no cycle is in effect.
Cycle#
This cycles the curve continuously, exactly as they are in the source. This typically requires your first and last keyframes to have the same values for a smooth transition in the cycle.
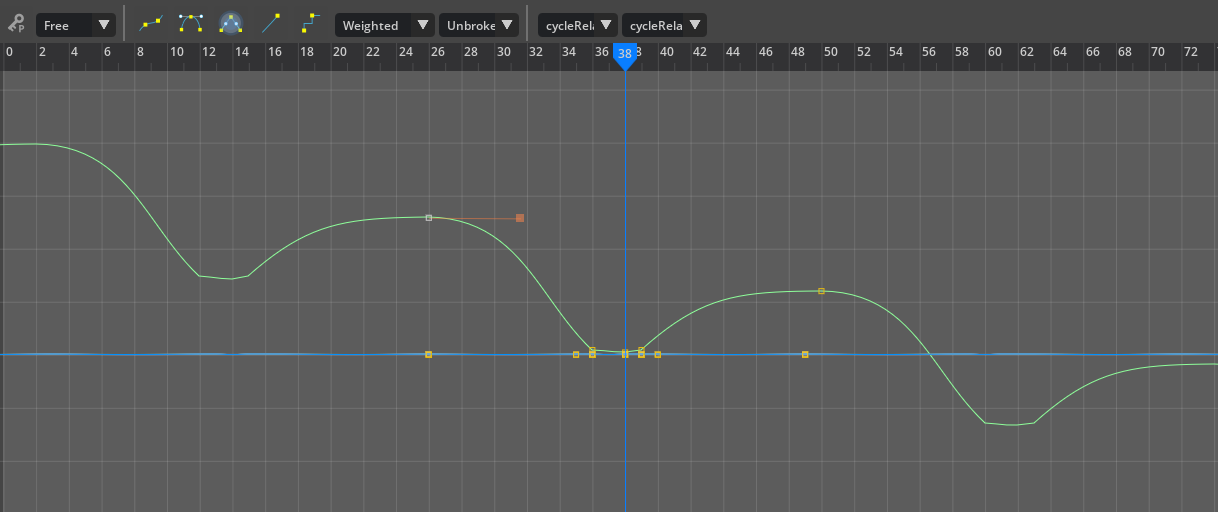
Cycle Offset#
This maintains the difference between the start and end frame on each loop to execute the relative offset. For example - this can be used for a characters root forward axis on a walk cycle to maintain the forward motion on each cycle.
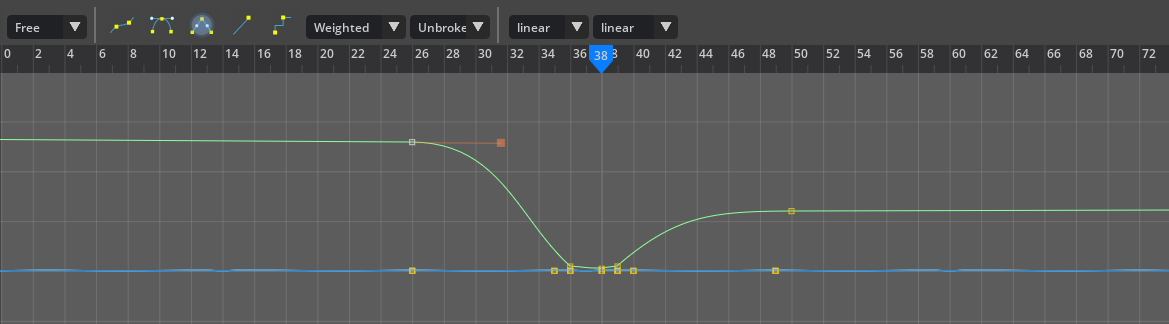
Cycle Linear#
This maintains the value of the first (pre) and last (post) key for infinity.
Cycle Oscillate#
Oscillate inverts the curve on the time axis - so differences between the first and last frame are resolved smoothly in an oscillating manner.
Keyframe movement on the graph#
Select Free to move a key in any direction on the graph.
Select Horizontal to only move horizontally.
Select Vertical to only move vertically.
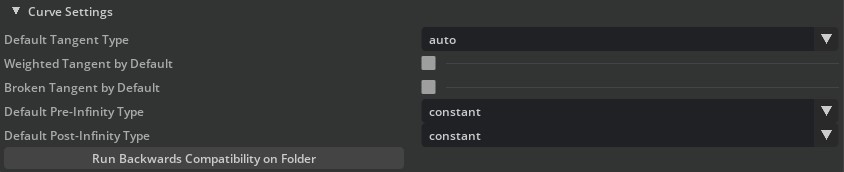
Curve Editor Preferences#
The Animation Curve Preferences can be found in the Animation Section of the Main preferences Panel. Window>Edit Preferences. Here you can set your preferred default curve type plus other options.
Float Curves#
The float curve functionality in the curve editor allows the user to define a curve to be used with the timeline node in the action graph.

How to create a Float curve.#
Go to the Action Graph>Animation and add a “timeline” node to your graph.
With the timeline node Selected - the menubar in the curve editor changes to reflect the float curve workflow.
Click on “New Float Curve” icon in the curve editor menu.
Name the curve.
Right click on the graph to add keyframes.
The timeline node can now be assigned to a function in the action graph and setup to execute the curve.