Add Supplemental Layers#
In the following steps, the power of USD layers continues to be used to affect the composition of the stage without being destructive to its individual elements. Each USD layer has a purpose and can be edited independently. The USD composition is very flexible - it can be as simple or complex as needed to adapt to the content and use case.
Here is how the supplemental layers can be added to the project USD file and what function they perform.
Note
Always set the edit context and the Authoring Layer when editing the scene to ensure any edits are captured on the intended USD Layer.
Here are the instructions on how to manually replace existing materials with new ones for future reference:
Open the project USD file in the Authored folder (
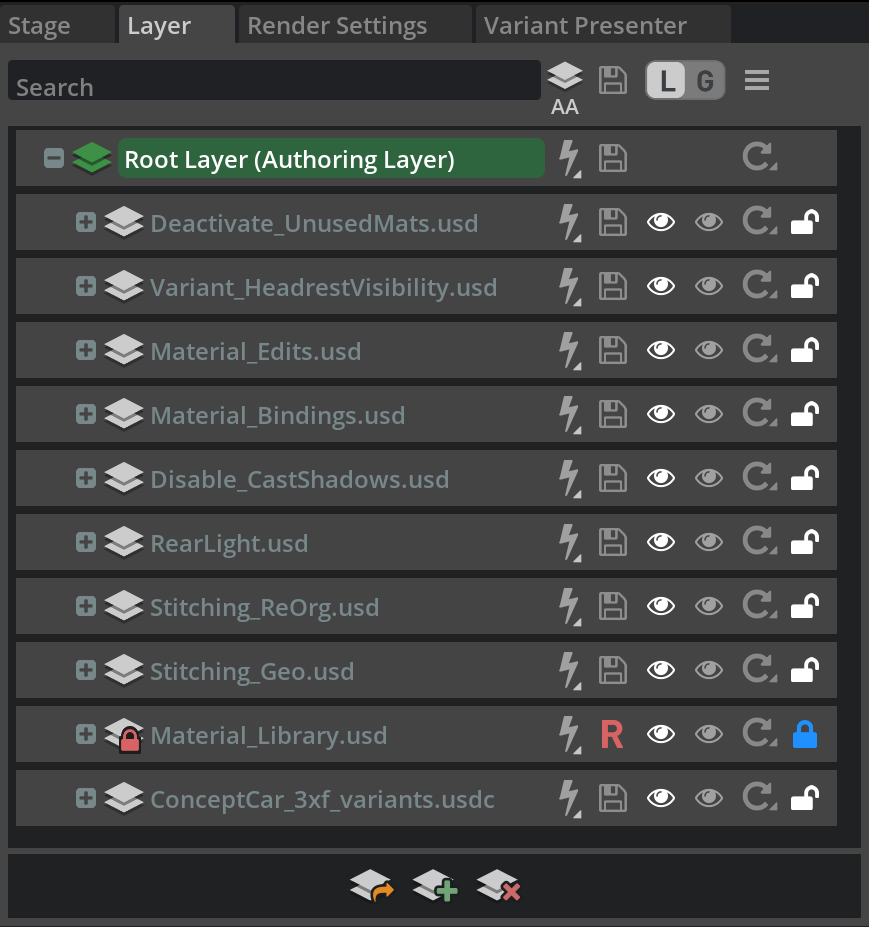
ConceptCar.usdc).Select the Insert Sublayer icon at the bottom of the
Layer paneland addStitching_Geo.usdfrom theAuthored/SubUSDsfolder. This brings in additional geometry that not originally included in the DELTAGEN project.In a typical 3D workflow, it is common for CAD data to be supplemented by additional geometry from a sculpting program like Autodesk Maya for organic details like seat stitching. While one designer is working on the car geometry in DELTAGEN, another artist can work simultaneously in a different 3D tool, and both pieces of geometry can be combined in the Omniverse application for the product configurator.
Insert
Stitching_ReOrg.usdas anotherlayer.This applies some minor edits, often referred to as
deltasoropinions, to the stitching geometry’s hierarchy to allow it to mesh better with the pre-existing car prims, especially the doors. For example, now with this layer added, if you move a car door, the stitching on that door moves with the car.Note
Take care with the ordering of the layers in the layer stack. Layers higher in the stack take precedence over lower layers, so some layer changes may not have any effect if the layers are out of order. For example, Stitching_ReOrg.usd must be higher in the layer stack than Stitching_Geo.usd since it makes changes to the geometry that was introduced in the layer below.
Insert
RearLight.usdas another layer.This layer adds a RectLight prim to the rear area of the car to illuminate a section between the tail lights.
Insert
Material_Bindings.usdas another layer.The Concept Car began with basic materials. This layer swaps out those materials for the new, high quality materials that exist in the Material Library added in the previous step.
This layer was created using these steps:
Right-click on one of the original materials in the Stage and select Select Bound Objects. This selects any prims in the stage that have been assigned that material.
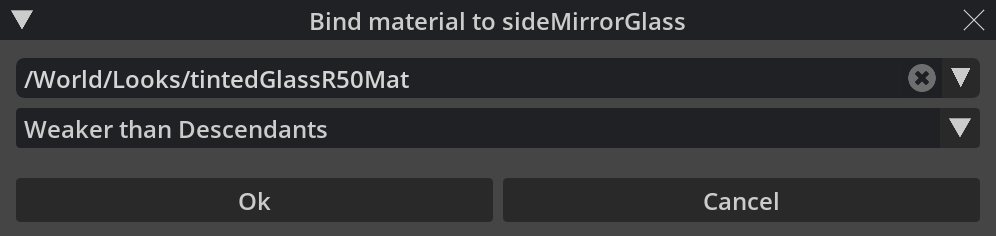
Find a new material from the Material Library that was added, right-click on the material, and select Assign Material (see image below).
Repeat this process until all basic materials have been replaced.
Note
There is an additional sample in the sample repo for searching and replacing materials based on a CSV table. When iterating on common assets in a pipeline, this can become a fast way to manage many changes. While this tutorial does not specifically go over this sample, it is available to use as reference on GitHub here.
Insert
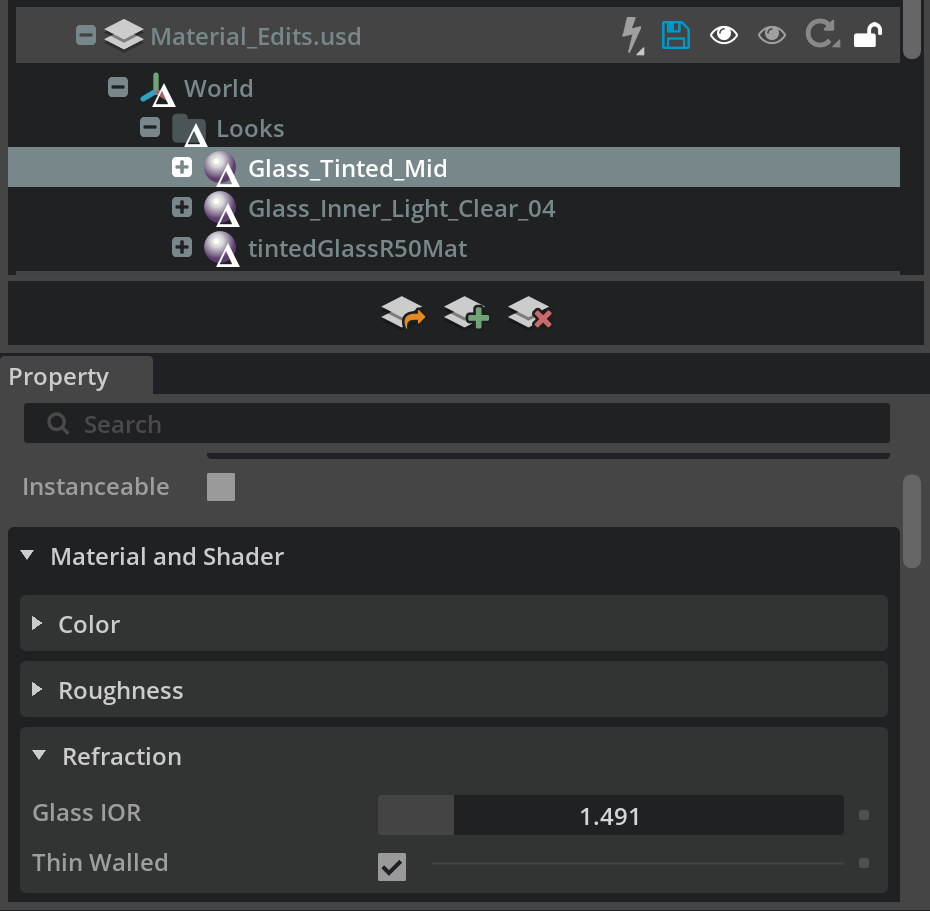
Material_Edits.usdas another layer.The Material Library was added to the stage earlier in the workflow. This material library USD itself should not be changed (to keep it consistent for other projects that may use it), but it is possible to make edits to the materials themselves using a layer. The deltas stored on this layer enable the thin_walled parameter on a few of the glass materials. This parameter allows for faster rendering of thin glass panes like the windows on the car.
Next, insert
Disable_CastShadows.usdin the same way as the previous steps.This is a modification to disable the Cast Shadows parameter on any geometry prims that are using non-opaque, glass materials and will prevent these prims from casting shadows. This is especially helpful for the interior of the car, which can appear overshadowed. While this optimization is somewhat physically inaccurate, it works well on the thin panes of glass found on most vehicles when rendered with the RTX real-time renderer.
This layer was created using these steps:
Select all non-opaque, glass materials in the Stage panel and right-click to Select Bound Objects.
In the Properties panel, scroll down to find the Geometry > Mesh section.
Find the Cast Shadows parameter, and uncheck the box.
Insert
Deactivate_UnusedMaterials.usdas another layer.This layer removes the basic DELTAGEN materials in the stage. This prevents the materials from loading and saves on memory. While it would make sense to delete these materials, since they are part of the ingested USD files, that would make a destructive change to those files. Instead, the deactivate function can be used to apply the same effect without the need to change those files, therefore optimizing iteration time.
This layer was created using these steps:
Select all non-opaque, glass materials in the Stage panel and right-click to Select Bound Objects.
In the Properties panel, scroll down to find the
Geometry > Meshsection.Find the
Cast Shadowsparameter, and uncheck the box.