Audio2Face Tool
Use the Audio2Face Tool to convert audio tracks to facial animations. This panel is composed of a collection of pipeline modules that contribute to the conversion process. Each instance of Audio2Face will have it’s own “Core” panel containing the settings for that particular instance. Audio2Face will load with the Full Face Core by default. See “multiple instances” below for more details.

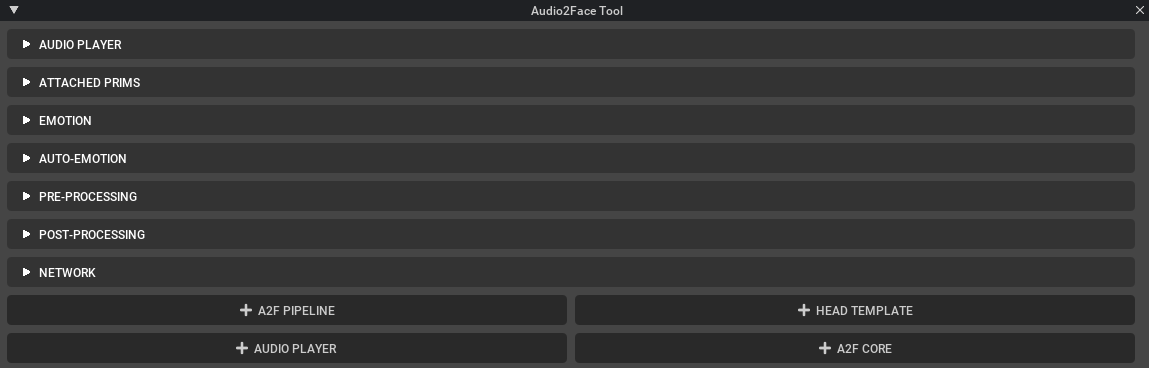
This panel is composed of the following widgets:
Audio Player and Recorder
Use the Audio Player widget to load custom audio tracks into Audio2Face. This widget serves as the primary audio playback mechanism.

Element |
Description |
---|---|
Track Root Path |
Selects the folder from which to load audio files |
Track Name |
Selects an audio track from the Track Root Path (Audio2Face only supports .wav files.) |
Range |
Selects start and end timestamps for clipping the audio track |
Timeline/AudioWaveForm |
Displays a visually descriptive timeline of the audio track Click to jump to a timestamp. Click and drag to scrub.) |
Play |
Plays the audio track (Press P to play.) |
Return to Head |
Starts the playback from the Range start time. (Press R to return to head.) |
Loop Playback |
Toggles audio playback looping. (Press L to toggle loop playback.) |
Record |
Reveals the recording tools and live mode for Audio2Face:
|
Tip
When batch processing audio files, it’s best to normalize their EQ levels. This will provide the most consistent results.
Streaming Audio Player
Use the Streaming Audio Player widget to stream audio data from external sources and applications via gRPC protocol. The player supports audio buffering. Playback starts automatically.

To test Streaming Audio Player, open a demo scene with streaming audio from the Audio2Face menu:

Or, use the Audio2Face tool to create a player manually:

After you create a streaming audio player, connect its time attribute to the Audio2Face Core instance’s time attribute:

Use the Prim Path of the created player as one of the parameters for the gRPC request, when passing audio data to the player from an external source.

To send the audio data to the player you need to implement your own logic (client), which pushes gRPC requests to the Streaming Audio Player server.
Example of such client implemented in Python is provided in “test_client_py”, which is located in A2F directory.
AUDIO2FACE_ROOT_PATH/exts/omni.audio2face.player/omni/audio2face/player/scripts/streaming_server/test_client.py
The script provides detailed description of the protocol and parameters (see comments) and also serves as a simple demo client, which takes input WAV audio file and emulates an audio stream by splitting it into chunks and passing it to the Audio Player.
To test the script:
Launch Audio2Face App and open the Streaming Audio Scene (or create a player manually)
Run the test_client.py script:
python test_client.py <PATH_TO_WAV> <INSTANCE_NAME>
PATH_TO_WAV: provide a path to any WAV audio file with speech
INSTANCE_NAME: Streaming Player Prim Path (see above)
Required pip packages to be installed:
grpcio
numpy
soundfile
google
protobuf
Attached Prims
Use the Audio Player widget to load custom audio tracks into Audio2Face. This widget serves as the primary audio playback mechanism.

Element |
Description |
---|---|
Track Root Path |
Selects the folder from which to load audio files |
Track Name |
Selects an audio track from the Track Root Path (Audio2Face only supports .wav files.) |
Range |
Selects start and end timestamps for clipping the audio track |
Timeline/AudioWaveForm |
Displays a visually descriptive timeline of the audio track Click to jump to a timestamp. Click and drag to scrub.) |
Play |
Plays the audio track (Press P to play.) |
Return to Head |
Starts the playback from the Range start time. (Press R to return to head.) |
Loop Playback |
Toggles audio playback looping. (Press L to toggle loop playback.) |
Record |
Reveals the recording tools and live mode for Audio2Face:
|
Tip
When batch processing audio files, it’s best to normalize their EQ levels. This will provide the most consistent results.
Emotion
Use the Emotion widget to control the facial emotions of your character.

Element |
Description |
---|---|
Emotion |
The emotion the character projects as they speak their line. These include Neutral, Anger, Joy, and Sadness. |
Emotion Strength |
A numerical value that represents how much impact the emotion has on the character. (0.0 means no impact. 1.0 means maximum impact.) |
Solo |
Sets the selected emotion’s strength to 1.0 and the strength of all other emotions to 0.0. |
Clear Emotion Strength |
Sets the selected emotion’s strength to 0.0, including across all keyframes. |
Timeline |
Shows the character’s emotional change over time using keyframes. (Click to jump to a frame. Click and drag to scrub through the frames.) |
Previous Key |
Jump to the previous key in the timeline. |
Next Key |
Jump to the next key in the timeline. |
Frame |
The currently-selected frame in the timeline. |
Add Keyframe |
Adds a new keyframe at the currently-selected frame in the timeline. The keyframe saves the emotion strength settings so your character’s emotions can change over time. |
Remove Keyframe |
Removes the selected keyframe. |
Clear Keyframes |
Removes all keyframes from the timeline. |
Auto-Emotion
Use the Auto-Emotion widget to automatically parses emotion from an audio performance and applies it to the character’s facial animations. The underlying AI technology that supports the Auto-Emotion widget is called “Audio2Emotion”.

Reference Number |
Element |
Description |
---|---|---|
1 |
Emotion Detection Range |
Sets the size, in seconds, of an audio chunk used to predict a single emotion per keyframe. |
2 |
Keyframe Interval |
Sets the number of seconds between adjacent automated keyframes. |
3 |
Emotion Strength |
Sets the strength of the generated emotions relative to the neutral emotion. |
4 |
Smoothing |
Sets the number of neighboring keyframes used for emotion smoothing. |
5 |
Max Emotions |
Sets a hard limit on the quantity of emotions that Audio2Emotion will engage at one time. (Emotions are prioritized by their strength.) |
6 |
Emotion Contrast |
Controls the emotion spread - pushing higher and lower values. |
7 |
Preferred Emotion |
Sets a single emotion as the base emotion for the character animation. The preferred emotion is taken from the current settings in the Emotion widget and is mixed with generated emotions throughout the animation. (is not set indicates whether or not you’ve set a preferred emotion.) |
8 |
Strength |
Sets the strength of the preferred emotion. This determines how present this animation will be in the final animation. |
9 |
Reset |
Resets the setting to its default value. |
10 |
Load |
Loads the emotion settings from the Emotion widget as the preferred emotion for the character. |
11 |
Clear |
Unsets the preferred emotion. |
12 |
Auto Generate On Track Change |
Automatically generates emotions when the audio source file changes. (This is off by default.) |
13 |
Generate Emotion Keyframes |
Executes Audio2Emotion, which generates emotion keyframes according to the settings. |
Note
Only the Regular Audio Player supports Audio2Emotion, not the Streaming Audio Player.
Pre-Processing
Use the Pre-Processing widget to adjust key variables that influence the final animation.

Reference Number |
Element |
Description |
---|---|---|
1 |
Prediction Delay |
Adjusts the synchronization of mouth motion to audio in seconds. |
2 |
Input Strength |
Adjusts the audio gain level, which influences the animation’s range of motion. |
3 |
Blink Interval |
Determines how often, in seconds, the eyelids perform an animated blink. |
4 |
Eye Saccade Data |
Determines which eye dart motion is applied. (The network is trained with various types of eye darts that vary in range and frequency.) |
5 |
Reset |
Resets the setting to its default value. |
Post-Processing
Use the Post-Processing widget to tweak the animation after the Neural Network has generated the motion.

Note
Te Reset button next to any setting resets that setting to its default value.
Face
Setting |
Description |
---|---|
Skin Strength |
Controls the skin’s range of motion. |
Upper Face Strength |
Controls the range of the motion of the upper region of the face. |
Lower Face Strength |
Controls the range of the motion of the lower region of the face. |
Eyelid Offset |
Adjusts the default pose of the eyelid (-1.0 means fully closed. 1.0 means fully open.) |
Blink Strength |
Controls the eye blink range of motion. |
Lip Open Offset |
Adjusts the default pose of lip (-1.0 means fully closed. 1.0 means fully open.) |
Upper Face Smoothing |
Smooths the motions on the upper region of the face. |
Lower Face Smoothing |
Smooths the motions on the lower region of the face. |
Face Mask Level |
Determines the boundary between the upper and lower region of the face. |
Face Mask Softness |
Determines how smoothly the upper and lower face regions blend on the mask boundary. |
Eyes
Setting |
Description |
---|---|
Offset Strength |
Controls the range of motion for the eye offset per emotion. |
Saccade Strength |
Controls the range of motion for the eye saccade. |
Right eye Rotate X |
Offsets the right eye’s vertical orientation. |
Right eye Rotate Y |
Offsets the right eye’s horizontal orientation. |
Left eye Rotate X |
Offsets the left eye’s vertical orientation. |
Left eye Rotate Y |
Offsets the left eye’s horizontal orientation. |
Lower Denture
Setting |
Description |
---|---|
Strength |
Controls the range of motion of the lower teeth. |
Height |
Adjusts the vertical position of the lower teeth. |
Depth |
Adjusts the front/back position of the lower teeth. |
Tongue
Setting |
Description |
---|---|
Strength |
Controls the range of motion of the tongue. |
Height |
Adjusts the vertical position of the tongue in the mouth. |
Depth |
Adjusts the front/back position of the tongue within the mouth. |
Default Expression Override
Use the Default Expression Override widget to change the default face pose by selecting a frame from the animation dataset. This gives you more control over specific emotional expressions of your character’s the performance.

Element |
Description |
---|---|
Source Shot |
Selects the animation clip. |
Source Frame |
Selects the specific frame from the animation source to use as shape of influence. |
Note
This feature is only available in the Regular A2F Core.
Network
Use the Network widget to configure the neural network for Audio2Face.

Element |
Description |
---|---|
Network Name |
Selects the neural network to use. |
Processing Time |
Displays the latency of the selected Network. |
Multiple Instances
You can create multiple instances of Audio2Face to run multiple characters in the same scene.

Button |
Description |
---|---|
|
Creates a new Audio2Face pipeline. |
|
Creates a new head template. |
|
Creates a new audio player. |
|
Creates a new Audio2Face core. |