Blendshape and joint Conversion
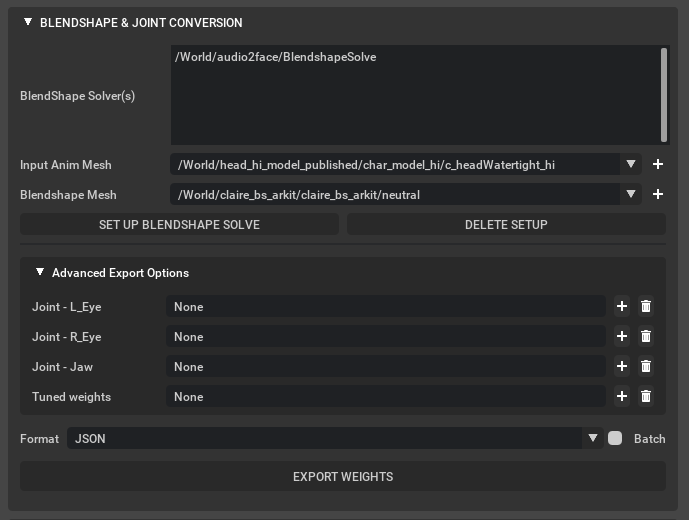
Use the Blendshape Conversion widget to convert the output Audio2Face animation into a blendshape-driven animation. To use - Set your input animation mesh (The mesh driven by audio2face) and then Set the Blendshape Mesh to connect to and click “Setup Blendshape Solve.”
Element |
Description |
|---|---|
Input anim mesh |
The mesh you want to convert into a blendshape animation. It is usually the mesh from the A2F pipeline. |
Blendshape mesh |
The neutral mesh with blendshape prims and this should be based on the usdSkel schema. |
Set up blendshape solve |
Setting up an interactive blendshape solve pipeline in the stage. |
Element |
Description |
|---|---|
Format |
Export the resulting blendshape weight values as .json file or USDskelanim. |
Batch |
Check this option to batch export multiple Blendshape Solves. |
Additional notes |
When exporting animation, you will use the information in “common settings” for the file path and the playback fps. |
MetaHuman |
Now supports Unreal Engine’s MetaHuman via the Omniverse Unreal Engine Connector version 103.1. The exporter creates custom “animation curves” that are imported as an animation sequence to align with the Metahuman skeleton. |
Two arrays |
|
custom:mh_curveNames |
This token array contains the names of the control curves, like CTRL_expressions_eyeLookUpR. |
custom:mh_curveValues |
this float array contains the time sampled curve value data. |
Advanced Export Options
Joint - L Eye: Allows for the Export of Left Eye Joint transform data.
Joint - R Eye: Allows for the Export of Right Eye Joint transform data.
Joint - Jaw: Allows for the export of the Jaw’s pivot as joint transform data.
Tuned Weights: If you have tuned the weights using the Blendshape Weight Tuning Node - add the node here to include in the export.
For additional setup options - Select the “BlendShapeSolve” Omnigraph node under the Audio2Face Main Graph node.
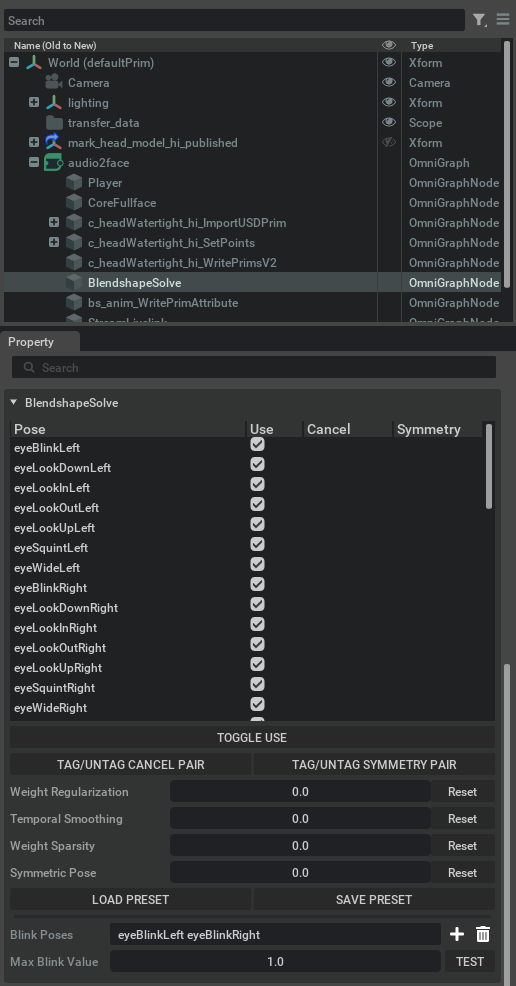
Pose & pose option table
When you set up blendshape solve, you can access the pose options:
Option |
Effect |
|---|---|
Pose |
Name of the blendshape poses. |
Use |
whether we want to include or exclude the pose in the blendshape solve. |
Cancel pair |
tagging 2 poses that cancel each other. They cannot be used together at a frame, only one of them can get a non-zero weight. |
Symmetry |
tagging 2 poses that are symmetric. They try to have the same weights during the blendshape conversion. |
Select All, Selection options |
(Right mouse click menu): Handy pose selection options. |
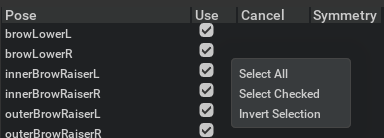
Toggle use |
Toggle the selected “use” checkboxes in the table. |
Tag/untag cancel pair |
Tag/untag the selected 2 poses as a cancel pair. |
Tag/untag symmetry pair |
Tag/untag the selected 2 poses as a symmetry pair. |
Weight regularization |
Stronger value prevents the solve to compute strong weight values. Weight regularization. |
Temporal smoothing |
Stronger value prevents pops between consecutive frames. Temporal weight regularization. |
Weight Sparsity |
Stronger value generates sparse blendshape weights, which is preferable for animator’s edit. L1 weight regularization. |
Symmetric Pose |
Stronger value makes the symmetry poses to have more similar weight values. |
Load preset |
Load preset blendshape options from a .json file. |
Save preset |
Save blendshape options as preset in a .json file. |
Blink Export
The Blendshape solve node gets the input “Blink Weight” from a2f_core.

Blink poses |
User can add/remove the blink pose which will get the blink data from the new “Blink weight” input. |
Max Blink Value |
Allows the user to modify the weight offsets to set the Eye blink Full value to a fully closed eye Blendshape. Set the maximum blink weight value (default is 1.0). Using the “Test” button, preview how the blink shape would look on the face, given the “Max Blink Value”. |
Blendshape Weights Tuner
Each Pose on a given mesh has a different range of motion. The Blendshape Weight Tuner provides the ability to modify the blendshape weight using gain & offset, so you can amplify/reduce/offset some pose weights as you want. This tuning process can greatly improve the animation result on the target face. The Blendshape Weight Tuner node can be found within the Audio2face Graph. Select the node and view it’s properties to adjust the offsets.
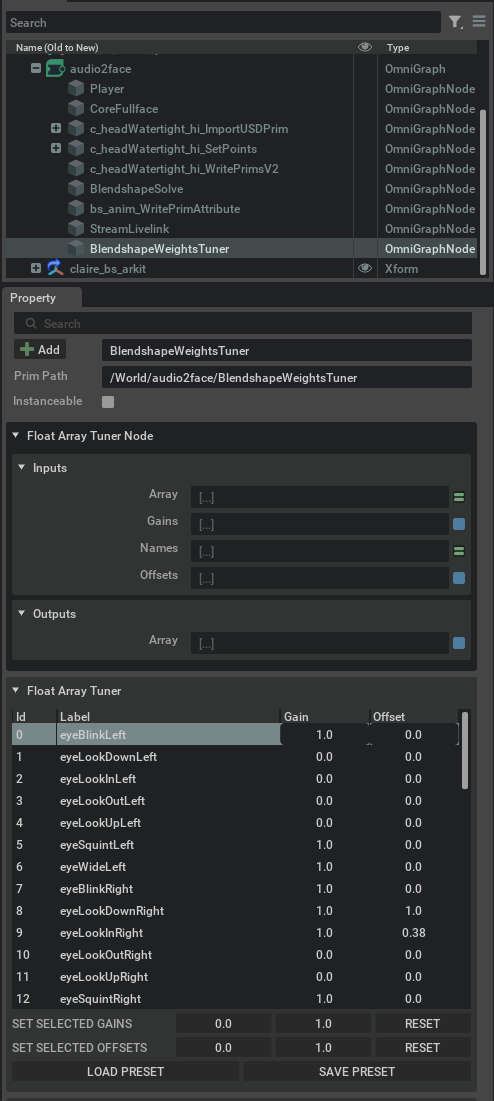
Set Selected Gains |
Set the gain values for the selected weights on the list. 0 sets the selected gains to 0. 1 sets the selected gains to 1. Reset sets the gain value to the default value stored in the input Gains attribute. |
Set Selected Offset |
Set the offset values for the selected weights on the list. 0 sets the selected gains to 0. 1 sets the selected gains to 1. Reset sets the offsets value to the default value stored in the input Offsets attribute. |
Save Preset |
Saves the current mapping to a json file. |
Load Preset |
Sets the mapping from a json file. |
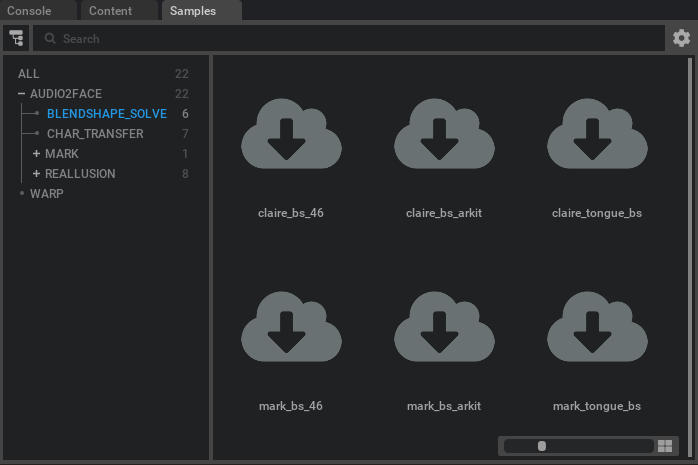
BlendShape Source files
You can find the required blendshape mesh assets in the Samples Tab under BlendShapes. Provided are BlendShape solutions for both Mark and Claire Models. Follow the Same Setup procedure for each mesh you which to generate data for.
To Setup - Drag and drop the _tongue_bs file into your stage window. The Blendshape assets are blue for easy identification from the driven mesh.