Advanced Settings
Advanced Settings allow a “One-Click” export experience with fully customizable settings. These settings are saved internally to the Revit file, so all members of the Project Team can export in the same way. Additionally, Advanced settings allow for a Project or BIM Manager to set an override .json file to control a subset of export settings across projects.
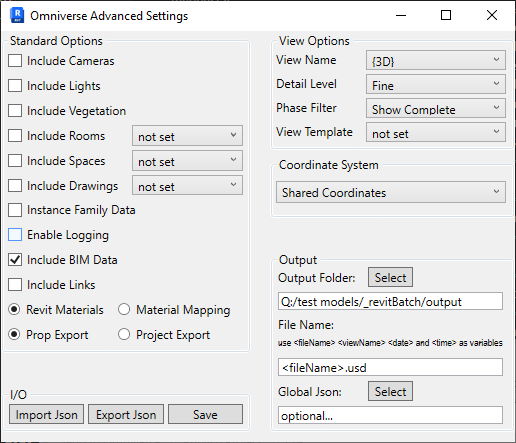
Standard Options |
Result |
|---|---|
Include Cameras |
When checked, all elevations in the Revit model are exported as cameras
|
Include Lights |
When checked, Revit Light objects are exported
|
Include Vegetation |
When checked, all plants in the Revit model are exported
|
Include Rooms |
When checked, exports rooms within the model as mesh volumes colored by selected color scheme.
|
Include Spaces |
When checked, exports spaces within the model as mesh volumes colored by selected color scheme.
|
Include Drawings |
When checked, exports drawings from selected Publish Set as textured mesh planes anchored at real-world scale to the model.
|
Enable Family Instancing |
When checked, export Revit Family objects
|
Enable Logging |
When checked, a log is created and a dialog displaying any errors or warnings is shown after export
|
Include BIM Information |
When checked, parameters of Revit elements are exported as USD properties
|
Include Links |
When checked, linked Revit models are included in the export
|
Use Revit Materials |
When selected, use the rendering assets of Revit materials
|
Use Material Mapping |
When selected, mapped materials are used in place of Autodesk rendering assets.
|
Prop Export |
When selected, Revit model is exported with Prop Workflow
|
Project Export |
When selected, Revit model is exported with Project Workflow
|
View Options |
Result |
|---|---|
View Name |
3D Revit View to export
|
Detail Level |
Set the detail level to be temporarily applied to the view during export
|
Phase Filter |
Set the phase filter to be temporarily applied to the view during export
|
View Template |
Set the view template to be temporarily applied to the view during export
|
Coordinate System |
Set the coordinate system to be used during model export
|
Output Options |
Result |
|---|---|
Output Folder |
Select a folder for the export
|
File Name |
Specify the name and usd extension of the file. Tokens may be used as variables in the file name.
|
Global Json |
Optionally select a .json file to override some of all of the Advanced Settings
|
I/O |
Result |
|---|---|
Import Json |
Select a .json file to import and apply its settings
|
Export Json |
Save the current advanced settings as an external .json file
|
Save |
Save the current advanced settings internally into the Revit model (Revit file must be Saved/Synced for settings to persist)
|
Scene Optimization
Scene Optimization utilizes core optimization libraries found in the standalone application and kit extension that performs scene optimizations at the USD level. This allows complex scenes to be converted into more lightweight representations which can be displayed and evaluated more quickly.
The integration provides various processes which can be used individually or in combination stack to optimize a scene. A few base configurations have been provided in the connector to optimize the data prior to sending to Omniverse USD Composer.


To use a different optimization preset, click > + then navigate to the desired json configuration file.
Please see the Scene Optimizer user manual for information on the optimization operations and how to create custom configuration files.
Note
Merging texture based materials is not currently supported, only base colors.
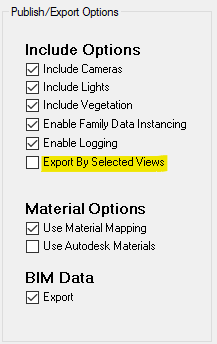
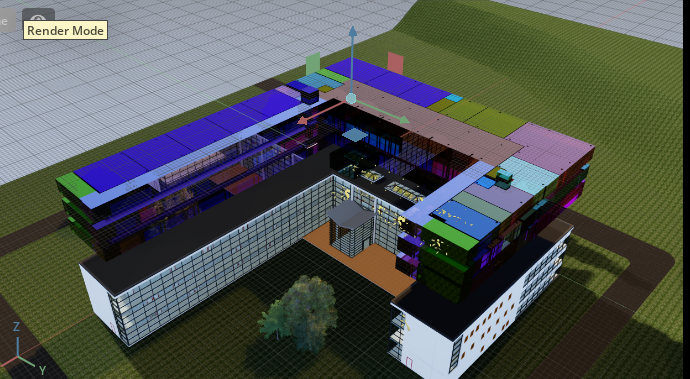
Export By Selected Views
With this setting checked, users can export views within a single Revit files as separate USDs. Depending on whether the user has selected prop or project export, the USDs are combined into a single project or not.
This feature is intended for models whose elements are separated by views showing worksets, phases, or other forms of categorization set by the user.
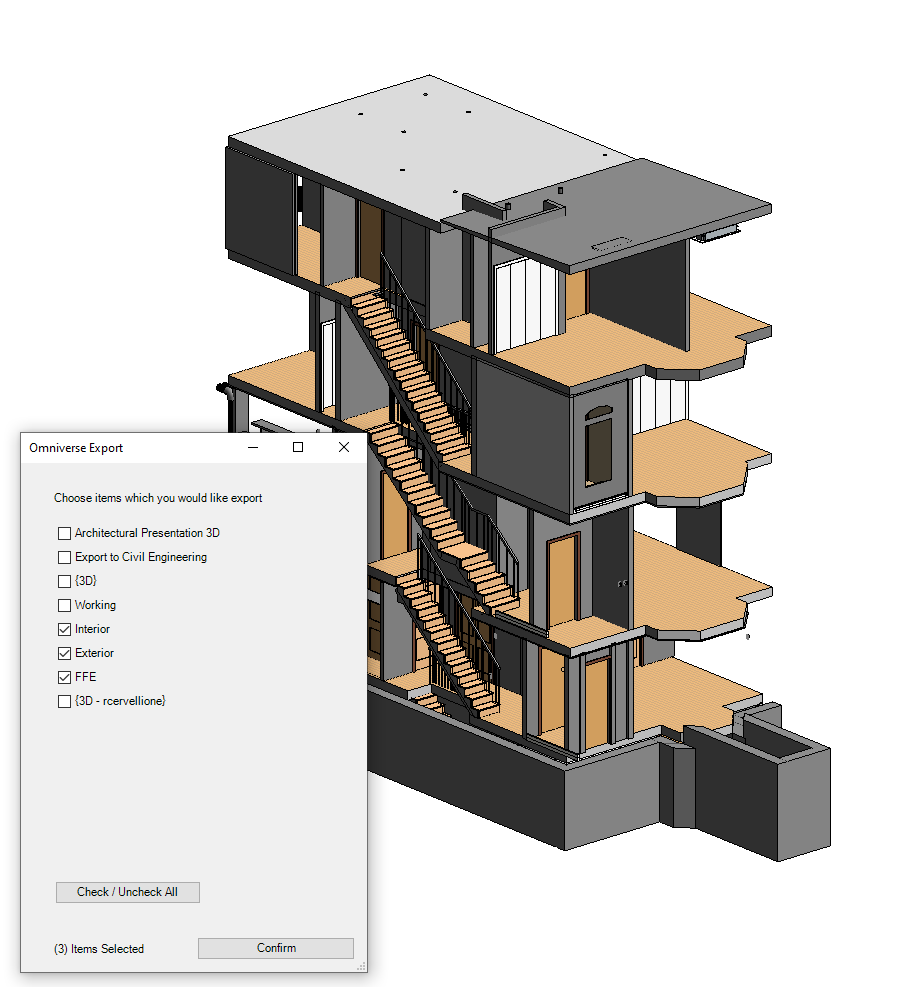
Similar to the Batch export UI, users can select which views to export. For example, this Brownstone model has views separating interior, exterior and FF&E elements:
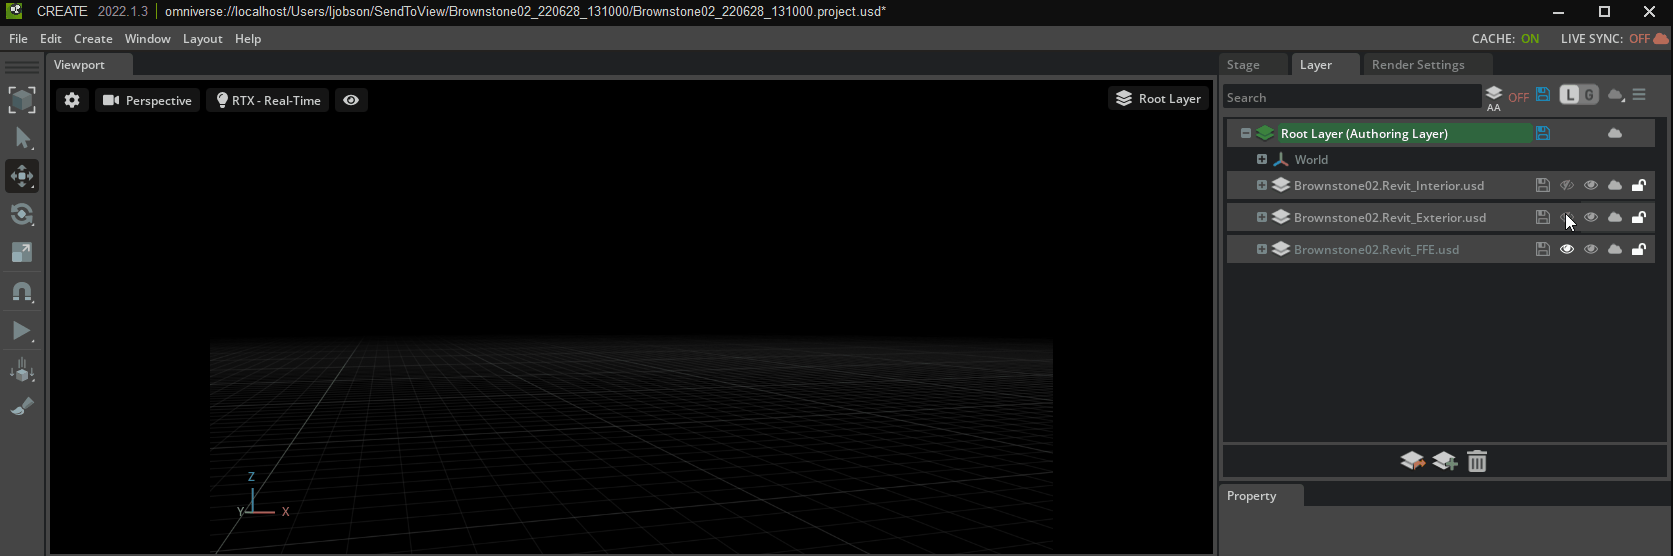
When exported as a project to Omniverse, elements in views are exported as separate USD files and combined into a single project (viewed in Omniverse USD Composer):
Additional Notes
If an element is shown in multiple views, it will be exported to each USD representing that view.
Names of exported views take the provided name of the file in the export UI + the name of the view.
Export Log
With logging enabled in settings, warnings and errors encountered in export as surfaced in a simple UI after export. This can provide some clarity on elements which failed to convert.
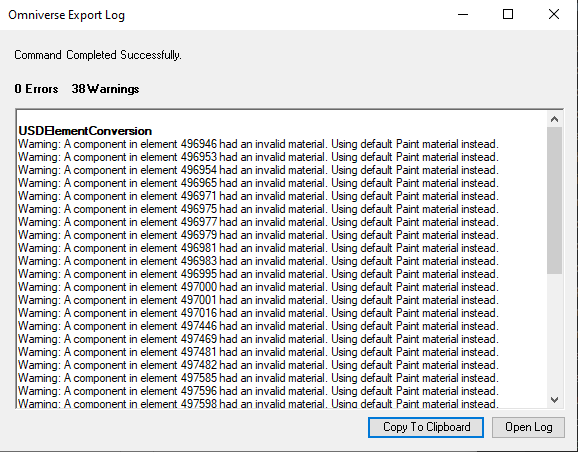
Note
Logs are saved in %localappdata%NVIDIA CorporationOmniverseLogs
Drawing Export
With this setting checked, you can now export drawings from Print Sets as textured mesh quads which are anchored in place to their respective areas.
To create a print set, open the Print dialog in Revit. You have the ability to choose which print set’s drawings you would like exported to the model.
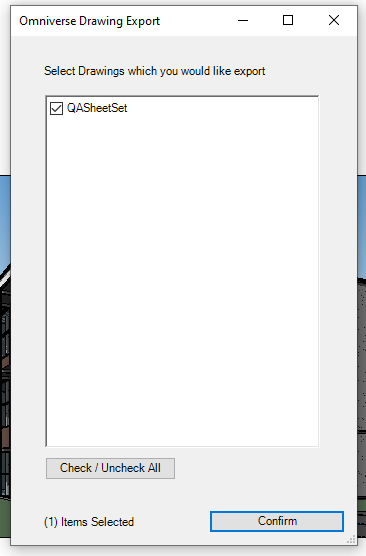
Drawings must have crop regions in their view in order to anchor to the model. If a drawing wasn’t successfully exported, this is because the drawing did not possess a crop region.
Drawings are located in the USD hierarchy under the path World/{modelName}/Media/Drawings , which is invisible by default.
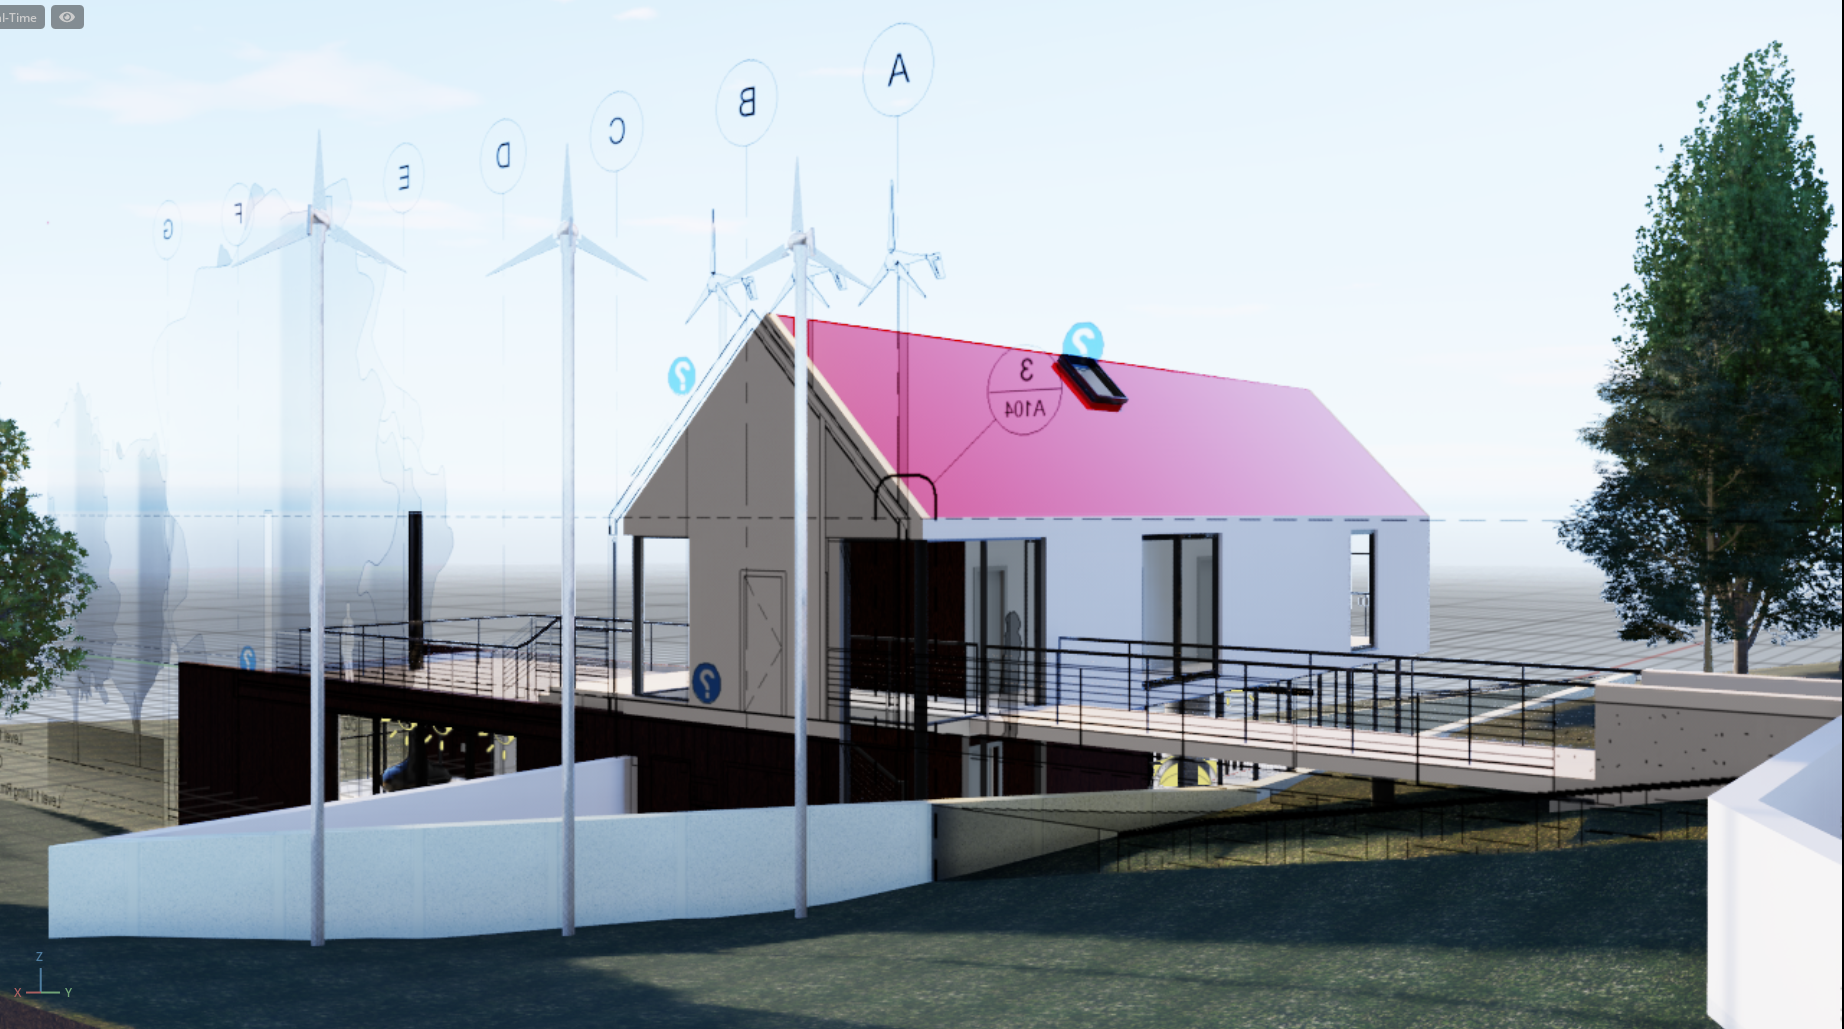
Use drawing export in combination with the Section widget in Omniverse USD Composer to bring your floorplans to life:
Additional Notes
Transparency can be applied in images in Omniverse USD Composer by modifying the material.
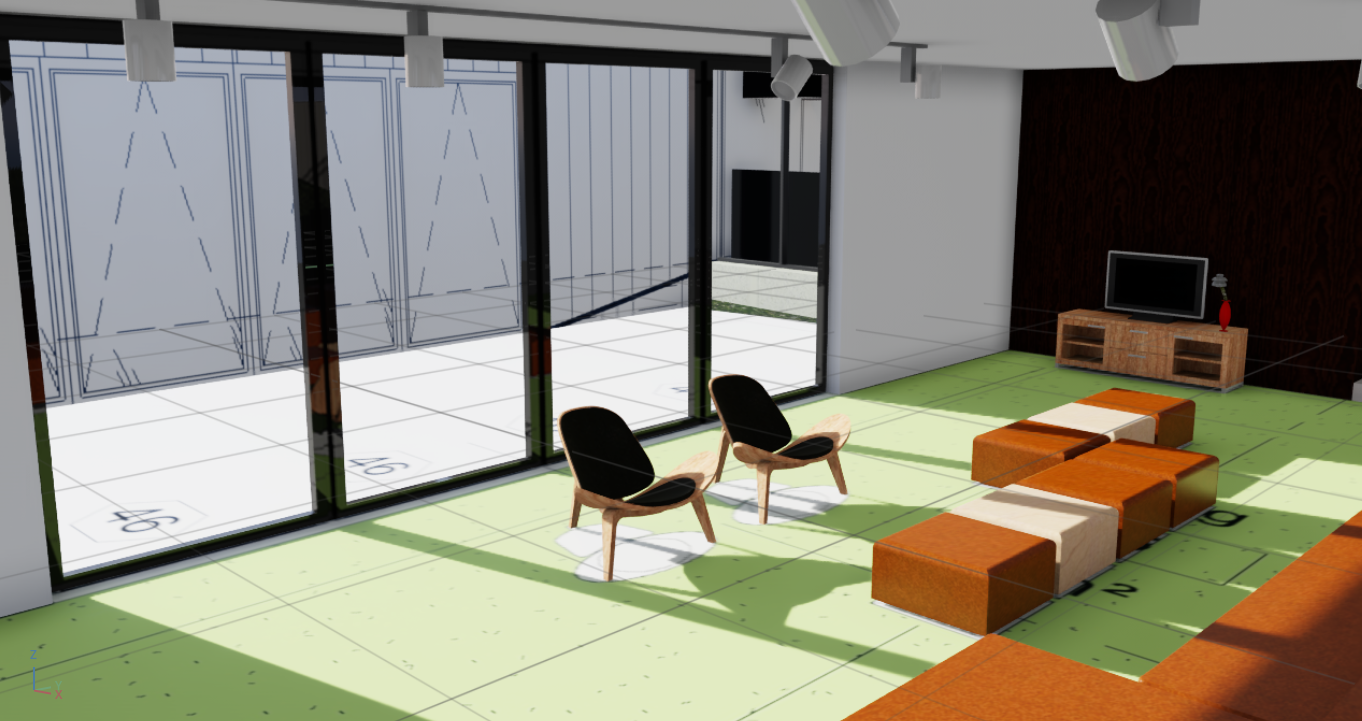
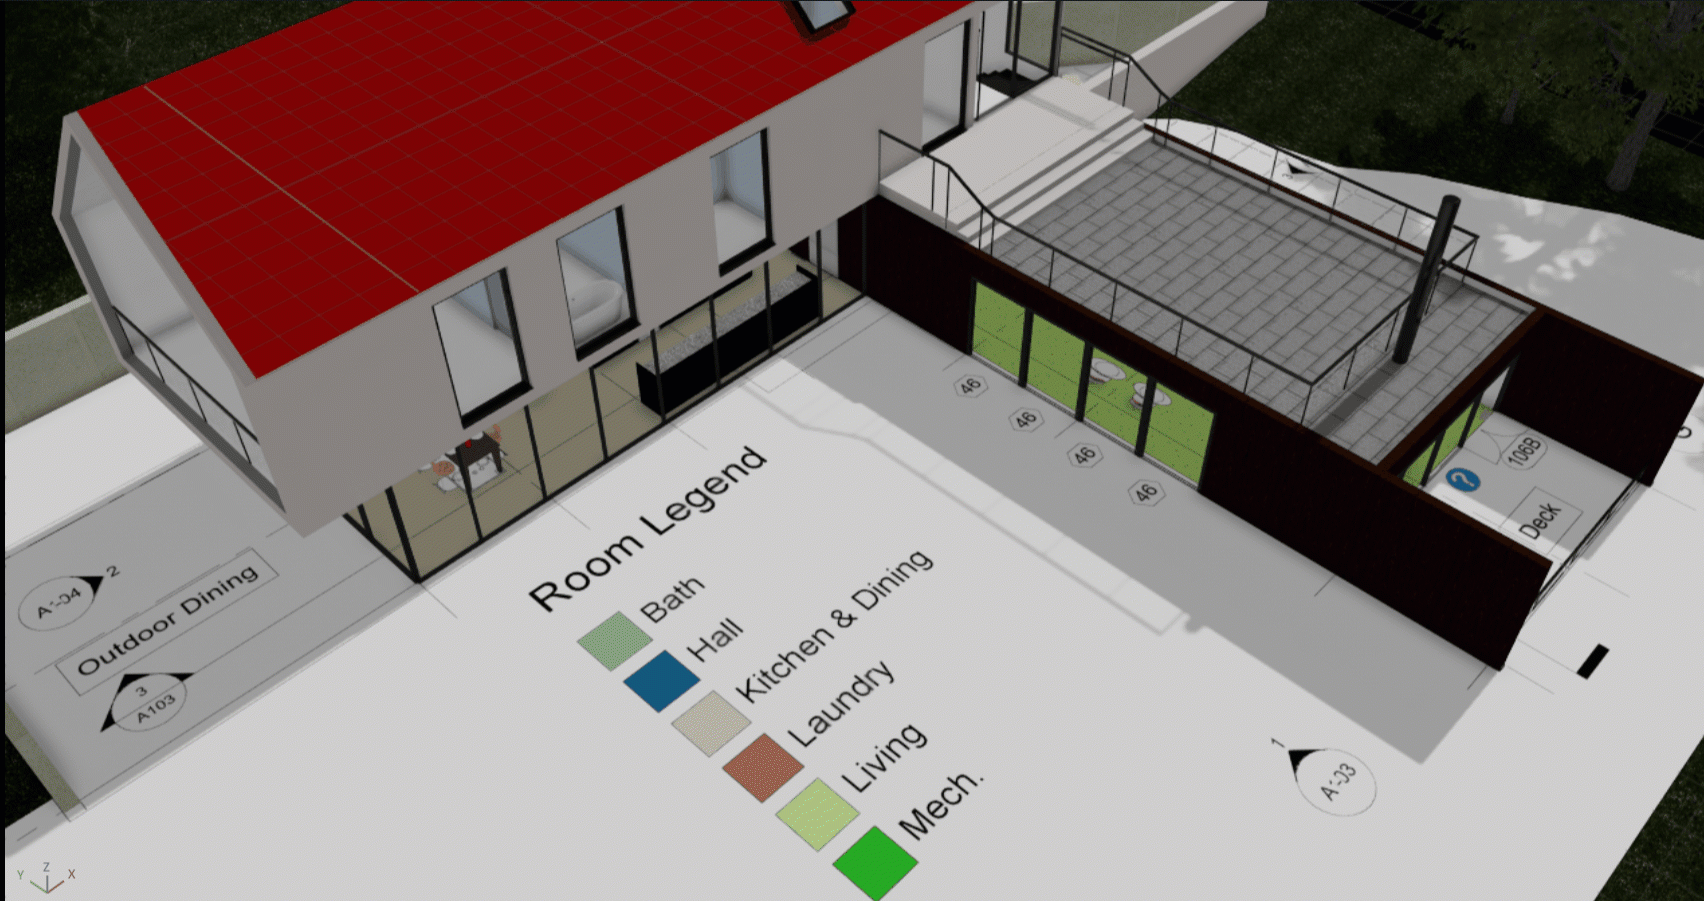
Room & Space Export
You can now check Include Rooms and Include Spaces in the settings window. This will export these areas as volumes.
Rooms and spaces are located in the USD hierarchy under the path World/{modelName}/Geometry/Rooms , which is invisible by default.
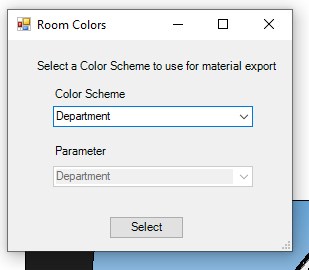
In versions 2022 and later, you can select a color scheme with which to color the exported rooms - this will create new materials in your USD.
Additional Notes
Volume of room object may be smaller than the volume of the room.
If a valid color cannot be generated, a random or default one is assigned.