Asset Swap
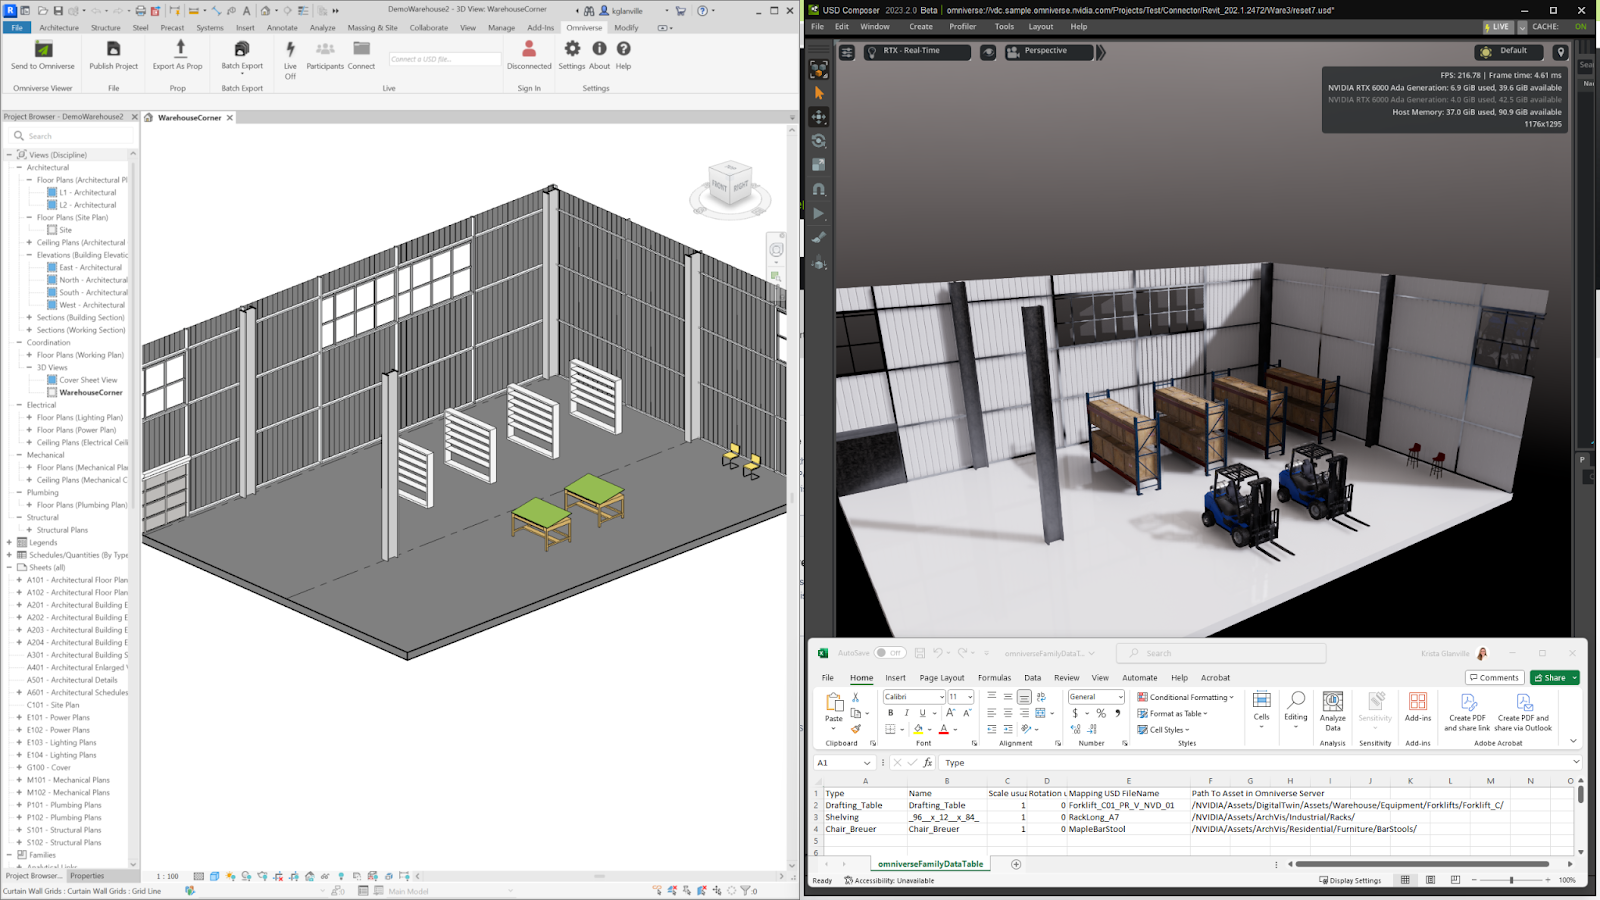
You can use CSV files to swap components from your Autodesk Revit model with USD assets upon exporting to Omniverse.
CSV and Assets
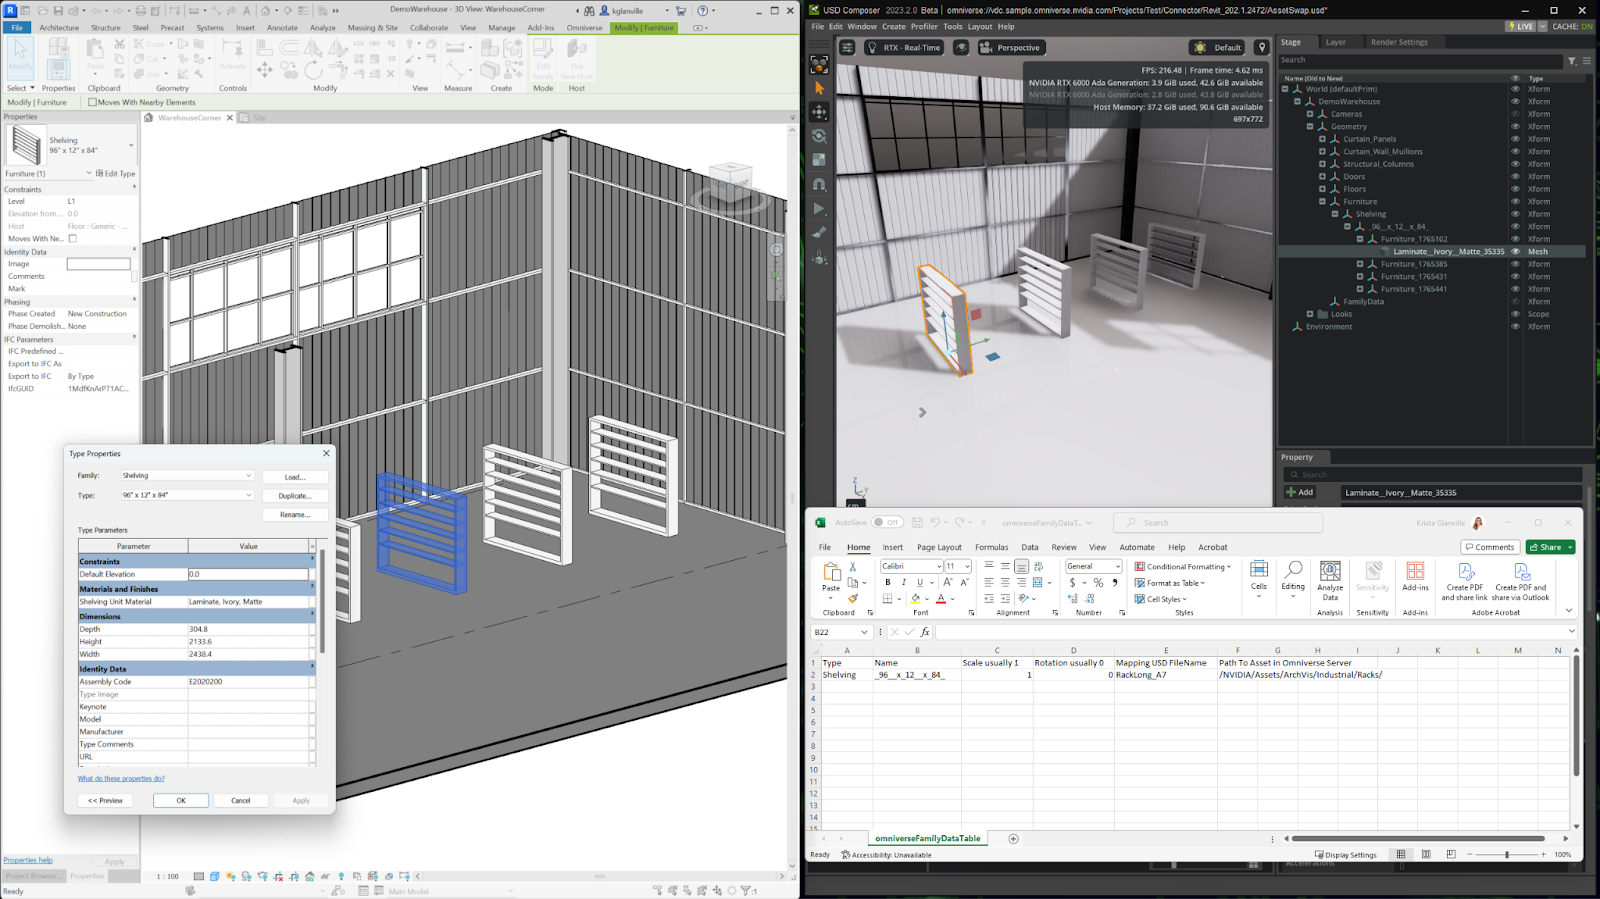
You will need to know the Family and Type of the components you’d like to swap in Revit, as well as the USD asset name and location you’d like to replace it with. You can find the CSV file to control these changes in the following directory:
<Documents>/Omniverse/Revit/omniverseFamilyDataTable.csv
Format
Column |
Expected Value |
|---|---|
Type |
“Family” name of component in Revit (see note below)
|
Name |
Indicates if there is a parameter override (see note below)
|
Scale usually 1 |
Path into the location in the Omniverse database (points to a Mount)
|
Rotation usually 0 |
If necessary, the parameter override in MDL
|
Mapping USD FileName |
Path into the location in the Omniverse database (points to a Mount)
|
Path to Asset in Omniverse server |
“Material and Asset Location” under Settings. Exclude the server name, ex: /NVIDIA/Assets/Furniture/
|
Note
Omniverse does not read spaces or special characters. Replace any spaces or special characters with underscores.
These fields are case sensitive.
If you are not sure about how to format the name of your Family or Type, you can send your file to Omniverse before editing the CSV.
Asset Swap Process
Once you have the information you need from Revit and Omniverse, follow these steps:
Close Revit if it is open. It is recommended that you also close your USD file if it is open.
Fill out the CSV file with your changes.
Save and close the CSV file.
Re-open Revit and export your file as a USD to Omniverse.
When you open the exported USD file, asset swap should be complete.