Nucleus on Microsoft Azure#

Introduction#
This guide focuses on installing and configuring an Omniverse Enterprise Nucleus Server on Microsoft Azure. The requirements for a successful deployment are outlined along with the technical steps for getting Nucleus successfully running within your Microsoft Azure account.
Depending on requirements and/or your internal policies, there may be some settings and/or options that are set differently than what’s covered within this documentation.
Solution Overview#
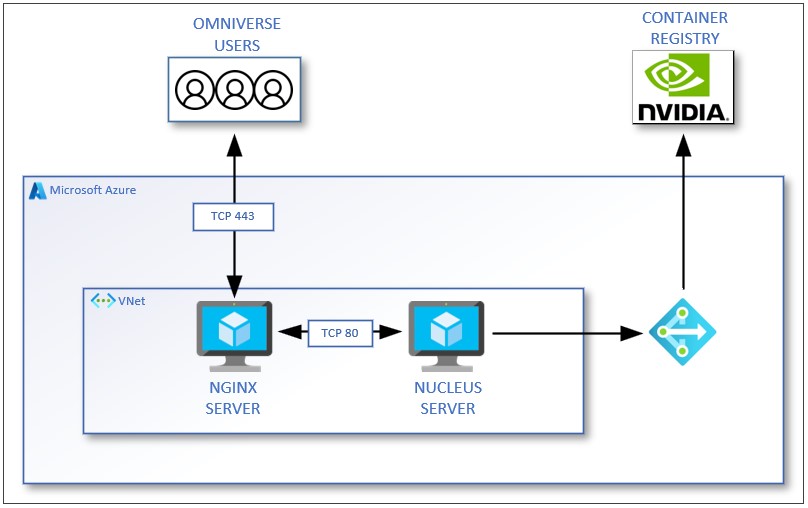
The following steps outline a reference solution that implements the basic components of a Nucleus deployment. To handle communication from end users, an NGINX server receives the traffic, provides an SSL termination endpoint, and passes the traffic back to the Nucleus Server.
In a future iteration of this documentation, an alternative method of using an Azure Application Gateway instead of an NGINX server will be provided.
Attention
Steps within this document require network configuration changes (via Network Security Groups) to allow remote connectivity. Please consult your IT/Information Security team for proper advisement.
Prerequisites#
A Microsoft Azure account to deploy the necessary Virtual Machines to run an Enterprise Nucleus Server and an NGINX Reverse Proxy server
A Fully Qualified Domain Name (FQDN) that you plan to use for your Nucleus environment
The ability to perform DNS changes
An SSL certificate for secure HTTPS/TLS communication from a public Certificate Authority (CA)
Provisioning your Environment#
From within your Microsoft Azure portal, click Create a resource, then click Create under Virtual Machine.
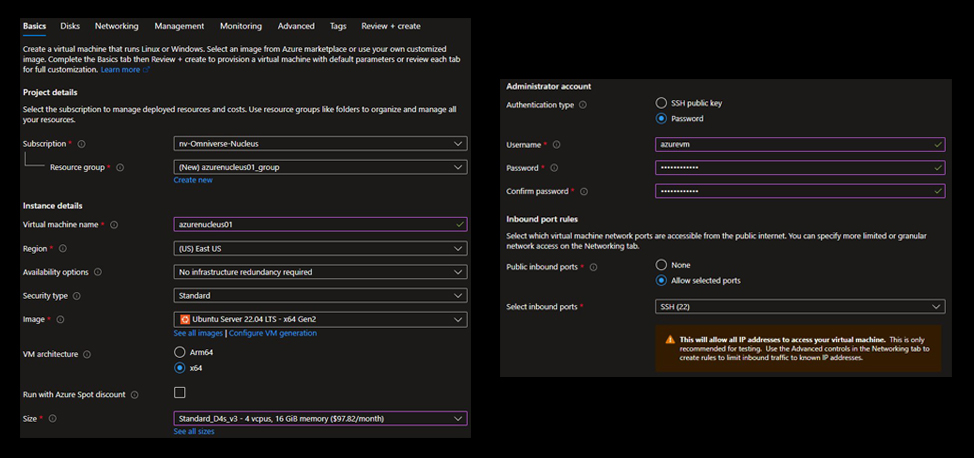
On the Basics tab, complete the following information:
Subscription - Choose the subscription that this VM and infrastructure should be within. (This is based on your Azure account; it’s common for only a single subscription to be present.)
Resource Group - If a common Resource Group is already present, that can be used. Depending on your configuration, a unique Resource Group can be created.
Virtual Machine Name - Name this Virtual Machine according to any preferred naming standards.
Region - Choose the preferred Region for this Virtual Machine.
Note
In this reference solution, no infrastructure availability redundancy is configured or enabled.
Image - Choose the version of the Linux Operating System to deploy to this Virtual Machine. (Ubuntu is recommended- 20.04 and 22.04 are fully supported.)
VM architecture - Select x64 as Nucleus is not supported under the Arm64 architecture.
Size - For this reference solution, the D4s_V3 (4 vCPU’s, 16GB RAM) instance type is used, however this sizing will vary depending on your usage and requirements.
Authentication Type - Depending on your security policies, you can choose to log into your Virtual Machine (SSH) using a password or a public key. If you choose to use a password, enter in a username, password, then confirm the password. If you choose to use a public key, you can choose to allow Azure to create a key for you, or you can provide your own.
Public inbound ports - For easier access to the Virtual Machine during set up, choose to allow SSH (TCP 22) inbound to the Virtual Machine as suggested by default. Once the Virtual Machine is deployed and access to it is confirmed, the access rules can be modified and further secured.
Click Next : Disks to continue.
Choose the type of disk architecture that you’d like to use for your Virtual Machine depending on your requirements. The Premium SSD disk type will provide the best performance for your Enterprise Nucleus Server.
Click Create and attach a new disk to create a disk that will be the storage location for your Nucleus assets.

The following screen will be shown:
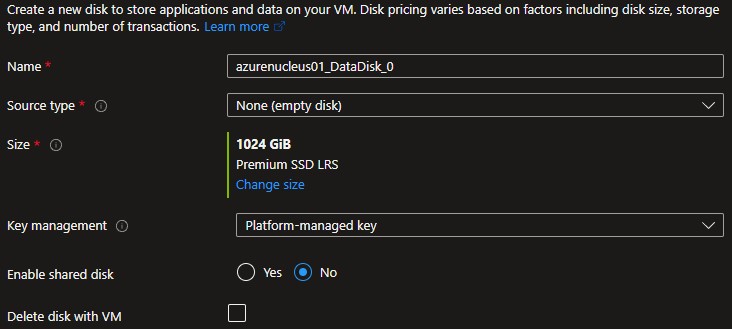
Name the disk or keep the default, then choose the appropriate size for your disk. (Typically, the default is 1TB.) Click OK to continue the Virtual Machine creation process. The following screen will now appear:
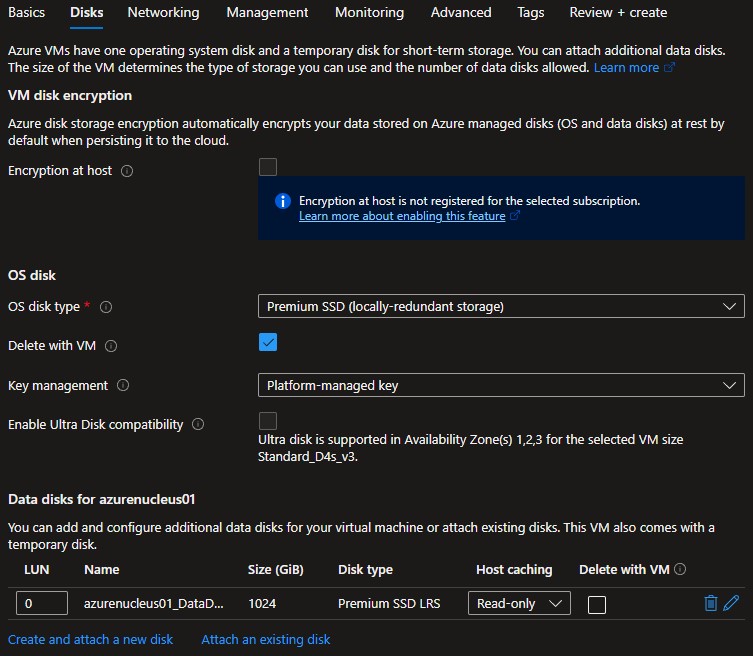
Attention
Additional disk(s) created will not be automatically added, formatted, or configured to be used within the Virtual Machine. Refer to the Additional Reading and Reference Links below for information on how to configure this disk correctly for use within Linux.
Click Next : Networking to continue.
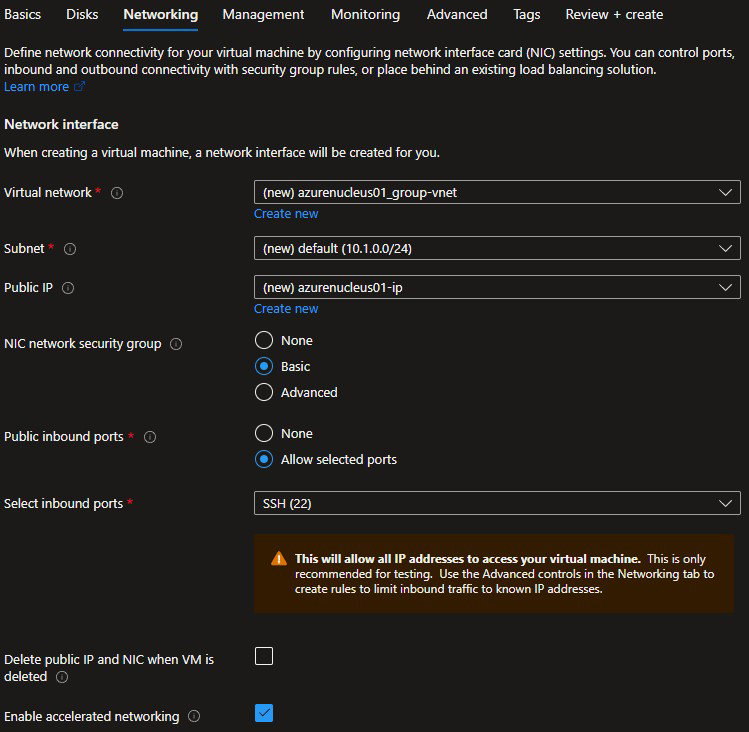
Choose the defaults as provided or choose to integrate this Virtual Machine into your existing Azure networking environment. As shown in a previous step, SSH (TCP 22) will be open from the Internet.
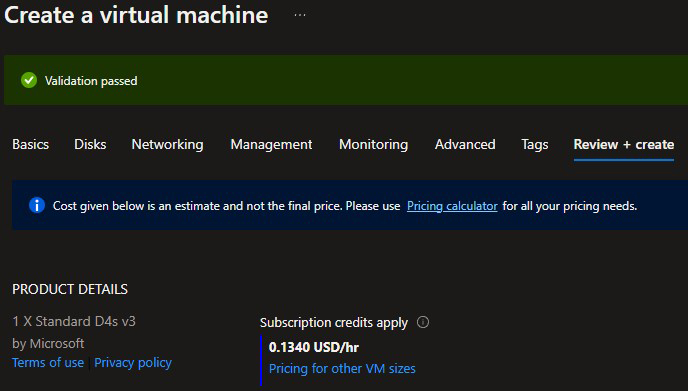
You can click Review + create at this stage to review your previously chosen settings and create the Virtual Machine, or you can choose to configure additional Management, Monitoring, and Tags as required for your infrastructure. For this example, we will click Review + create.
If there are no errors, the Virtual Machine validation should pass and a summary will be provided. If there are no required edits or changes, click Create.
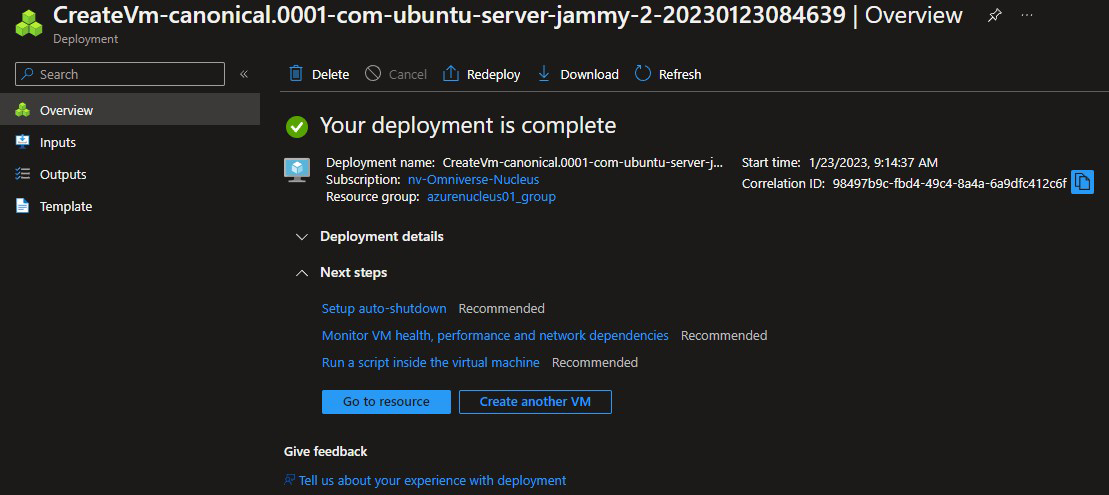
The deployment will now begin as shown:
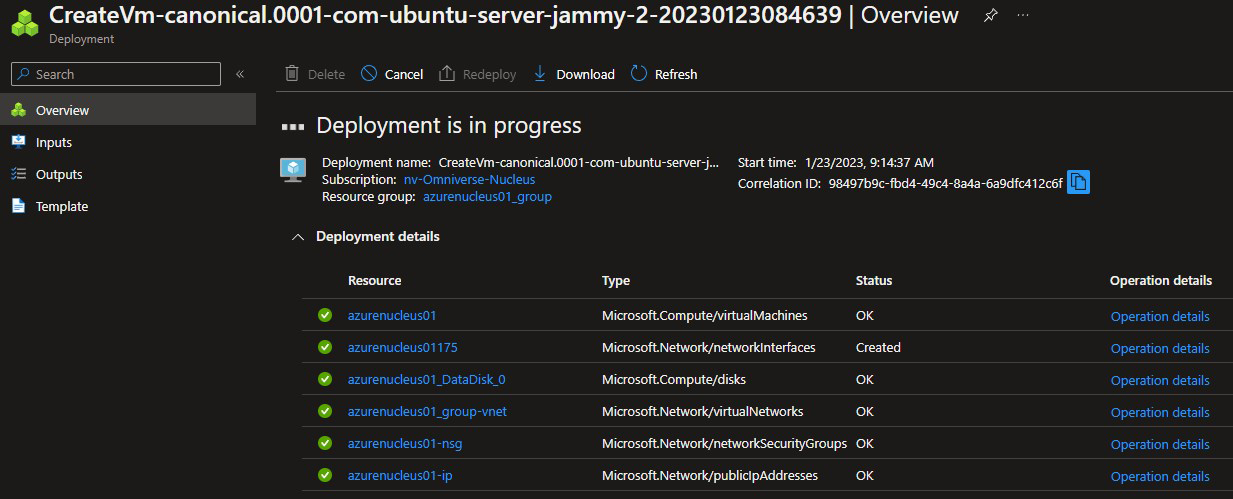
When the deployment is complete, the following confirmation is shown:
Before configuring your Enterprise Nucleus Server Virtual Machine, you may choose to build a second Virtual Machine for your NGINX Reverse Proxy. Return to the Provisioning your Environment section above to create this Virtual Machine.
Note
The NGINX Virtual Machine does not require the same vCPU, memory, and storage that your Enterprise Nucleus Server requires. While your requirements may vary, the B4ms (4 vCPU’s, 16GB RAM) instance type is recommended for most installations.
Note
When configuring the networking for your NGINX Virtual Machine, ensure that it’s created within the same Virtual Network (VNet) and subnet so that this server and your Enterprise Nucleus Server can communicate over the internal subnet. In more complex Azure network infrastructures, both Virtual Machines may be on different subnets, however, ensure that routing infrastructure is present to allow these Virtual Machines to communicate.
When both Virtual Machines are built and accessible, continue to the configuration steps.
Configuring your Environment#
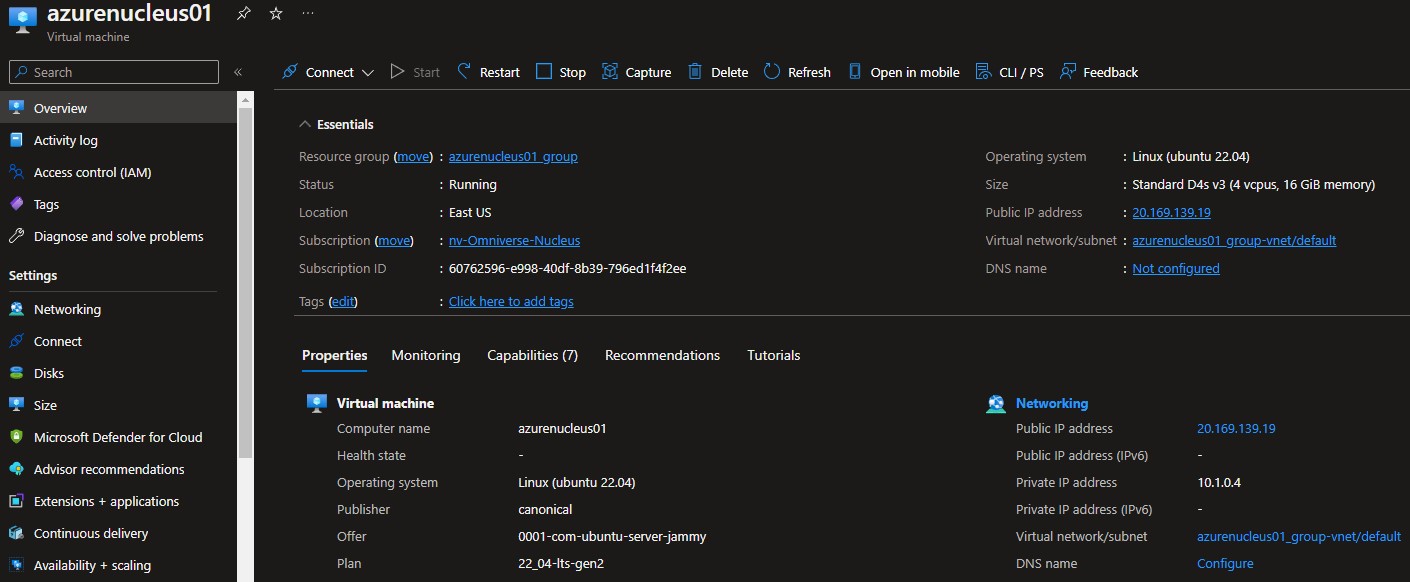
From within the Microsoft Azure portal, click the name of the Nucleus Virtual Machine to display its properties as shown below:
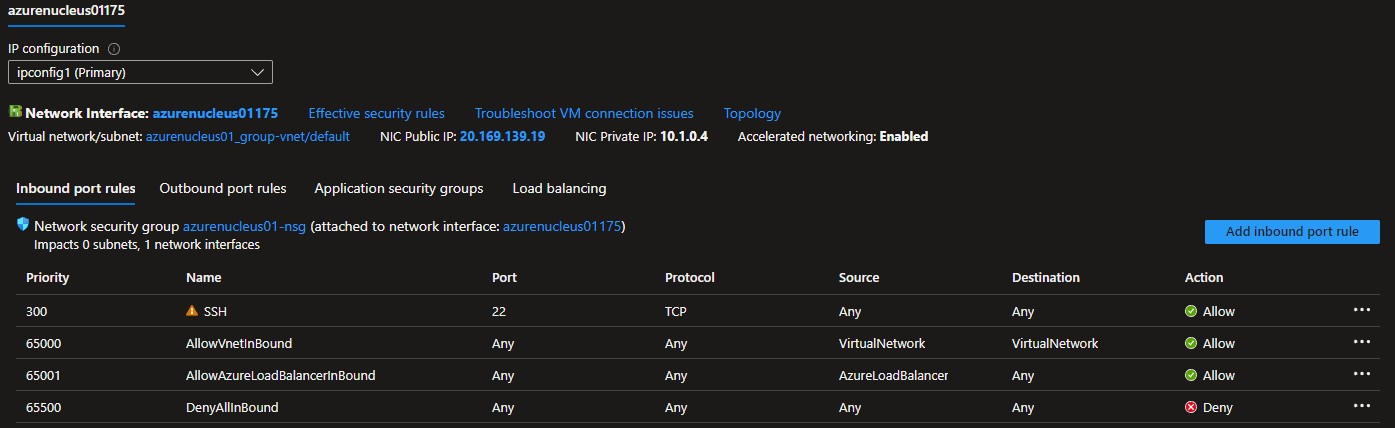
Under Settings, click Networking. This screen will now appear:
Note
Make note of the private IP Address for your Enterprise Nucleus Server. This IP Address will be required in a future step when configuring the NGINX Reverse Proxy server.
Under Inbound port rules, click SSH which will allow you to modify the rule. For best security practices, change the Source of this rule to your Internet-facing IP Address or network range. This will limit access to only the address(es) that are specified.
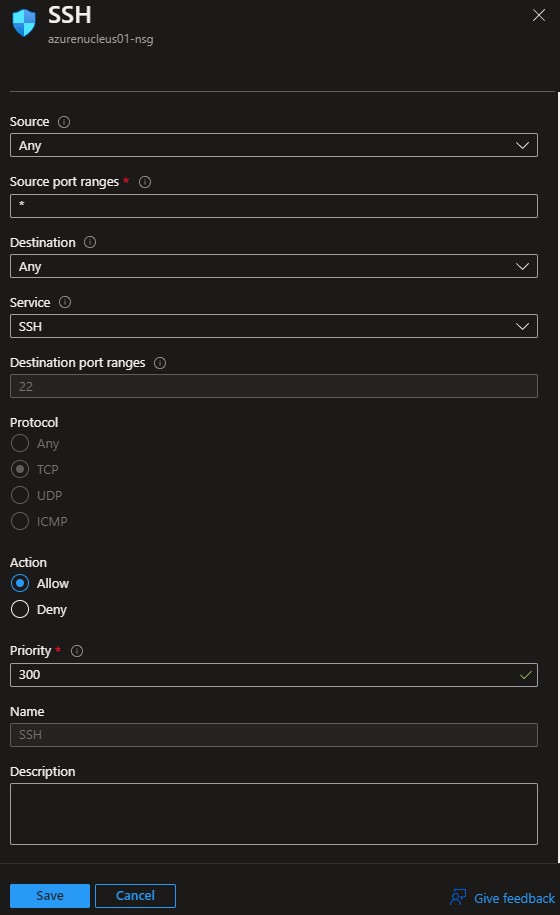
Once your changes are made, click Save.
Locate the public IP Address of your Enterprise Nucleus Server Virtual Machine and connect to it using your preferred SSH client using the authentication type (username/password or keys) chosen earlier. The connection should be successful.
Before installing the Enterprise Nucleus software, you will want to partition, format, and then mount the additional data disk that was created in an earlier step. Once those steps are completed and the new disk is presented to the Virtual Machine, install the Enterprise Nucleus software.
See the Additional Reading and Reference Links at the bottom of this document to access a walk-through of installing and configuring a Enterprise Nucleus Server.
Following the same steps above, locate your NGINX Virtual Machine and modify the SSH configuration appropriately. As this Virtual Machine will be accessible via HTTPS (TCP 443), you will also want to add an inbound port rule to the networking configuration:
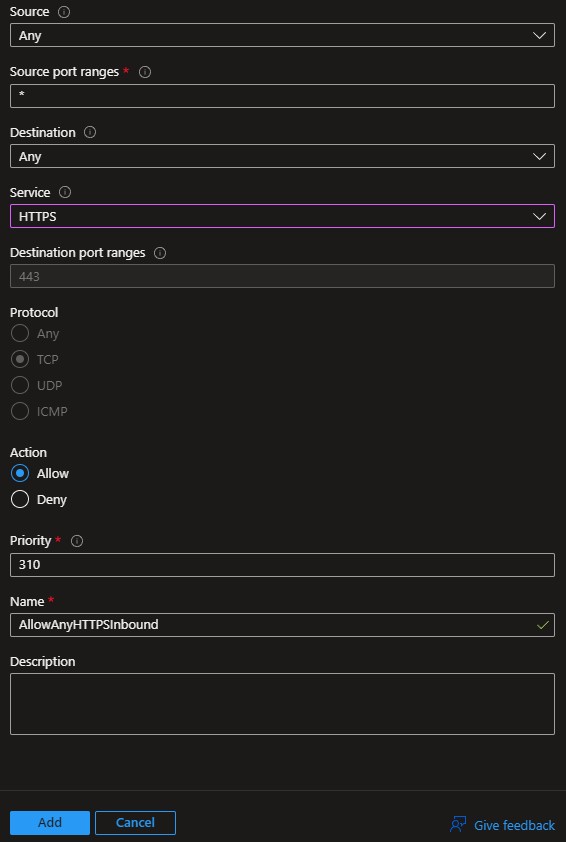
Once your changes are made and verified, click Add to save them.
Note
In the above screenshot, all traffic over HTTPS is allowed to access the NGINX Virtual Machine. Configure the access as appropriate for your environment.
Locate the public IP Address of your NGINX Virtual Machine and connect to it using your preferred SSH client using the authentication type (username/password or keys) chosen earlier. The connection should be successful.
See the Additional Reading and Reference Links at the bottom of this document to access a walk-through of installing and configuring an NGINX Reverse Proxy.
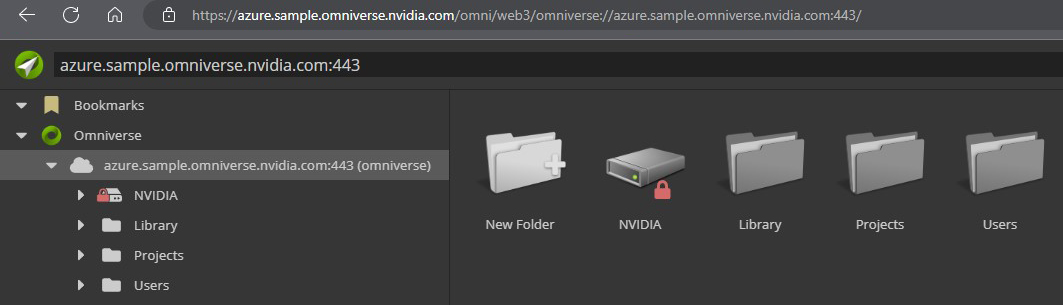
Once the NGINX and Enterprise Nucleus Servers are configured and services have been started, access your Enterprise Nucleus Server using its DNS name using your web browser. If your configuration is correct, the following screen should appear: