Deploy, Configure, and Develop#
USD Search API can be deployed easily on your preferred infrastructure and connected to a compatible storage backend. Currently, supported storage backends include:
Amazon S3 buckets and other S3-compatible storage providers
Enterprise Nucleus server
Azure Blob storage
Google Cloud storage.
Note
To set up an Enterprise Nucleus server, please follow these setup instructions.
Prerequisites#
For evaluation or development purposes, a quickstart script is available to set up a local Kubernetes environment using MicroK8s. For more robust setups or production environments, ensure you have a configured Kubernetes cluster.
If you do not have a Kubernetes environment, please refer to Kubernetes Cluster Setup Quickstart and Kubernetes Setup Documentation for installation guidance. For information on Kubernetes-specific tasks and troubleshooting, please refer to the Kubernetes Documentation.
For Amazon Elastic Kubernetes Service (Amazon EKS) deployments, you can use the USD Search Terraform Module as a quickstart to provision a fully operational EKS cluster with GPU support and the necessary infrastructure, allowing you to run USD Search API effortlessly.
The following table guides you to the corresponding starting point based on your deployment environment.
Deployment Environment |
Where to Get Started |
Supported Storage Backend |
Suitable for: |
|---|---|---|---|
Bare Metal (MicroK8s) |
Amazon S3, Enterprise Nucleus |
Evaluation, development |
|
K8s cluster (AWS, GKE, on-prem K8s cluster) |
Amazon S3, Enterprise Nucleus |
Production, evaluation, development |
Kubernetes Cluster Setup Quickstart#
To simplify installation, provided are two sample ways of provisioning a Kubernetes cluster in the following scenarios:
Bare Metal (MicroK8s)
Amazon Web Services (AWS)
Please find a more detailed explanation for each of these sample scenarios below.
Bare Metal (MicroK8s)
This type of deployment focuses on setting up the MicroK8s cluster and then deploying the USD Search API helm chart on an empty node. Such installation is typically well-suited for quickly starting up the service for testing purposes.
To get started with installation, please follow USD Search API Quick Setup.
Quick startup scripts provision the MicroK8s cluster and install the USD Search API helm chart. Therefore, upon successful completion of the script, no extra steps are required; a working instance of USD Search API will be created.
Note
The USD Search API helm chart deployed with this script is tuned for deployment on the MicroK8s cluster (that is getting provisioned as part of the installation procedure). Therefore it may not work with other K8s servers.
AWS
This type of deployment focuses on creating a cluster in AWS using the dedicated terraform module. The cluster provisioned in this way will have all components required for USD Search enabled.
To get started with this installation, please follow the USD Search Terraform instructions.
After the cluster is provisioned, the standard Helm installation of the USD Search API is required to complete the deployment. Please refer to the helm chart deployment section for more details.
Deploy Helm Chart#
For this type of installation, it is assumed that the Kubernetes cluster is already available and configured.
Note
You need to generate your NGC Helm and container registry API key prior to fetching the Helm chart. See onboarding guide NGC API Key onboarding guide.
Please follow the USD Search Helm chart for installation procedure details.
After all the pods are initialized, you can run the following command to verify deployment:
helm test <deployment name>
This command will run a few tests to verify that the deployment is operational. Sample output of this command for a successful deployment includes the following lines:
TEST SUITE:     <deployment name>-ags-api-verification
Last Started:   Tue Sep 23 13:00:03 2025
Last Completed: Tue Sep 23 13:00:09 2025
Phase:          Succeeded
TEST SUITE:     <deployment name>-embedding-service-verification
Last Started:   Tue Sep 23 13:00:17 2025
Last Completed: Tue Sep 23 13:00:24 2025
Phase:          Succeeded
TEST SUITE:     <deployment name>-database-search-api-verification
Last Started:   Tue Sep 23 13:00:09 2025
Last Completed: Tue Sep 23 13:00:16 2025
Phase:          Succeeded
TEST SUITE:     <deployment name>-<storage backend type>-storage-check
Last Started:   Tue Sep 23 13:00:32 2025
Last Completed: Tue Sep 23 13:00:39 2025
Phase:          Succeeded
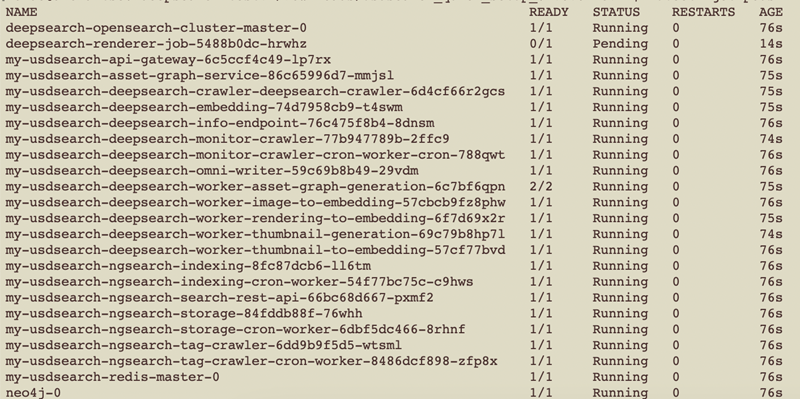
Successful installation should result in:
All the pods on the server are in Running mode, except for
deepsearch-render-job-...ones, which may be in Pending mode. The reason why render-jobs may be in Pending mode is that each new rendering job would wait for the sufficient Kubernetes resources.
The following screenshot shows an example of a healthy operation of the Helm chart.
The API gateway endpoint is available and responds to requests. To check this, run:
helm status <deployment name>
This command outputs information on how to access the USD Search endpoint. Please view the sample output below:

[If monitoring was enabled] Grafana dashboards should be visible in Grafana instances that are running on the Kubernetes cluster.
The terminal window shows a successful deployment.
Note
For troubleshooting, please refer to the following resources:
Usage#
Once USD Search API is deployed, it can be accessed directly through the REST API or via the Python client library.
REST API
The USD Search REST API is ready to use immediately after deployment. Comprehensive documentation for the REST API can be found on GitHub. Additionally, live interactive API docs are available at /docs on your deployment, allowing you to explore and test endpoints directly.
For complete access to developer APIs reference documentation, please refer to the API reference documentation.
Python Client
For integration via Python, the USD Search API Python Client library provides an easy way to interact with your deployment. This library simplifies usage of the API directly in Python applications. To get started, refer to the GitHub repository for full documentation and installation instructions.
Omniverse Kit Integration#
If you want to use the read-only sample USD Search API Sample from the NVIDIA API Catalog, you need to get an API Key first. Click the Get API Key button in the NVIDIA API Catalog and follow the steps to generate an API key and use it to access the endpoint.
More detailed step-by-step instructions for generating an API key from the NVIDIA API Catalog can be found in the NVIDIA API Catalog API key generation guide.
Sample Kit Extension#
You can also integrate USD Search API into your Kit-based application as a sample extension. This enables you to query the OpenUSD asset database in your Kit-based environment.
Get the Extension on GitHub. Follow the instructions on the README in the repo to install and use this extension.
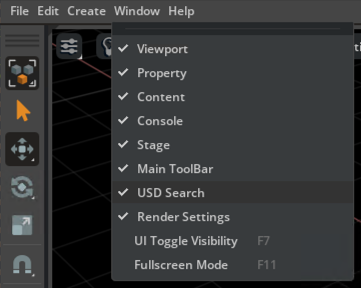
After the installation is complete, make sure to enable USD Search from the Window menu in Kit as illustrated in the following image:
This sample Kit extension can be used with either the NVIDIA API Catalog USD Search service endpoint or with a self-hosted version of USD Search. Below you can find configuration details for each of these scenarios:
NVIDIA API Catalog setup requires providing the NVIDIA API key and setting the
nvidia_api_keyparameter in the extension.toml configuration file.Self-hosted USD Search deployment requires:
Providing the search service endpoint as the
host_urlparameter. It is important to note that the host URL should be in the following format: http(s)://<USD Search API gateway URL>/search.Then, if the self-hosted USD Search instance is connected to an S3 bucket, make sure the
nvidia_api_keysetting is empty.In cases where the self-hosted USD Search instance is connected to a Nucleus instance, there are two authentication possibilities:
Use the admin access key, generated at deployment time (use Helm status
<deployment name>to learn how to retrieve it). Set thenvidia_api_keysetting in the extension.toml file with the admin access key value.Use Nucleus authentication. In that case,
nvidia_api_keyneeds to remain empty and it is required to set thenucleus_serversetting to the Nucleus server URL (including the omniverse:// prefix), which the USD Search instance is connected to.
Note
In case of any changes in the extension configuration, restart the Kit app to apply changes.
Use Cases#
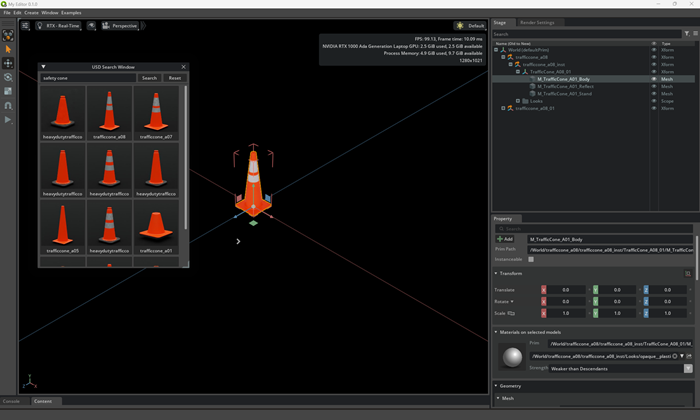
This following image shows the selection of an asset from a database and placement of the asset in the stage.
Note
The sample Kit extension illustrates text-based search capabilities of USD Search APIs. To use image-based search capabilities, refer to the REST API documentation.
In-scene search functionality is only available for those scenes that are indexed by the USD Search services. Therefore, to enable in-scene search for a given scene, it is required to:
Upload the scene to the storage backend to which the USD Search instance is connected.
Wait until that scene gets indexed.
In the case of Enterprise Nucleus server, such indexing is triggered as soon as the scene is loaded (provided all the previous background indexing tasks were completed).
For the Amazon S3 bucket, there is a cron job that scans the whole bucket for updates. The frequency of such jobs is configured during USD Search service deployment time.
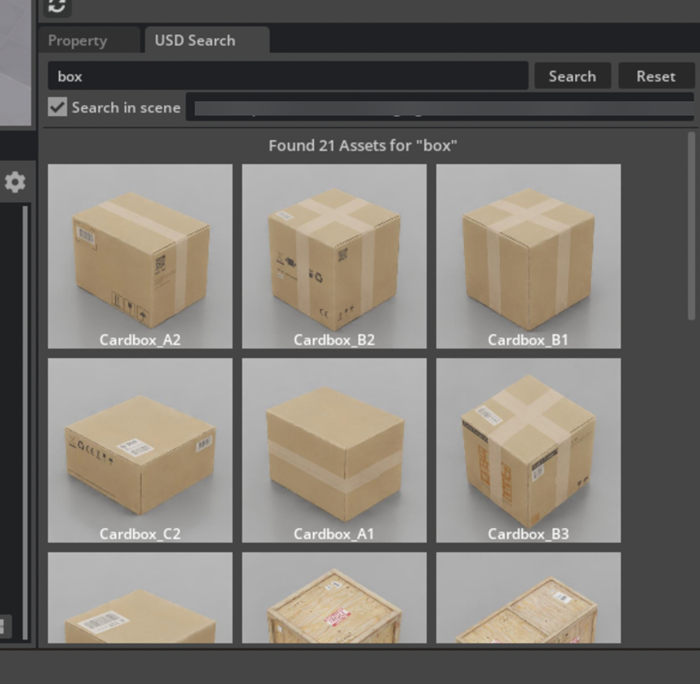
You can also find an asset in the existing scene and later place that asset in the stage:
Integrate into an Omniverse Kit-based Application#
To integrate USD Search API into an Omniverse Kit-based application together with other USD AI APIs, please refer to the steps outlined in USD Code integration with other USD AI APIs. The same API key should work well with the USD Search API.
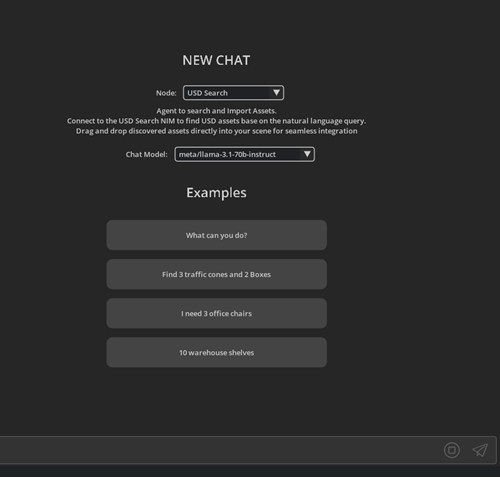
For instance, NVIDIA built ChatUSD, a multi-agent workflow that uses both USD Search and USD Code. With them together, you can prompt more complex yet still intuitive queries such as “Find 10 oranges and place them on the table.”
The link above is for installing the USD Code Extension. The process for installing the Sample Kit Extensions is the same, except for the step where you select the model from the node drop-down menu - please select USD Search.
Tip
To ensure best performance for in-scene search, make sure the stage is properly structured. Objects that are part of the scene should be stored as individual assets on the storage backend. The assets should be added as references to the scene instead of being pre-baked inside the scene.
Asset graph search will not be able to fully index assets in the scene if they are not brought in as references.
See this case study for more details.