3.3. Debugging With Visual Studio Code
3.3.1. Learning Objectives
In this tutorial, we will go over
Debugging a standalone python script
Attaching to the
omni.kit.debug.vscode_debuggerextension to debug a running instance of Isaac Sim
3.3.2. Standalone Python Scripts
Note
Debugging standalone python scripts is only supported on Linux currently
From the Isaac Sim App Selector click the “Open in Terminal” button, then execute the following command:
code .This launches a new VS Code window and opens the current folder. You can also launch VS Code and open the folder.Let’s try debugging a simple script, open
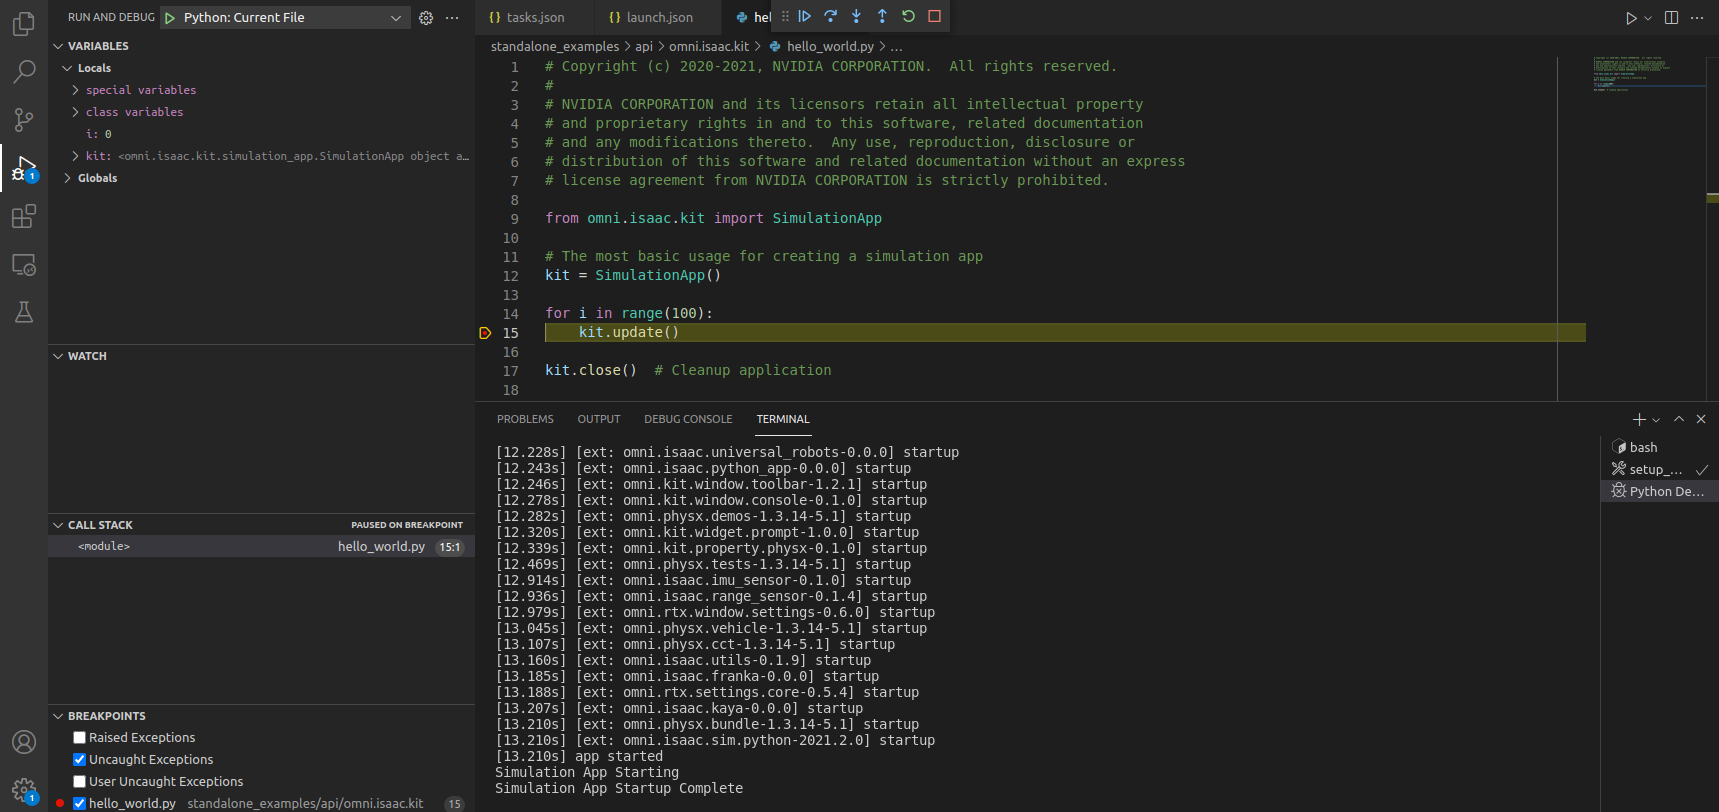
standalone_examples/api/omni.isaac.kit/hello_world.pyand place a breakpoint.Select the “Run” icon from the toolbar on the left, and ensure “Current File” is selected from the configuration dropdown menu.
Click “Start Debugging” or press F5 to launch the debugger. Pressing F10 will step line by line. You can mouse over to examine variable values.
Stop the current debugging session and let’s try passing a command-line argument to our code in the “args” field of the .vscode/launch.json file. For example, here we change the default nucleus server
    {
        "name": "Python: Current File",
        "type": "python",
        "request": "launch",
        "program": "${file}",
        "console": "integratedTerminal",
        "env": {
            "EXP_PATH": "${workspaceFolder}/apps",
            "RESOURCE_NAME": "IsaacSim"
        },
        "python": "${workspaceFolder}/kit/python/bin/python3",
        "envFile": "${workspaceFolder}/.vscode/.standalone_examples.env",
        "preLaunchTask": "setup_python_env",
        "args": ["--/persistent/isaac/asset_root/default=\"omniverse://my_server\""]
    }
Add the following lines to
hello_world.pyand place a breakpoint on theprint(server_check)line.# The most basic usage for creating a simulation app kit = SimulationApp() import carb server_check = carb.settings.get_settings().get_as_string("/persistent/isaac/asset_root/default") print(server_check) for i in range(100): kit.update() kit.close() # Cleanup application
After modifying and saving the launch.json, press F5 to launch the debugger.
Verify that the variable contains the server set in the
argsinlaunch.json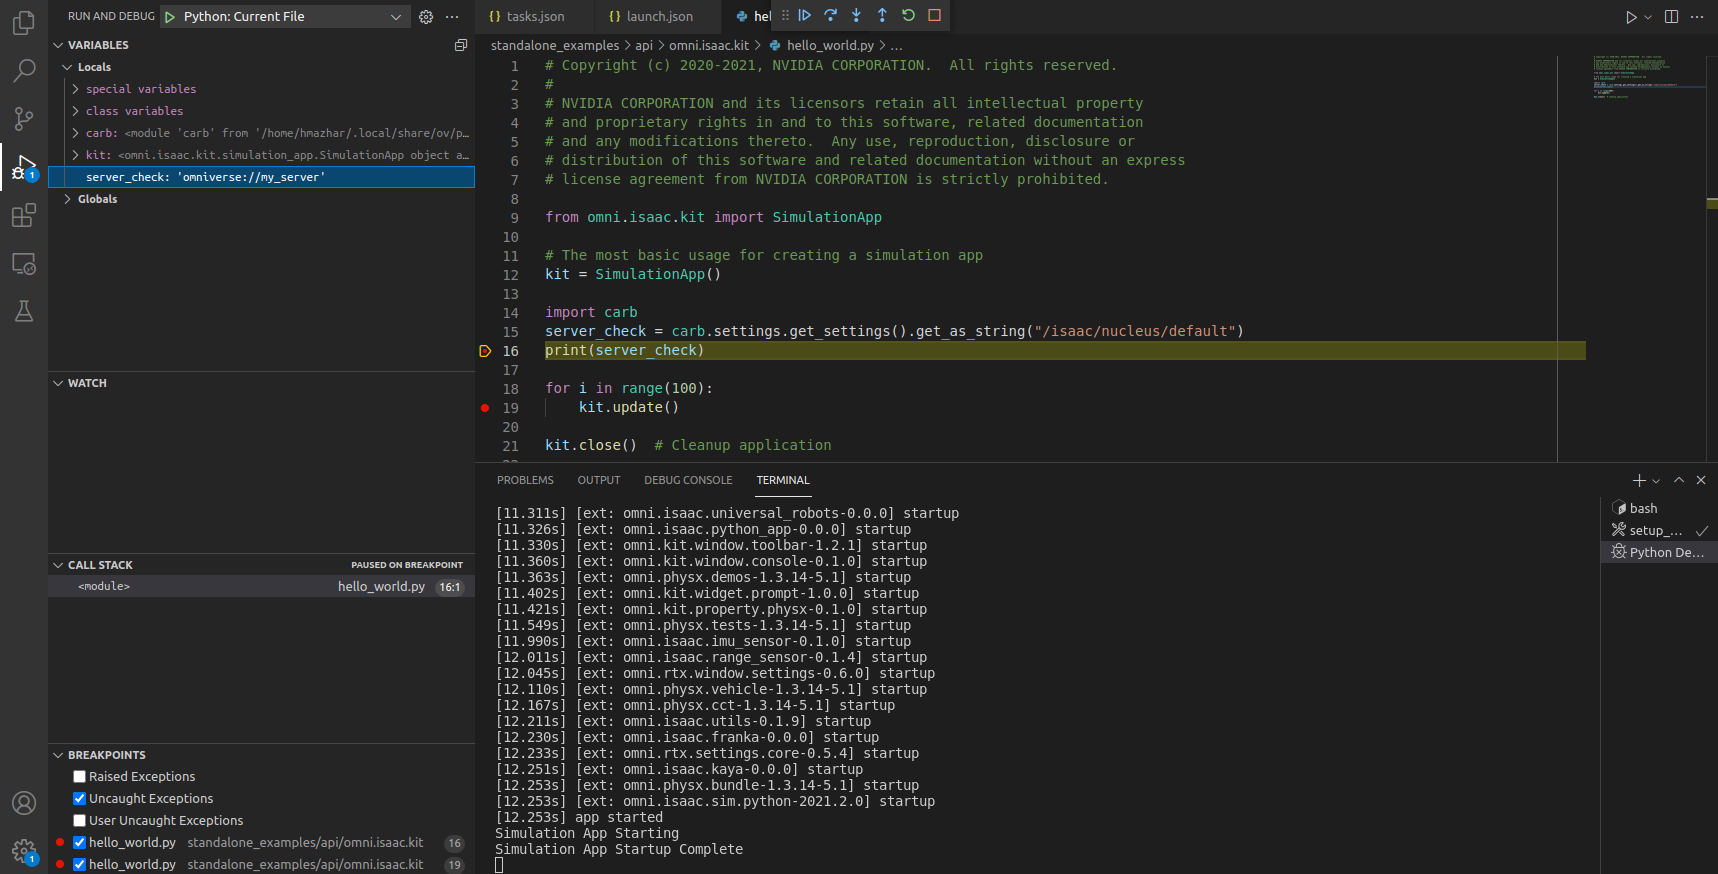
3.3.3. Attaching the Debugger to a Running App
To debug a script you are already running, use the VS Code Debugger extension.
Launch Isaac Sim, and from the top toolbar, select Window > Extensions. Then search for “vscode” and click the Enable button for the
omni.kit.debug.vscodeextension. By default, the status will show “VS Code Debugger Unattached” in red text.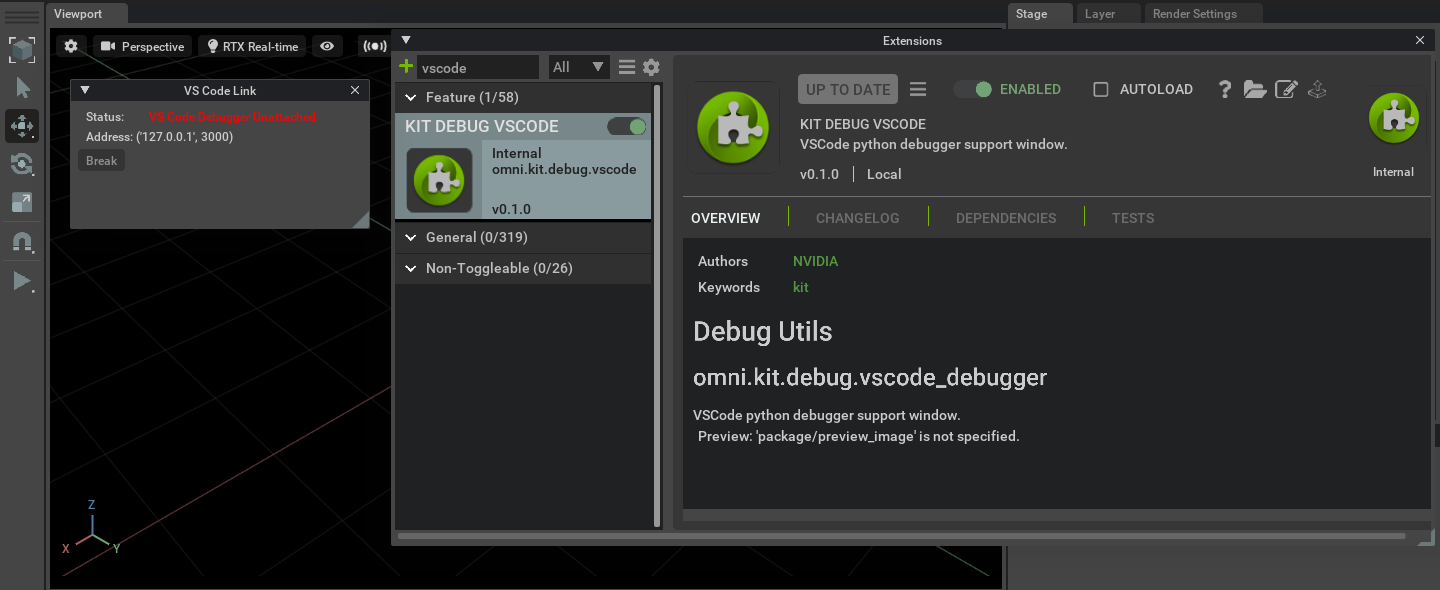
Then launch VS Code, and select the “Run” icon from the toolbar on the left.
From the configuration menu, select “Python: Attach (windows-x86_64/linux-x86_64) and click the green arrow to start debugging.
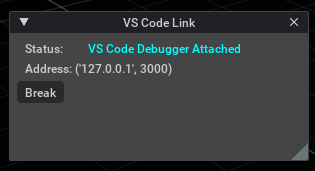
Notice that the status in Isaac Sim changes to “VS Code Debugger Attached” in blue text.
You can now return to your python file in VS Code and add breakpoints to debug, as described above.
Note
To configure the host and port used for debugging, the following command-line arguments can be provided
--/exts/omni.kit.debug.python/host="127.0.0.1"
--/exts/omni.kit.debug.python/port=3000
These should match the configuration in your vscode launch.json
:emphasize-lines: 5,6
    {
        "name": "Python: Attach (windows-x86_64/linux-x86_64)",
        "type": "python",
        "request": "attach",
        "port": 3000,
        "host": "127.0.0.1"
    },
3.3.4. Summary
In this tutorial, we covered #. Debugging a standalone python script #. Attaching the vscode debugger to a running instance of Isaac Sim
3.3.4.1. Further Learning
For more details about how the vscode integration works, refer to Visual Studio Code (VSCode) Support