Quick Start: Omniverse Spatial Server to Client in 10 Minutes#
Note
Applies to: Spatial Extensions, Kit 109.0.3+, CloudXR 6
This quick start walks you through the fastest path from zero to a connected XR client streaming from an Omniverse Kit application. By the end, you will have a Kit app rendering the built-in sample scene and an XR client viewing it spatially.
Prerequisites#
Before you start, ensure you have:
NVIDIA GPU workstation: RTX 6000 Ada or equivalent, with current drivers
OS: Windows 10/11 or Ubuntu 22.04/24.04
Git with Git LFS installed
Network: WiFi 6 router, server and client on the same subnet
For Apple clients (pick one):
macOS with Xcode 16.4+, Apple Developer Program membership
Apple Vision Pro (visionOS 2.4+) or iPad Pro (iPadOS 18.4+)
For Meta clients (pick one):
Node.js v20+ and a Chromium-based browser
Meta Quest 2/3/3S (OS 79+) or Pico 4 Ultra (OS 15.4.4U+)
Tip
No headset yet? You can verify your entire server setup without a physical device using SimulatedXR, which renders a virtual XR viewport on your desktop. Complete Steps 1–6 below, then see Testing with SimulatedXR instead of Steps 7a/7b.
Step 1: Clone Kit App Template#
git clone --single-branch --branch 109.0.3 https://github.com/NVIDIA-Omniverse/kit-app-template.git
cd kit-app-template
Step 2: Create a USD Viewer Application#
The USD Viewer template provides a streaming-ready viewer with built-in message handlers for loading assets and interacting with the stage.
./repo.sh template new
.\repo.bat template new
Follow the prompts:
Select what you want to create: Application
Select desired template: USD Viewer
Enter a name for your application (e.g.,
my.xr.viewer)Accept defaults for the required extensions
Step 3: Add XR Extensions#
Open your generated .kit file (located in source/apps/) and add the following to the [dependencies] section:
# XR extensions -- add these to the end of [dependencies]
"omni.kit.xr.core" = {}
"omni.kit.xr.ui.window.profile" = {}
"omni.kit.xr.ui.window.viewport" = {}
"omni.kit.xr.ui.stage" = {}
"omni.kit.xr.cloudxr" = {}
Then add the following to the [settings] section (create one if it does not exist). Choose the settings block that matches your target client:
[settings]
# Enable XR with the AR profile on launch
xr.profile.ar.enabled = true
defaults.xr.activeProfile = "ar"
defaults.xr.system.display = "OpenXR"
# Use CloudXR Native runtime for Apple clients
persistent.xr.system.openxr.runtime = "cloudxr"
# Use the CloudXR native data channel for bidirectional JSON messaging between client and server
xr.openxr.preferNVOpaqueDataChannel = true
[settings]
# Enable XR with the AR profile on launch
xr.profile.ar.enabled = true
defaults.xr.activeProfile = "ar"
defaults.xr.system.display = "OpenXR"
# Use CloudXR WebRTC runtime for web/Meta clients
persistent.xr.system.openxr.runtime = "cloudxr-webrtc"
# Use the CloudXR native data channel for bidirectional JSON messaging between client and server
xr.openxr.preferNVOpaqueDataChannel = true
Save the file.
Warning
Do NOT add omni.kit.livestream.webrtc or any 2D streaming extensions. These extensions initialize a separate 2D streaming pipeline that conflicts with the XR stereo pipeline, causing extension load failures or a flat 2D stream instead of stereoscopic XR.
Step 4: Build#
./repo.sh build
.\repo.bat build
Wait for BUILD (RELEASE) SUCCEEDED.
Step 5: Launch with Sample Scene#
./repo.sh launch -- --/app/auto_load_usd='${omni.usd_viewer.samples}/samples_data/stage01.usd'
.\repo.bat launch -- --/app/auto_load_usd='${omni.usd_viewer.samples}/samples_data/stage01.usd'
${omni.usd_viewer.samples} is a Kit token that resolves to the samples directory bundled with the USD Viewer template. On Linux, single quotes prevent shell expansion of ${}.
Select your application when prompted. The first launch compiles RTX shaders and can take 5–8 minutes. Subsequent launches are much faster.
Once the scene finishes loading, the viewport should look like this:
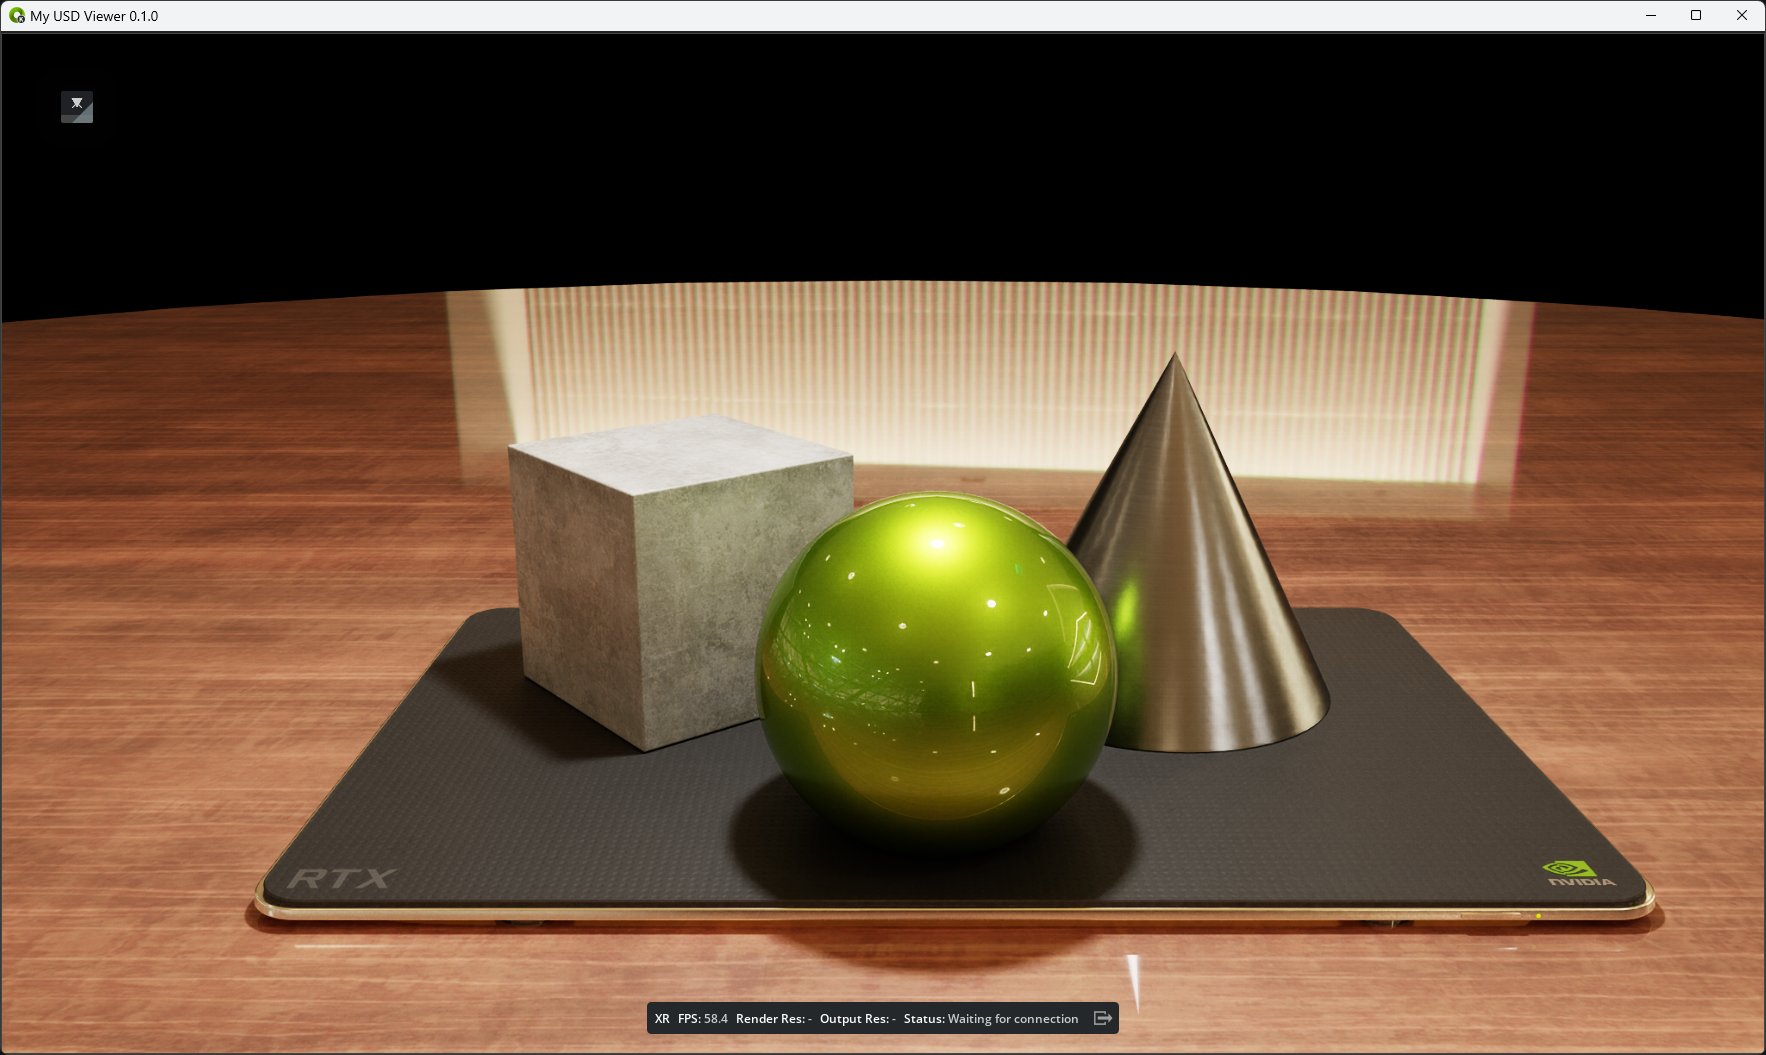
Step 6: Verify CloudXR Is Running#
The settings you added in Step 3 configure XR to start automatically. After the sample scene finishes loading, verify you see “Status: Waiting on Connection” in the viewport.
Tip
If you need to switch between Apple and Meta/Web clients, change the persistent.xr.system.openxr.runtime value in your .kit file and relaunch:
Target Client |
Runtime Setting |
|---|---|
Apple Vision Pro / iPad |
|
Meta Quest 2/3/3S / Pico 4 Ultra |
|
Find your server IP address:
ip addr
ipconfig
Note the IP address: you will enter it on the client.
Step 7a: Connect from Apple Vision Pro or iPad#
Clone and build the generic viewer (refer to Apple Client Setup for details):
git clone https://github.com/NVIDIA/cloudxr-apple-generic-viewer.git
Open
CloudXRViewer.xcodeprojin Xcode.Add the CloudXR Framework package dependency:
Right-click the project -> Add Package Dependencies
URL:
https://github.com/NVIDIA/cloudxr-frameworkAdd to the appropriate target (
CloudXRViewer-visionOSorCloudXRViewer-iOS)
Select the target device and build (
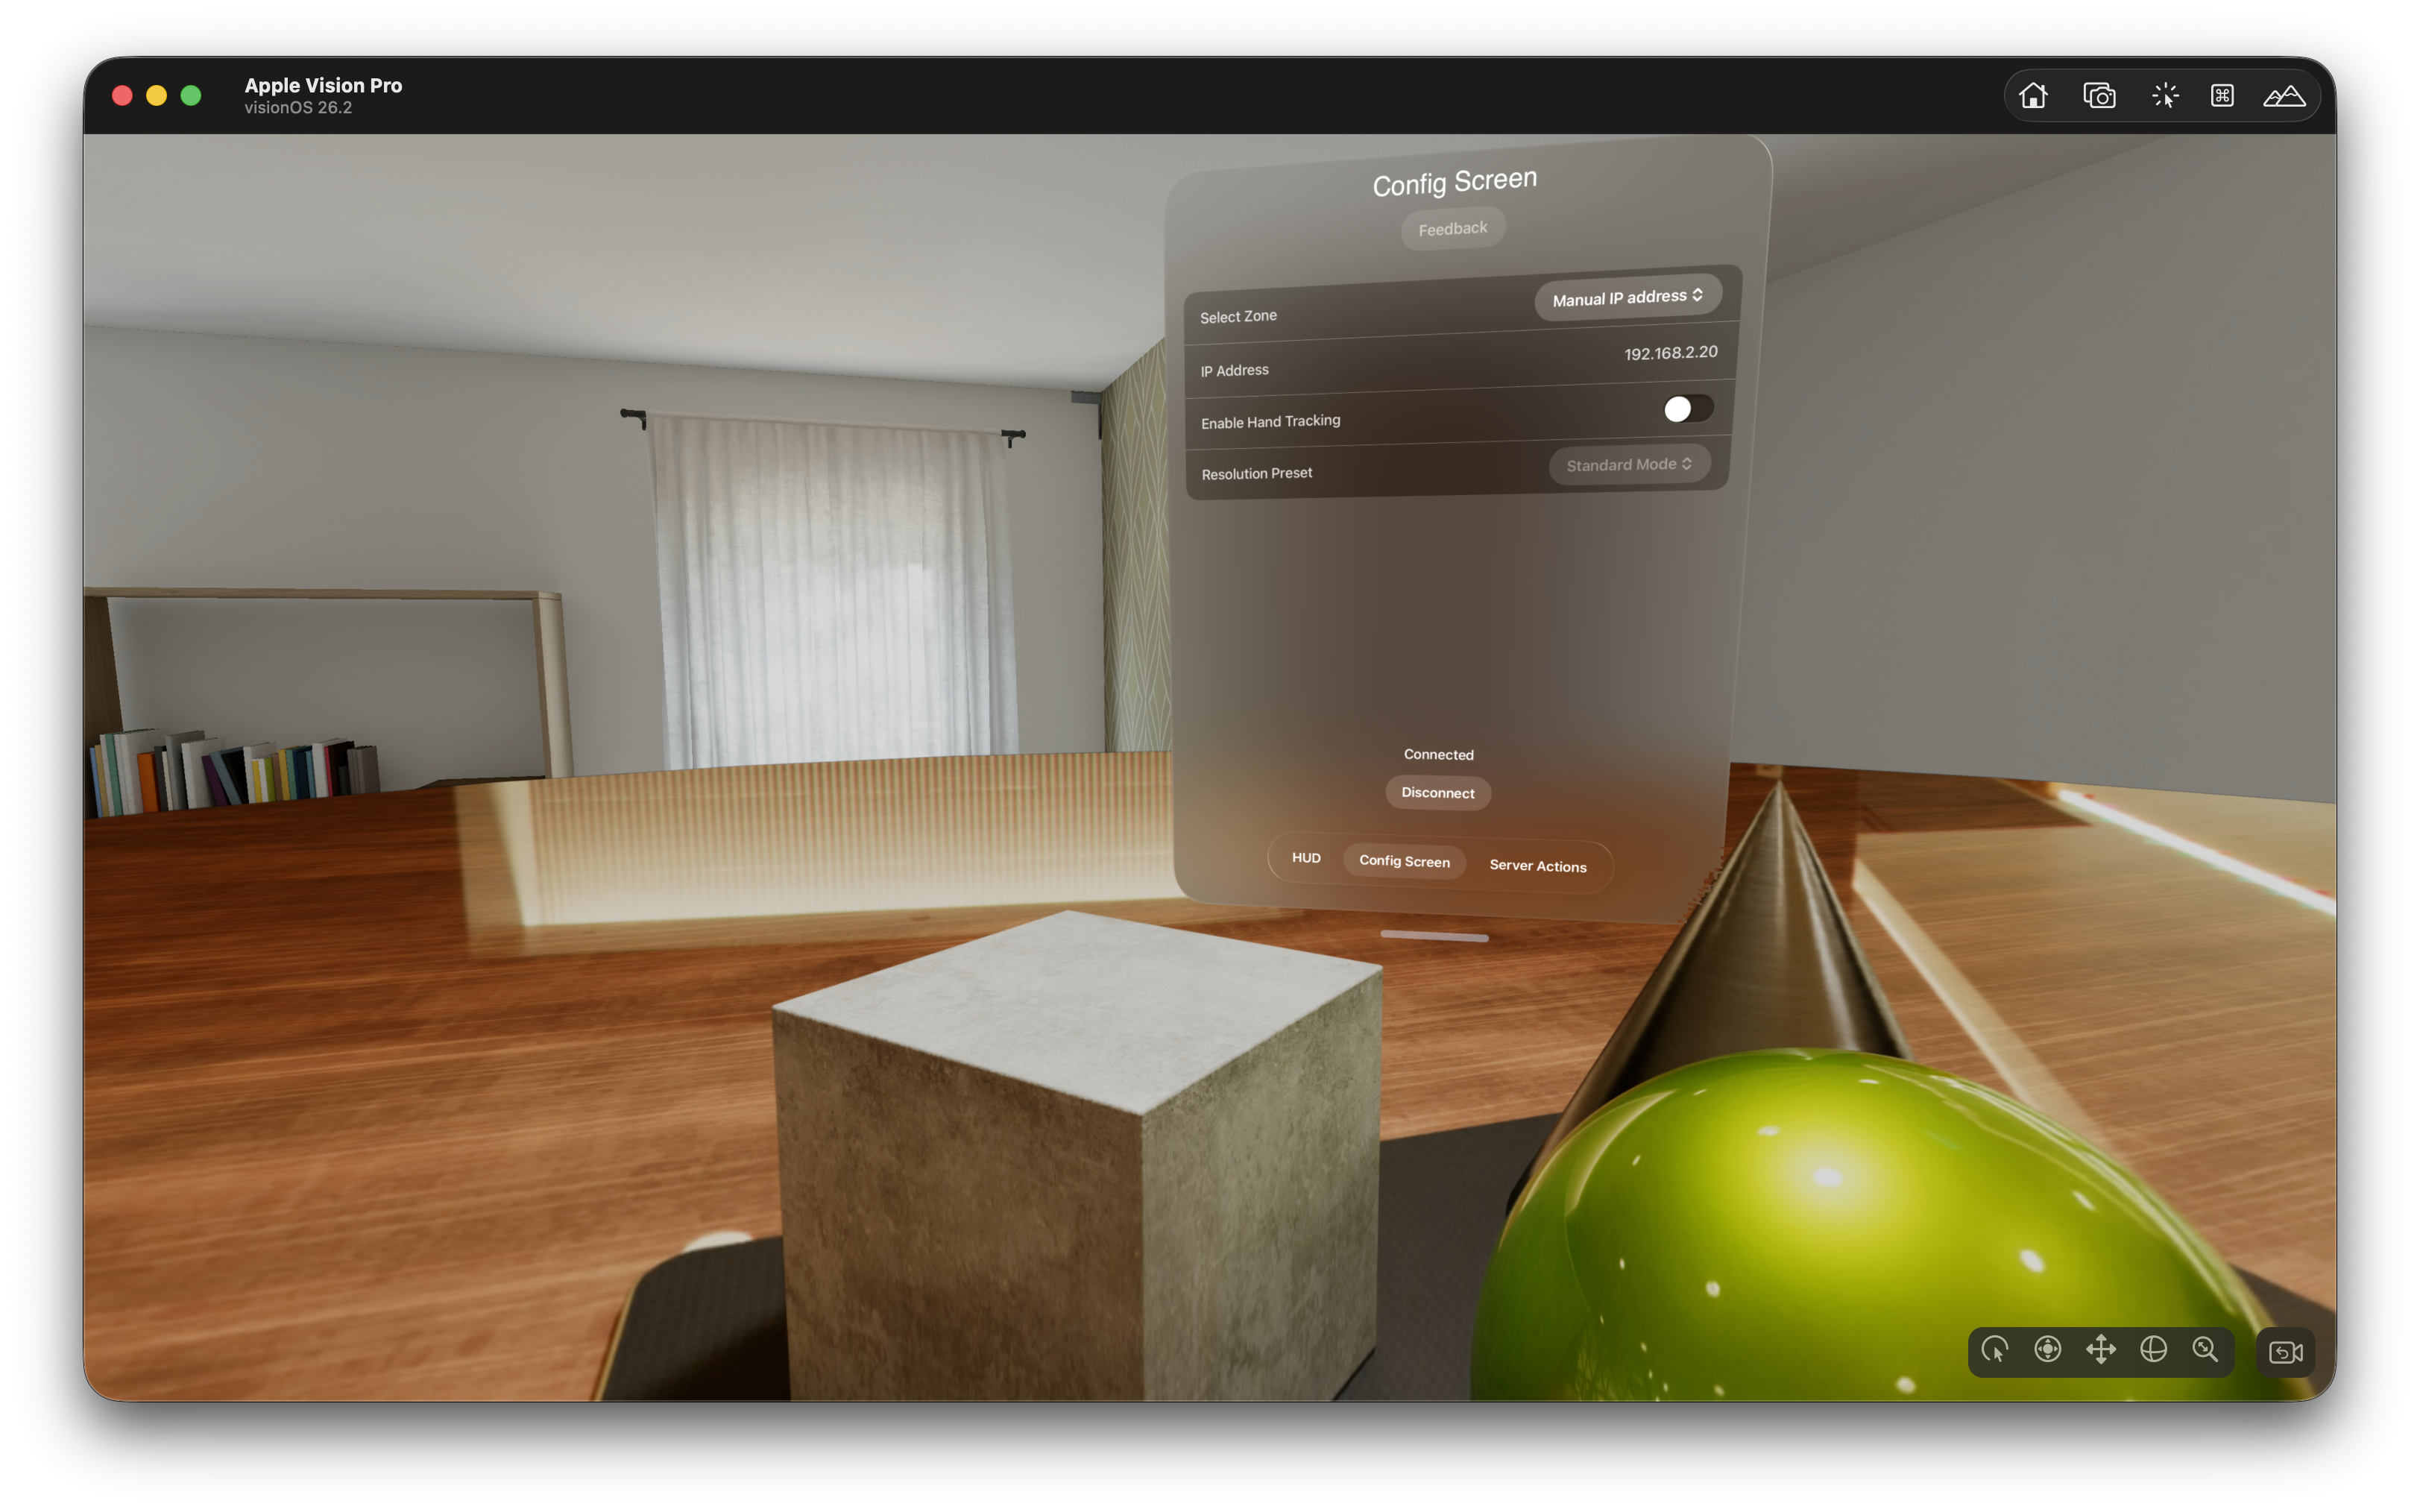
Cmd+R).On the device, select Manual IP address as the zone, enter your server IP, and tap Connect.
You see the streamed USD scene in your headset or on your iPad.
Step 7b: Connect from Meta Quest 2/3/3S#
Download the CloudXR.js SDK tarball (
nvidia-cloudxr-<version>.tgz) from NGC. You will need this in thenpm installstep below.Clone and build the CloudXR.js sample (refer to Meta Client Setup for details):
cd simple
npm install /path/to/nvidia-cloudxr-<version>.tgz
npm install
npm run build
npm run dev-server
Test from your desktop first (recommended): Open
http://localhost:8080/in Chrome. The page loads Immersive Web Emulator Runtime (IWER) automatically for desktop testing.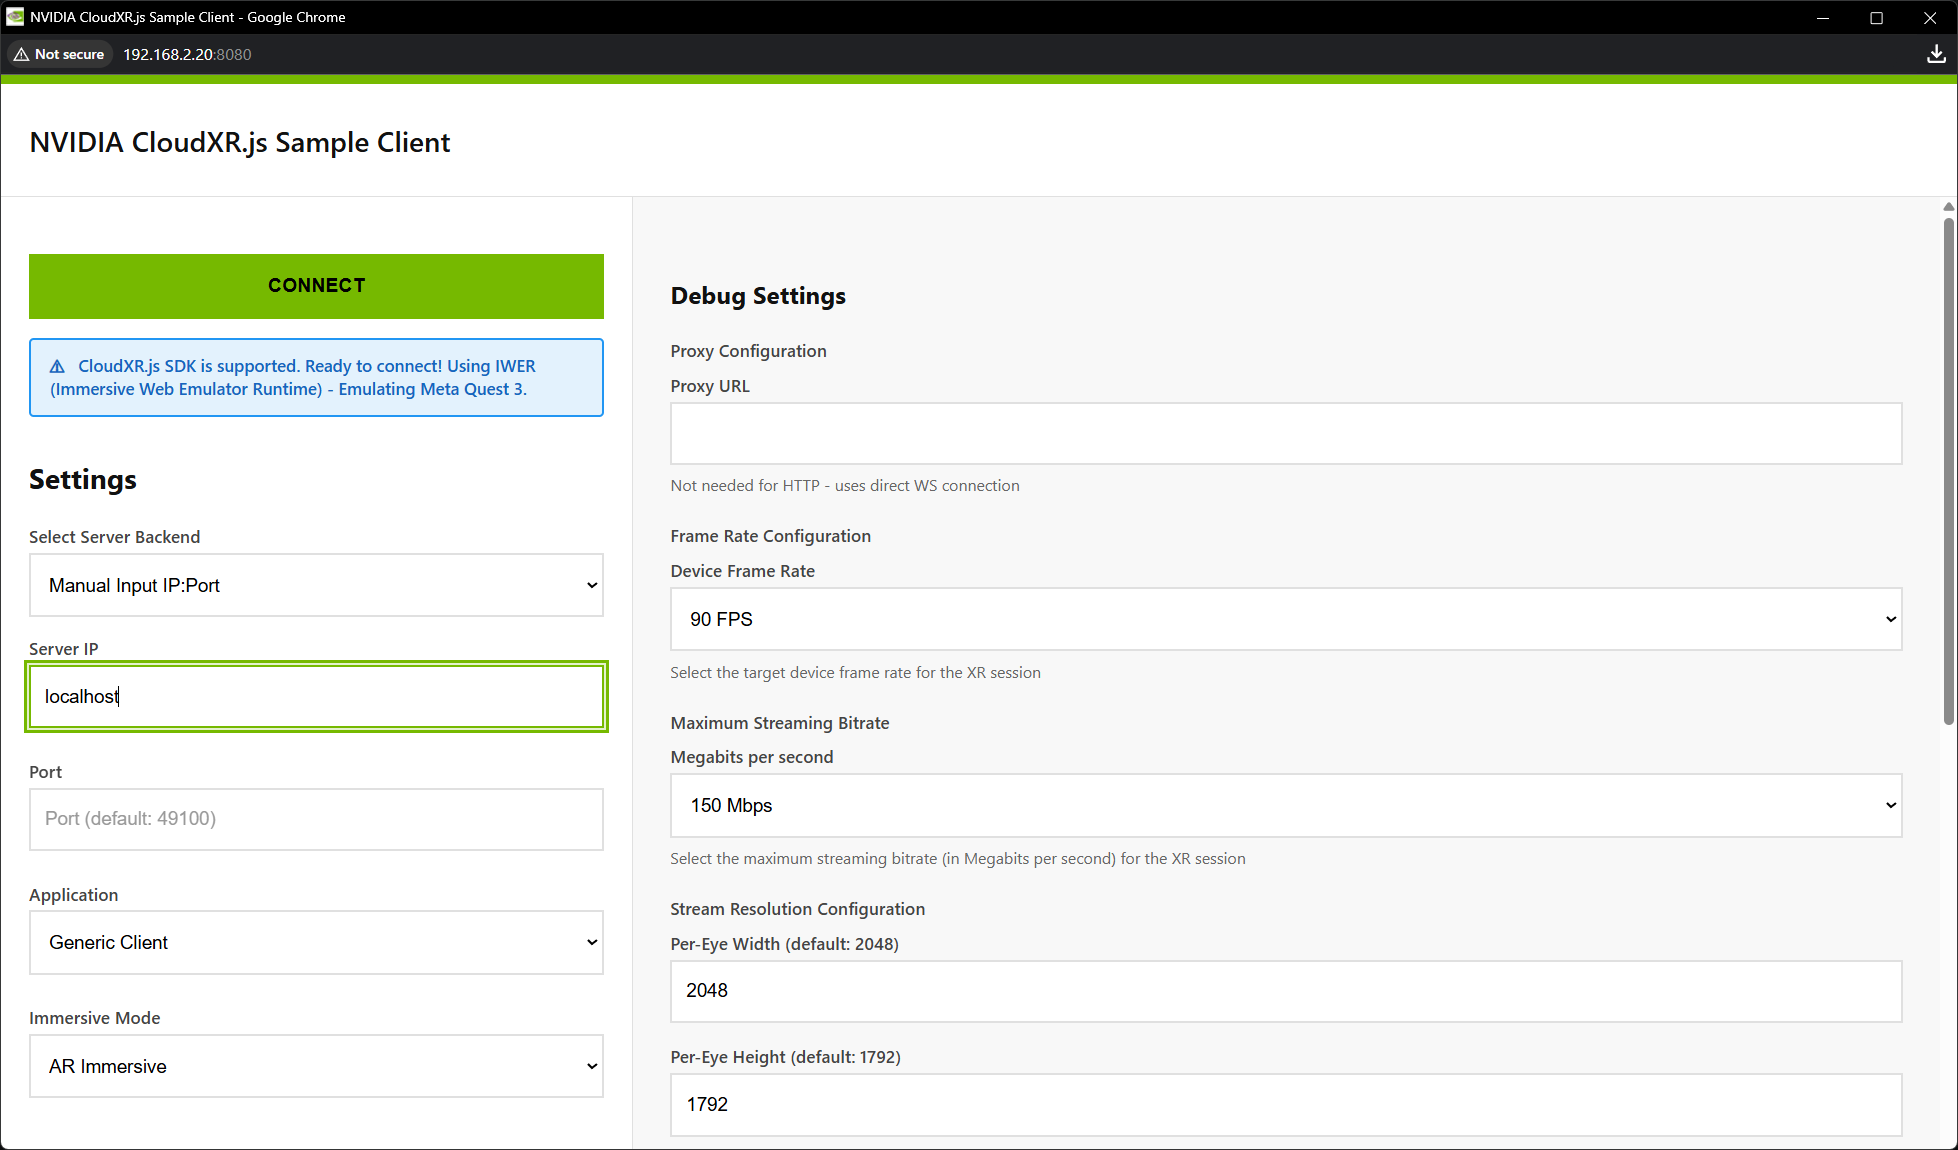
Enter your server IP and port
49100, select AR mode, and click CONNECT. If successful, the button changes to CONNECT (STREAMING) and the streamed scene appears in the IWER viewport.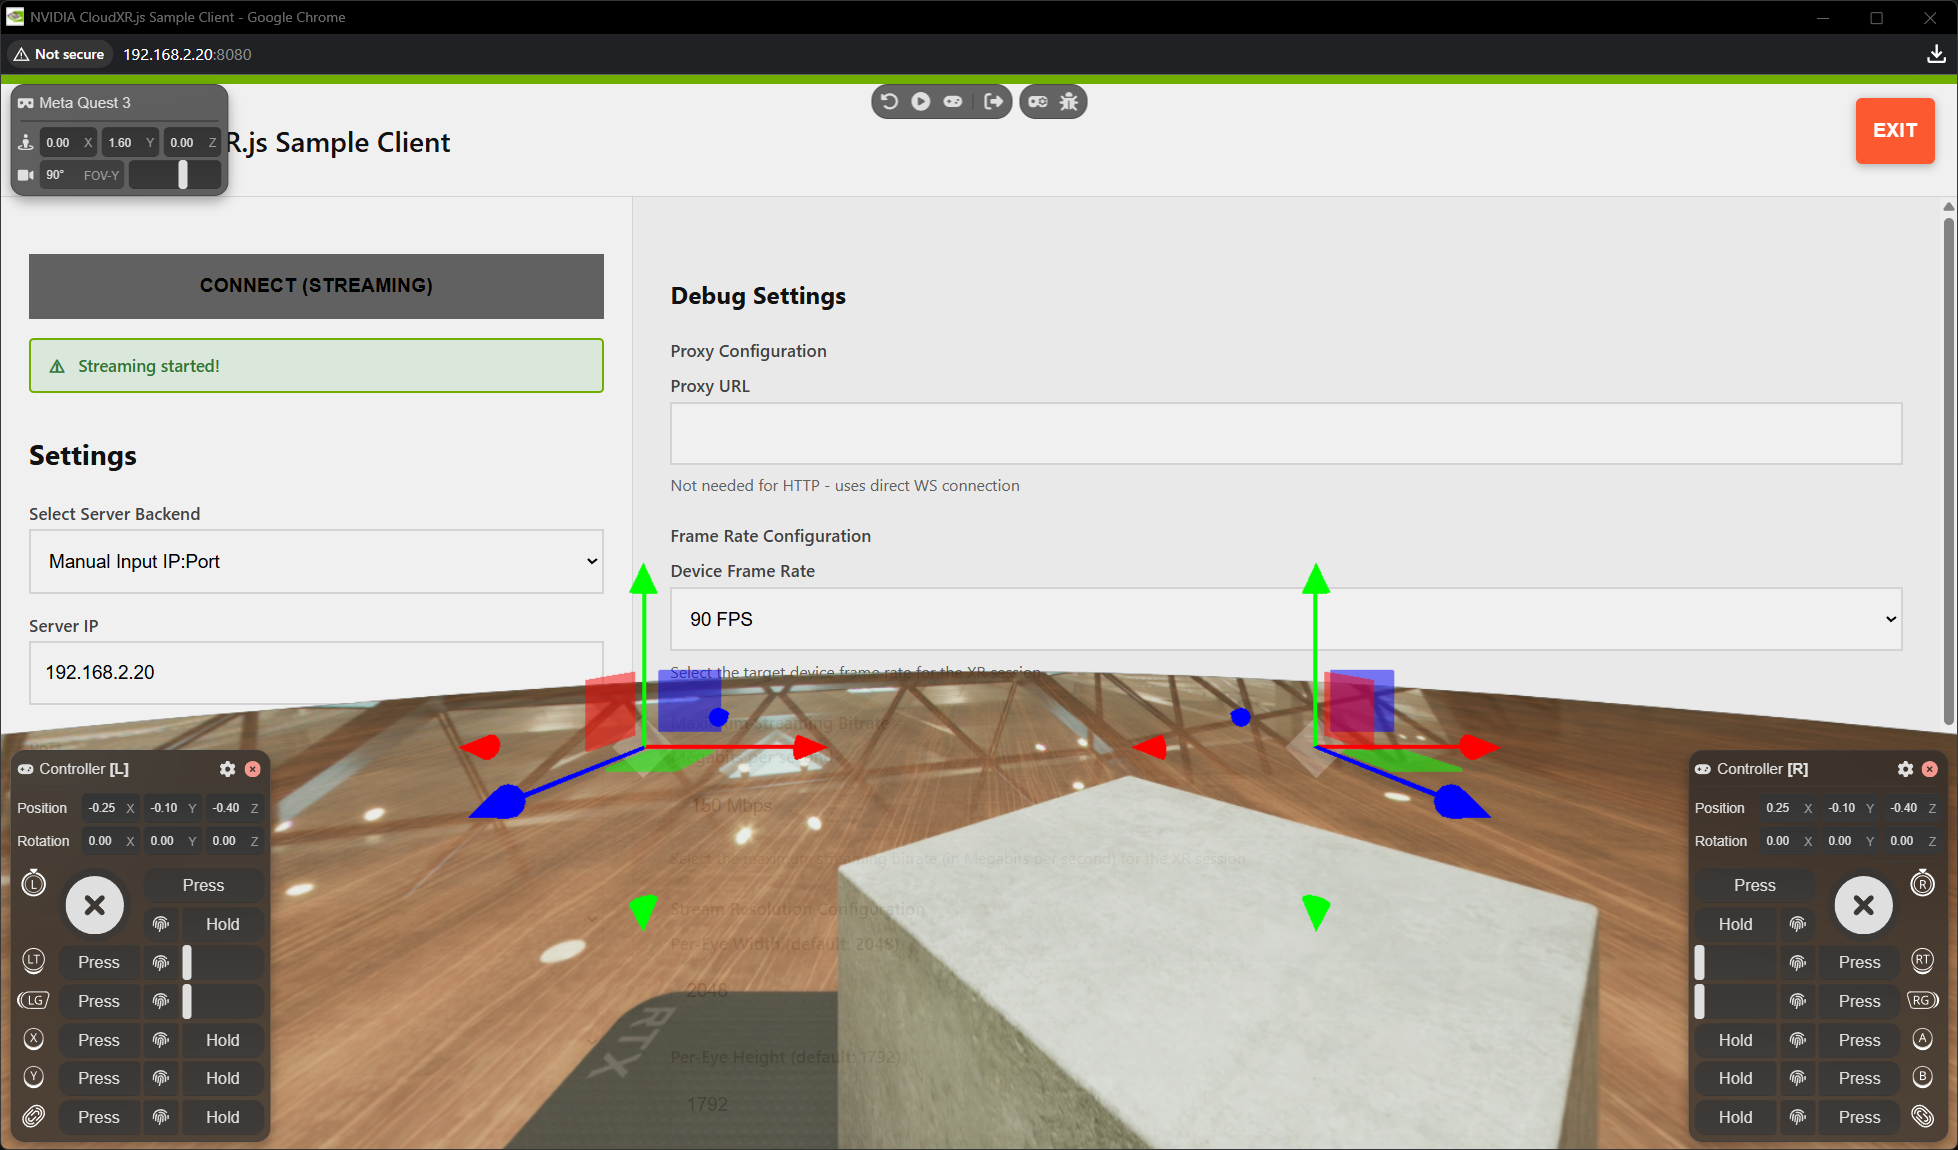
From Meta Quest – Before loading the client page, configure the browser to allow WebXR over HTTP:
In the Meta Quest Browser, navigate to
chrome://flags/#unsafely-treat-insecure-origin-as-secureAdd your web server’s origin (e.g.,
http://<web-server-ip>:8080) to the text fieldSet the flag to Enabled and restart the browser
Then navigate to
http://<web-server-ip>:8080/. Enter the Kit server IP, port49100, select AR, and click CONNECT. Allow WebXR permissions when prompted.
You see the streamed USD scene in your headset.
Next Steps#
Now that you have a working end-to-end connection, try these:
Load your own scene – Replace the sample stage with your own USD file using
--/app/auto_load_usd='/path/to/your/scene.usd'at launch (see Build and Launch)Send a message from the client – Use the opaque data channel to send a
selectPrimsRequestoropenStageRequestmessage and watch the Kit server respond (see Scene Integration and Messaging)Tune quality for your device – Adjust resolution, foveation, and frame rate in the XR Settings Reference to optimize for your target headset
Go deeper on server setup:
Create a Kit XR App – Three integration methods in detail
See also:
System Architecture – Understand the full pipeline
Apple Code Snippets – Swift recipes for gestures, variant switching, portals, and more
Networking Guide – WiFi, firewall, and port configuration
Troubleshooting – Common issues and solutions