Web Client: Connect to Server#
Note
Applies to: Spatial Extensions, Kit 109.0.3+, CloudXR 6
This connection workflow covers connecting the CloudXR.js client to your Kit XR server, both from a desktop browser (for development) and from an XR headset.
Before You Connect#
Ensure:
Your Kit application is running with a USD scene loaded
The XR panel shows OpenXR as the output plugin
The OpenXR Runtime is set to
CloudXR 6 (WebRTC)XR is started: you see “Status: Waiting on Connection” in the viewport
Your server IP address is known (see Build and Launch)
The CloudXR.js web server is running (
npm run dev-serverornpm run dev-server:https)Firewall allows required ports (see Networking Guide)
Hand Tracking Setup#
Meta Quest 2/3/3S and Pico 4 Ultra share the same hand tracking configuration:
Open Settings on the headset
Navigate to Interaction -> Interaction Controls
Enable Auto Switch between Hands & Controllers
This allows the headset to switch between controller input and hand tracking automatically. When hand tracking is active, CloudXR.js streams 26 joint positions per hand to the Kit server each frame. You can also use mixed input (one hand tracked, one hand holding a controller) simultaneously.
Tip
For developer or kiosk setups, you can optionally disable the system hand gesture (which can interrupt sessions) under Settings -> Developer -> Business Settings -> System -> disable Handtracking system gesture.
Connection Settings Reference#
Fill in these settings on the web client before connecting. The device-specific sections below note which values to use for each setup.
Required Settings#
Setting |
Description |
Default |
|---|---|---|
Server IP Address |
IP of the machine running Kit |
– |
Port |
|
|
Immersive Mode |
|
|
Display Settings#
Setting |
Description |
Quest 3 Recommended |
|---|---|---|
Framebuffer Scale Factor |
WebGL framebuffer multiplier |
|
Fixed Foveation |
Foveated rendering level |
|
Per-Eye Resolution |
|
|
Frame Rate |
Target frame rate |
|
Max Bitrate |
Maximum streaming bitrate (Kbps) |
|
WebGL Antialiasing |
Browser-side antialiasing |
|
XR Positioning#
Fine-tune the spatial position of streamed content:
Setting |
Description |
Default |
|---|---|---|
Preferred Reference Space |
|
|
X Offset (cm) |
Horizontal positioning |
|
Y Offset (cm) |
Vertical viewing height |
Depends on scene |
Z Offset (cm) |
Viewing distance (depth) |
Depends on scene |
Tip
Optimal offset values depend on your USD scene. For product visualization, position objects at a comfortable arm’s length. For architectural scenes, adjust Y offset to match the floor height.
HTTPS and Certificates#
When using HTTPS mode (npm run dev-server:https), the development server uses a self-signed certificate. Each device that connects must accept this certificate before the page will load. If you are also using a WebSocket proxy, you must accept its certificate separately by navigating to https://<proxy-ip>:48322/ in the device browser.
Desktop Testing with IWER#
For development, test from your desktop browser first. CloudXR.js automatically loads IWER (Immersive Web Emulator Runtime) to emulate an XR headset when no physical device is detected.
Open Chrome and navigate to your web server:
HTTP:
http://localhost:8080/HTTPS:
https://localhost:8080/(accept the certificate warning)
Verify IWER is loaded: you see a message indicating XR emulation is active.
Note
If you have the Immersive Web Emulator Chrome extension installed, disable it as it conflicts with IWER.
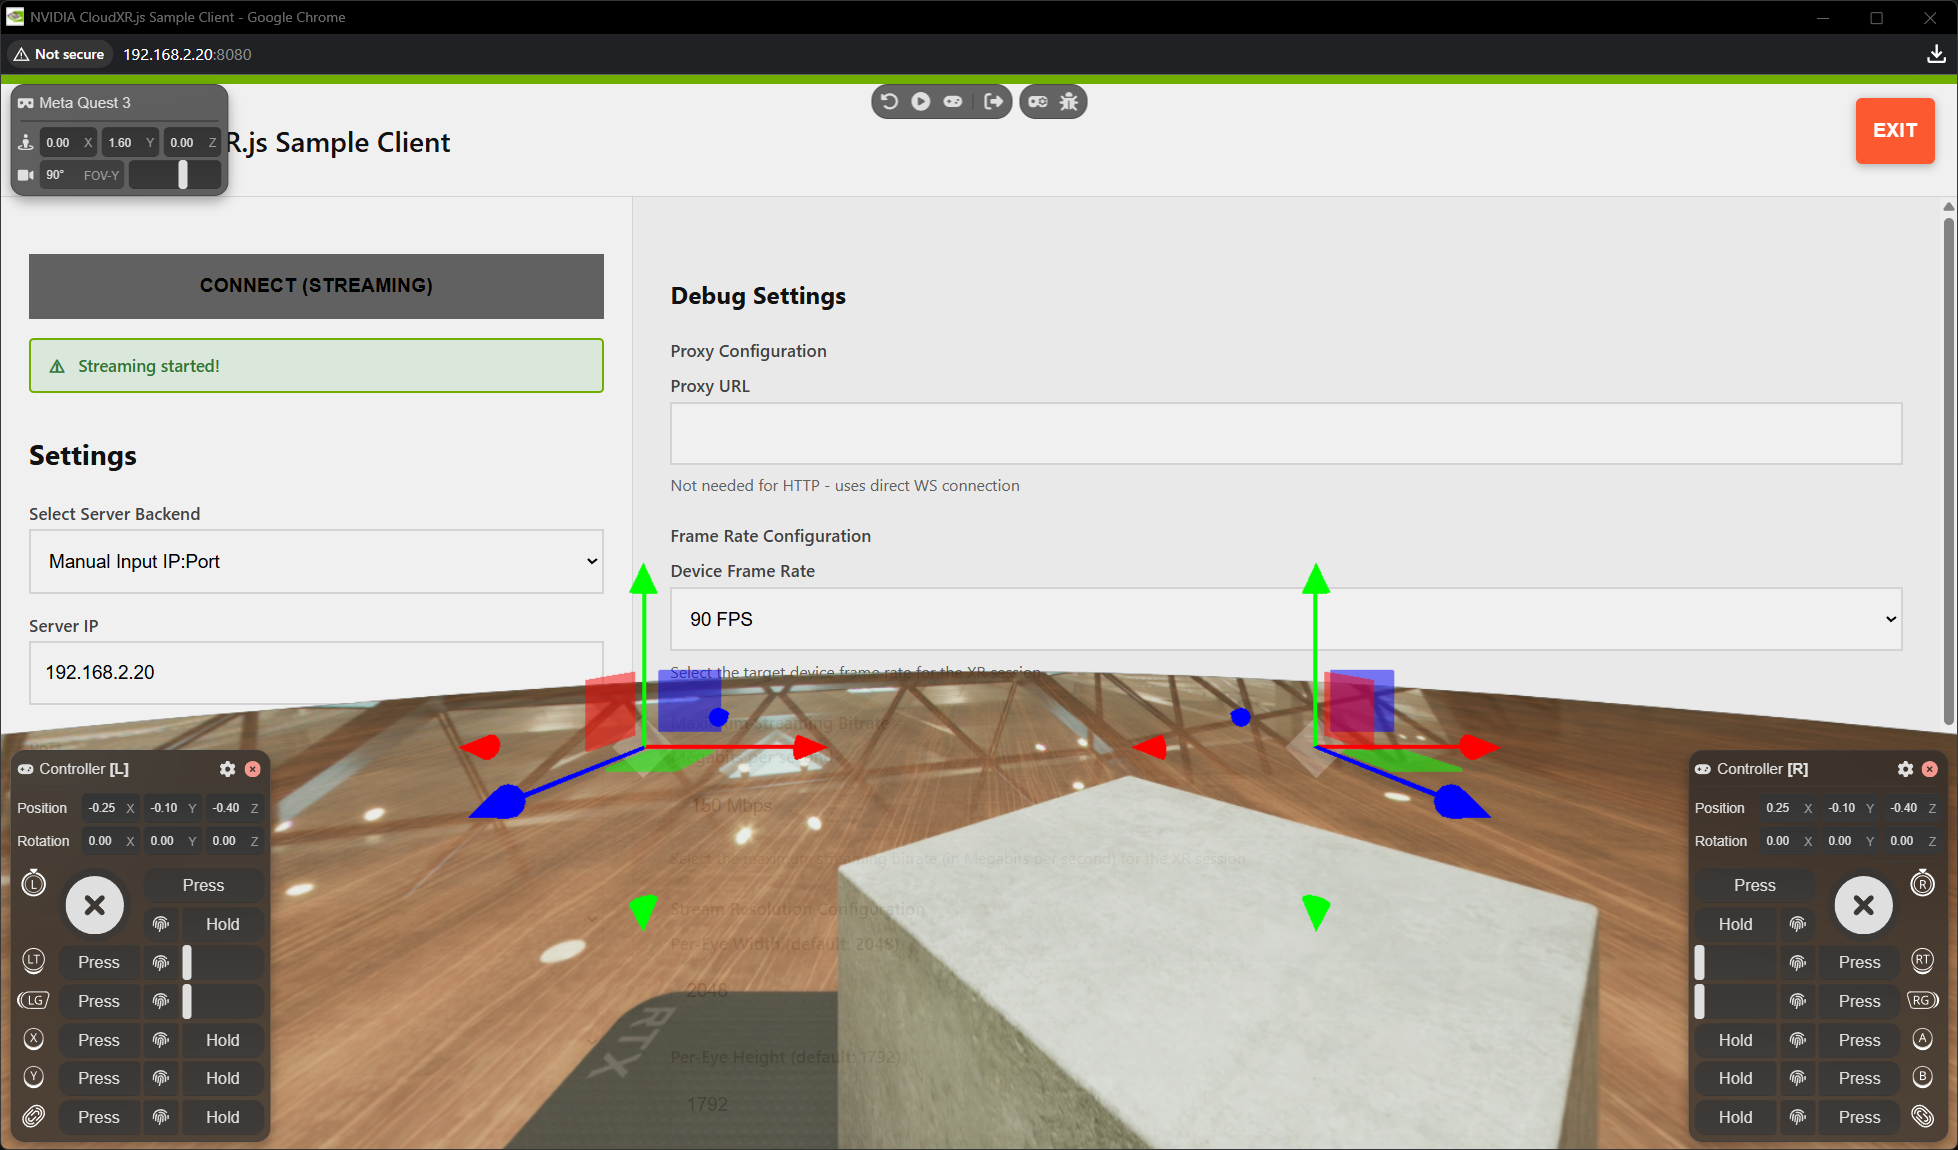
Fill in the connection settings (use
localhostfor the server IP if Kit is on the same machine, port49100). For HTTPS mode, fill in the Proxy URL if configured.Click CONNECT. If successful, the button changes to CONNECT (STREAMING) and rendered content from your Kit application appears in the browser.
You can use IWER’s developer UI to emulate device position and controller input.
Important
Disconnect your IWER session before connecting from a physical headset. The Kit XR server accepts one client connection at a time, so an active IWER session will block a real device from connecting.
Connecting from Meta Quest 2/3/3S#
Prerequisites#
Meta Quest 2/3/3S with OS version 79 or later
Same WiFi network as the Kit server
Hand tracking enabled (see Hand Tracking Setup above)
HTTP Mode#
When using HTTP mode (npm run dev-server), the browser must be told to treat your web server’s origin as secure so that WebXR APIs are available over plain HTTP:
Open the Meta Quest Browser and navigate to
chrome://flags/#unsafely-treat-insecure-origin-as-secureIn the text field, add your web server’s origin (e.g.,
http://<web-server-ip>:8080)Set the flag to Enabled
Restart the browser
Then navigate to http://<web-server-ip>:8080/ and use port 49100.
HTTPS Mode#
Navigate to https://<web-server-ip>:8080/ and accept the self-signed certificate (see HTTPS and Certificates). Use port 48322 for the proxied connection.
Connect#
Fill in the connection settings (see reference)
Click CONNECT
When prompted, allow WebXR permissions
The browser enters immersive mode and you see the streamed content from Kit
Connecting from Pico 4 Ultra#
Prerequisites#
Pico 4 Ultra with Pico OS 15.4.4U or later
HTTPS mode required: HTTP is not supported on Pico
WebSocket proxy configured (see Networking Guide)
Hand tracking enabled (see Hand Tracking Setup above)
Connect#
Open the Pico browser and navigate to
https://<web-server-ip>:8080/Accept the self-signed certificate (see HTTPS and Certificates)
Fill in the connection settings: use port
48322(proxied through WSS)Click CONNECT and allow WebXR permissions when prompted
Troubleshooting Connection Issues#
Issue |
Solution |
|---|---|
Cannot connect |
Verify server IP, check port ( |
CONNECT button does not change |
Check browser console for errors, verify firewall ports are open |
No XR mode available |
In |
Mixed content error (HTTPS) |
Configure WebSocket proxy (port |
Certificate errors |
Accept self-signed certs on the device (see HTTPS and Certificates), or use properly signed certificates |
Pico cannot connect |
Ensure HTTPS mode and WSS proxy are configured: HTTP is not supported on Pico |
Hand tracking not responsive |
Pause the session (press the MENU button) and resume. If the issue persists, restart the headset to clear caches. |
System gesture interrupts session |
Disable the hand tracking system gesture in developer settings (see Hand Tracking Setup) |
See the full Troubleshooting Guide for additional solutions.
See Also#
Scene Integration – Send custom messages to Kit
XR Settings Reference – Tune server-side rendering
Networking Guide – Detailed network configuration