Apple Client: Connect to Server#
Note
Applies to: Spatial Extensions, Kit 109.0.3+, CloudXR 6
This connection workflow covers connecting the CloudXR Apple Generic Viewer to your Kit XR server.
Before You Connect#
Important
Ensure all of the following are true before attempting to connect:
Your Kit application is running with a USD scene loaded
The XR panel shows OpenXR as the output plugin
The OpenXR Runtime is set to
CloudXR 6 (Native)XR is started – you see “Status: Waiting on Connection” in the viewport
Your server IP address is known (see Build and Launch)
Both server and client are on the same network subnet
Firewall allows CloudXR ports (see Networking Guide)
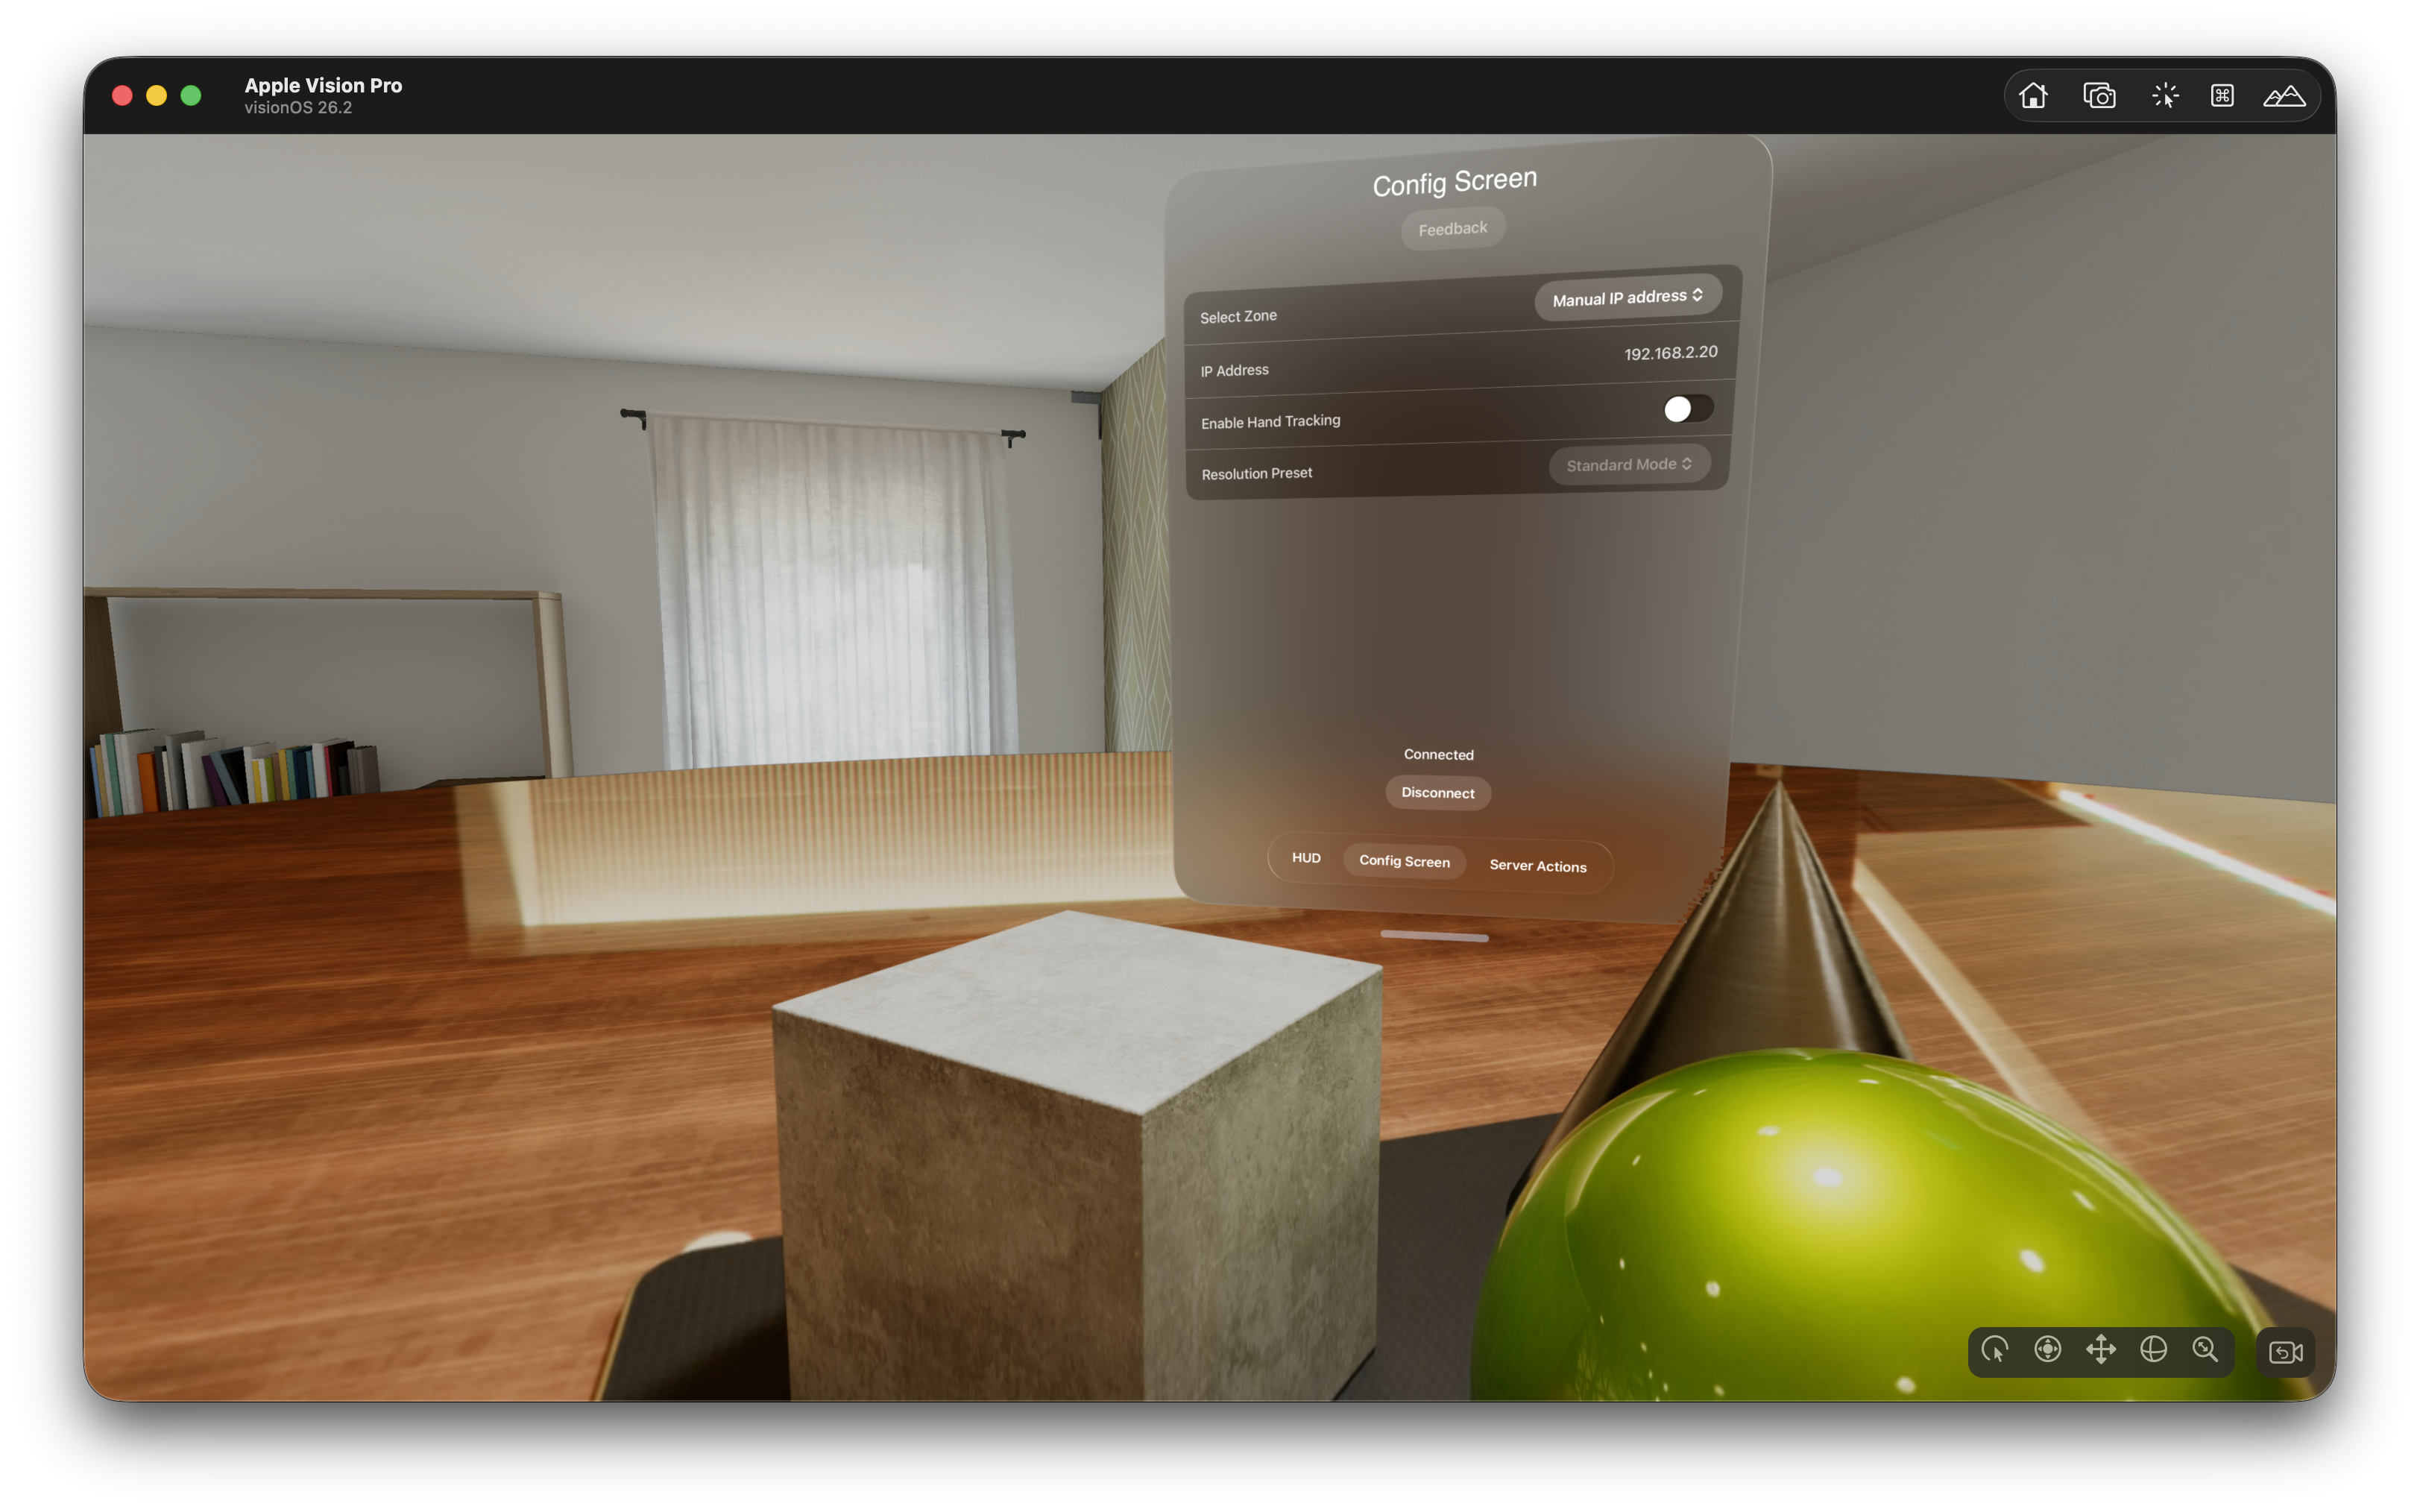
Connection Configuration#
When you launch the Generic Viewer app, you see the Session Configuration screen.
Zone Selection#
Zone |
Use Case |
|---|---|
Manual IP address |
Direct connection to a local server – enter the server’s IP address |
Auto |
Automatic NVIDIA GDN zone selection |
US East / US Northwest / US West / EU North |
Specific GDN data center regions |
Tip
For local development, select Manual IP address and enter your server’s IP address.
Resolution Preset#
Choose a resolution preset based on your network bandwidth and desired quality. Higher resolutions require more bandwidth.
Preset |
Streaming Resolution |
Description |
|---|---|---|
Standard |
2752 × 2064 |
Full-resolution stream with no foveation. Good default for most use cases. |
Performance |
2400 × 1920 |
Uses foveated rendering (60 % inset) to reduce bandwidth while maintaining perceived quality. Best for bandwidth-constrained networks. |
Record 4K |
3840 × 2176 |
Full 4K stream with no foveation, capped at 30 fps pose rate. Ideal for high-quality screen recording or capture. |
Hand Tracking (visionOS Only)#
Toggle Enable Hand Tracking to send hand pose data to the server. When enabled:
Prediction-based hand tracking using visionOS ARKit hand anchors.
Simulated hand tracking for UI testing (no actual hand data).
Connecting#
Configure your settings as described above
Tap Connect
The app establishes a CloudXR session with the server
After connecting, the streamed XR content appears in your headset or on your iPad
Connection Lifecycle#
State |
Description |
|---|---|
Disconnected |
No active session |
Connecting |
Establishing connection to server |
Connected |
Streaming active |
Paused |
Session paused (e.g., headset removed) |
Using the App#
After connecting on Vision Pro:
Look around – Head tracking drives the camera in Kit
Use hands – Hand tracking data is sent to the server (if enabled)
Access HUD – The window UI provides tabs for Configuration, Data Channel Actions, and more
After connecting on iPad:
View the stream – The rendered scene appears on screen
Touch interaction – Touch input is sent to the server
Access controls – Configuration and action UI is available
Opaque Data Channel#
The Actions tab in the app demonstrates bidirectional messaging with the server.
Selecting a Channel#
Go to the Actions tab
Use the Channels picker to select an available message channel
The channel status shows whether it is active
Sending Messages#
The default “Action 1” and “Action 2” buttons send plain text. To trigger Kit message bus handlers (like those in the USD Viewer template), modify them to send JSON payloads with a "type" and "payload" field.
First, add this helper function to the top of the ServerActionsView struct in ServerActionsView.swift (before any button code):
/// Build a JSON message for the CloudXR opaque data channel.
/// CloudXR reads "type" for the event name and flattens "payload"
/// children into event.payload on the server.
private func buildMessage(type: String, payload: [String: Any] = [:]) -> String? {
    let message: [String: Any] = [
        "type": type,
        "payload": payload
    ]
    guard let data = try? JSONSerialization.data(withJSONObject: message, options: []),
          let jsonString = String(data: data, encoding: .utf8) else {
        return nil
    }
    return jsonString
}
Then replace the button actions:
Button("Load Stage 1") {
    if let json = buildMessage(type: "openStageRequest", payload: [
        "url": "${omni.usd_viewer.samples}/samples_data/stage01.usd"
    ]) {
        sendMessage(message: json)
    }
}

Button("Load Stage 2") {
    if let json = buildMessage(type: "openStageRequest", payload: [
        "url": "${omni.usd_viewer.samples}/samples_data/stage02.usd"
    ]) {
        sendMessage(message: json)
    }
}
The full walkthrough for modifying ServerActionsView.swift is in Scene Integration – Sending Messages from the Apple Generic Viewer.
See also
For structured, type-safe messaging patterns – including variant switching, camera changes, lighting control, and more – refer to the Code Snippets cookbook.
Receiving Messages#
Incoming messages from Kit appear in the Last message received field. These are JSON strings from the Kit message bus (e.g., openedStageResult, loadingStateResponse).
GDN Connections#
Cloud Deployment
For cloud deployments through NVIDIA Graphics Delivery Network:
Select a Zone (Auto or a specific region)
Choose an Authentication method (Starfleet or Guest)
Enter an Application ID if required
Tap Connect
The GDN manages server allocation and routing automatically.
Troubleshooting Connection Issues#
Issue |
Solution |
|---|---|
Cannot connect |
Verify server IP, check firewall ports, ensure |
Connection drops |
Check WiFi signal strength, ensure 5 GHz band, verify bandwidth (200 Mbps recommended) |
Poor visual quality |
Increase resolution preset, check RTX render settings on server |
No hand tracking |
Verify hand tracking is enabled in app settings, check visionOS permissions |
Code signing error |
Verify Apple Developer Program membership, check provisioning profiles |
Tip
See the full Troubleshooting Guide for additional solutions.
Next Steps#
Swift snippets for gestures, variant switching, portals, and structured messaging.
Send custom messages to Kit and wire up server-side handlers.
See also
XR Settings Reference – Tune server-side rendering
Networking Guide – Detailed network configuration