Web Client: Setup and Build#
Note
Applies to: Spatial Extensions, Kit 109.0.3+, CloudXR 6
This setup workflow walks you through setting up a CloudXR.js sample client, installing dependencies, building the web application, and hosting it for development.
Prerequisites#
Choose a Sample#
The CloudXR.js sample repository provides two sample projects. Both connect to the same Kit XR server and support the same headsets: they differ in architecture and how much they give you out of the box.
The SDK tarball contains the CloudXR.js library. Sample applications are hosted separately at NVIDIA/cloudxr-js-samples.
Simple |
React |
|
|---|---|---|
Stack |
Vanilla TypeScript, WebGL2, WebXR API |
React 19, React Three Fiber, drei, @react-three/xr |
Scene graph |
None – purely a streaming client |
Three.js scene graph through R3F; you can add 3D objects alongside the CloudXR stream |
UI |
2D HTML settings form |
2D HTML settings form and 3D in-headset controls (React Three UIKit) |
Source complexity |
Single class ( |
Component-based architecture across multiple files ( |
Dependencies |
Minimal ( |
Heavier (React, Three.js, R3F, UIKit, drei, @react-three/xr) |
Extension points |
Hook callbacks ( |
Standard React component composition and R3F hooks |
Best for |
Learning the CloudXR API, lightweight integrations, embedding in an existing page |
Building full XR applications with custom 3D overlays, in-headset UI, or React-based toolchains |
Tip
If you are new to CloudXR.js, start with the Simple sample to understand the core connection lifecycle, then move to the React sample when you need a richer application framework.
Simple Sample#
Step 2: Install the CloudXR.js SDK#
Download the CloudXR.js SDK tarball from NGC and install it:
npm install /path/to/nvidia-cloudxr-<version>.tgz
Step 3: Build the Application#
npm run build
Step 4: Choose a Hosting Mode#
Select the hosting mode based on your deployment needs.
HTTP Mode (Development)#
npm run dev-server
Local:
http://localhost:8080/Network:
http://<server-ip>:8080/Supports both
ws://(direct) andwss://(proxied) runtime connectionsMeta Quest 2/3/3S: Requires enabling a browser flag (see Connect Guide)
Note
HTTP mode is not supported on Pico 4 Ultra.
HTTPS Mode (Production / Pico)#
npm run dev-server:https
Local:
https://localhost:8080/Network:
https://<server-ip>:8080/Generates self-signed certificates for development
Required for Pico 4 Ultra
Requires a WebSocket proxy for CloudXR connections (see Networking Guide)
Important
When using HTTPS, browsers enforce mixed content policies that block insecure ws:// connections. You must configure a WebSocket proxy to handle wss:// connections. See the Networking Guide for proxy setup.
Project Structure#
simple/
├── src/
│   ├── main.ts             # Application entry point (~700 lines)
│   └── ...
├── index.html              # Entry HTML page with settings form
├── package.json            # Dependencies and scripts
├── webpack.common.js       # Shared webpack configuration
├── webpack.dev.js          # Development webpack config
├── webpack.prod.js         # Production webpack config
├── tsconfig.json           # TypeScript configuration
└── node_modules/           # (after npm install)
The entire CloudXR integration lives in main.ts as a single CloudXRClient class. The connection lifecycle follows a straightforward sequence:
Initialize – Create a WebGL2 context and check browser capabilities
Start WebXR session – Enter VR or AR mode and obtain a reference space
Create CloudXR session – Configure server address, resolution, bitrate, and codec
Render loop – Each frame sends tracking data to the server and renders the returned stereo frame
The class exposes hook callbacks (onXRFrame, onWebGLInitialized, onCleanup) that you can use to layer custom rendering on top of the streamed content.
React Sample#
The React sample wraps the same CloudXR APIs in a React Three Fiber application, giving you a full 3D scene graph and component-based architecture.
Step 1: Navigate to the Sample Directory#
cd react
Step 2: Install the CloudXR.js SDK#
Download the CloudXR.js SDK tarball from NGC and install it:
npm install /path/to/nvidia-cloudxr-<version>.tgz
Step 3: Build the Application#
npm run build
Step 4: Choose a Hosting Mode#
The hosting modes are the same as the Simple sample:
# HTTP (development)
npm run dev-server

# HTTPS (production / Pico)
npm run dev-server:https
See the Simple sample hosting section above for details on each mode.
Project Structure#
react/
├── src/
│   ├── index.tsx            # React app entry point
│   ├── App.tsx              # Main application component
│   ├── CloudXR2DUI.tsx      # 2D HTML settings form management
│   ├── CloudXRUI.tsx        # 3D in-headset controls (React Three UIKit)
│   └── index.html           # HTML template
├── public/
│   └── *.svg                # UI icons (play, stop, reset, disconnect)
├── package.json             # Dependencies and scripts
├── webpack.common.js        # Shared webpack configuration
├── webpack.dev.js           # Development webpack config
├── webpack.prod.js          # Production webpack config
├── tsconfig.json            # TypeScript configuration
└── node_modules/            # (after npm install)
Architecture#
The React sample separates concerns across several components:
Component |
Role |
|---|---|
|
Root component. Creates the R3F |
|
Manages the CloudXR session inside the R3F render loop. Handles WebGL state preservation so R3F and CloudXR do not conflict. Imported from shared helpers. |
|
Class that manages the 2D HTML settings form (server IP, resolution, codec, device profile, etc.). Persists preferences to |
|
3D in-headset control panel built with React Three UIKit. Provides start/stop/reset buttons and status display visible while wearing the headset. |
The component hierarchy looks like this:
App
├── Canvas (React Three Fiber)
│   ├── XR (React Three XR session wrapper)
│   │   ├── XROrigin
│   │   ├── CloudXRComponent (CloudXR session + render loop)
│   │   └── CloudXRUI (3D in-headset controls)
│   └── PointerEvents
└── CloudXR2DUI (2D HTML settings form)
Key Differences from Simple#
Dual UI system – The React sample provides both a 2D HTML form for pre-session configuration and a 3D in-headset panel (built with React Three UIKit) for runtime controls like start, stop, reset, and disconnect. The Simple sample only has the 2D form.
WebGL state preservation – Because React Three Fiber maintains its own WebGL state, the React sample uses a bindGL() helper to save and restore WebGL state around CloudXR rendering calls. This prevents conflicts between R3F’s renderer and CloudXR’s frame injection. The Simple sample does not need this because it owns the WebGL context exclusively.
Scene composition – With R3F you can compose Three.js objects, lights, and post-processing effects alongside the CloudXR stream using standard React components. The Simple sample has no scene graph – it is a pure streaming client.
XR session management – The React sample uses createXRStore() and the <XR> component from @react-three/xr to manage WebXR sessions declaratively. The Simple sample calls the WebXR API directly (navigator.xr.requestSession()).
Verifying Your Setup#
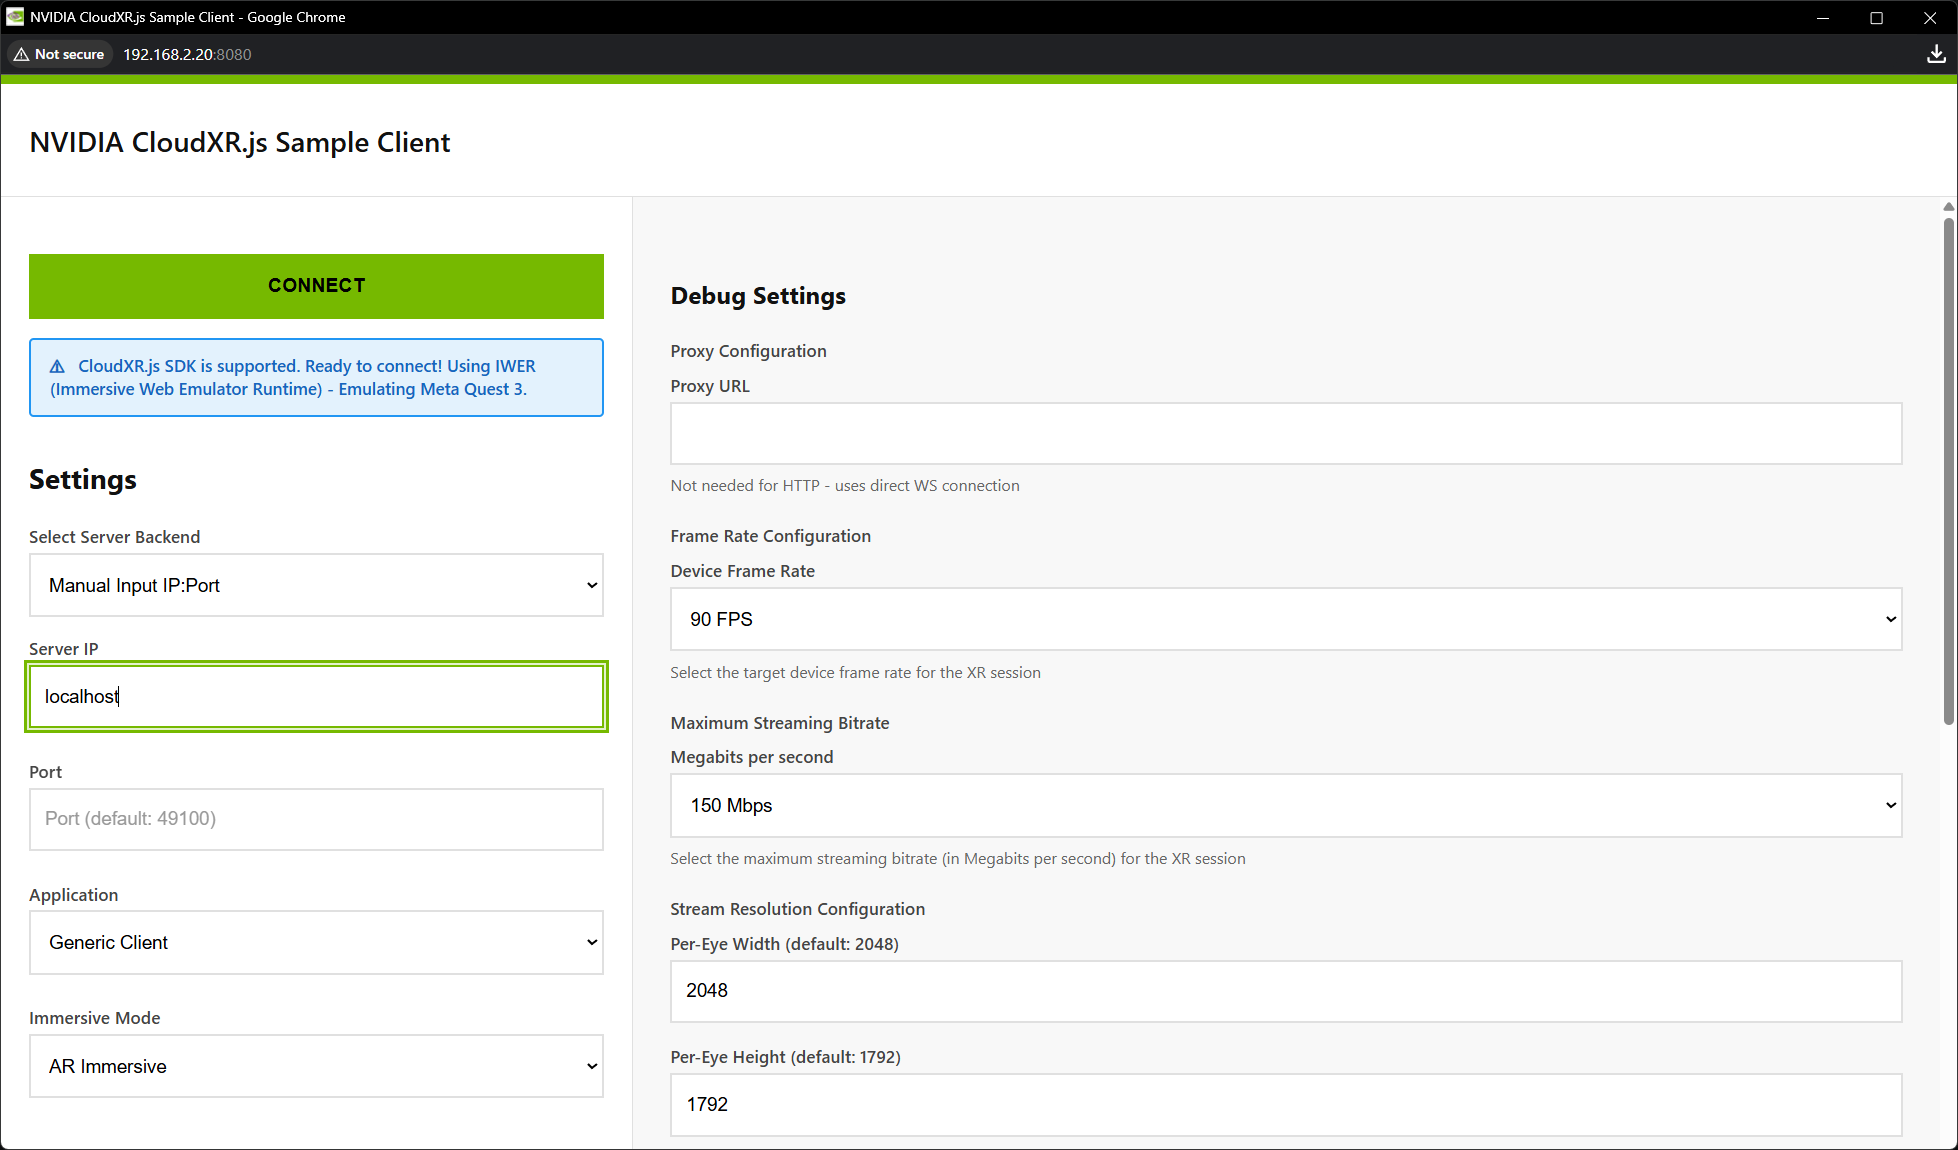
After starting the dev server for either sample, open http://localhost:8080/ (or https:// for HTTPS mode) in Chrome on your development machine. You see the CloudXR.js client UI with:
Server IP address field
Port field (default:
49100)Immersive mode selector (VR / AR)
Device profile selector (Quest 3, Pico 4 Ultra, Custom)
Connect button
If IWER (Immersive Web Emulator Runtime) loads automatically, you see a message indicating XR emulation is active. This is expected and allows desktop testing without a headset.
Trusting SSL Certificates (HTTPS Mode)#
When using HTTPS with self-signed certificates, you need to trust the certificate on both your development machine and your headset.
Desktop Browser#
Navigate to https://localhost:8080/ and accept the browser’s security warning.
Meta Quest 2/3/3S#
Open the browser on Meta Quest
Navigate to
https://<server-ip>:8080/Accept the certificate warning
Pico 4 Ultra#
Open the browser on Pico
Navigate to
https://<server-ip>:8080/Accept the certificate warning
For production deployments, use properly signed certificates from a certificate authority.
Next Steps#
Next step:
Connect to Server – Connect from a headset or desktop browser
See also:
Networking Guide – WebSocket proxy and firewall configuration