NVIDIA Omniverse Spatial: Stream USD Scenes to XR Headsets with CloudXR#
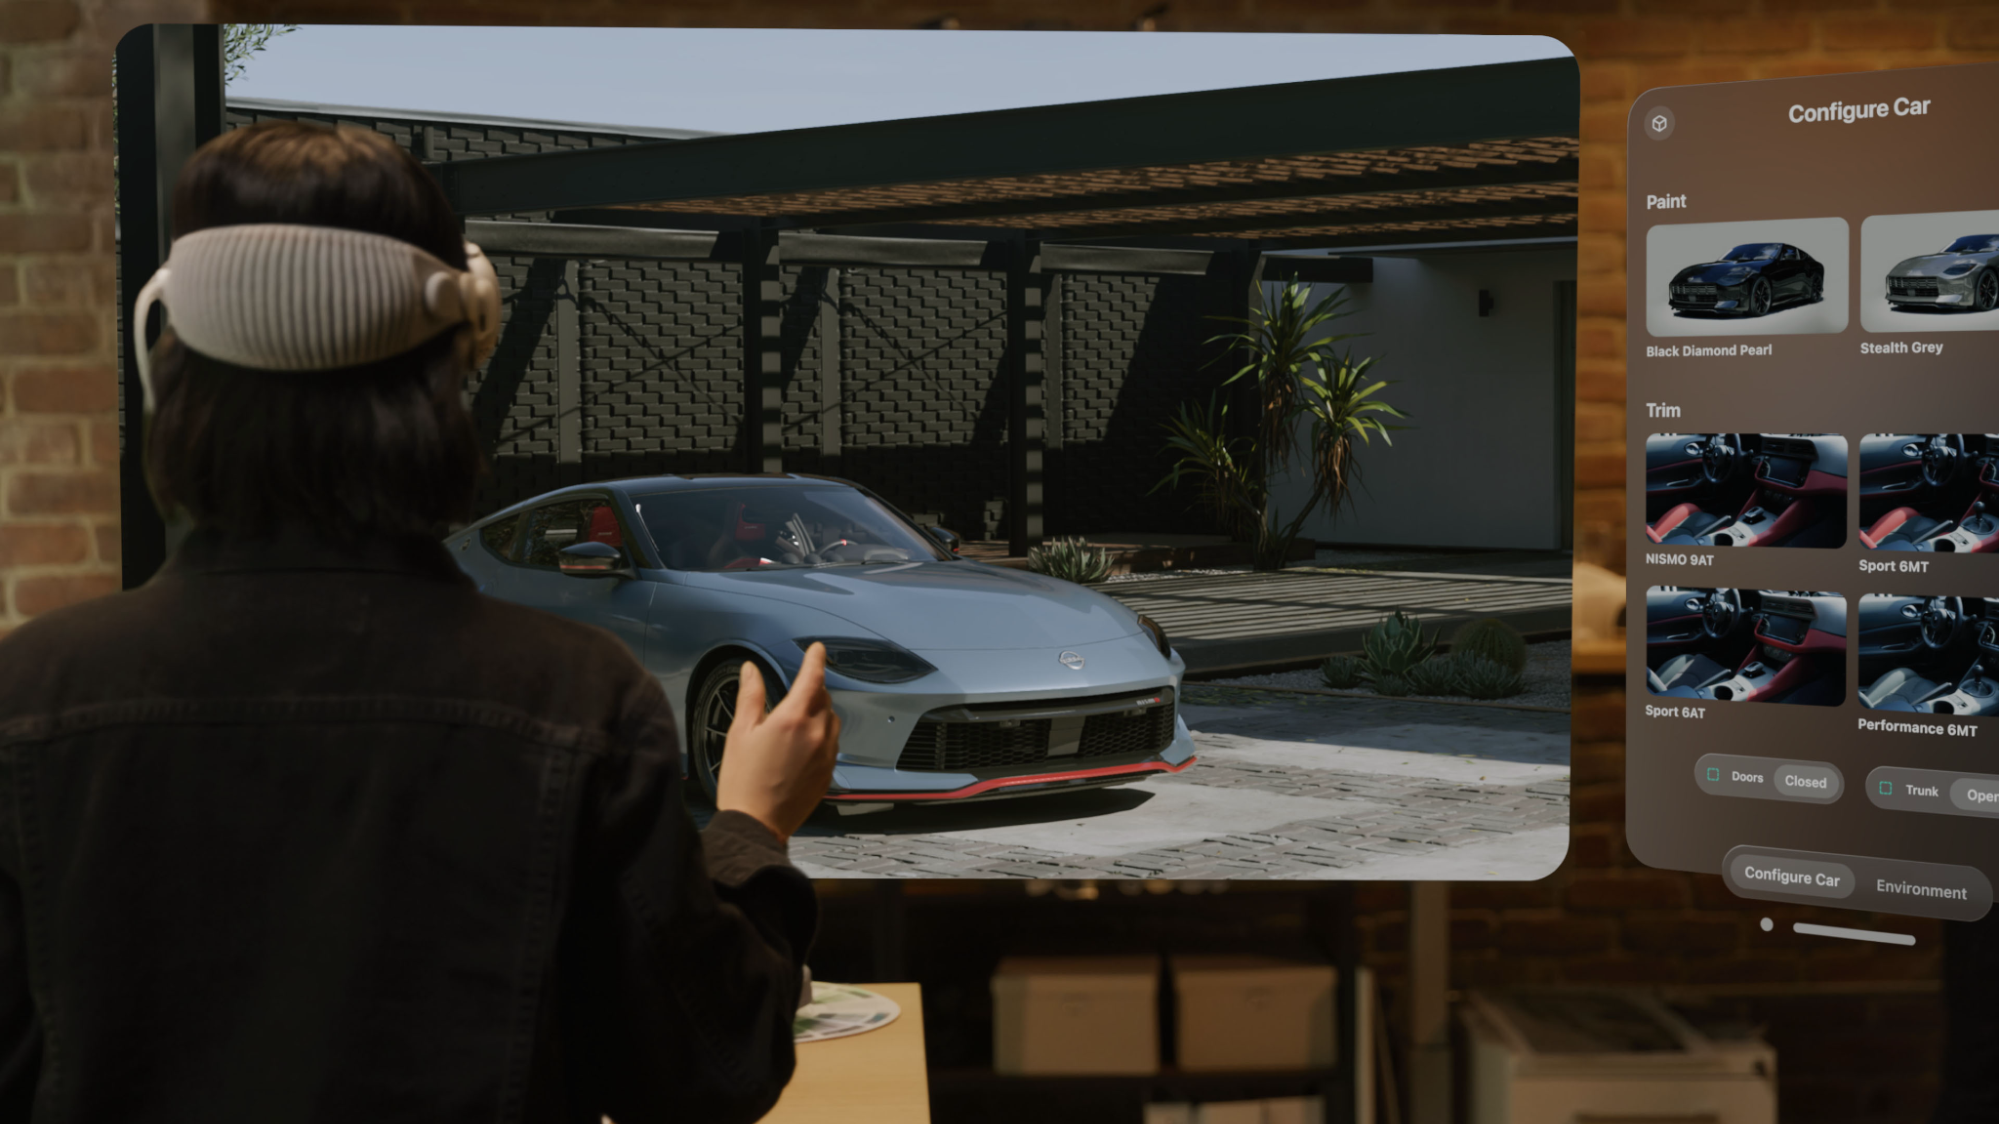
NVIDIA Omniverse Spatial enables developers to stream 3D USD scenes from an Omniverse Kit application to XR headsets and tablets over CloudXR and OpenXR. Supported clients include Apple Vision Pro, iPad, Meta Quest 2/3/3S, Pico 4 Ultra, and desktop browsers. The server renders stereo frames using RTX and streams them at low latency while clients send back head and hand tracking data each frame. Tethered OpenXR devices are supported for non-streaming use cases.
Who this is for: XR developers, enterprise visualization developers, and Kit/Omniverse developers adding spatial streaming to their applications. Requires an NVIDIA RTX GPU (RTX 6000 Ada or equivalent) and Kit SDK 109.0.3+. See the Prerequisites for full requirements.
High-Level Pipeline#
The server renders stereo frames of your USD scene using RTX and streams them at low latency to connected XR headsets and tablets. Clients send pose data (head and hand tracking) back to the server each frame, and bidirectional opaque data channels carry application-level messages (JSON payloads) in both directions.
Omniverse Spatial CloudXR Runtimes: Native vs WebRTC#
Kit 109.0.3+ ships with two integrated CloudXR 6 runtimes. You select the appropriate one in the Kit XR panel dropdown before clicking Start XR:
Runtime |
Kit Dropdown Selection |
Target Clients |
Transport |
|---|---|---|---|
Native |
|
Apple Vision Pro, iPad |
CloudXR native protocol |
WebRTC |
|
Meta Quest 2/3/3S, Pico 4 Ultra, desktop browsers |
WebSocket signaling + WebRTC media |
Important
You can only run one runtime at a time. Choose the runtime that matches the client you intend to connect.
XR Extension Stack#
The following extensions compose the XR system inside Kit:
Add these to your .kit file to enable XR:
[dependencies]
"omni.kit.xr.core" = {}
"omni.kit.xr.ui.window.profile" = {}
"omni.kit.xr.ui.window.viewport" = {}
"omni.kit.xr.ui.stage" = {}
"omni.kit.xr.cloudxr" = {}
Alternatively, use a bundle extension that pulls in all of the above:
"omni.kit.xr.bundle.generic" = {}          # Cross-platform (recommended default)
# OR
"omni.kit.xr.bundle.apple_vision_pro" = {} # Apple Vision Pro optimized
# OR
"omni.kit.xr.bundle.ipad" = {}             # iPad / tablet optimized
If in doubt, use omni.kit.xr.bundle.generic — it includes all XR extensions and works with every supported client.
XR Profiles#
Kit XR uses profiles to configure rendering and interaction for different form factors:
Profile |
Blend Mode |
Use Case |
|---|---|---|
VR |
Fully opaque immersive |
Stereoscopic rendering with no passthrough — the headset shows only the rendered scene |
AR |
Alpha-blended passthrough |
Virtual content composited over the real world via the headset’s passthrough cameras |
The profile is selected either in the Kit XR panel UI or programmatically:
import omni.kit.xr.core

xr_core = omni.kit.xr.core.XRCore.get_singleton()
xr_core.request_enable_profile("ar")  # or "vr"
Kit Message Bus – Universal Integration Point#
Both CloudXR runtimes deliver opaque data channel messages to the same Kit message bus. This is the key architectural property that makes Kit-side logic transport-agnostic:
This means:
A Kit extension that listens on the message bus for
selectPrimsRequestwill respond whether the message came from an Apple Vision Pro over CloudXR Native or a Meta Quest headset over WebRTC.The JSON message format is identical regardless of transport:
{
  "event_type": "selectPrimsRequest",
  "payload": { "paths": ["/World/Geometry/Cube"] }
}
The USD Viewer template ships with a
setupextension that already handles messages likeselectPrimsRequest,openStageRequest,resetStage, andgetChildrenRequest. These handlers work with any CloudXR client that sends the correct payload.
Important
This setup extension is specific to the USD Viewer template. If you build your application from a different template (such as Kit Base Editor or USD Composer), no message handling extension is included – the Kit message bus will still receive data channel messages, but nothing will process them. You will need to create a similar extension that subscribes to the message bus. See Scene Integration and Messaging: Writing Custom Message Handlers for guidance.
Client Comparison#
Apple Path |
Meta / Web Path |
|
|---|---|---|
Client SDK |
CloudXRKit (Swift) |
CloudXR.js (JavaScript) |
Client App |
cloudxr-apple-generic-viewer |
|
Platforms |
visionOS (Vision Pro), iOS/iPadOS (iPad) |
Meta Quest 2/3/3S, Pico 4 Ultra, desktop browser |
Kit Runtime |
|
|
Build Tool |
Xcode |
Node.js + npm |
Connection |
Enter server IP directly in app |
Navigate to web app URL, enter server IP + port |
Ports |
TCP/UDP 47995-48012 |
TCP 49100 (signaling), UDP 47998 (media), TCP 48322 (WSS proxy) |
Hand Tracking |
Native visionOS hand tracking |
WebXR hand tracking |
Data Channels |
Opaque data channel in CloudXRKit |
Opaque data channel in CloudXR.js |
What NOT to Use#
Do not add 2D streaming extensions to your XR application. The following are for flat 2D desktop streaming and are incompatible with XR extensions:
omni.kit.livestream.webrtcomni.kit.livestream.appThe
web-viewer-sampleWebRTC streaming client
If you see documentation referencing these for streaming to a browser, that is the 2D streaming path – a separate workflow that does not support stereoscopic rendering, head tracking, or spatial interaction.
CloudXR Session Lifecycle in Omniverse Spatial#
A CloudXR session follows this lifecycle on both client paths:
Configure -> Connect -> Streaming -> Pause / Resume -> Disconnect
Configure – Client sets server IP, resolution, and options
Connect – Client initiates connection to the CloudXR runtime on the server
Streaming – Server renders and streams stereo frames; client sends pose data each frame
Pause / Resume – Session can be paused (e.g., when headset is removed) and resumed
Disconnect – Client or server terminates the session
Network Requirements Summary#
Requirement |
Apple Path |
Meta / Web Path |
|---|---|---|
Bandwidth |
200 Mbps recommended |
200 Mbps recommended |
WiFi |
WiFi 6 (5 GHz) |
WiFi 6 (5 GHz or 6 GHz) |
Latency |
< 20 ms recommended |
< 20 ms recommended |
Firewall (TCP) |
47995, 47998-48002, 48005, 48008, 48010, 48012 |
49100, 48322 (WSS proxy) |
Firewall (UDP) |
47998-48002, 48005, 48008, 48010, 48012 |
47998 |
See the Networking Guide for detailed configuration.
Next Steps#
Get started:
Get connected in 10 minutes (fast path)
Hardware, software, and network requirements (detailed path)
Go deeper:
WiFi, firewall, and port configuration
Common issues and solutions
Python API, custom tools, XRUsdLayer, and more