Installation on Windows
Prerequisites for Installation
There are two elements that you need to have prior to starting the installation process. Both components are available within the NVIDIA Licensing Portal (NLP).
It’s important to note that the entitlements themselves are provided to the person at the company who makes the purchase, and that person can add others (including the IT Managers) to the Licensing Portal so that they can grab the components listed below. You can read more about this process as part of our Enterprise Quick Start Guide.
- Download the IT Managed Launcher Installer.
(.exe) Executable since you’re running Windows.
Your Organization Name Identifier (org-name).
To find the IT Managed Launcher executable on the NLP:
Once you’ve logged into the Portal, go to the Software Downloads section (left nav) and look for the NVIDIA Omniverse IT Managed Launcher for your platform of choice (Windows in this case).
Click Download to initiate the download process of the installer.
Note
Once the installer is downloaded, you should place it onto your designated staging hardware inside of your company firewall.
Next you’ll grab your Organization’s Name Identifier (org-name).
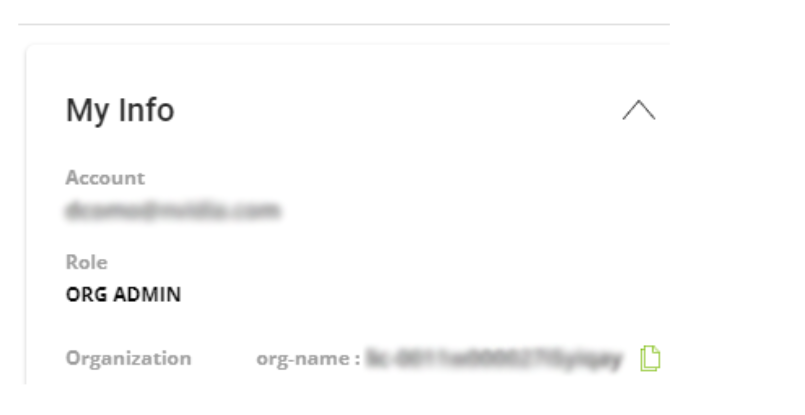
To do this, at the top of the portal, hover your mouse over your user account until you see a View Settings message pop up. (See image below)
Within the resulting My Info dialog, under the Organization area, you will see an org-name section. The information that is presented there represents your Organization Name and will be required later.
View Settings:

Be sure to capture this information before you begin the installation process. You will need it to install the IT Managed Launcher as well as configure your enterprise enablement.
Organization Name
Once you have this information, it’s time to install the IT Managed Launcher.
There are two ways to install the IT Managed Launcher on Windows:
Manually: You can install the Launcher manually on a user’s workstation directly (e.g. using CMD or PowerShell).
Deployment: You can pre-configure the Launcher to be installed as part of a deployment software strategy (e.g. SCCM / Group Policy)
We will cover both options below.
PowerShell
Deploying Launcher
Run the IT Managed Launcher installer you downloaded from the Licensing Portal locally on a user’s workstation. This can be done in the UI by double-clicking omniverse-launcher-win-enterprise.exe or via the PowerShell terminal, by typing:
./omniverse-launcher-win-enterprise.exeFollow the prompts until the installer finishes. At the end of the install process, the option to immediately run the IT Managed Launcher will be checked by default.
Leave that option checked, then click Finish to finish the install process.
Note
You can install the IT Managed Launcher silently by adding the /S parameter to the end of the filename. Example: ./omniverse-launcher-win-enterprise.exe /S
Note
You can install the IT Managed Launcher to a specific location by adding the /D parameter to the end of the filename. Example: ./omniverse-launcher-win-enterprise.exe /S /D="C:\Program Files\NVIDIA Corporation\NVIDIA Omniverse Launcher"
Setting Up TOML Files
( Learn more about TOML syntax: https://toml.io/en/ )
1) When the IT Managed Launcher first opens, you’ll immediately be prompted to set a number of default locations for Omniverse data. These paths determine where Omniverse will place the installed applications (Library Path), data files (Data Path), content files (Content Path) and Cache information.
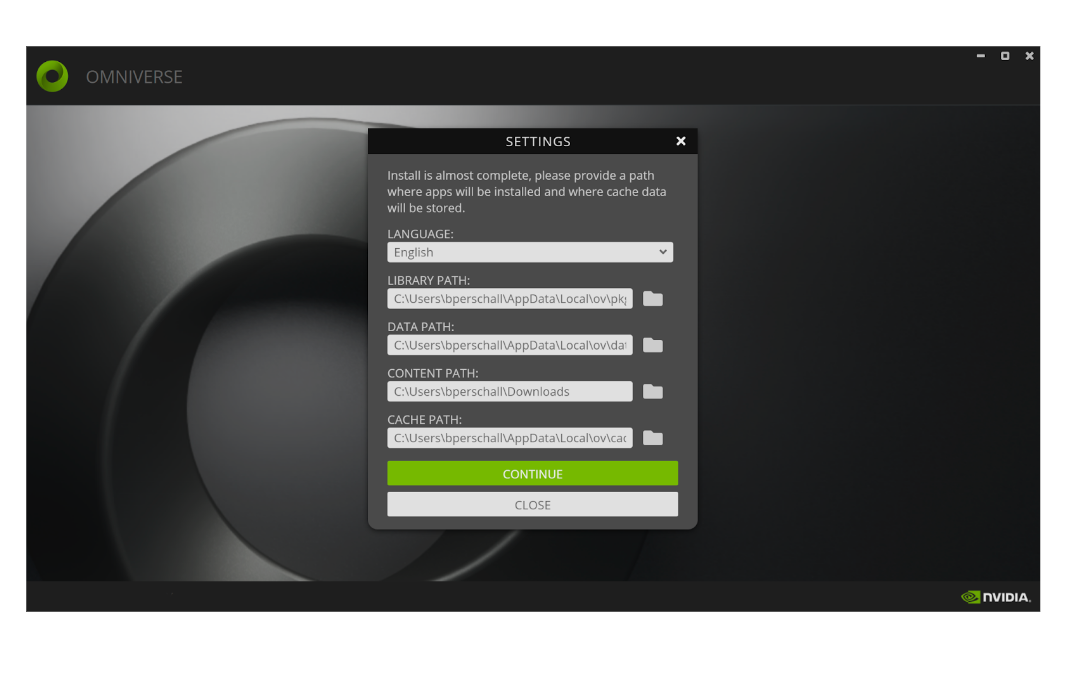
All of the paths set here will be recorded and stored within an omniverse.toml file for later editing as needed. It’s important to note that all of the paths set here can be changed as per preference and IT Policy at a later time. By default, the installer takes all of these path preferences and stores them in the omniverse.toml under the following folder structure:
c:\Users\[username]\.nvidia-omniverse\config
Where [username] represents the local user’s account.
2) Once you’ve set the default paths for Omniverse to use, click on the Continue Button.
You should now be presented with a blank Library window inside of the launcher.
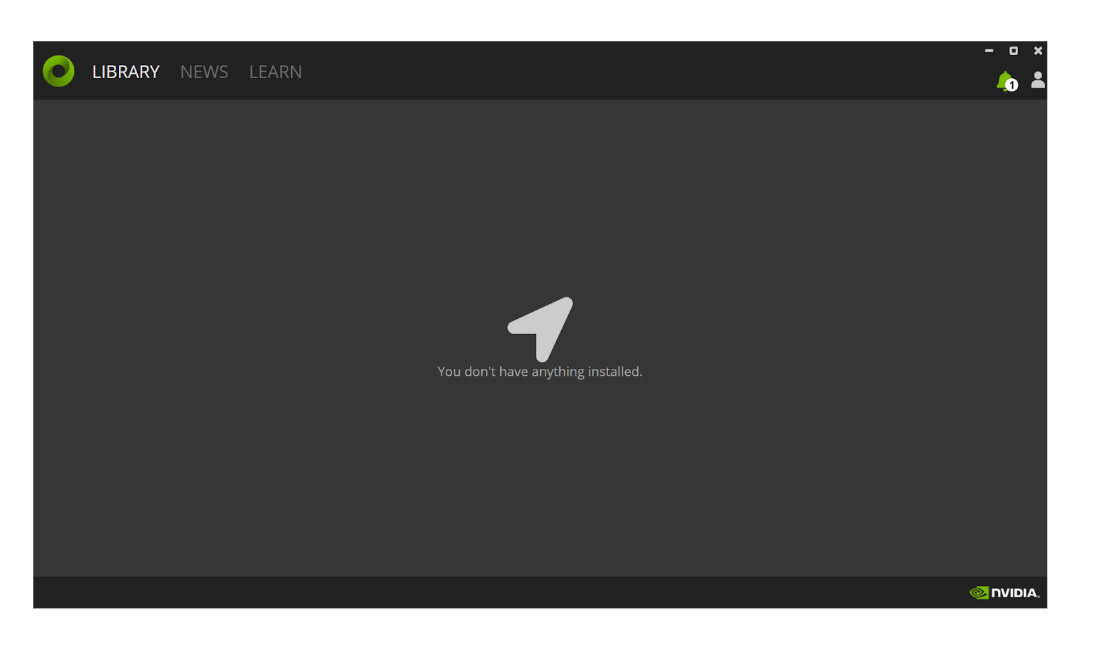
3) Close the IT Managed Launcher.
At this point, the IT Managed Launcher is installed. However, before you start to install Omniverse applications, you’ll need to add two additional, important configuration files.
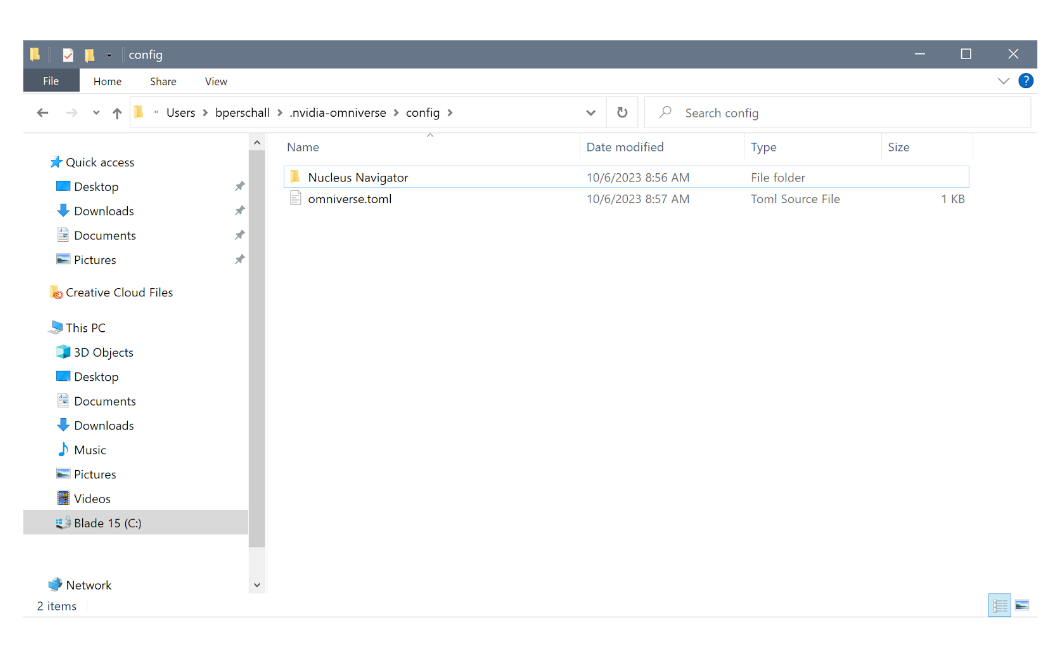
When you look at the default configuration location in Windows (c:\Users\[username]\.nvidia-omniverse\config), you should see the omniverse.toml file that the installer added as shown below.
This omniverse.toml file is the primary configuration file for the IT Managed Launcher. Within this configuration file, the following paths are described, and they should match the selections you made in step 1. Be aware that you can set these after the installation to different paths as needed for security policy at any time.
[paths]
library_root = "C:\\Omniverse\\library"                                 # Path where to install all Omniverse applications
data_root = "C:\\Omniverse\\data"                                       # Folder where Launcher and Omniverse apps store their data files
cache_root = "C:\\Omniverse\\cache"                                     # Folder where Omniverse apps store their cache and temporary files
logs_root = "C:\\Users\\[username]\\.nvidia-omniverse\\logs"            # Folder where Launcher and Omniverse apps store their logs
content_root = “C:\\Users\\[username]\\Downloads”                       # Folder where Launcher saves downloaded content packs
extension_root = “C:\\Users\\[username]\\Documents\\kit\\shared\\exts”  # Folder where all Omniverse shared extensions are stored
confirmed = true                                                        # Confirmation that all paths are set correctly, must be set to `true`
Important
Also be aware that all paths on Windows require a double backslash (\) for proper operation.
Note
If a system administrator doesn’t want to allow users to change these paths, the omniverse.toml file can be marked as read-only. Also, if a System Administrator plans to install the IT Managed Launcher to a shared location like Program Files on Windows, they need to specify a shared folder for library_root and logs_root path in omniverse.toml file.
You’re now going to add two additional files to this /config folder in addition to the omniverse.toml file.
privacy.tomlfile to record consent choices for data collection and capture of crash logs.license.tomlto provide your license details.
Note
When creating or editing these configuration files, use a text editor such as Windows Notepad. Do not use a rich-text editor such as Wordpad or Microsoft Word.
Important
By opting into telemetry within the privacy.toml, you can help improve the performance & stability of the software. For more details on what data is collected and how it is processed see this section.
4) Within the /config folder, create a text file named privacy.toml. This is the configuration file for Omniverse telemetry. Within this privacy file, copy the following information:
[privacy]
performance = true
personalization = true
usage = true
Once this file contains these four lines, save the file.
Note
If your IT or Security Policy prohibits the collection of telemetry on a user’s workstation, set all of the values in the file to false.
5) For the last file needed in your /config folder, create a text file named license.toml This is the licensing configuration file for Omniverse. Within this licensing file, specify the Organization Name Identifier (org-name) you retrieved from the Licensing Portal in the prerequisites section:
[ovlicense]
org-name = "<insert-your-org-name-here>"
Once this file contains these two lines, save the file.
Once you’ve completed these steps, your /.nvidia-omniverse/config folder should have the directory and required .toml files like the screenshot below:
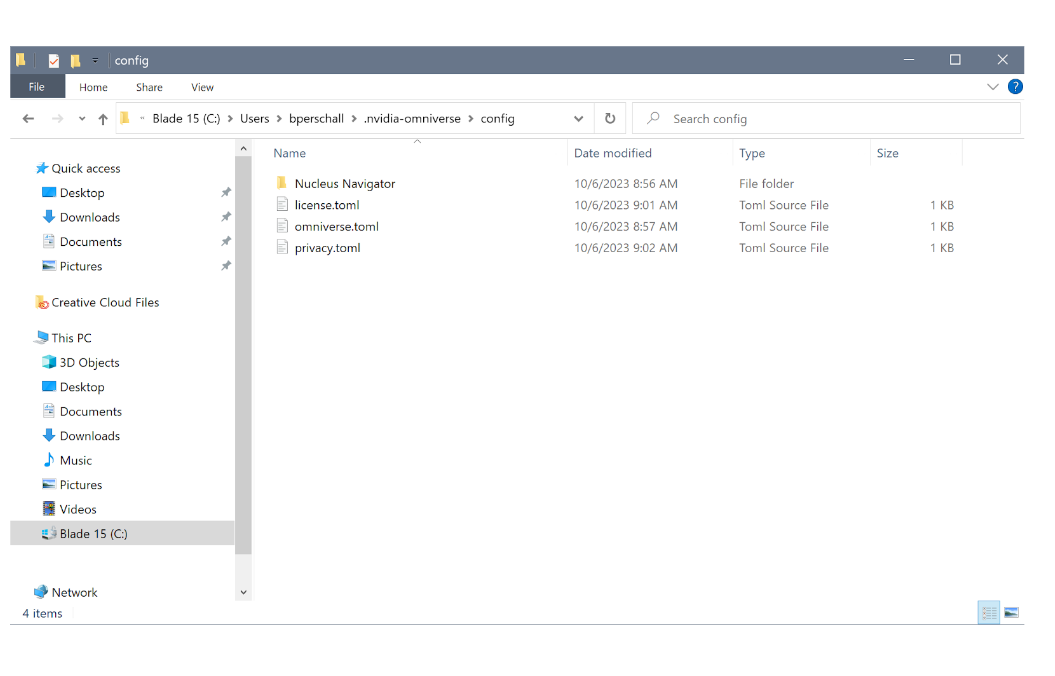
That completes the IT Managed Launcher manual installation for Windows and Omniverse applications can now be installed to users’ workstations.
Setting Up Packages
Once the Omniverse IT Managed Launcher is installed and configured, you’re ready to install the Omniverse foundation applications for your users.
As an IT Manager, you now need to download the various Omniverse foundation applications from the Omniverse Enterprise Web Portal. Each application will come in the form of an archived .zip file that you can take to a user’s machine and install either manually, or via your internal deployment framework.
1) To begin, log into the Omniverse Enterprise Web Portal.
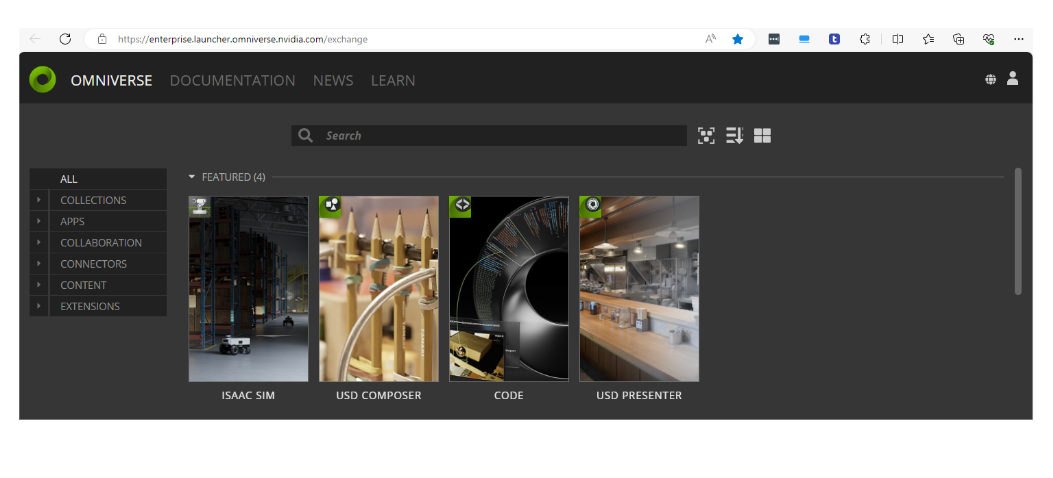
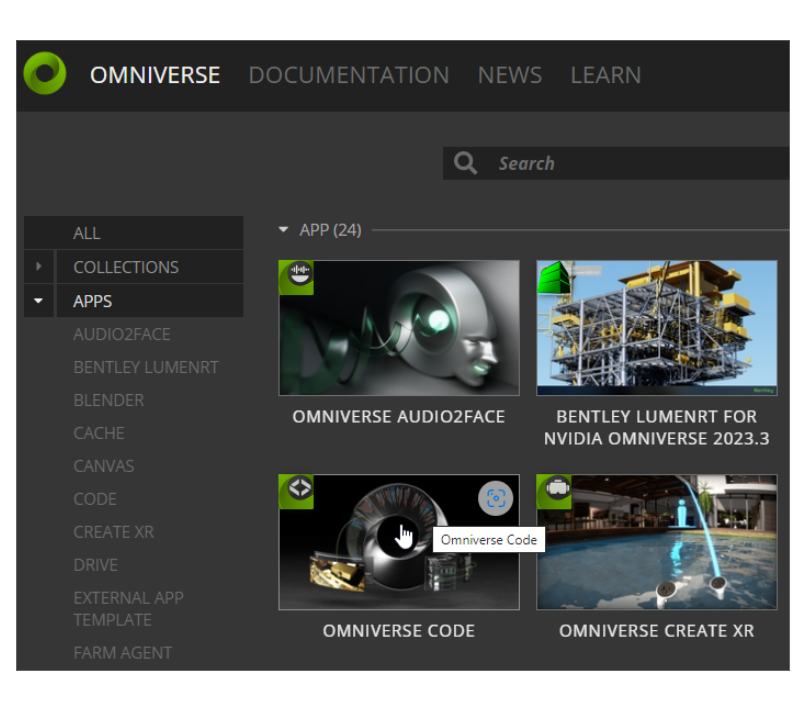
2) In the left-hand navigation area, select Apps, and from the resulting view, click on the tile of the Omniverse foundation application you want to install.
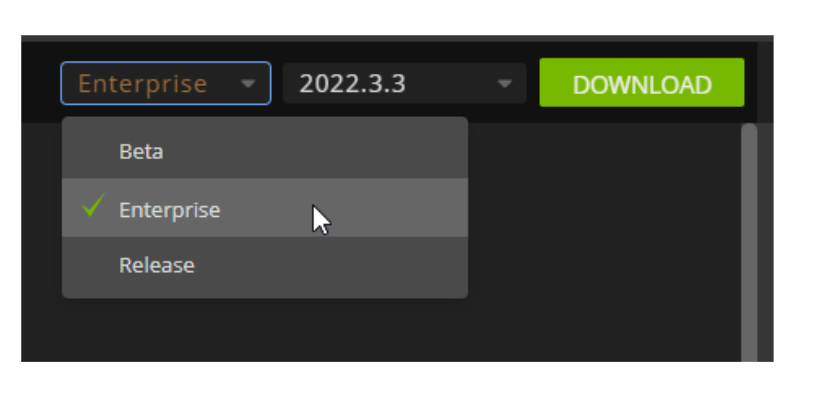
3) Available releases are categorized by release channel. A release is classified as Beta, Release, or Enterprise, depending on its maturity and stability.
Beta |
Beta builds may or may not be feature complete or fully stable. These are good for testing new Omniverse functionality, but aren’t guaranteed to be ready for production. |
Release |
Release builds (also known as GA or General Availability) are feature complete and stable builds ready for production. |
Enterprise |
Enterprise builds are provided for Enterprise customers and represent supported production versions of Omniverse software. |
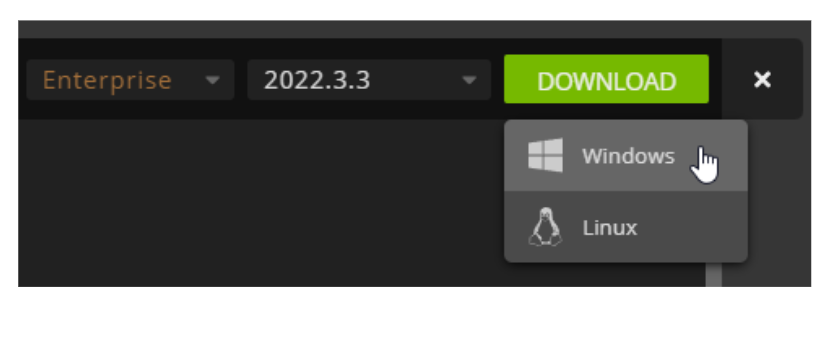
4) Select a package version in the dropdown list and click Download.
5) Clicking the download button will prompt you to select the Windows or Linux version of the application to install. Choose the OS version that matches the user’s workstation.
6) Once downloaded, the application archive must then be transferred to the user’s machine or hosted on your chosen local network staging hardware so it can be accessed and installed on a user’s workstation.
Once you’ve downloaded the various Omniverse foundation applications, you are ready to proceed to the installation.
Deploying the Apps
The most basic way to install Omniverse foundation applications is to open a custom protocol URL directly on the user’s machine. The simple command below will trigger the IT Managed Launcher to run the installation routine for the given Omniverse application .zip archive.
The format of the custom protocol can vary depending on the command line interface used, but as a general rule of thumb, the settings are as follows:
omniverse-launcher://install?path=<package.zip>
Where <package.zip> represents the name and path where the downloaded application archive is on the local workstation. Be aware that it does not matter where you place the archive, the custom protocol will install the application to its default location based on the library_root path in the omniverse.toml file that you configured earlier as part of the IT Managed Launcher installation process.
Example: start omniverse-launcher://install?path=C:/temp/usd_explorer.zip
Example: start omniverse-launcher://install?path=//Mainframe/temp/usd_explorer.zip
When the command is run, it will trigger the IT Managed Launcher to open and it will begin the installation process. You should see a screen similar to the one below that shows the progress bar for the application being installed in the upper right of the Launcher window.
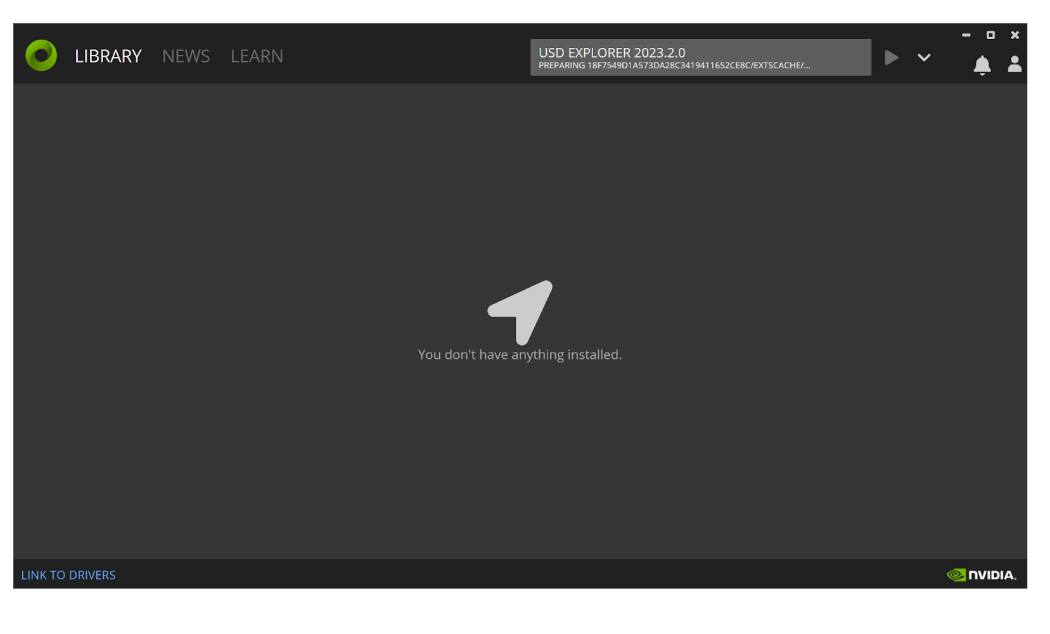
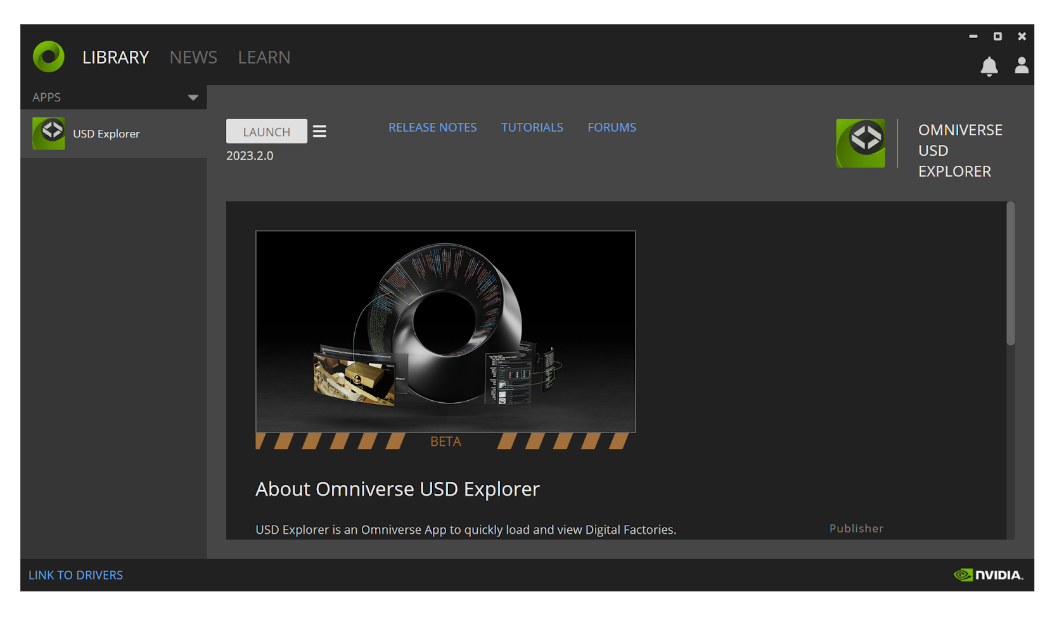
Once the installation is complete, the Omniverse application will appear in the Library section of the Launcher window and these steps can be repeated for any additional applications you want to make available to your users.
SCCM
To deploy the IT Managed Launcher executable file to users’ Windows workstations you will need to perform several tasks.
You’ll need to download and stage the IT Managed Launcher .EXE file to a shared network location inside your firewall that all of the users’ workstations can see and access.
Next, you’ll create and pre-configure a user’s
omniverse.toml,policy.tomlandlicense.tomlfiles and stage them in the same shared network location.After that, you’ll create a .bat file to control the installation process and reference .toml files you’ve set up.
Finally, you’ll configure another .bat file within the Windows Local Group Policy to execute at user logon to trigger the installation and configuration of the IT Managed Launcher for the user on their local workstation.
As per the prerequisite section of this document, you should have already downloaded the Windows version of the IT Managed Launcher install file from the Enterprise Web Portal. If not, please do that first.
Setting up TOML Files
(Learn more about TOML syntax: https://toml.io/en/)
The first step is to create and stage the three .toml files for deployment.
omniverse.toml: Copy the following information into a new text document, replacing the path information with the location you want Omniverse and its data installed on each user’s workstation. Once done, save it to the staging location.
[paths]
library_root = "C:\\Omniverse\\library"  # Path where to install all Omniverse applications
data_root = "C:\\Omniverse\\data"        # Folder where Launcher and Omniverse apps store their data files
cache_root = "C:\\Omniverse\\cache"      # Folder where Omniverse apps store their cache and temporary files
logs_root = "C:\\Users\\[username]\\.nvidia-omniverse\\logs"   # Folder where Launcher and Omniverse apps store their logs
content_root = "C:\\Users\\[username]\\Downloads" # Folder where Launcher saves downloaded content packs
extension_root = "C:\\Users\\[username]\\Documents\\kit\\shared\\exts"  # Folder where all Omniverse shared extensions are stored
confirmed = true   # Confirmation that all paths are set correctly, must be set to `true`
Path |
Description |
|---|---|
library_root = “C:\Omniverse\library” |
Path where to install all Omniverse applications |
data_root = “C:\Omniverse\data” |
Folder where Launcher and Omniverse apps store their data files |
cache_root = “C:\Omniverse\cache” |
Folder where Omniverse apps store their cache and temporary files |
logs_root = “C:\Users\[username]\.nvidia-omniverse\logs” |
Folder where Launcher and Omniverse apps store their logs |
content_root = “C:\Users\[username]\Downloads” |
Folder where Launcher saves downloaded content packs |
extension_root = “C:\Users\[username]\Documents\kit\shared\exts” |
Folder where all Omniverse shared extensions are stored |
confirmed = true |
Confirmation that all paths are set correctly, must be set to true |
Important
Also be aware that all paths on Windows require a double backslash (\) for proper operation.
privacy.toml: Copy the following information into a new text document. This is the configuration file for Omniverse telemetry capture for each user’s workstation. Once done, save it to the staging location.
[privacy]
performance = true
personalization = true
usage = true
Note
If your Security Policy prohibits the collection of telemetry on a user’s workstation, set all of the values in the file to false.
license.toml: This is the licensing configuration file for Omniverse. Within this licensing file, specify the Organization Name Identifier (org-name) you retrieved from the Licensing Portal in the prerequisites section. Once done, save it to the staging location.
[ovlicense]
org-name = "<insert-your-org-name-here>"
Once you’ve saved all three .toml files, it’s time to build a .bat file that will be used to help deploy the files to each user’s workstation.
Deploying Launcher
1) Create a new .bat file (you can name the file as needed, e.g. deployment-omniverse.bat). In that batch file, add the following information:
@echo off
SETLOCAL EnableDelayedExpansion

set CONFIG_PATH=%USERPROFILE%\.nvidia-omniverse\config\
set INSTALL_PATH=%ProgramFiles%\NVIDIA Corporation\NVIDIA Omniverse Launcher\

set SCRIPT_PATH=%~dp0
set REG_QUERY=Reg Query "HKLM\Software\Microsoft\Windows\CurrentVersion\Uninstall\ddd216ee-cf6c-55b0-9ca8-733b2ef622a0" /v "DisplayName"

:CONFIGURATION

:: Test for existing omniverse.toml config file.
if exist "%CONFIG_PATH%\omniverse.toml" GOTO INSTALLLAUNCHER

:: Copy.toml files to user's configuration.
xcopy /y "%SCRIPT_PATH%\omniverse.toml" "%CONFIG_PATH%"
xcopy /y "%SCRIPT_PATH%\privacy.toml" "%CONFIG_PATH%"
xcopy /y "%SCRIPT_PATH%\license.toml" "%CONFIG_PATH%"

:: Substitute [username] with %USERNAME%.
del "%CONFIG_PATH%\omniverse.txt" 2>NUL
for /f "usebackq tokens=*" %%a in ("%CONFIG_PATH%\omniverse.toml") do (
    set LINE=%%a
    set LINE=!LINE:[username]=%USERNAME%!
    echo !LINE! >> "%CONFIG_PATH%\omniverse.txt"
)
del "%CONFIG_PATH%\omniverse.toml" 2>NUL
ren "%CONFIG_PATH%\omniverse.txt" "omniverse.toml"

:: Set the readonly flag to prevent users from changing the configured paths
attrib +r "%CONFIG_PATH%"\*.toml

:INSTALLLAUNCHER

:: Test if Launcher is already installed.
%REG_QUERY% 1>NUL 2>&1
if %ERRORLEVEL%==0 GOTO STARTLAUNCHER

:: Run the installer and wait until Launcher is installed (silent).
start /WAIT %SCRIPT_PATH%\omniverse-launcher-win-enterprise.exe /S /D="%INSTALL_PATH%"

:STARTLAUNCHER

:: Start the Launcher.
start "" "%INSTALL_PATH%\NVIDIA Omniverse Launcher.exe"
timeout /T 5 1>NUL 2>&1

:END
ENDLOCAL
The .bat script above copies the .toml files and installs Launcher.
All files must be located in the root directory of the script. (.toml / omniverse-launcher-win-enterprise.exe).
Install into a public folder, example C:NVIDIA.
2) Save this file to the same location as the pre-configured .toml files on the staging hardware.
In order to run the .bat file as part of a deployment strategy, you need to set up a local group policy for your users’ workstations.
3) Open the Local Group Policy Editor on the GPO manager machine.
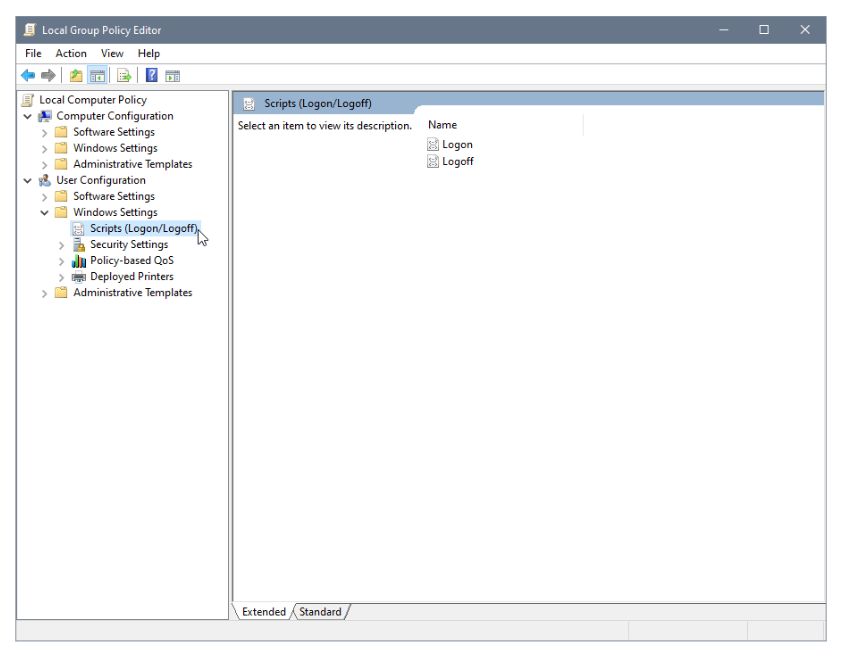
4) Double-click to choose Logon.
5) From the Logon Properties dialog, choose Add.
6) Then point to the .bat file you created earlier and click OK.
The file should appear in the Logon Properties dialog.
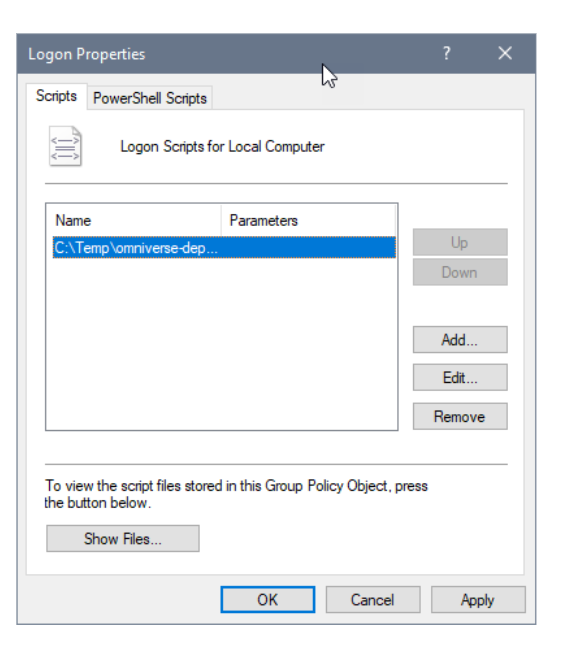
7) Click OK to close the dialog
8) The scripts will run on the remote machines during the next Logon.
Setting Up Packages
Once the Omniverse IT Managed Launcher is installed and configured, you’re ready to install the Omniverse foundation applications for your users.
As an IT Manager, you now need to download the various Omniverse foundation applications from the Omniverse Enterprise Web Portal. Each application will come in the form of an archived .zip file that you can take to a user’s machine and install either manually, or via your internal deployment framework.
1) To begin, log into the Omniverse Enterprise Web Portal.
2) In the left-hand navigation area, select Apps, and from the resulting view, click on the tile of the Omniverse foundation application you want to install.
Available releases are categorized by release channel. A release is classified as Beta, Release, or Enterprise, depending on its maturity and stability.
Beta |
Beta builds may or may not be feature complete or fully stable. These are good for testing new Omniverse functionality, but aren’t guaranteed to be ready for production. |
Release |
Release builds (also known as GA or General Availability) are feature complete and stable builds ready for production. |
Enterprise |
Enterprise builds are provided for Enterprise customers and represent supported production versions of Omniverse software. |
3) Select a package version in the dropdown list and click Download.
4) Clicking the download button will prompt you to select the Windows or Linux version of the application to install. Choose the OS version that matches the user’s workstation.
5) Once downloaded, the application archive must then be transferred to the user’s machine or hosted on your chosen local network staging hardware so it can be accessed and installed on a user’s workstation.
Once you’ve downloaded the various Omniverse foundation applications, you are ready to proceed to the installation.
Deploying the Apps
To deploy the Omniverse Applications to users’ Windows workstations you will need to perform several tasks.
You’ll need to download and stage the Omniverse Application .zip archive files you want to deploy to a shared network location inside your firewall that all of the users’ workstations can see and access.
After that, you’ll create a .bat file to control the installation process that you’ve downloaded.
Finally, you’ll configure another .bat file within the Windows Local Group Policy to execute at user logon to trigger the installation and configuration of the Omniverse Applications for the user on their local workstation.
As per the prerequisite section of this document, you should have already downloaded the Windows .zip archive files for each Omniverse Application you want to deploy from the Enterprise Web Portal. If not, please do that first.
The next step is to create the .bat file that will handle the installation process on the local user’s workstation.
1) Create a new .bat file for the app installation (you can name the file as needed, e.g. deploy_OV<AppName>.bat). In that batch file, add the following information:
@echo off
SETLOCAL EnableDelayedExpansion

set CONFIG_PATH=%USERPROFILE%\.nvidia-omniverse\config\

set SCRIPT_PATH=%~dp0

:INSTALLAPPS

:: Find library_root from omniverse.toml
for /f "usebackq tokens=*" %%a in ("%CONFIG_PATH%\omniverse.toml") do (
    set LINE=%%a
    echo !LINE!|find "library_root" 1>NUL 2>&1
    if !ERRORLEVEL!==0 (
        for /f tokens^=^2^ delims^=^" %%i in ("!LINE!") do set LIBRARY_ROOT_PATH=%%i
        set LIBRARY_ROOT_PATH=!LIBRARY_ROOT_PATH:\\=\!
    )
)

:: Find .zip files
for /f "tokens=*" %%a in ('dir /B "%SCRIPT_PATH%\*.zip"') do (
    set ZIP_FILE=%%a
    set ZIP_FILE_SUB=!ZIP_FILE:.windows-x86_64-ent-package.zip=!

    :: Check if ZIP_FILE_SUB is a folder in LIBRARY_ROOT_PATH. If not, install.
    dir /B "!LIBRARY_ROOT_PATH!"| findstr "!ZIP_FILE_SUB!" 1>NUL 2>&1
    if !ERRORLEVEL!==1 (
        start omniverse-launcher://install?path="%SCRIPT_PATH%\!ZIP_FILE!"
        timeout /T 600 1>NUL 2>&1
    )
)

:END
ENDLOCAL
You are welcome to string together as many of the Custom Protocol Commands as needed to cover all of the Omniverse Applications you want to install.
Note
You can also choose to add this information to the existing .bat file that was used to install the IT Managed Launcher.
The .bat script above installs the Apps from a .zip
All files must be located in the root directory of the script. ( “App”.zip).
Install into the same directory that launcher was previously installed.
2) Save this .bat file to the staging hardware. In order to run the .bat file as part of a deployment strategy, you need to get up a local group policy for your users’ workstations.
3) Open the Local Group Policy Editor on the GPO manager machine.
4) Double-click to choose Logon.
5) From the Logon Properties dialog, choose Add.
6) Then point to the .bat file you created earlier and click OK.
The file should appear in the Logon Properties dialog.
7) Click OK to close the dialog
8) The scripts will run on the remote machines during the next Logon.