USD Authoring#
Unless everything is fully automated in the previous step, an additional process might involve taking the cleaned and validated USD asset and performing an authoring pass as needed. This may include reorganizing the individual prims to better suit the desired workflow (such as Scopes, XForms, Collections), upgrading applied materials, adding physics colliders, joints, or constraints to the asset, or any other attribute or opinion that is needed.
This is completely dependent on your use case and needs.
Assets that are part of a larger mechanism or assembly should be treated as distinct “atomic level” components and authored individually. The aim is to ensure that each component asset can be enhanced and validated independently before being integrated into the larger assembly.
This part of the process is also an opportune moment to consider the various OpenUSD composition arcs and their potential to enhance asset creation within your pipeline.
Hands On#
Let’s enhance the material output from the CAD data.
In the Content Browser, copy the
{your_unzip_location}/vfi_workflow_data/Materialsfolder to your{your_chosen_path}/Assets/Wheel/Partsfolder.Remember, if we are going to define materials at the parts level, that folder of assets should be portable and define the material files with a relative path starting with
./By placing the material library into the
{your_chosen_path}/Assets/Wheel/Partsfolder, the Parts folder becomes portable and can be easily shared without causing composition problems.
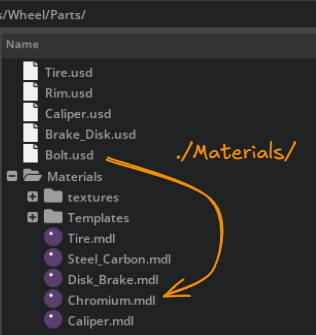
A material referenced from any of the part USD files will be a relative path starting with ./
In USD Composer, open the Materials tab and click on the cog -> Add Collection.

Browse to the Materials folder you just copied into the Parts directory (make sure you navigate into the Materials folder first) and click Select.
You will see a new collection in the Materials tab with the materials from this folder.Open
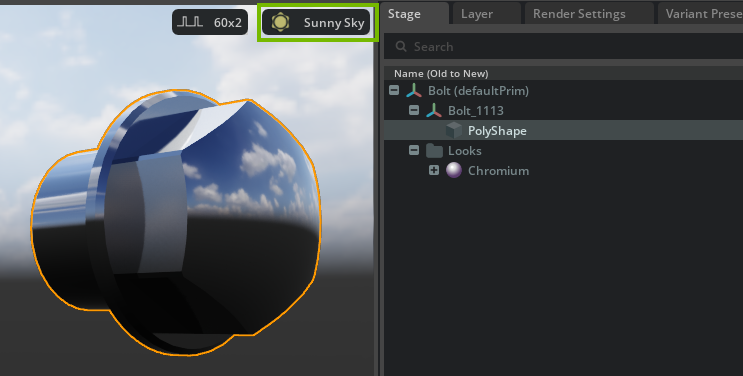
Bolt.usd.Select the bolt mesh
/Bolt/Bolt_1113/PolyShapeand double-click the Chromium material in the Materials tab. This will both assign the material and create the material in the stage under the Looks folder.Click the Current Stage tab in the Materials browser, then click the cog -> Remove Unused Materials.
To better see the material you can change the stage preview lighting to something like Sunny Sky in the top right corner. Actual lighting for composition downstream is not changed by doing this, but just changing temporary preview lighting.
Save the stage.
Go to the stage prim path
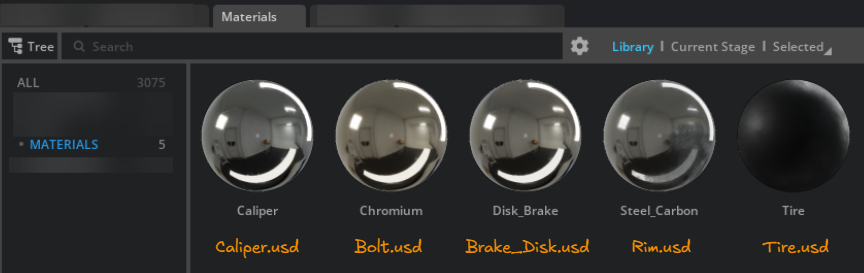
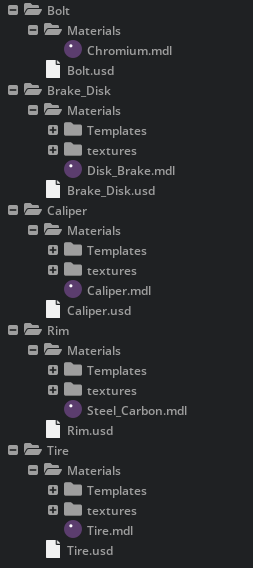
/Bolt/Looks/Chromium/Shaderand note in the Property panel under the Info section how the mdl source asset has a relative path that starts with./MaterialsRepeat for the other parts following the image below. Do not forget to switch back and forth from the Library to assign and to Current Stage to delete unused.
You could also layer in a material library USD file that contains all the /World/Looks/ materials further down the line or just make the assignments in a component file that puts the wheel together. Note that the material folder would exist in the Wheel folder if that is where we create the material bindings. Those assignments could override these original assignments. If you are planning on that, you could have kept the simple USD preview materials that were created from the CAD conversion.
It is also legitimate to arrange the parts in their own sub folders with the materials - /Assets/Wheel/Parts/Bolt/Bolt.usd, /Assets/Wheel/Parts/Bolt/Materials/Chromium.mdl if you wanted to make each individual part transportable.
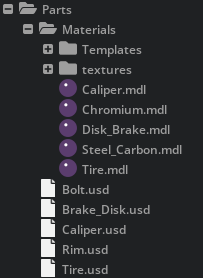
The entire Parts directory could be moved anywhere without breaking composition of the USD files contained within.
Sharing a single component with another project is not as straightforward as the setup below, because it is not apparent what material goes with what file.
Each individual part could be moved anywhere without breaking the composition of the part. This is because the material that belongs to each part is referenced relatively and each part is encapsulated within its own part directory.
This could be useful for parts that could be shared with different projects and moved around without a fear of breaking the composition of the part.
In the example above, it is not apparent which material belongs to Bolt.usd if you wanted to copy that component elsewhere.
You can also embed custom attributes to any prims here to enrich your USD data with information that can be queried and used further down the line. For example, you might tag a manufacturing part with a part number. You could tag geometry with some string attribute and at a later stage, query all meshes with that tag and merge them together.