CAD Conversion#
Below are links to all the converters as well as all supported CAD formats via the CAD converter extension.
In a Kit application with the CAD converter extension enabled, you can convert many of the most common formats via DGN, JT, and Hoops converters. The CAD converter GUI also allows you to pass in a scene optimizer preset to be run after conversion. Scene Optimizer will be discussed in more detail later, but note that this framework is available directly at the CAD conversion stage.
By using the converters in CLI (Command Line Interface) mode, you can scale your conversion efforts and in this mode, each converter allows you to pass in a specification file that contains instructions for the converter for added customizability. Part of the specification file includes an optional path to a scene optimizer preset.
The CLI is a text-based interface that enables you to execute commands and automate tasks. This makes it particularly useful for batch processing and integrating into larger, automated workflows.
Hands On#
Launch USD Composer.
Verify the CAD Converter extension is installed and enabled by going to Developer > Extensions and type “Cad” into the filter field that already has “@feature” in it.
If Enabled is not green or you see an Install button, go ahead and install and enable it.
Cad converter extension#
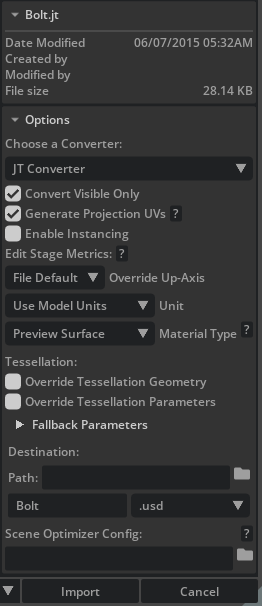
Go to File > Import and select the
Bolt.jtfile from the JT sub-folder in thevfi_workflow_datafolder that you unzipped.Switch the converter to be JT Converter and un-check Enable Instancing, then click Import.
Press the F key to frame the object in the viewport. By default, the converted USD file will be written to the same location as where the jt file resides. The file will then be payloaded or referenced into your current stage (depending on your USD Composer preference where payload is default).
Notice the pop-up info box that will briefly appear in the bottom right of the viewport, informing you the file that was just added to your current stage has different scene units (cm default) than the one that was just added as a payload in your stage (CAD authored in mm) and that a corrective transform has been applied.

Note
Scene scale and up axis is a very important consideration that should be thought about beforehand and how you want to comply with your decision.
Scene Scale#
In the USD Composer Kit app, you can inspect your current scene units settings in the Layer panel and by selecting the Root Layer. Layer metadata specifies both up axis, meters per unit, which are important considerations for visualization capability. Other settings like time code and kilograms per unit are important considerations for animations and simulations respectively.
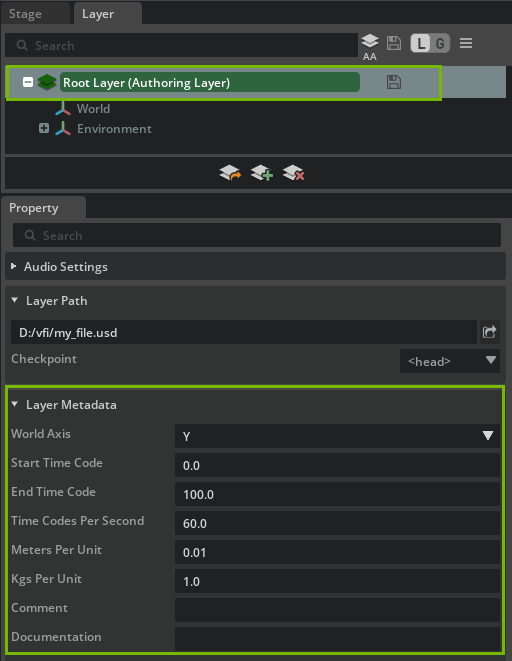
Read only data, editing data here will create unexpected results.#
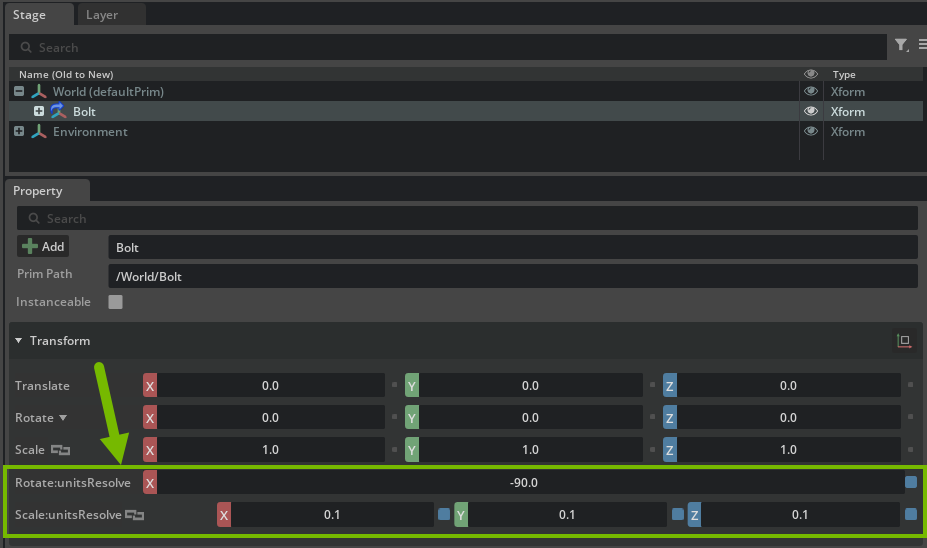
The information pop-up box from the previous step is a Kit extension called Metrics Assembler (omni.usd.metrics.assembler). It applies corrective transforms to the inbound USD file. You can see these corrective transforms if you select /World/Bolt from the Stage panel and look in the Property panel below.
If you want to avoid adding extra transforms to correct scale or orientation in your workflow, you can instead apply the necessary scale adjustments directly to the geometry itself. This ensures your scene has a consistent scale and up axis from the start. This approach is especially useful if you are using Scene Optimizer tools or other pipeline steps that depend on the geometry being at the correct unit scale, as it helps those tools produce accurate results.
Create a new directory on your computer
{your_chosen_path}/Assets/Wheel/Parts
USD asset structure best practices has some best practices on how to organize your data, a key is to make it portable.
Re-import the bolt in a new stage (File -> New).
Use the same converter (JT) and uncheck Enable Instancing.
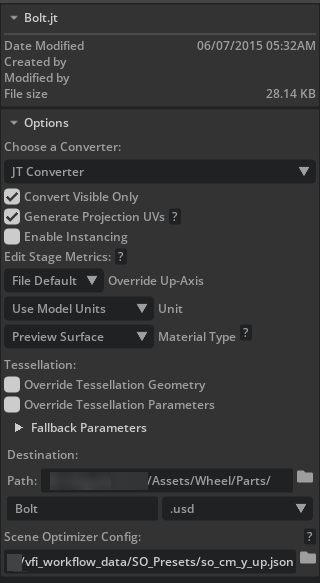
Within the assets sidebar window, point the Scene Optimizer Config path to the file that is provided in the SO_Presets directory called
so_cm_y_up.json. You may have to resize the panel to fully see the folder icon that allows you to select a path.Change the Destination path to the directory you created in step 4.
Click Import.
Notice that there is no pop up info box this time, because we set the transformation change of the bolt into the geometry via Scene Optimizer, which will be used more later on in this guide.
This is but one example of the many utilities it can apply to your pipelines. Some CAD converters also have the ability to collapse existing transformations into the resulting geometry.
Repeat the conversion for the other parts using the same import settings as the image above. There is no need to save the resulting file whether you choose to bring components into the current stage or not. We will focus on aggregation after we have validated the component geometry.
You can multi-select jt files when importing, but you must set the import dialog for each file when multiple files are selected.
Alternatively, you can also trigger multi- or single-convert via the Content Browser panel. Right-click on any number of files and choose Convert to USD.
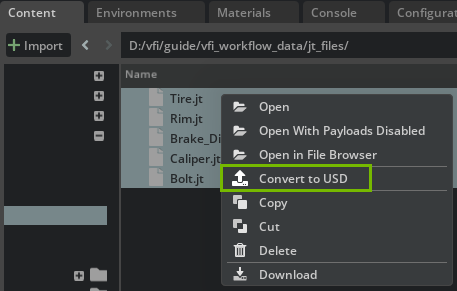
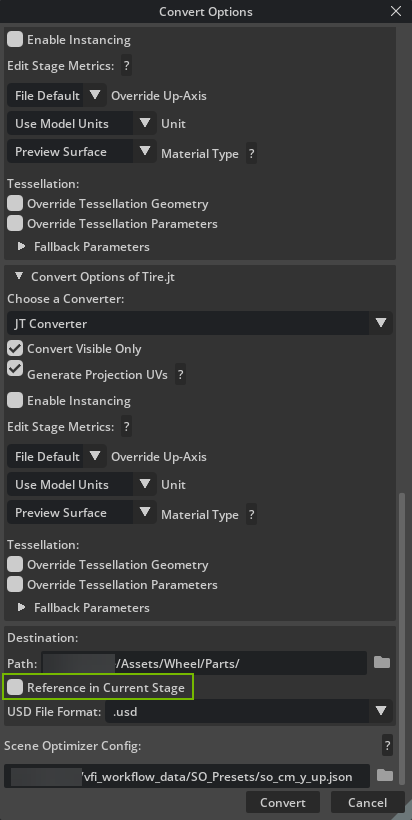
For this option you will also need to set the import dialog for each file using the settings in the image above as a guide. This approach will have an additional option in the conversion panel GUI of referencing in files in the current stage or not. Go ahead and un-check Reference in Current Stage to save some time.
Click Convert.
Default Prim#
In the converted files, you can find the default prim at the top of the stage hierarchy with (defaultPrim) next to the prim name. As mentioned before, the default prim gives your assets a home path to map to when they are composed into another stage. When you drag and drop USD files from the content browser into the viewport, these files will be added to the current stage as a payload or a reference (depending on your preference setting). Where that payload or reference prim will end up in your stage tree is determined by the defaultPrim metadata. Note that you can drag and drop USD files directly into the Stage tree to direct where you want them to end up.
Next, we are going to validate our files using the Asset Validator framework in the Kit app.