RTX – Scientific (IndeX)
Overview
RTX – Scientific (IndeX) is the integration of the NVIDIA IndeX® SDK on the NVIDIA Omniverse platform. RTX Scientific enables you to interactively visualize and explore entire volumetric data sets in a collaborative setting. RTX Scientific can scale for a wide range of GPU configurations: from a single GPU, to multiple GPUs, to multi-node GPU clusters for scalable real-time visualization and accelerated compute of multi-valued volumetric data and embedded geometry data.
RTX Scientific provides a range of tools designed for interactive and collaborative analysis. Team members can, for example, change color maps with ease to highlight subtle attributes of the data, view cross-sections across the entire time series, and leverage features like ambient occlusion and shadows to examine key components of the data.
When you select RTX Scientific as the viewport renderer visualizations are generated with the help of transfer functions that map attribute values in the dataset to color and opacity; no lighting or materials are needed. You can combine scientific visualization of volumetric data with photorealistic rendering of surface models (generated with the RTX renderer), by using the real-time RTX compositing option to generate depth-correct images and animations.
Settings
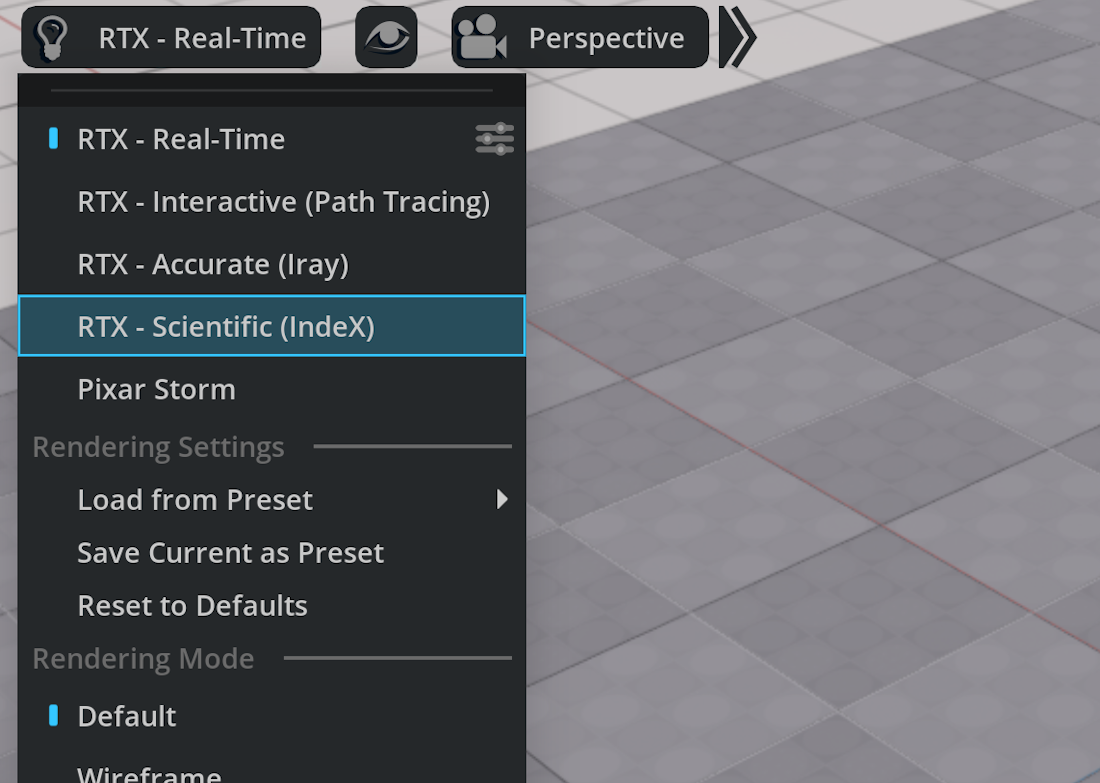
Viewport Renderer
To add the RTX Scientific renderer to the list of available viewport renderers, load and enable the Omniverse extension RTX Scientific (IndeX) (omni.index.kit.rtx_scientific).
After the RTX Scientific renderer is enabled, you can visualize USD scenes containing volumetric data in standard USD Volume format with the actual volume data provided in OpenVDB files. The IndeX extension also adds new import options, enabling you to load RAW volume data in binary format and render it with RTX Scientific.
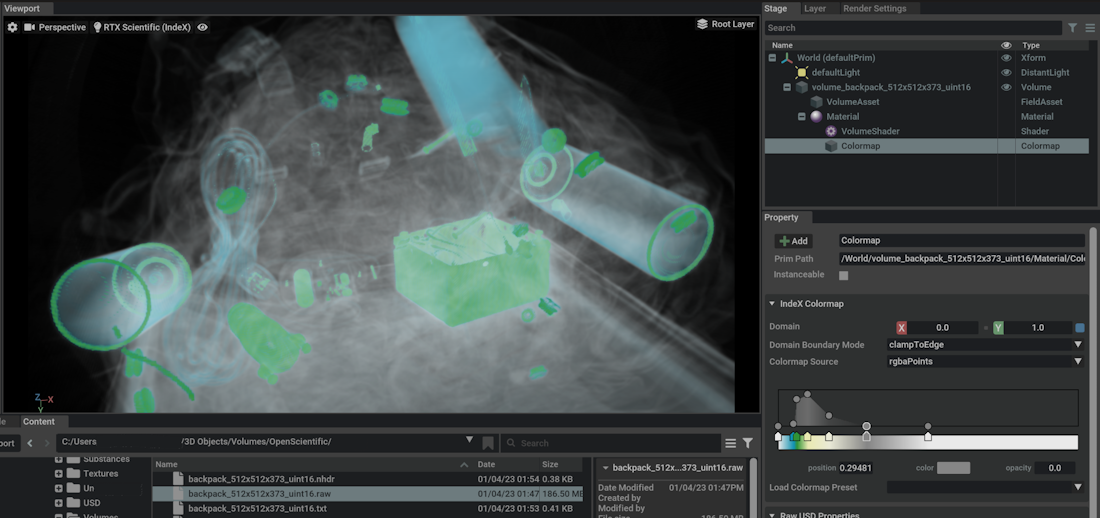
For shading, the RTX Scientific renderer supports so-called transfer functions, which map scalar values within a certain value range (“domain”) to color and opacity — often called a colormap — for final display. This colormap is used to customize shading of the IndeX volume material.
After importing volume data or loading plain USD volumes, you can create a dedicated IndeX volume material from the Property Panel, which is using a default black-white color ramp for shading.
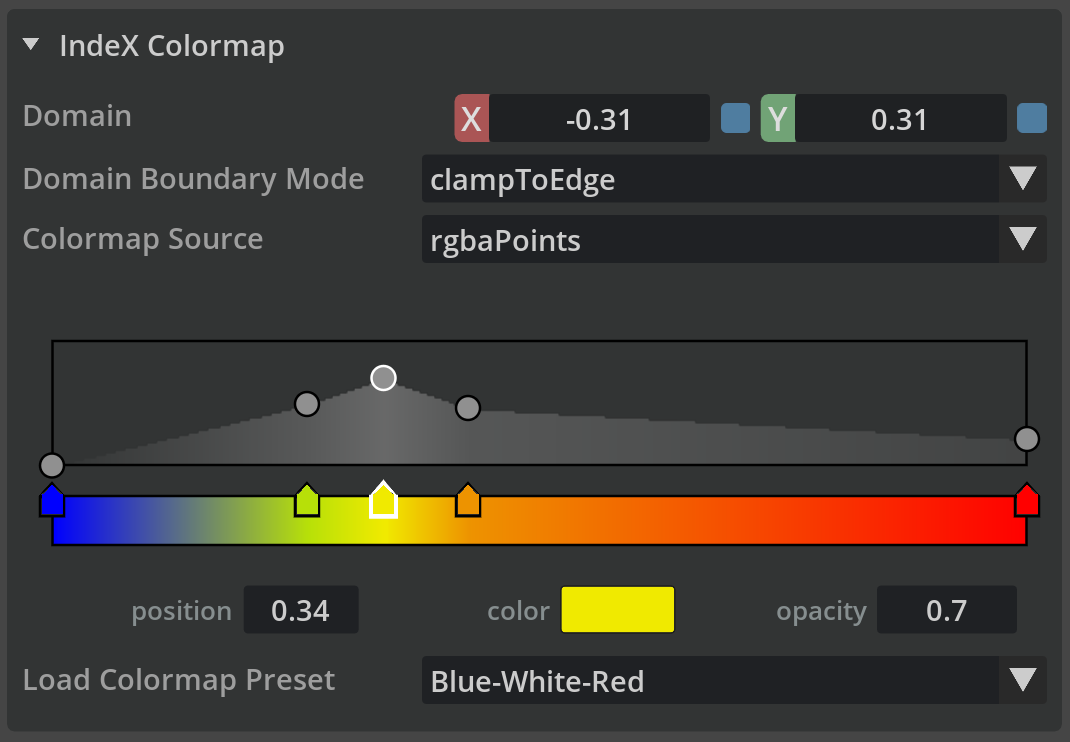
IndeX Colormap
To edit a colormap, select a different colormap from a list of presets, or change individual colormap entries by using the built-in editor.
Setting |
Effect |
|---|---|
Domain
|
Sets the domain of the colormap, describing how source data (for example, voxel values) should be mapped to color values. Note the following:
- For normalized float data, the default domain [0.0, 1.0] corresponds to raw data values in the range [0.0, 1.0].
- For non-normalized data, the domain should be set to the actual value range found in the data.
- The domain may be outside the actual value range of the data, or only cover part of the value range. Data values outside the specified domain are treated according to the Domain Boundary Mode.
|
Domain Boundary Mode
|
clampToEdge: Data values outside the domain are clamped to the domain, in other words, mapped to either the first or last entry of the colormap.
clampToTransparent: Data values outside the domain are considered fully transparent and therefore ignored when rendered.
|
Colormap Source
|
rgbaPoints: Uses RGBA color values from the colormap defined by the point-based colormap editor.
colormapValues: Uses color values from a fixed lookup table.
|
Load Colormap Preset |
Applies a different colormap preset. |
The colormap editor consists of the opacity bar, the color bar underneath, and the fields for manual editing of numerical values. The existing color and opacity values are shown as small symbols; you can change their values by dragging the mouse. After you select a symbol, you can directly edit its numerical values. To choose a different color from a color chart, click the color field. To add new points, double-click at the desired location. To remove a point, double-click its symbol.
3D Slices
You can render an arbitrary number of 3D slices - cutting planes through the volumetric data - by applying special IndeX shaders to the slice surfaces.
Render Settings
The render settings are divided into common IndeX settings and networking options for IndeX cluster rendering.
IndeX Common
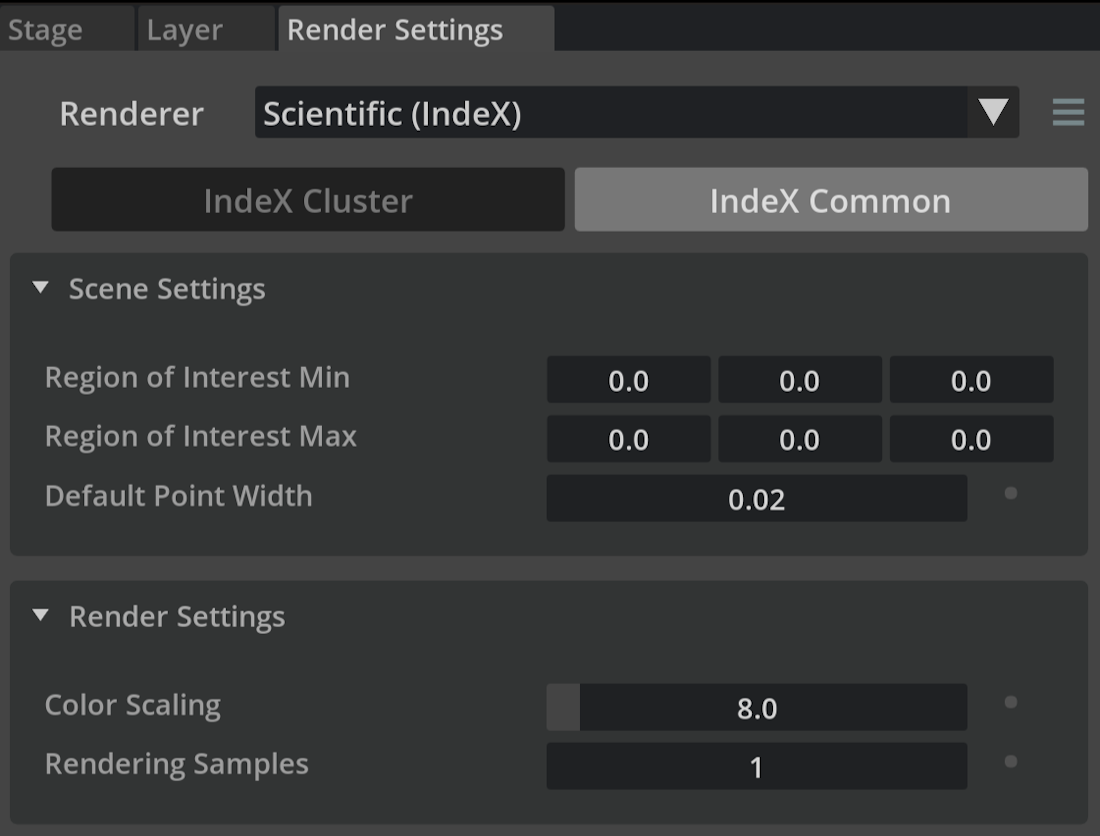
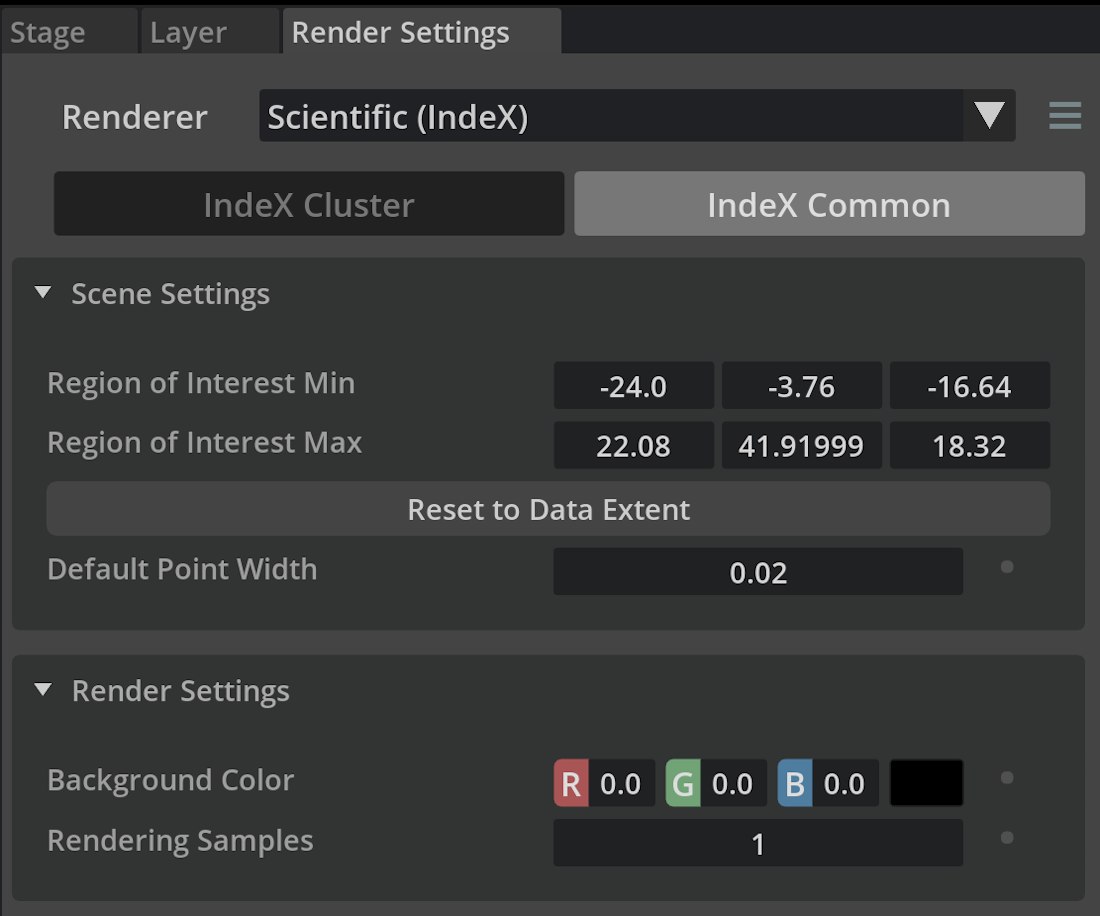
Scene Settings
Setting |
Effect |
|---|---|
Region of Interest Min |
Low x,y,z coordinates of the 3D region of interest |
Region of Interest Max |
High x,y,z coordinates of the 3D region of interest |
Default Point Width |
Default point width for new point clouds loaded from USD. If set to 0, a simple heuristic is used. |
Render Settings
Setting |
Effect |
|---|---|
Color Scaling |
Scale factor for color output (in Compositing Mode). |
Rendering Samples |
Number of samples per pixel used during rendering. |
Render Settings after Loading a Scene
Scene Settings
Setting |
Effect |
|---|---|
Reset to Data Extent |
Resets the region of interest to contain all scene elements. |
Render Settings
Setting |
Effect |
|---|---|
Background Color |
Color of the rendered background. |
IndeX Cluster
IndeX cluster rendering is an advanced feature that requires a special setup outside of Omniverse. For further details, please refer to the NVIDIA IndeX SDK documentation.
RTX Compositing
To enable the RTX Compositing mode, load the Omniverse extension RTX / NVIDIA IndeX Compositing (omni.rtx.index_composite). In this special mode, you can enable IndeX as a secondary render mode for the RTX primary renderer. Both primary and secondary renderers, RTX and IndeX, will render the current frame and their outputs will be composited live in a depth-correct way to produce the final image with a valid 3D look. There is no lighting interaction between the two renderings; instead, the IndeX pass will appear as a 3D scientific “addition” to the photorealistic scene.
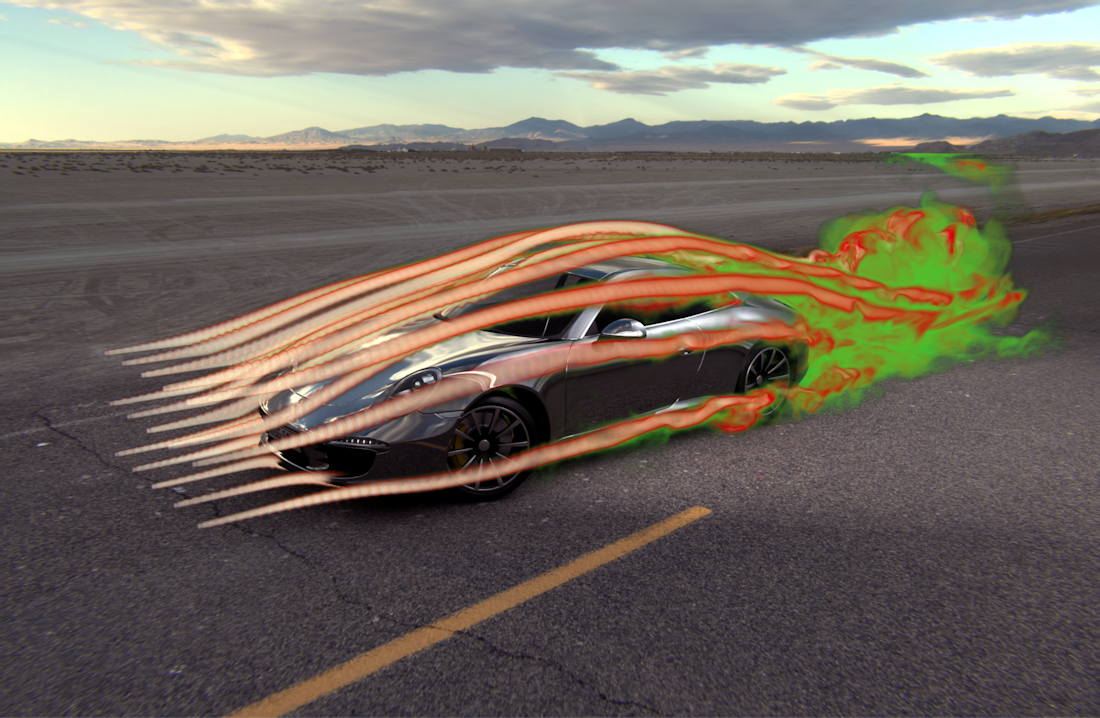
Credit: Porsche model openly licensed by CC BY-SA, Karol Miklas @ Sketchfab
The IndeX renderer can take advantage of any number of available GPU resources, on multi-GPU or multi-node GPU systems, to visualize massive datasets that do not fit onto a single GPU. This way, it is possible to render a photorealistic model combined with the results of a large-scale scientific simulation on many GPUs in an interactive session.
Render Settings for Compositing
The IndeX-related compositing settings are part of the Common tab of Render Settings for the RTX renderer. Here you can activate composite rendering globally. IndeX will render all USD volume and point prims in the scene that it supports unless explicitly disabled on individual USD prims, see further below.
NVIDIA IndeX Compositing
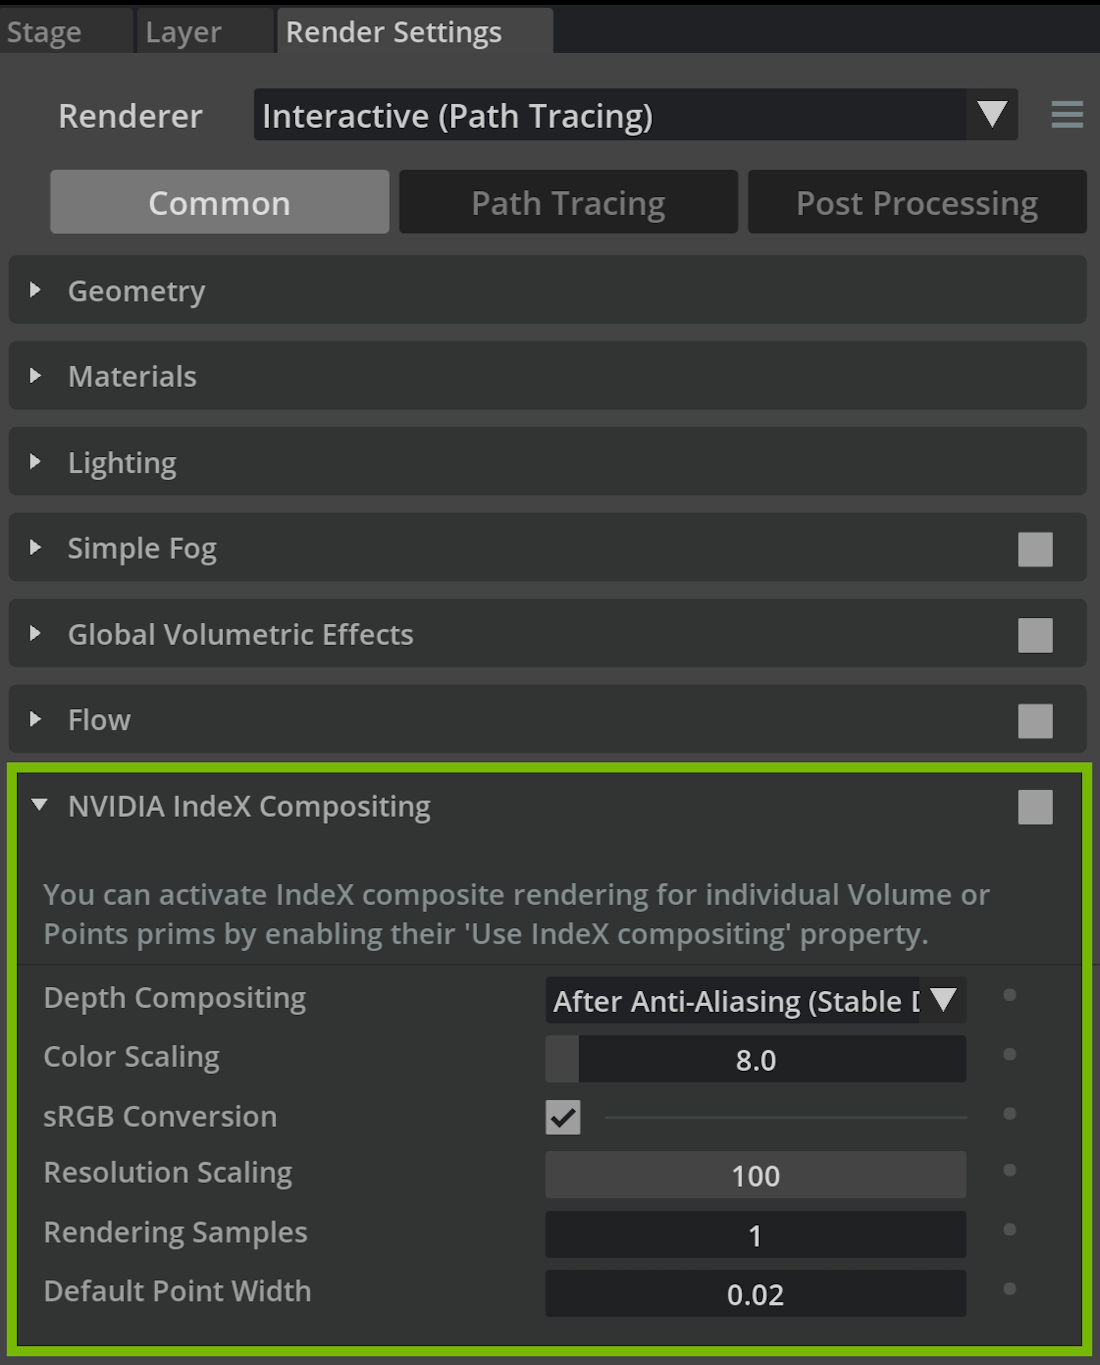
The following table lists the composite render settings and their effect:
Setting |
Effect |
|---|---|
Depth Compositing |
Depth-correct compositing between renderers. |
Color Scaling |
Scale factor for color output. |
sRGB Conversion |
Applies color space conversion to IndeX rendering. |
Resolution Scaling |
Reduces the IndeX rendering resolution (in percent relative to the viewport resolution). |
Rendering Samples |
Number of samples per pixel used during rendering. |
Default Point Width |
Default point width for new point clouds loaded from USD. If set to 0, a simple heuristic is used. |
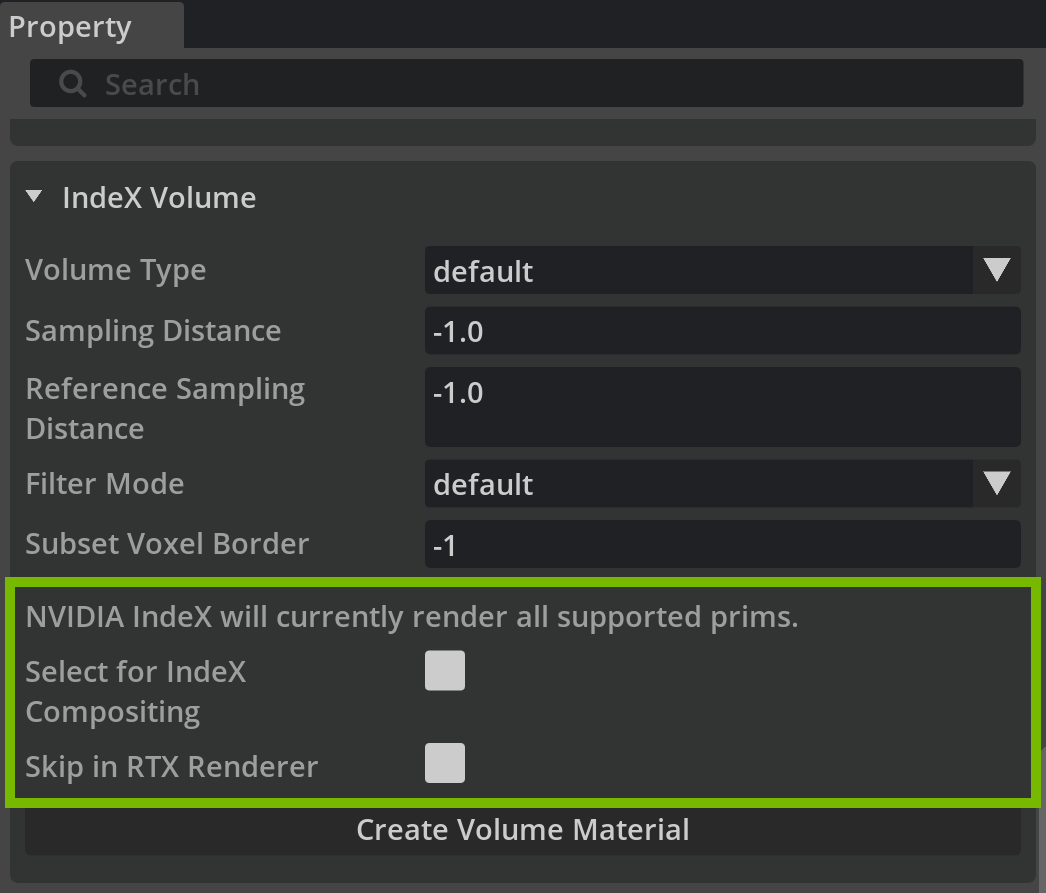
Scene Settings
You can activate IndeX composite rendering for individual Volume or Points prims by enabling the Select for IndeX Compositing property as shown below. Individual volume rendering properties can be tuned per prim.
Setting |
Effect |
|---|---|
Volume Type |
Default: IndeX detects the volume type. |
Sampling Distance
|
Sets the volume sampling distance.
A smaller sampling distance improves quality at the expense of performance.
When set to -1.0, IndeX determines the sampling distance.
|
Reference Sampling Distance
|
The reference sampling distance is used during volume rendering to steer the opacity correction and therefore the appearance of the volume display.
When set to -1.0, the IndeX internal default setting is used.
|
Filter Mode
|
Sets the filter kernel for 3D voxel interpolation.
Default: Uses the IndeX internal default.
Nearest: Uses fast nearest-neighbor filtering.
Trilinear: Uses high-quality tri-linear filtering.
|
Subset Voxel Border
|
Sets the voxel border that is applied when VDB subsets are created.
Such a border can be beneficial when using larger sampling kernels in XAC programs (for example, for gradient generation calculations).
When set to -1.0, the IndeX internal default setting is used.
|
Select for IndeX Compositing |
If enabled, this prim is rendered by IndeX. |
Skip in RTX Renderer |
If enabled, the RTX renderer ignores this prim. |
Create Volume Material |
A new IndeX volume material with a default colormap is created and assigned to the prim. |