It is the first option and default mode to run from the Isaac Sim App Selector.
Isaac Sim Headless App (via Omniverse Streaming Client)
This is a command line version of Isaac Sim. It can be run remotely on a workstation with an RTX GPU
and accessed from the Omniverse Streaming Client app available for Linux and Windows.
Isaac Sim Headless App (via WebRTC Browser Client)
This is a command-line version of Isaac Sim. It can be run remotely on a workstation with an RTX GPU
and accessed on a browser using the WebRTC Browser Client client.
Isaac Sim Headless App (via WebSocket Browser Client)
This is a command-line version of Isaac Sim. It can be run remotely on a workstation with an RTX GPU
and accessed on a browser using the WebSocket Browser Client client.
Warning
The WebSocket Browser Client is deprecated in Isaac Sim 2023.1.0. This feature will be removed in 2024.
Workstation Installation can be installed from the Omniverse Launcher and is recommended for Workstation users.
Install Container is recommended for remote headless servers or the Cloud using a Docker container.
Note
Here are the main differences between Workstation and Docker installations:
The Isaac Sim Docker container does not include Nucleus and will access assets directly from the Cloud by default.
The workstation version of Isaac Sim works with a local Nucleus server by default.
The root folder of the workstation package is at ~/.local/share/ov/pkg/isaac_sim-2023.1.1, while the root folder in the Docker container is /isaac-sim.
To access the Isaac Sim assets, a Omniverse Nucleus server is required. The Nucleus server should also have access to the Internet.
Note
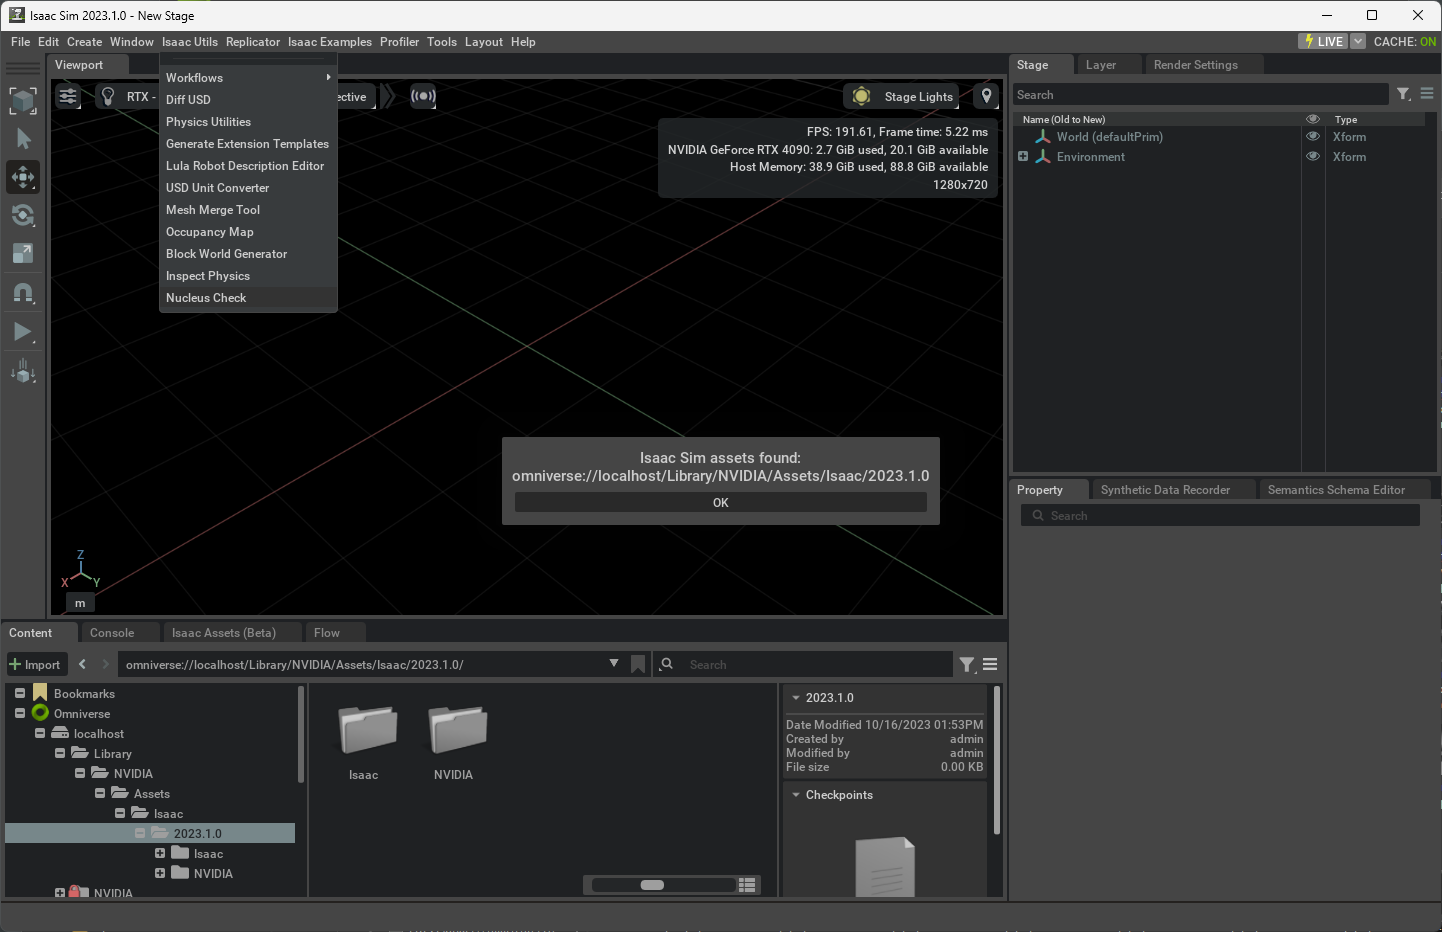
Our Isaac Sim assets is now available in the main /NVIDIA folder in every Nucleus server. Adding mounts is not needed.
Enabling Cache is recommended when accessing Isaac Sim assets.
Login to the Nucleus server via the Web UI as the admin user. For localhost, go to
http://localhost:8080/login. See Omniverse Navigator for more details.
The Isaac Sim assets are located at the /localhost/NVIDIA/Assets/Isaac/2023.1.1/Isaac/ folder.
To set the default Nucleus server when running in Docker, use the flag -e"OMNI_SERVER=omniverse://<ip_address>/NVIDIA/Assets/Isaac/2023.1.1",
where <ip_address> is the IP address of the Nucleus server.
$ sudo docker run --gpus all -e "ACCEPT_EULA=Y" -e "OMNI_SERVER=omniverse://<ip_address>/NVIDIA/Assets/Isaac/2023.1.1" --rm --network=host nvcr.io/nvidia/isaac-sim:2023.1.1
Setting the Default Username and Password for Connecting to the Nucleus Server
Use the following commands to set the default credentials when running natively:
To set the default credentials when running in Docker, use the flag -e"OMNI_USER=<username>"-e"OMNI_PASS=<password>"
(the default is “admin” for each).
$ sudo docker run --gpus all -e "ACCEPT_EULA=Y" -e "OMNI_USER=<username>" -e "OMNI_PASS=<password>" --rm --network=host nvcr.io/nvidia/isaac-sim:2023.1.1
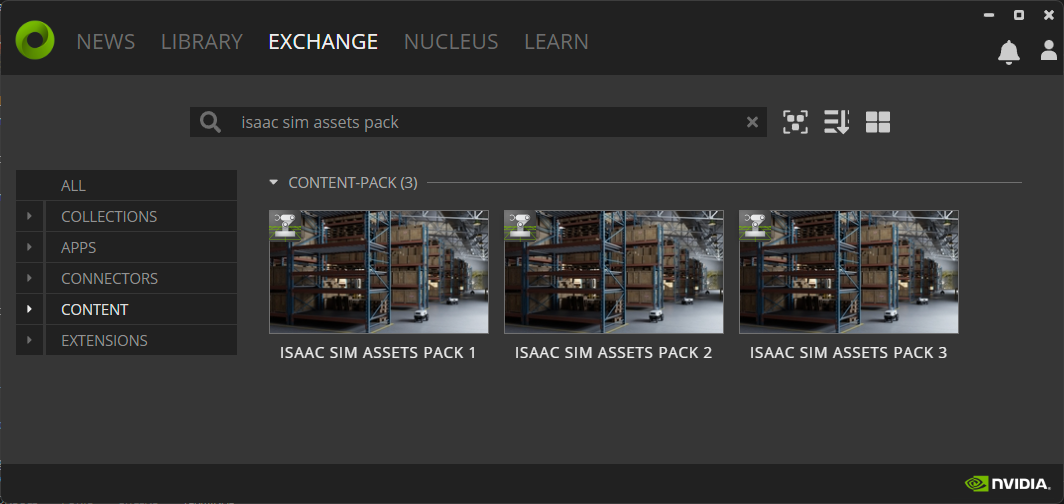
Isaac Sim Assets Packs are available on the Exchange tab in the Omniverse Launcher. To simplify the
process, enter “isaac sim assets pack” in the search bar.
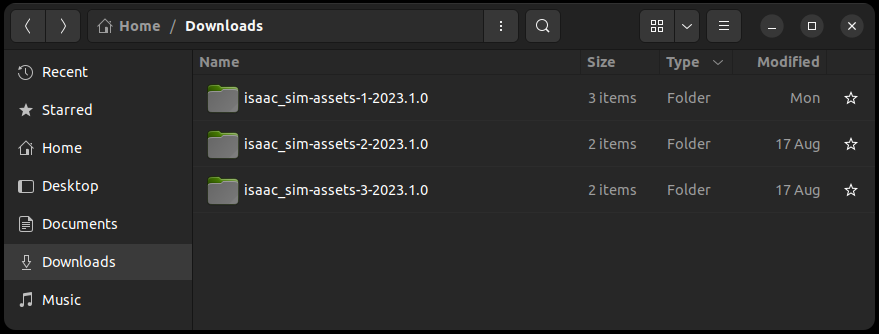
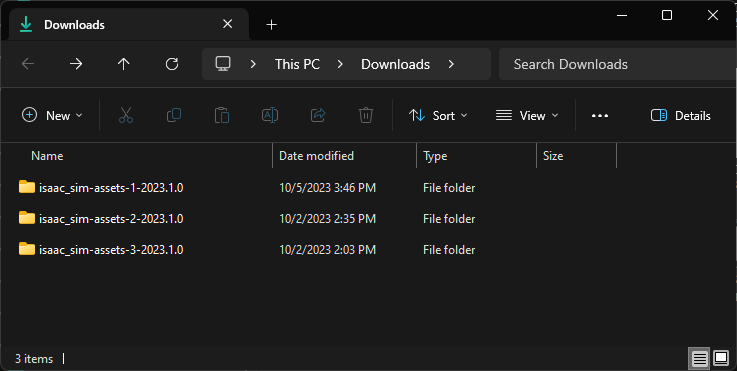
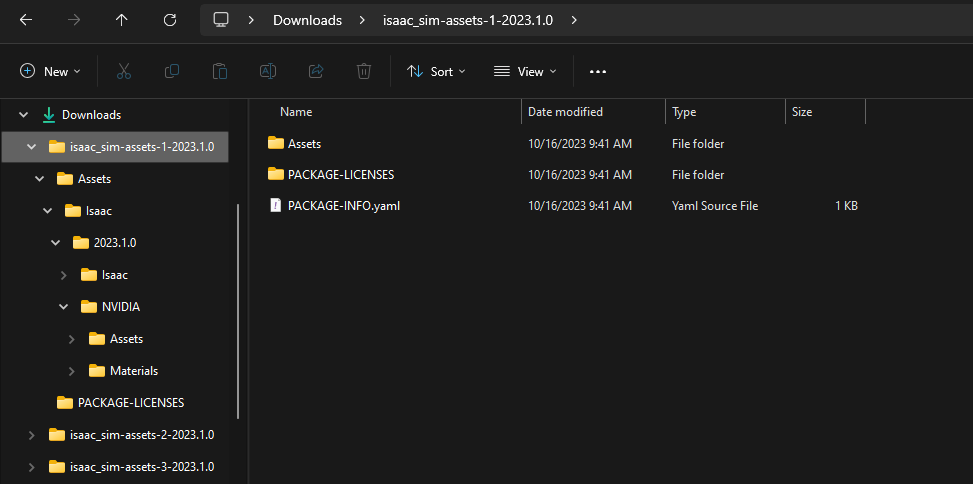
The three asset packs are downloaded to your default downloads folder. Each asset pack is in its own sub-folder.
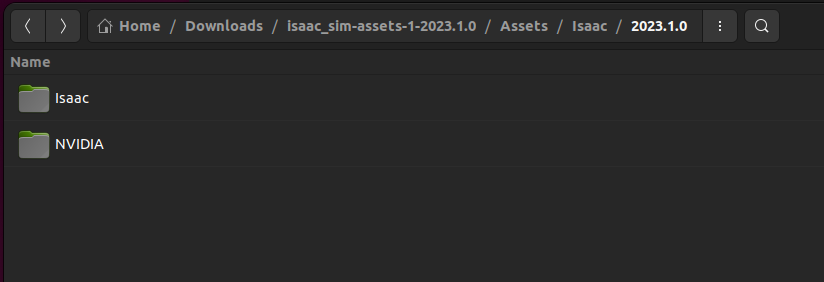
Once downloaded, combine the contents of each pack into a single root folder.
For example, merge or copy the contents from assets pack 2 and 3 into the assets pack 1 folder (isaac_sim-assets-1-2023.1.1).
This root folder (Downloads/isaac_sim-assets-1-2023.1.1/Assets/Isaac/2023.1.1) must contain the NVIDIA and Isaac folders.
Once downloaded, combine the contents of each pack into a single root folder.
For example, merge or copy the contents from assets pack 2 and 3 into the assets pack 1 folder (isaac_sim-assets-1-2023.1.1).
This root folder (Downloadsisaac_sim-assets-1-2023.1.1AssetsIsaac2023.1.1) must contain both the NVIDIA and Isaac folders.
Note
All three assets packs are required and they need to be combined into a single root folder (e.g. isaac_sim-assets-1-2023.1.1).
Run Isaac Sim with the flag below to use the local assets.
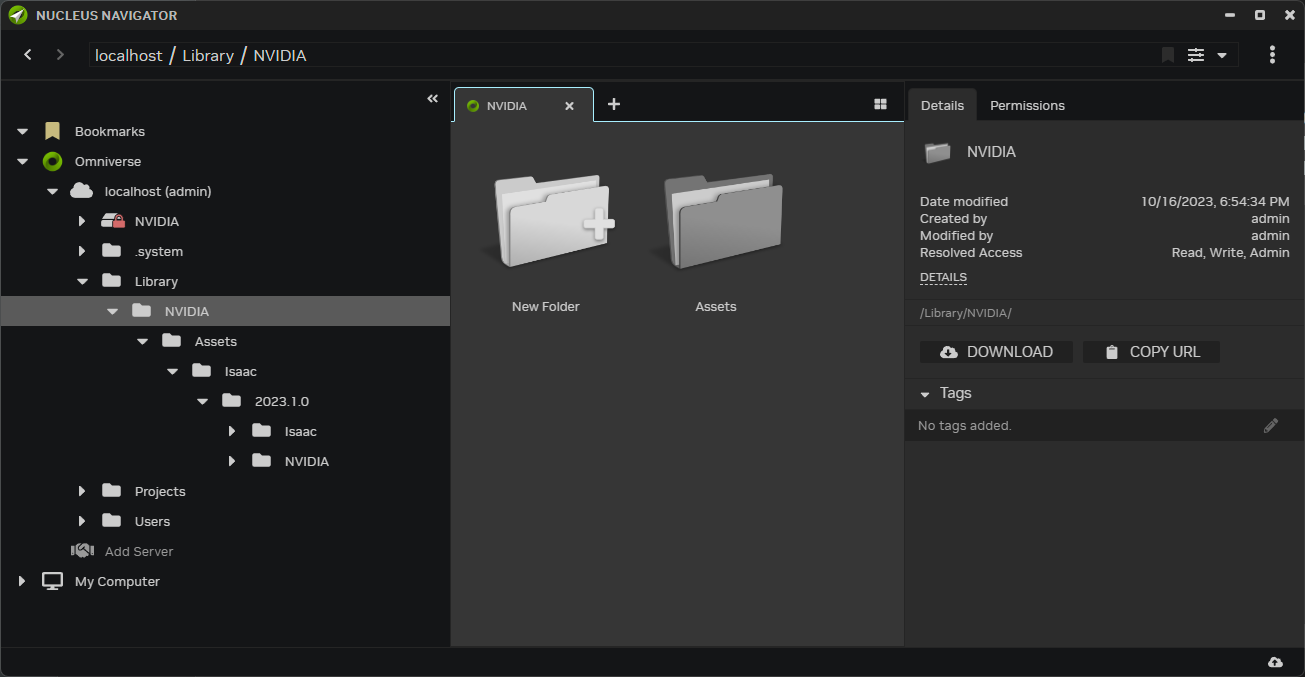
For assets collaboration, upload the combined assets pack folder to a Nucleus server. For example, drag and drop the Assets folder into a local Nucleus folder like the Library/NVIDIA folder.
Note
Create a new NVIDIA sub-folder in the Library folder then copy the local Assets folder into it.
This will maintain a similar folder structure as omniverse://localhost/NVIDIA mounted folder.
When the upload is done, run Isaac Sim with the flag below to use the uploaded assets from the Nucleus.
To ensure Omniverse Isaac Sim is running in a container, you can read the logs:
If the Omniverse Isaac Sim container is on a remote machine, SSH into the Docker host using a terminal.
Run this command from where your pem key folder is; replace the <public_ip_address> with your
instance or remote host IP address:
$ ssh -i "yourkey.pem" ubuntu@<public_ip_address>
Access the running container as follows:
$ docker exec -it <container_id_or_name> bash
$ cd /root/.nvidia-omniverse/logs/Kit/Isaac-Sim/<version_number>
If you want to restart Omniverse Isaac Sim while keeping Docker running, you must start the Docker with
Bash as the entrypoint so that you can manually start or stop Omniverse Isaac Sim.
Start the Docker with Bash, and start Omniverse Isaac Sim manually.
$ sudo docker run -it --entrypoint bash --gpus all -e "ACCEPT_EULA=Y" --rm --network=host nvcr.io/nvidia/isaac-sim:2023.1.1
$ ./runheadless.native.sh
When you need to exit, in a separate terminal start an interactive bash session inside the same
container that’s running the headless server and kill the Omniverse Isaac Sim related processes.
If you made significant changes inside the Docker, for example, installed ROS or other libraries, you may want to save the Docker image so that you can restart the Docker without having to reinstall everything.
Creating a local cached image of Isaac Sim will help improve the load times of running Isaac Sim in a container as well as having custom pre-installed dependencies.
To create this cached image, first pull and run the latest Isaac Sim container from NGC.
Once you have Docker on Linux installed, follow the instructions at Post-installation steps for Linux to set it up so you would not need to use sudo to run a Docker container.
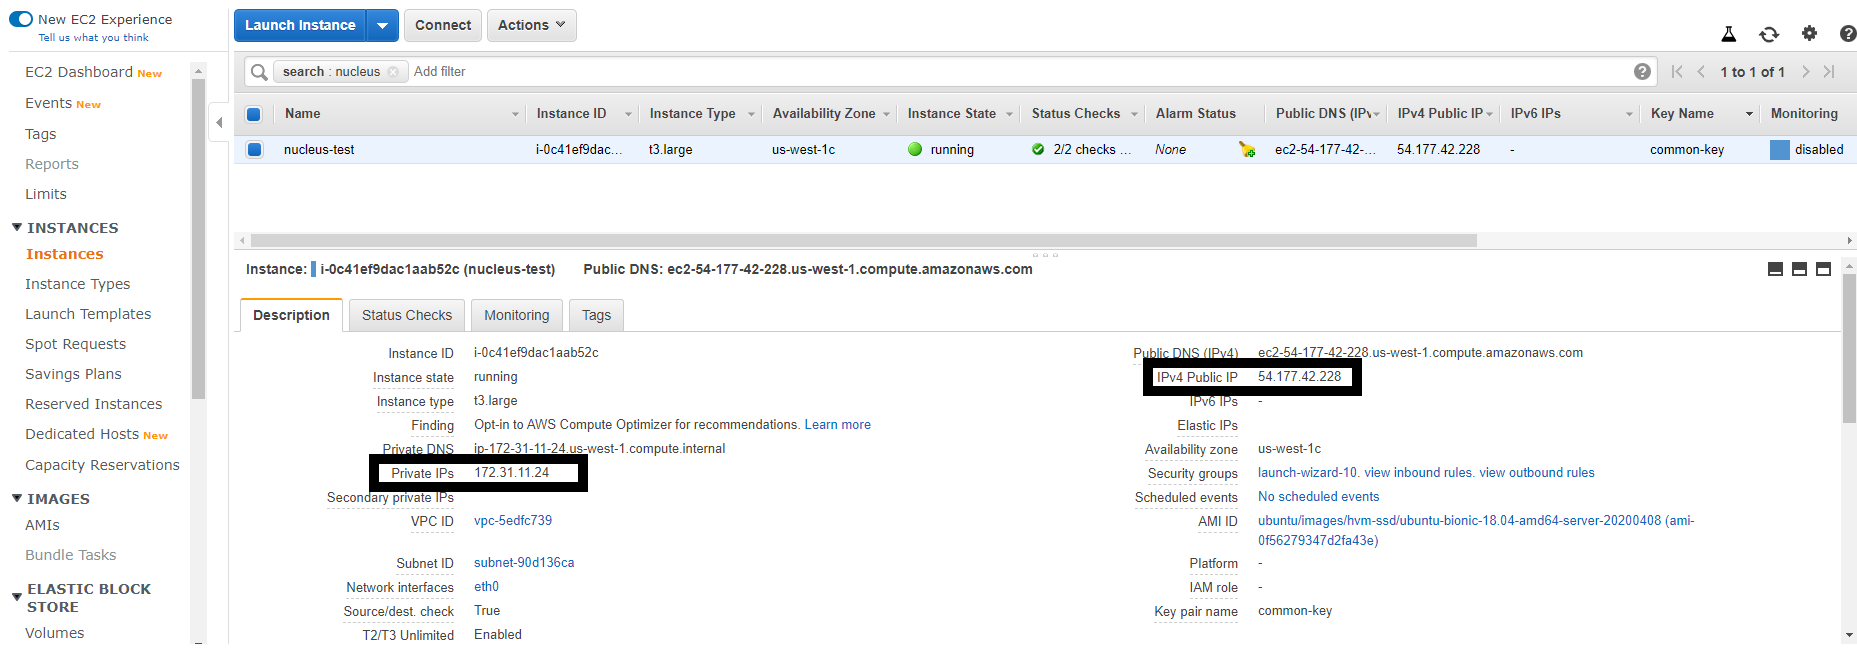
To get the public and private IP addresses of an AWS EC2 instance, go to the Instances section of the EC2 Dashboard and select the instance. See the image below for an example of the Private and Public IPs:
# Linux
~/.nvidia-omniverse/logs/Kit/Isaac-Sim# Windows
%userprofile%\.nvidia-omniverse\logs\Kit\Isaac-Sim
# Container
/root/.nvidia-omniverse/logs/Kit/Isaac-Sim
Location for Omniverse Kit shader cache
# Linux
~/.cache/ov/Kit# Windows
%userprofile%\AppData\Local\ov\cache\Kit
# Container
/root/.cache/ov/Kit
Location for Isaac Sim configs
# Linux
~/.local/share/ov/data/Kit/Isaac-Sim# Windows
%userprofile%\AppData\Local\ov\data\Kit\Isaac-Sim
# Container
/root/.local/share/ov/data/Kit/Isaac-Sim
Location for Isaac Sim packages
# Linux
~/.local/share/ov/pkg/isaac_sim-2023.1.1# Windows
%userprofile%\AppData\Local\ov\pkg\isaac_sim-2023.1.1
# Container
/isaac-sim