User Manual
Pre-Requisites
In order to use this Extension, it’s required that you install 6SigmaRoom first. Please register and create a Future Facilities account here in order to download the software.
Enable 6SigmaDCX Extension
The 6SigmaDCX Extension is not enabled by default in Omniverse USD Composer and will need to be enabled for use.
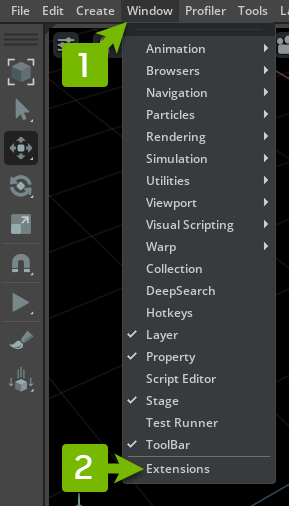
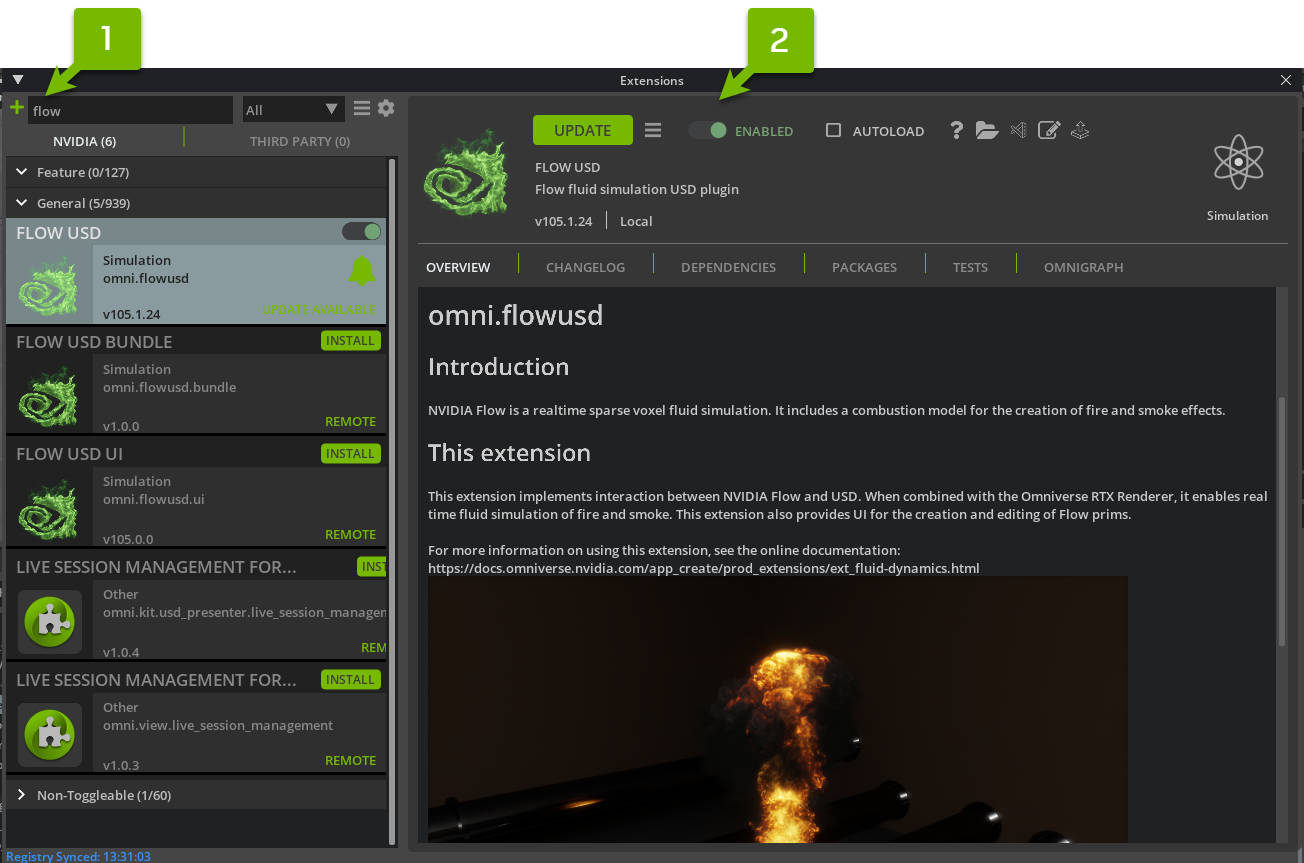
Open Omniverse USD Composer and click on Window > Extensions to open the Extensions Manager.
Install and enable the 6SigmaDCX Extension

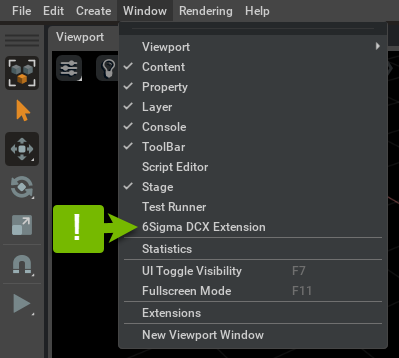
Click on Window -> 6Sigma DCX Extension to open the Extension Window.
User Interface
A floating window is shown after toggling on the 6SigmaDCX Extension option. Currently the extension supports two main features which allow users to import models from 6SigmaRoom via the Import tab or view the properties of the imported models under the Properties tab.
Import tab
The Import tab provides users the ability to import 6SigmaRoom models and CFD results into Omniverse. These default options are shown initially to the users.
Element |
Description |
|---|---|
6SigmaCommander Executable |
The path to the 6SigmaCOmmander executable file. 6SigmaCommander is the tool that acts as a communication bridge between Omniverse and 6SigmaRoom. |
Import Destination |
The path to the directory to store the converted files. Support both local file system path and Nucleus URL. |
Path to .room |
The path to the 6SigmaRoom’s model .room file. |
Path to .vtk |
The path to the .vtk output generated by 6SigmaRoom. |
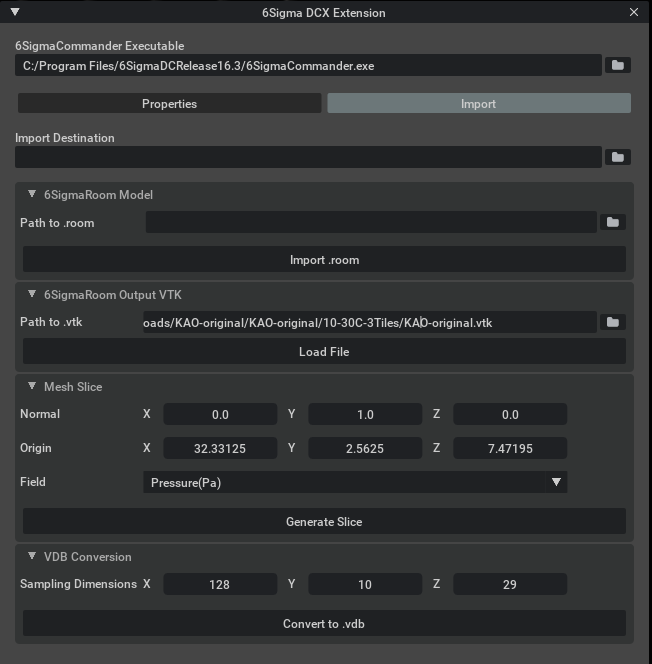
Additional options are shown after the extension loads .vtk file into memory.
Mesh Slice Panel Element |
Description |
|---|---|
Normal |
Normal vector of the slice to generate. |
Origin |
Origin of the slice to generate. |
Field |
Scalar field to apply for color mapping. |
VDB Panel Element |
Description |
|---|---|
Sampling Dimensions |
Sampling dimension x, y, z for the result .vdb file |
Properties tab

Element |
Description |
|---|---|
Entity Type |
Displays a list of entity types available in the opened stage |
Entity |
Display a list of entities filtered by the selected entity type. |
Attributes Panel |
Shows entity attributes on entity selection. Initially hidden below the Entity Type and Entity List Views. |
Use the Extension
Import 6SigmaRoom Model
It’s highly recommended to go through the basic tutorials which can also be downloaded with 6SigmaRoom installation. In this guide we’ll go over how to import the models from Tutorial 3 provided by Future Facilities.
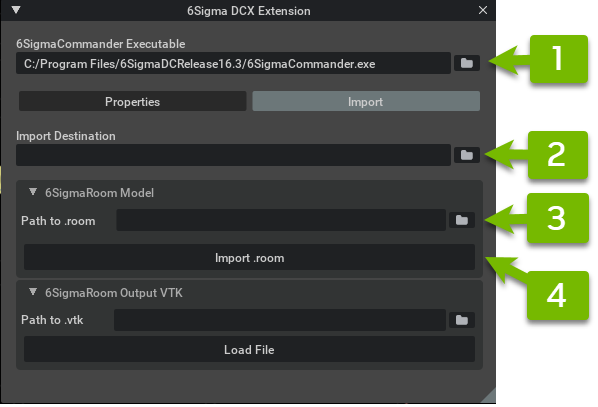
Click on the 6SigmaCommander Executable text field or the browse button to set the path to the
.exefile. This is the process that the extension uses to export models and properties from 6SigmaRoom.Click on the Import Destination text field or the browse button to set the directory to write the converted models.
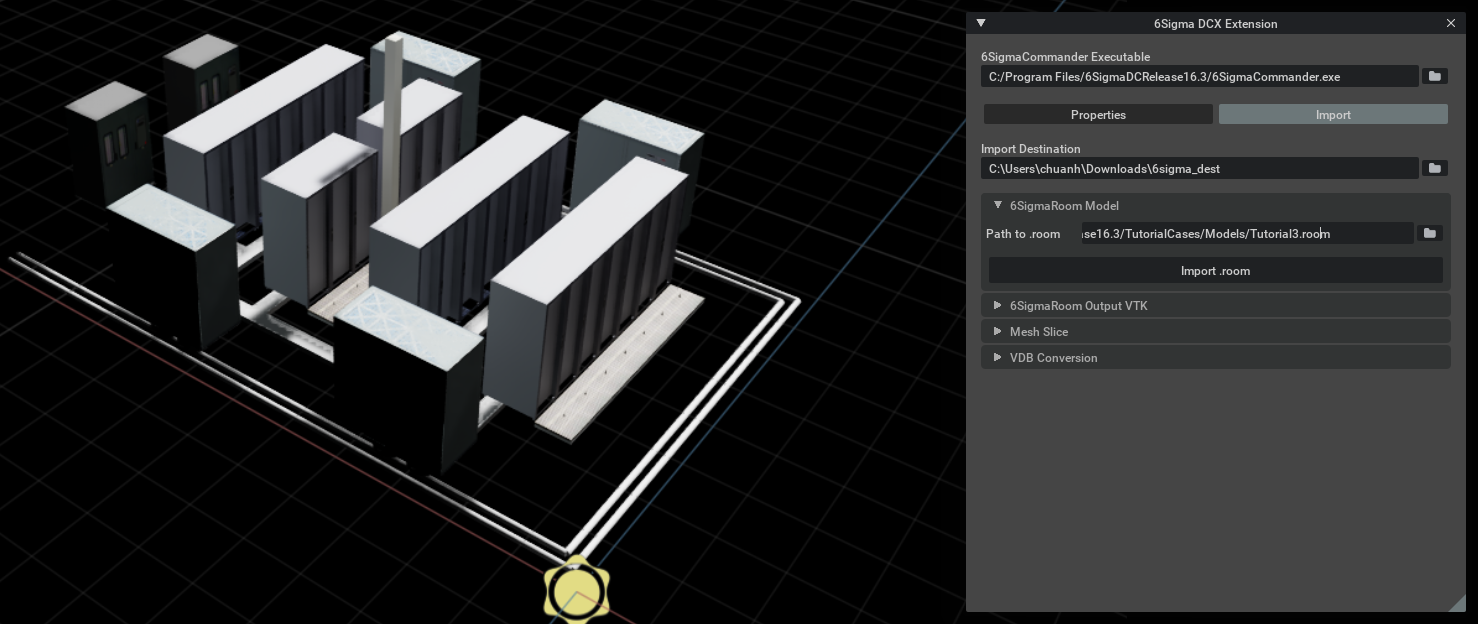
Click on the Path to .room text field or the browse button to set the path to Tutorial3.room file. By default, the file is located at
C:\\Users\\Public\\Documents\\6SigmaDC\\Release<VERSION>\\TutorialCases\\Models\\Tutorial3.roombut it may be different for users who installed 6SigmaRoom and the tutorials under another location.Click the Import .room button to start the importing process. A progress bar will be shown and more detailed conversion status can be seen from the console.
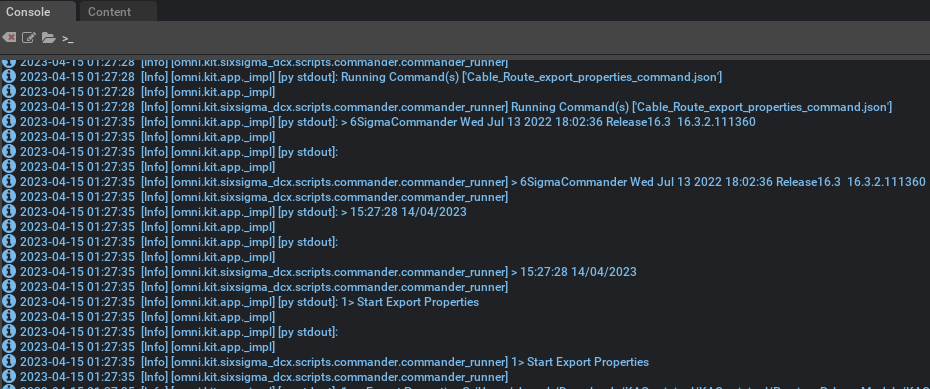
Once the import process is done, we can see the converted models inside the viewport.
Import 6SigmaRoom’s result .vtk
Mesh Slice Visualization
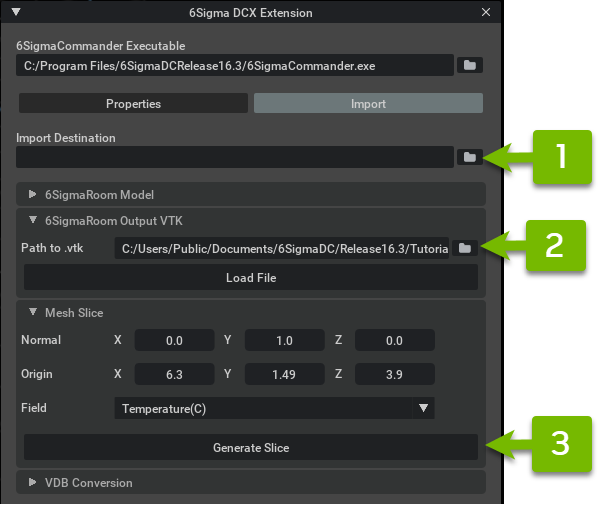
Click on the Import Destination text field or the browse button to set the directory to write the converted mesh.
Click on the Path to .vtk text field or the browse button to set the path to the .vtk generated by 6SigmaRoom.
Additional panels, such as the Mesh Slice and VDB Conversion, are shown after the files are loaded. Set the desired normal, origin, and scalar field for the slice and click the Generate Slice button.
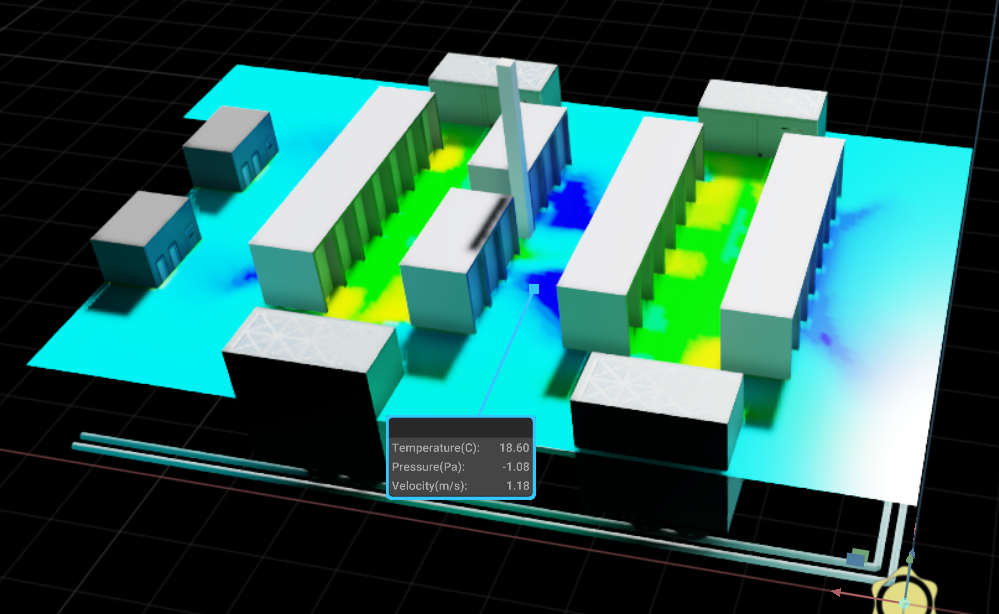
The resulting slice is shown in the Viewport once the conversion is complete. In addition, the users can click anywhere within the volumetric bound to query for CFD profile readings after loading the .vtk file.
Flow Visualization
We will utilize
omni.flowusdExtension for air particle flow rendering. Open extensions manager to ensure thatomni.flowusdis enabled and up to date.
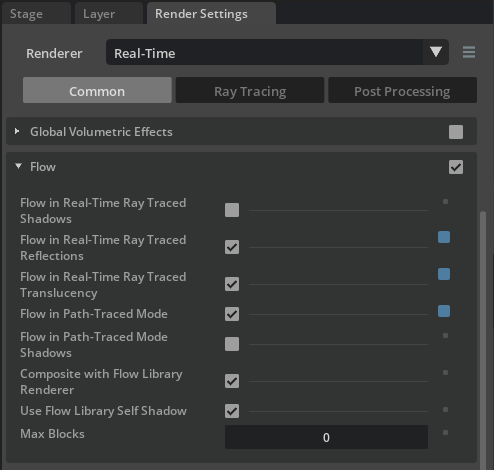
Enable Flow under Render settings
Upon
.vtkfile load completion, a VDB Conversion panel is shown with integer fields pre-populated according to the simulation domain size. Change the sampling dimensions to the desired values and click the Convert to .vdb button to start the conversion process.

Create NanoVDB emitter, FlowSimulate, FlowOffscreen, and FlowRender prims from Create/Flow menu then place the NanoVDB emitter under an Xform scaled up by (100, 100, 100)
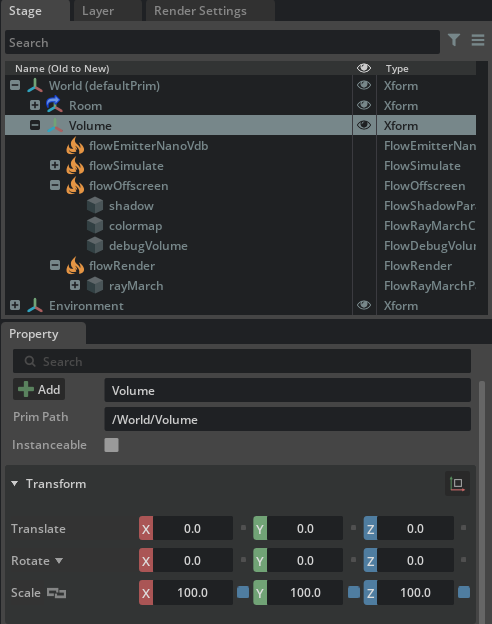
Select flowSimulate and set Density Cell Size to 5.0
Select flowSimulate/advection and set Gravity to (0, 0, 0)
Click the Play button or toggle on Force Simulate property under flowSimulate to see the effects from updating settings in real time.
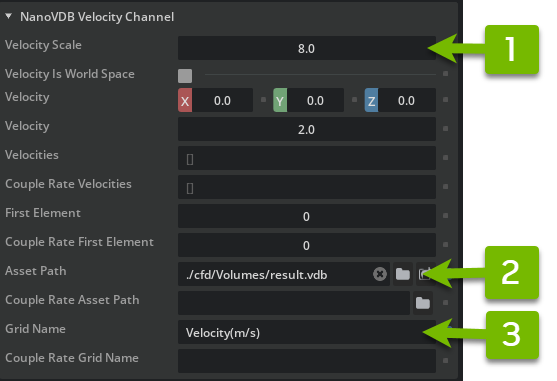
Select flowEmitterNanoVdb and navigate to Velocity Channel settings. Change Velocity Scale to 8, Asset Path to the converted
.vdbfile path, and Grid Name to Velocity(m/s)
Navigate to Smoke Channel settings under flowEmitterNanoVdb and change Smoke target value to 1.0
Select flowOffscreen/debugVolume prim and toggle on Enable Speed as Temperature checkbox.
Select flowOffscreen/colormap prim and change Color Scale to 14, add a blue control point at position 0.05 with 0 alpha, add a green control point at position 0.1 with 0.1 alpha, and add a red control point at position 0.35 with 0.75 alpha.
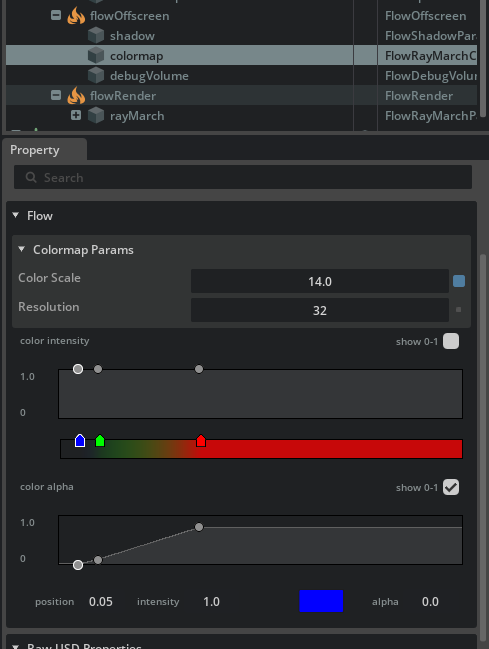
The result should look like the image below. Please refer to the Omniverse Flow guide at Using Omniverse™ Flow to learn more about the Flow extension.

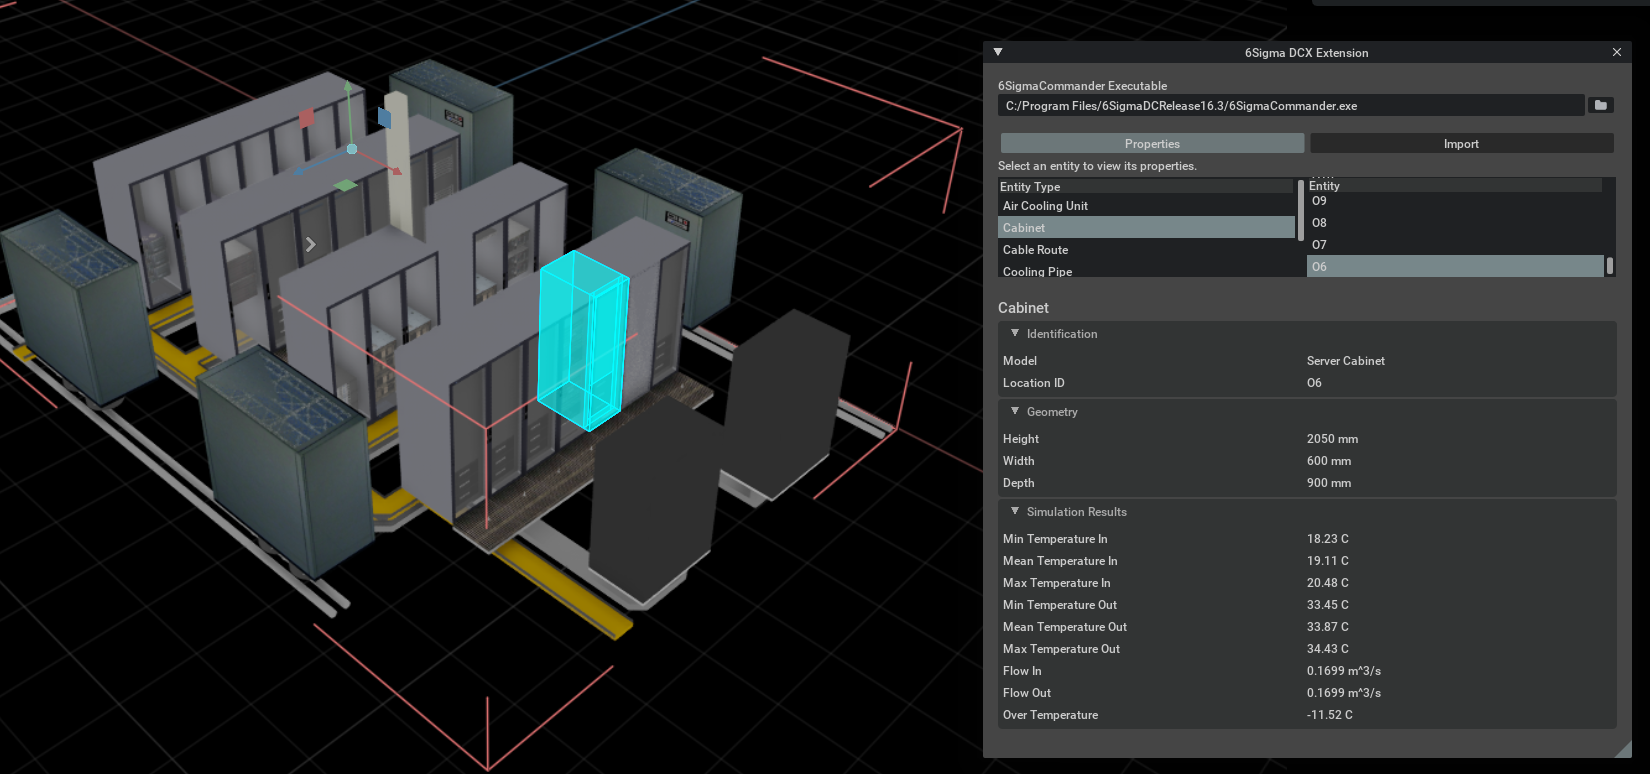
View Imported Properties
The Properties tab is where the Extension displays imported properties from 6SigmaRoom. First, we select an entity type of interest from the left tree view. All entities of that type will be listed in the right tree view for selection. Optionally, you can also click on an entity inside the Viewport to see its properties.
Attributions
Future Work
Import more entity types
Two-way connectivity from Omniverse to 6SigmaRoom is currently being explored (.usd to .room model conversion).