Reusable Light Panel
Gestures are a powerful way to allow you to create scenes with interactive objects. In this hands-on tutorial you will create a light panel where users can alter the size and intensity of the light by dragging its edges.
Learning Objectives
In this tutorial, you will learn how to:
Extend the Manipulator class to create a light panel with a basic model based UI.
Use Gestures to customize and extend an object’s UI.
Prerequisites
It is recommended to understand the concepts in the following tutorials before proceeding:
Note
You must use Omniverse Code version 2022.1.2 or newer.
Step 1: Download the Starter Project
Clone the tutorial-start branch of the kit-extension-sample-ui-scene repository to get the assets for this tutorial:
https://github.com/NVIDIA-Omniverse/kit-extension-sample-ui-scene
This tutorial will focus on the light_manipulator.py file found in the
/exts/omni.example.ui_scene.light_manipulator/omni/example/ui_scene/light_manipulator directory. To learn more about the other files in the repository check out the How to make an extension that spawns primitives.
Step 2: Familiarize Yourself with on_build() of the LightManipulator Class
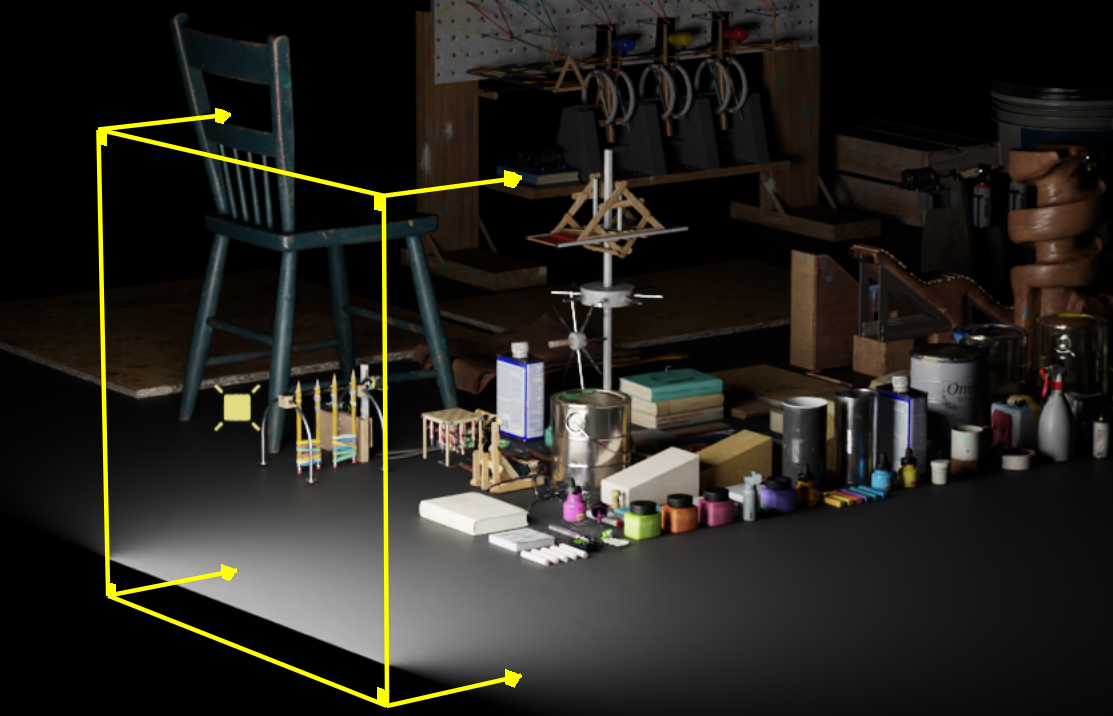
This tutorial will be focusing on the LightManipulator class, which is created by extending the Manipulator class. By doing this, it enables you to create an interactive rectangular light, a LightPanel, as shown in the image below:
LightManipulator overrides on_build() from Manipulator and is where you will be adding the custom code. It should initially look like this:
def on_build(self):
    """Called when the model is changed and rebuilds the whole slider"""
    model = self.model
    if not model:
        return

    # if we don't have selection then just return
    prim_path_item = model.prim_path
    prim_path = prim_path_item.value if prim_path_item else None
    if not prim_path:
        return

    #TODO: Add Step 3

    self.__root_xf = sc.Transform(model.get_as_floats(model.transform))
    with self.__root_xf:
        self._x_xform = sc.Transform()
        with self._x_xform:
            self._shape_xform = sc.Transform()
            # Build the shape's transform
            self._build_shape()
            with self._shape_xform:
                #TODO: Add Step 4.1

                #TODO: Add Step 4.2

                #TODO: Add Step 5.1

                #TODO: Add Step 6.1

                #TODO: Add Step 6.2

                #TODO: Add Step 7.1

                #TODO: Add Step 7.2
                pass
When a Manipulator needs updating on_build() is called and uses a Model, as defined in light_model.py.
This self.model has a number of useful functions such as getting and setting the height, width and intensity of the light. get_as_floats() and set_floats() allow you to retrieve or alter all of these values all at once.
If self.model is not set the function ends since there isn’t anything to manipulate. Similarly, there must also be a RectLight available in prim_path.
Step 3: Setting Line Style of the LightPanel
To show the user the LightPanel is resizable, and which edge of its rectangle is being hovered over, set the style and thickness of its edges:
Copy the following code under the # Add Step 3 comment in on_build(). This will not render anything in Omniverse yet, but will provide a setup for later.
# Style settings, as kwargs
thickness = 1
hover_thickness = 3
color = cl.yellow
shape_style = {"thickness": thickness, "color": color}

def set_thickness(sender, shapes, thickness):
    for shape in shapes:
        shape.thickness = thickness
Here you created set_thickness() for the HoverGesture to use as a callback for adjusting the size of the edge that’s being hovered over.
CHALLENGE (optional): Want to make the style your own? Try changing the thickness, hover_thickness and color variables to your liking. It may be worth revisiting this code and adjusting it over the course of this tutorial.
Step 4: Building the Manipulator Transform
To make it easier for the user to scale the LightPanel, give it a Transform.
A Translation Transform is created with the following code:
Note
Please do not copy this code
self.__root_xf = sc.Transform(model.get_as_floats(model.transform))
with self.__root_xf:
    self._x_xform = sc.Transform()
    with self._x_xform:
        self._shape_xform = sc.Transform()
        # Build the shape's transform
        self._build_shape()
This code will start from the top down, store the root Transform of the Model in self.__root_xf. Then, the code creates self._x_xform, a Transform for translation and it also creates a Transform for the shape, self._shape_xform:
Step 4.1: Set the Scale
Add this code to # Add Step 4.1 in on_build():
def _build_shape(self):
    if not self.model:
        return
    if self.model.width and self.model.height and self.model.intensity:
        x = self.model.get_as_floats(self.model.width)
        y = self.model.get_as_floats(self.model.height)
        # this INTENSITY_SCALE is too make the transform a reasonable length with large intensity number
        z = self.model.get_as_floats(self.model.intensity) / INTENSITY_SCALE
        self._shape_xform.transform = [x, 0, 0, 0, 0, y, 0, 0, 0, 0, z, 0, 0, 0, 0, 1]
Finally, _build_shape() sets the scale on the _shape_xform using the vector [x, 0, 0, 0, 0, y, 0, 0, 0, 0, z, 0, 0, 0, 0, 1] where x is width, y is the height, and z is the light intensity. This list is
being used as a scale matrix.
Step 4.2: Build the Geometry
Now that the transform has been created you need to render the rectangle’s geometry.
Copy the below code block under the # Add Step 4.2 comment in on_build(). Be sure to check the alignment of the python code and feel free to view the completed function
as a hint.
# Build the shape geometry as unit-sized
h = 0.5
z = -1.0
# the rectangle
shape1 = sc.Line((-h, h, 0), (h, h, 0), **shape_style)
shape2 = sc.Line((-h, -h, 0), (h, -h, 0), **shape_style)
shape3 = sc.Line((h, h, 0), (h, -h, 0), **shape_style)
shape4 = sc.Line((-h, h, 0), (-h, -h, 0), **shape_style)
There should now be a rectangle viewable in Omniverse.
Step 5: Handling Gestures
Gestures handle callback data from user input. There are many kinds of Gestures in Omniverse, listed here.
This tutorial focuses on the Hover and Drag gestures.
Step 5.1: Add the HoverGesture for the RectLight
Copy the below code block under the # Add Step 5.1 comment on_build(). Again, make sure that this code aligns with the comment.
# add gesture to the lines of the rectangle to update width or height of the light
vertical_hover_gesture = sc.HoverGesture(
    on_began_fn=lambda sender: set_thickness(sender, [shape1, shape2], hover_thickness),
    on_ended_fn=lambda sender: set_thickness(sender, [shape1, shape2], thickness),
)
shape1.gestures = [_DragGesture(self, [1], [1]), vertical_hover_gesture]
shape2.gestures = [_DragGesture(self, [1], [-1]), vertical_hover_gesture]

horizontal_hover_gesture = sc.HoverGesture(
    on_began_fn=lambda sender: set_thickness(sender, [shape3, shape4], hover_thickness),
    on_ended_fn=lambda sender: set_thickness(sender, [shape3, shape4], thickness),
)
shape3.gestures = [_DragGesture(self, [0], [1]), horizontal_hover_gesture]
shape4.gestures = [_DragGesture(self, [0], [-1]), horizontal_hover_gesture]
To change the thickness of the edges of your RectLight while the user hovers over them, set the on_began_fn() (beginning of the hover) and on_ended_fn() (ending of the hover) to use set_thickness() defined in Step 3: Setting Line Style of the LightPanel
Since the rectangle will grow and shrink about its center, you will highlight both of the affected edges to reflect this mirrored behavior. For instance, if you’re changing the vertical height of the rectangle, both the top and bottom edges will be highlighted like so:
Step 5.2: Analyzing the DragGesture
The DragGesture will do a number of different things to your light panel depending on which edge is dragged. You’ll extend the base DragGesture class into _DragGesture.
Take a look at a key part of the on_began() function:
Note
Please do not copy this code
if 0 in self.orientations:
    self.width_item = self.model.width
    self._manipulator.model.set_item_value(self.width_item, self.model.get_as_floats(self.width_item))
if 1 in self.orientations:
    self.height_item = self.model.height
    self._manipulator.model.set_item_value(self.height_item, self.model.get_as_floats(self.height_item))
if 2 in self.orientations or self.is_global:
    self.intensity_item = self.model.intensity
    self._manipulator.model.set_item_value(self.intensity_item, self.model.get_as_floats(self.intensity_item))
When defining the Gesture, you pass in an Orientation to let it know whether it’s for width, height, or intensity. Then, you will alter the respective variable. Finally, to build the Gesture, call it like so:
_DragGesture(manipulator, orientation, flag)
Where flag indicates the negative or positive edge, e.g., the left horizontal edge v. the right horizontal edge.
Step 6: Adding Intensity
While you have learned how to manipulate the light’s height and width, it would be useful if users could also define the intensity of the light using the DragGesture. To make it clear to the user that they are using the panel’s local z-axis to modify its intensity, you can use arrows.
Step 6.1: Create Custom Arrows
Add this code to # Add Step 6.1 in on_build()
# create z-axis to indicate the intensity
z1 = sc.Line((h, h, 0), (h, h, z), **shape_style)
z2 = sc.Line((-h, -h, 0), (-h, -h, z), **shape_style)
z3 = sc.Line((h, -h, 0), (h, -h, z), **shape_style)
z4 = sc.Line((-h, h, 0), (-h, h, z), **shape_style)

def make_arrow(translate):
    vert_count = len(ARROW_VI)
    with sc.Transform(
        transform=sc.Matrix44.get_translation_matrix(translate[0], translate[1], translate[2])
        * sc.Matrix44.get_rotation_matrix(0, -180, 0, True)
    ):
        return sc.PolygonMesh(ARROW_P, [color] * vert_count, ARROW_VC, ARROW_VI, visible=False)

# arrows on the z-axis
arrow_1 = make_arrow((h, h, z))
arrow_2 = make_arrow((-h, -h, z))
arrow_3 = make_arrow((h, -h, z))
arrow_4 = make_arrow((-h, h, z))

# the line underneath the arrow which is where the gesture applies
z1_arrow = sc.Line((h, h, z), (h, h, z - ARROW_HEIGHT), **shape_style)
z2_arrow = sc.Line((-h, -h, z), (-h, -h, z - ARROW_HEIGHT), **shape_style)
z3_arrow = sc.Line((h, -h, z), (h, -h, z - ARROW_HEIGHT), **shape_style)
z4_arrow = sc.Line((-h, h, z), (-h, h, z - ARROW_HEIGHT), **shape_style)
The arrow’s mesh has already been defined at the top of light_manipulator.py with the variables ARROW_P, ARROW_VI, and ARROW_VC. make_arrow() makes use of these variables to draw the arrows.
While this draws the arrows, you still need to add the HoverGesture to show them…
Step 6.2: Adding the HoverGesture to the Arrows
Add this code to # Add Step 6.2 in on_build()
def set_visible(sender, shapes, thickness, arrows, visible):
    set_thickness(sender, shapes, thickness)
    for arrow in arrows:
        arrow.visible = visible

thickness_group = [z1, z1_arrow, z2, z2_arrow, z3, z3_arrow, z4, z4_arrow]
visible_group = [arrow_1, arrow_2, arrow_3, arrow_4]
visible_arrow_gesture = sc.HoverGesture(
    on_began_fn=lambda sender: set_visible(sender, thickness_group, hover_thickness, visible_group, True),
    on_ended_fn=lambda sender: set_visible(sender, thickness_group, thickness, visible_group, True),
)
gestures = [_DragGesture(self, [2], [-1]), visible_arrow_gesture]
z1_arrow.gestures = gestures
z2_arrow.gestures = gestures
z3_arrow.gestures = gestures
z4_arrow.gestures = gestures
This code creates a function, set_visible(), that alters both the visibility of the arrows and the thickness of the edge lines as part of your HoverGesture. Then, adds the DragGestures in order to change the light intensity while dragging an arrow.
CHALLENGE (Optional): Right now, the arrows are always visible regardless if the cursor is hovering over them or not. Can you alter the code so that the arrows only appear when hovering? Only one line needs to be changed. Click the below for a hint.
Solution
In on_ended_fn, the visible parameter (the last argument of the function) should be set to False.
Step 7: Scaling Everything
All the critical features of the extension have been implemented so far:
The ability to change the width and height of a light panel
The ability to change the intensity of a light panel.
In many 3D apps, there is often a shortcut to scale all of the dimensions of an object at once. Add a few small rectangles to the corners of the LightPanel to allow users to scale width and height at the same time.
Step 7.1: Add Scaling Rectangles
Add this code to # Add Step 7.1 in on_build()
# create 4 rectangles at the corner, and add gesture to update width, height and intensity at the same time
s = 0.03

def make_corner_rect(translate):
    with sc.Transform(transform=sc.Matrix44.get_translation_matrix(translate[0], translate[1], translate[2])):
        return sc.Rectangle(s, s, color=0x0)

r1 = make_corner_rect((h - 0.5 * s, -h + 0.5 * s, 0))
r2 = make_corner_rect((h - 0.5 * s, h - 0.5 * s, 0))
r3 = make_corner_rect((-h + 0.5 * s, h - 0.5 * s, 0))
r4 = make_corner_rect((-h + 0.5 * s, -h + 0.5 * s, 0))
This defines the function make_corner_rec() to draw a rectangle.
Step 7.2: Highlight All of the Edges at Once
Add this code to # Add Step 7.2 in on_build()
def set_color_and_visible(sender, shapes, thickness, arrows, visible, rects, color):
    set_visible(sender, shapes, thickness, arrows, visible)
    for rect in rects:
        rect.color = color

highlight_group = [shape1, shape2, shape3, shape4] + thickness_group
color_group = [r1, r2, r3, r4]
hight_all_gesture = sc.HoverGesture(
    on_began_fn=lambda sender: set_color_and_visible(sender, highlight_group, hover_thickness, visible_group, True, color_group, color),
    on_ended_fn=lambda sender: set_color_and_visible(sender, highlight_group, thickness, visible_group, False, color_group, 0x0),
)

r1.gestures = [_DragGesture(self, [0, 1], [1, -1]), hight_all_gesture]
r2.gestures = [_DragGesture(self, [0, 1], [1, 1]), hight_all_gesture]
r3.gestures = [_DragGesture(self, [0, 1], [-1, 1]), hight_all_gesture]
r4.gestures = [_DragGesture(self, [0, 1], [-1, -1]), hight_all_gesture]
You’ve defined set_color_and_visible() in order to highlight all the edges at once with your HoverGesture. Then, the code passes in multiple orientations ([0, 1]) to the _DragGesture to indicate you’re altering the width and height at the same time.
Step 8: Congratulations!!
Great job getting through this tutorial. Interested in improving your skills further? Please consider checking out the Reticle Extension Tutorial.