Modulus Extension
Overview
NVIDIA Modulus is a neural network framework that blends the power of physics in the form of governing partial differential equations (PDEs) with data to build high-fidelity, parameterized surrogate models with near-real-time latency. The Modulus Extension combines Modulus with Omniverse, and allows you to explore Modulus-based simulations interactively
Notes on Installation and Execution
To use this extension, you’ll need to be on a supported operating system, and using Omniverse USD Composer. For now, only Linux versions supported by Omniverse USD Composer are supported. We suggest Ubuntu 20.04. Omniverse USD Composer can be installed via the Omniverse Launcher. Instructions for installing the Omniverse Launcher can be found in the Omniverse documentation. Currently the extension works with Omniverse USD Composer 2022.2.0 or older. Some methods of CUDA installation do not include libnvToolsExt.so.1, which is required for one of the Modulus dependencies to function properly. If your system does not have libnvToolsExt.so.1, you should install the libnvtoolsext1 as follows:
sudo apt install libnvtoolsext1
Currently, Modulus integration into Omniverse is preliminary. Debugging Modulus scenarios during development or testing is particularly troublesome. To easily view the logging information generated by Modulus, we recommend starting Omniverse USD Composer within a terminal window by using the following command, making sure to change the Omniverse USD Composer version to match your installed version:
# Change the version (here 2022.2.0) to match your Composer version

~/.local/share/ov/pkg/create-2022.2.0/omni.create.sh --enable modulus_ext.core
Note
Due to the combination of both deep learning and Omniverse USD Composer, the GPU memory requirement is quite high. Users should use a GPU with at least 12 Gb of VRAM for most Modulus scenarios. Presently, the recommend hardware is a NVIDIA 3090 GPU or greater.
Enabling the Extension
From the menu bar, navigate to
Window>ExtensionsUsing the search field of the Extension Manager, search for “Modulus” Extension
Install and enable the
modulus_ext.coreExtensionUsing the search field of the Extension Manager, search for “vtkm” Extension
Install and enable the
hpcvis.vtkm_bridge.coreExtension
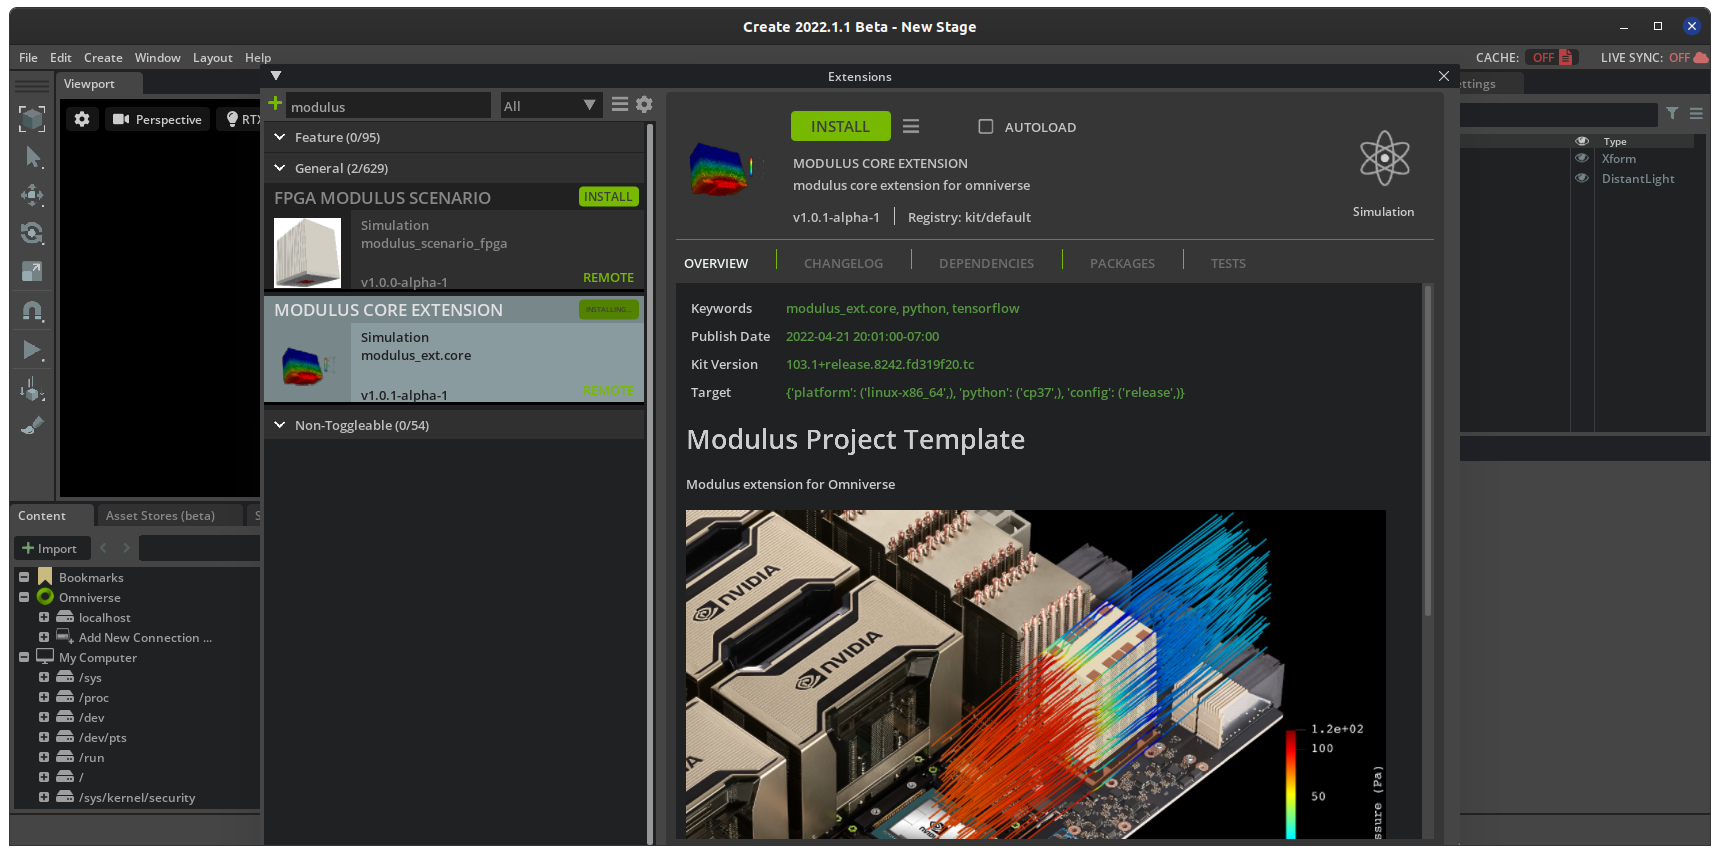
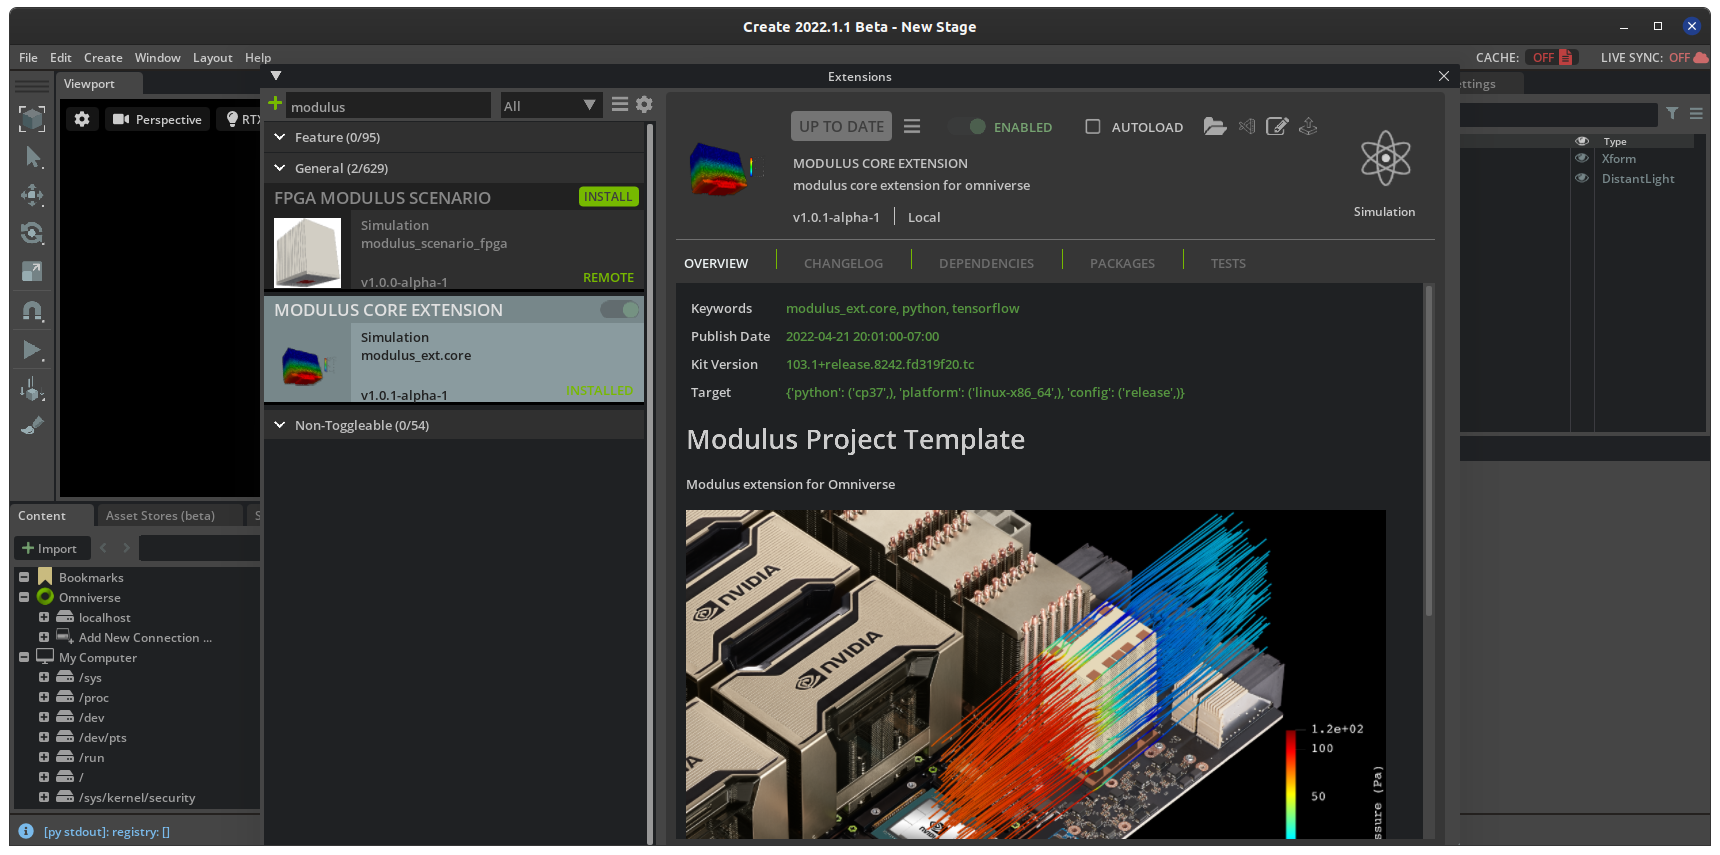
The first time you do this, it will take up to several minutes to download the Modulus extension; during this time, Omniverse USD Composer may not react to your input.
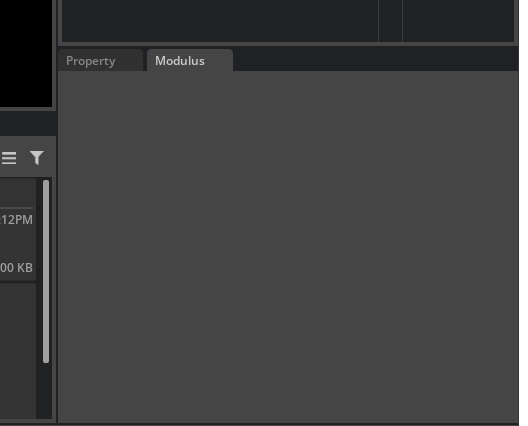
After the extension is successfully installed and loaded, you should see an otherwise empty tab entitled Modulus.
If there is an issue with downloading an extension within Omniverse USD Composer, you can instead manually download the extension and import it to Omniverse USD Composer. To do so, follow these steps:
Identify the URL that fails to download (can be found from the logs in the terminal window)
In the URL, replace the character + with %2B (e.g.: http://kit-103-0-public-extensions.s3.amazonaws.com/public/3/archives/modulus_ext.core-22.7.0+lx64.r.cp37.zip becomes http://kit-103-0-public-extensions.s3.amazonaws.com/public/3/archives/modulus_ext.core-22.7.0%2Blx64.r.cp37.zip)
Download the modified URL using a browser or a tool like wget or curl
In the extension manager in Omniverse USD Composer, use the ‘import extension’ feature to import the downloaded zip file
Choosing a Scenario
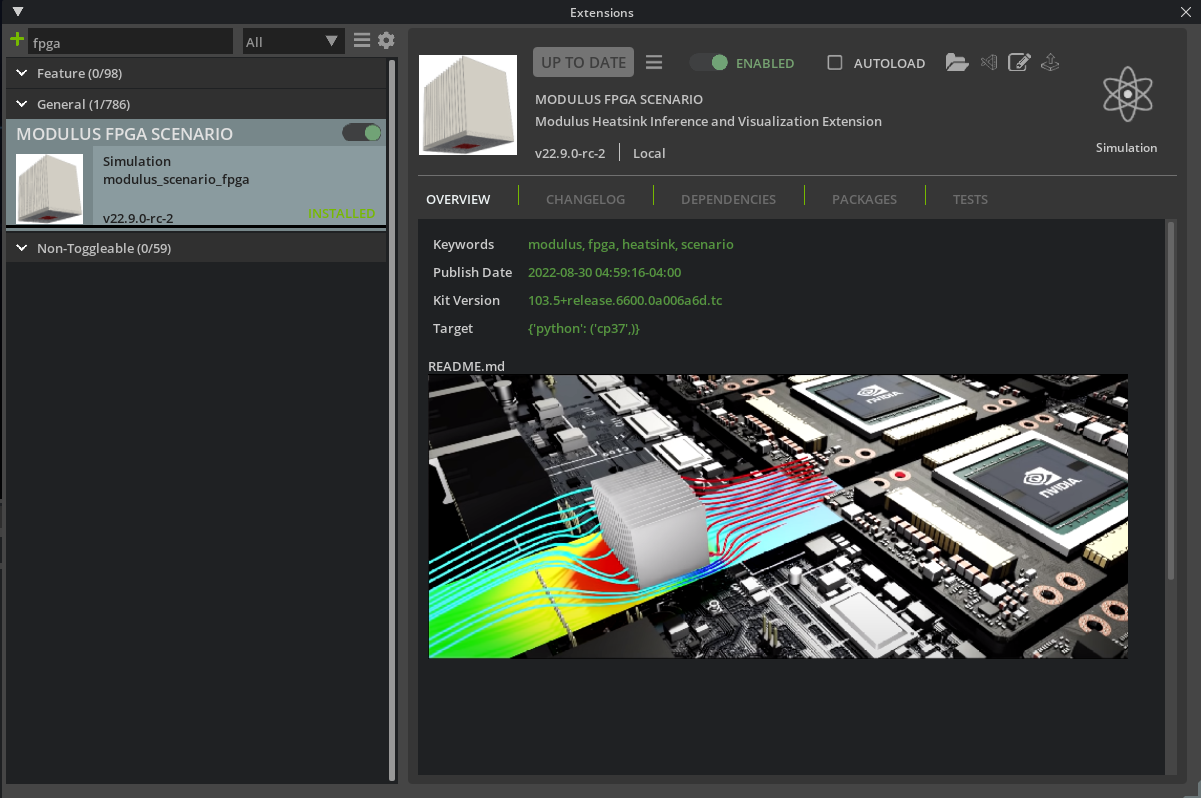
Simulation scenarios for the Modulus Extension are themselves extensions. For now, the following preconfigured scenarios are available to experiment with:
modulus_scenario_fpgamodulus_scenario_aneurysmmodulus_scenario_fcn
To learn more about the problem description for these two scenarios, visit Modulus documentation:
FPGA Scenario Walk Through
The FPGA scenario involves visualizing the flow features for a parameterized geometry, while the aneurysm scenario visualizes non-parameterized flow through a blood vessel. Later we will discuss two different ways for creating new scenarios for parameterized and non-parameterized models.
Load a scenario extension by searching for its name in the Extension manager (in the following, we will use modulus_scenario_fpga). Install and enable the extension. If you do this for the first time, this process can take a few minutes for the pretrained model to be downloaded and installed on your machine.
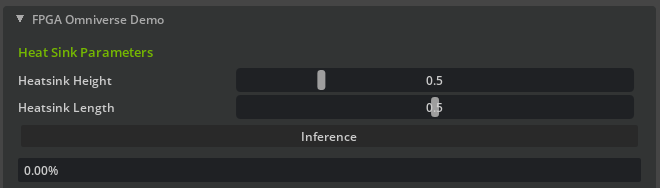
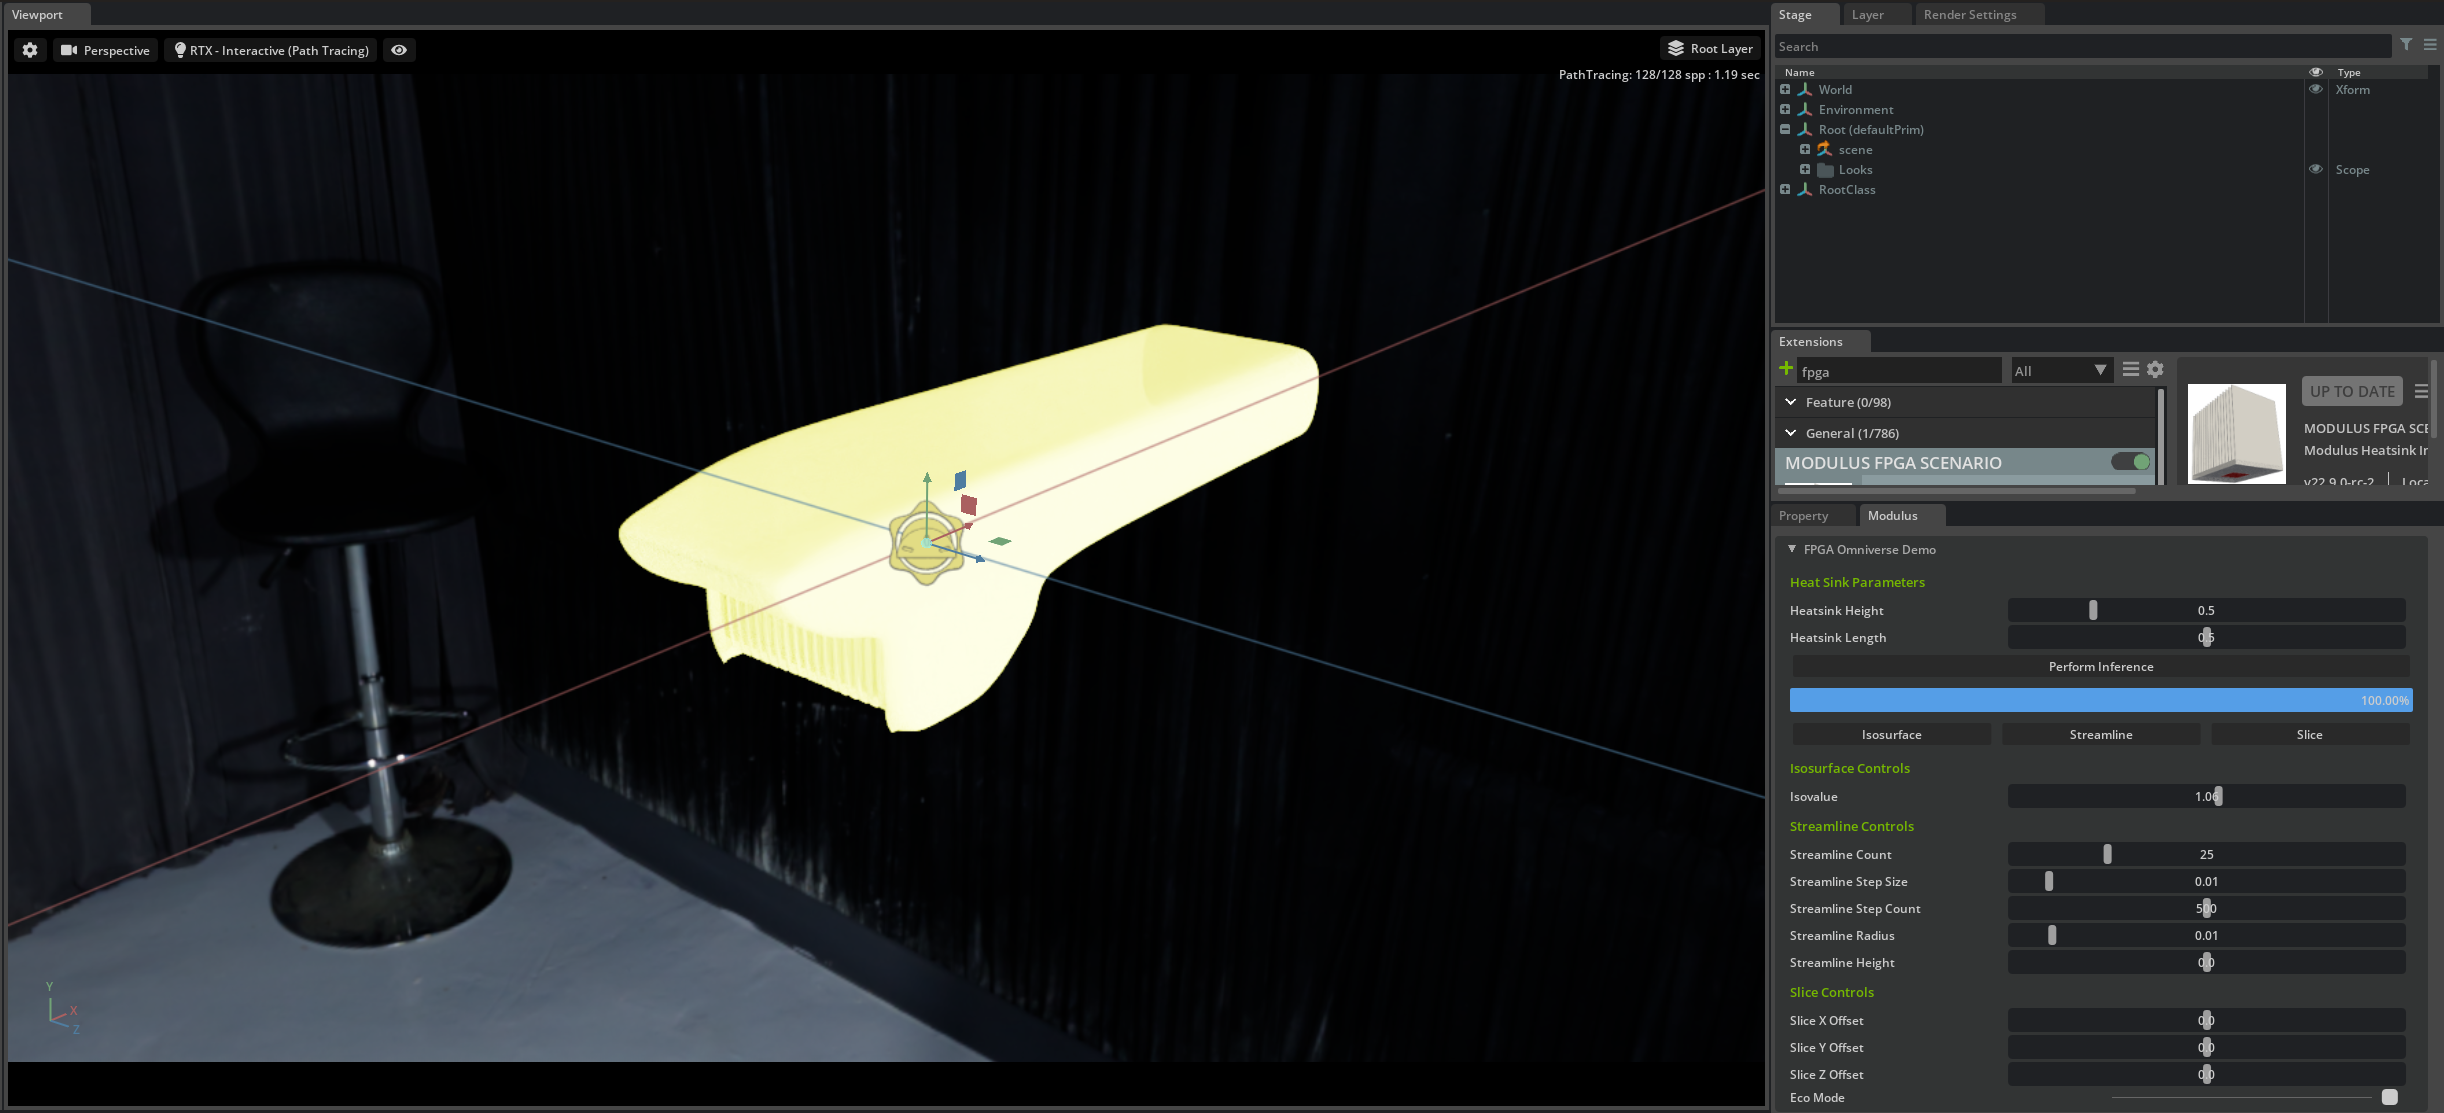
The Modulus window should now be populated with a list of parameters.
Run FPGA Flow Inference
The first step is to perform inference, i.e. query the machine learning model for a given heatsink parameterization. Adjust the heatsink height and width sliders to the desired value. Pressing the inference button will then run the trained neural network model for the specified heatsink configuration. The progress bar should reach 100% when complete, giving the solution of the solved flow field.
The following parameters can be adjusted to influence inference:
Heatsink Height: Height of the heatsink finsHeatsink Length: Length of the heatsink finsEco Mode: An option for GPUs with less memory. Decreased VRAM requirement during inference.
Visualize the Solution
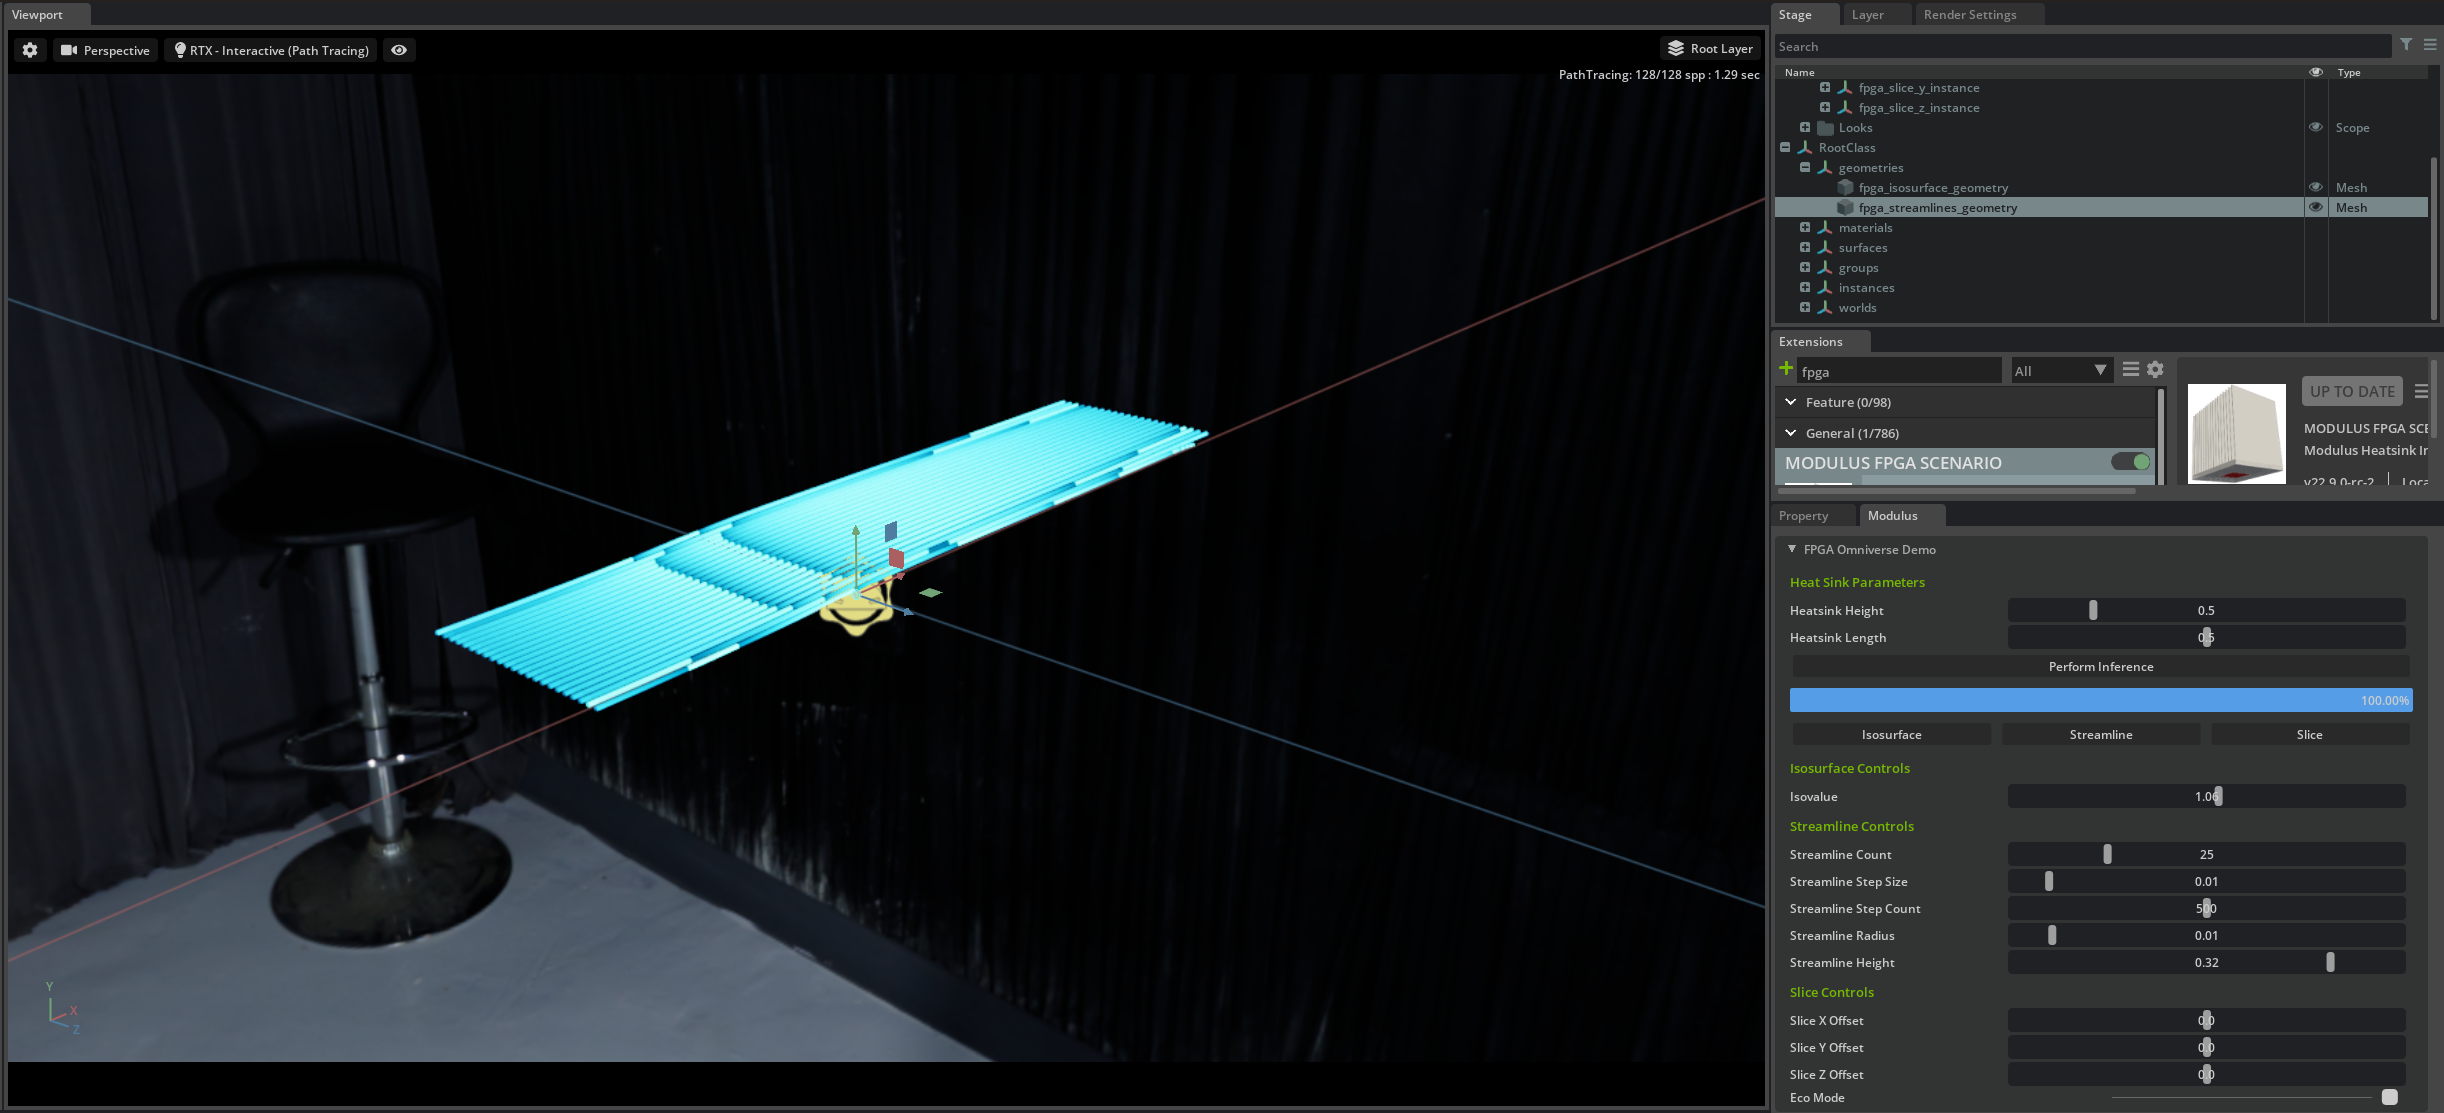
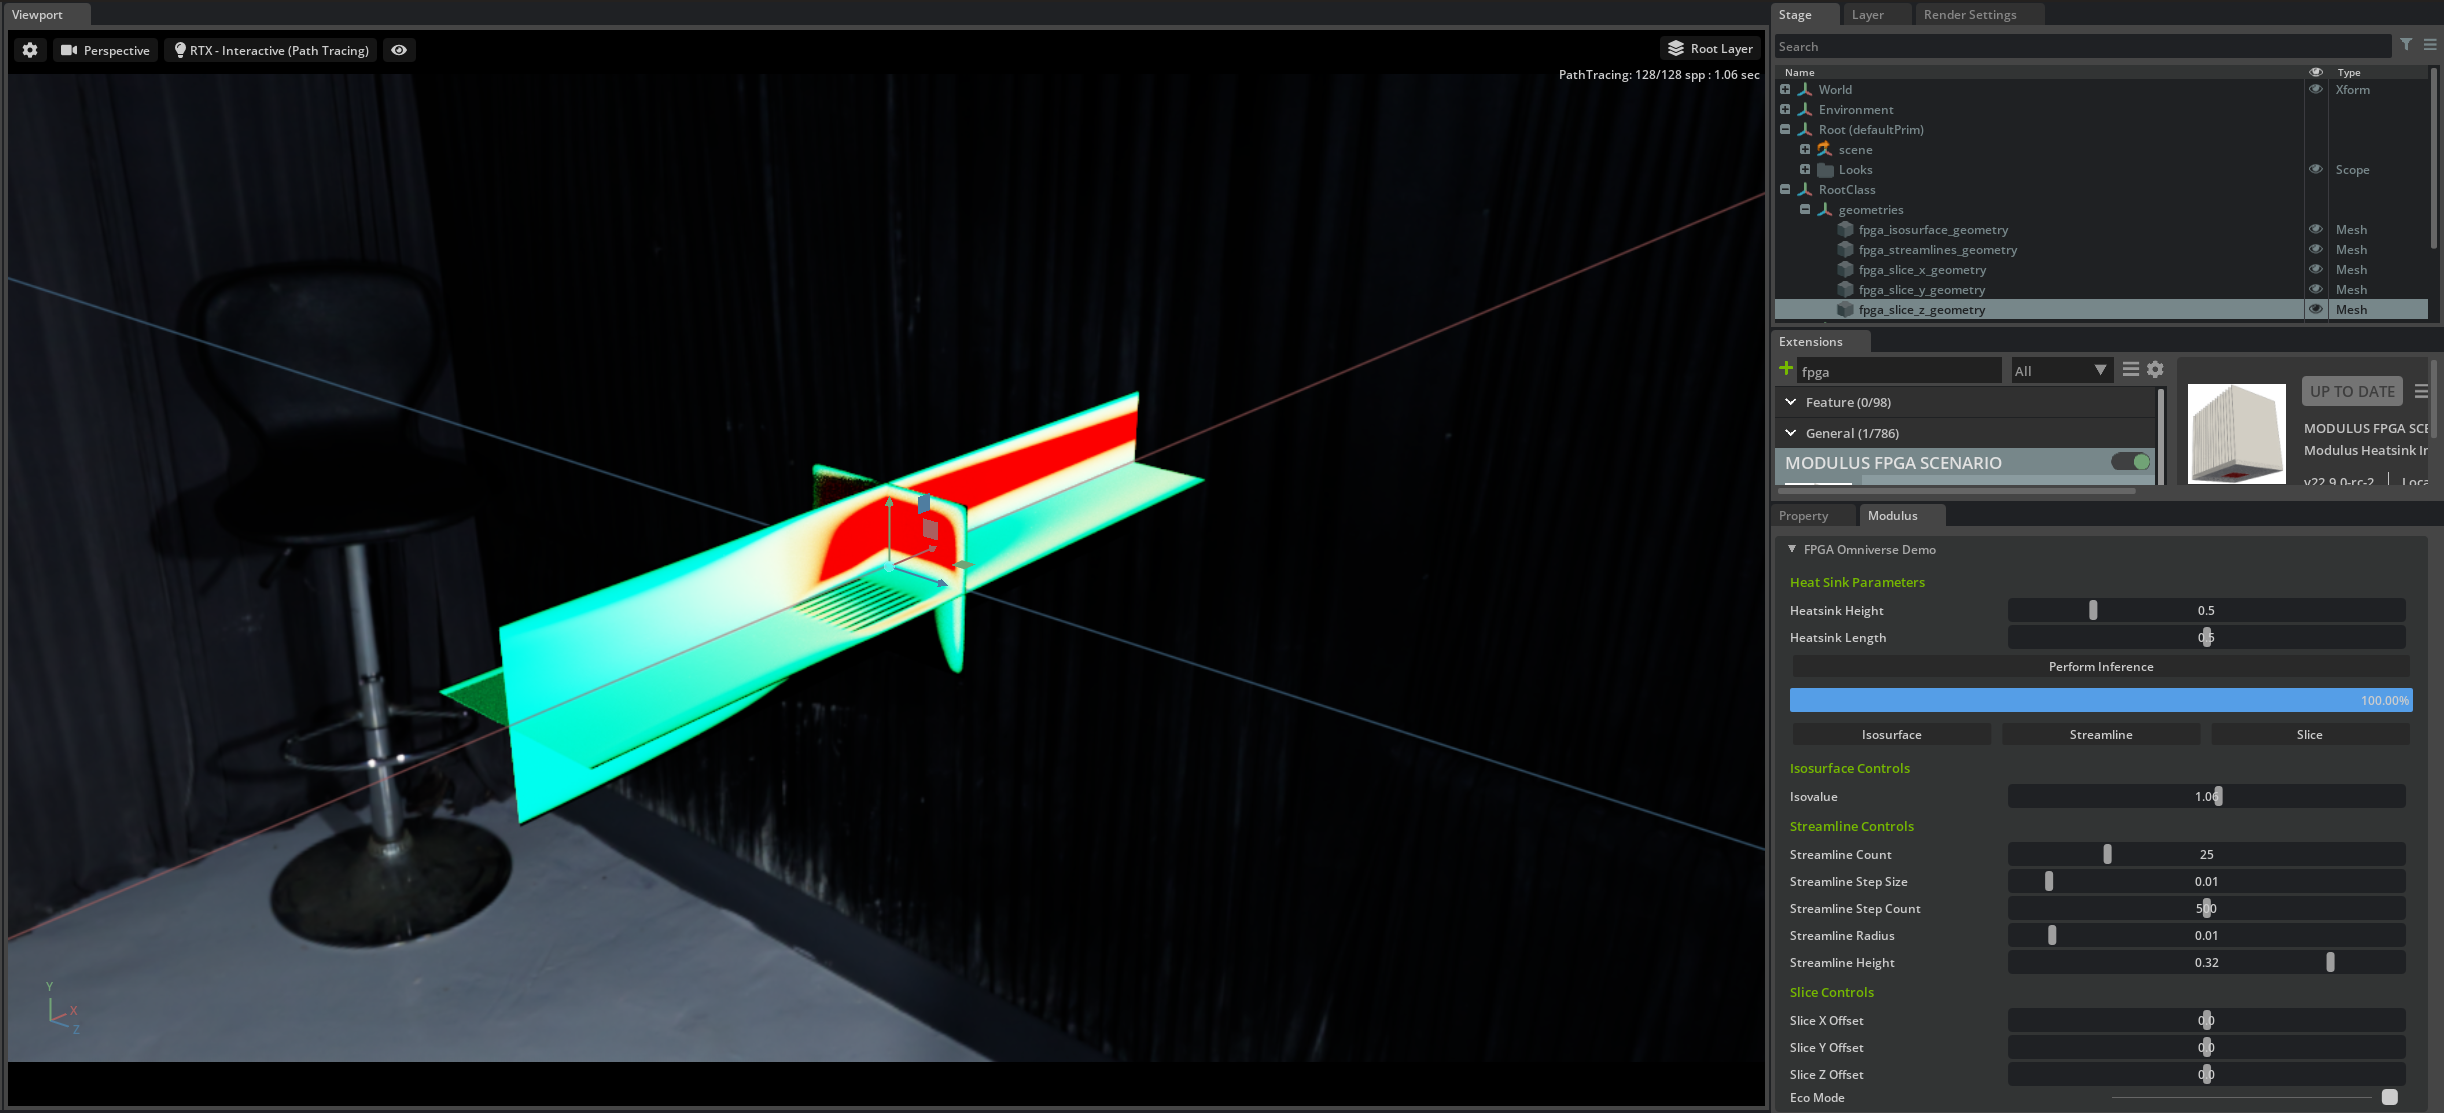
Several visualization modes are available, which can be initialized using the buttons under the inference progress bar. Each mode will populate whichever stage is currently open in Omniverse USD Composer with the respective visualization object. Visualization feature can be updated real-time using the different sliders.
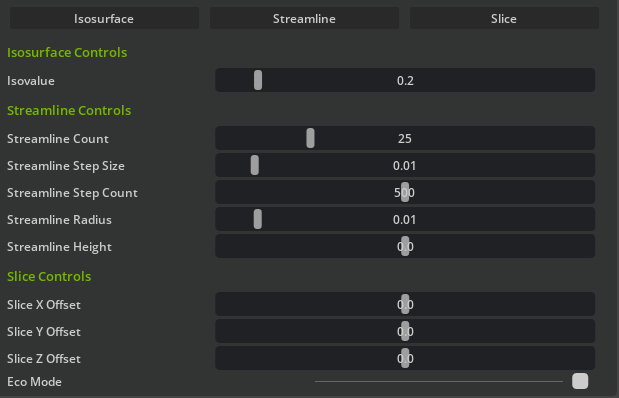
Isosurface: Create an isosurface of the velocity magnitude.Streamlines: Create a set of streamlines.Slices: Add three axis-aligned slices of the velocity magnitude.
Adjust Visualization Parameters
Make adjustments to each parameter and observe the visualization change. The model is not reevaluated when visualization parameters are modified. Parameters for the visualization are:
Isovalue: The isovalue for which the velocity magnitude isosurface is generatedStreamline Count: Number of streamlines for streamline visualizationStreamline Step Size: Numerical integration step size for streamline visualizationStreamline Step Count: Number of numerical integration steps for streamline visualizationStreamline Radius: Radius of the tube diameter for the streamlines visualizationStreamline Height: Height at which streamlines are seededSlice X Offset: Position of the X-orthogonal slice along the X axisSlice Y Offset: Position of the Y-orthogonal slice along the Y axisSlice Z Offset: Position of the Z-orthogonal slice along the Z axis
Creating New Scenarios
Note
The Modulus Omniverse extension is presently in an alpha release, thus API documentation and guides for creating your own scenario is forthcoming. We encourage users that would like to begin experimenting with the Modulus extension to look at the source code for the provided scenarios.
If your Modulus model is not parameterized, you can use the aneurysm scenario source files as a template:
The
configfolder includes a singleextension.tomlfile, where you can specify the configs for your extension.The
datafolder includes the USD file, image and icon that are used in your extension UI. Additionally, this folder is used to store all related data for the scenario such as STL file. The path to these files should be properly set inextension.toml.The
aneurysmfolder includes the following key folders/files:checkpoints: Contains the trained model checkpoints.conf: Modulus configuration file for loading the model and performing inference.extension.py: The main extension script that handles the construction of the user-interface, registration with the core extension and call-backs from user events.visualizer.py: Includes the required utilities for visualization and the connection the Omniverse visual pipeline.aneurysm_runner.py: The code that interfaces with Modulus to load the pretrained model and perform inference.
If your Modulus model is parameterized, you can use the FPGA scenario source files as a template:
The
configfolder includes a singleextension.tomlfile, where you can specify the configs for your extension.The
datafolder includes the USD file, image and icon that are used in your extension UI. The path to these files should be properly set inextension.toml.The
fpgafolder includes the following:outputs: Contains the trained model checkpoints.conf: Modulus configuration file for loading the model and performing inference.extension.py: The main extension script that handles the construction of the user-interface, registration with the core extension and call-backs from user events.visualizer.py: Includes the required utilities for visualization and the connection the Omniverse visual pipeline.fpga_runner.py: The code that interfaces with Modulus to load the pretrained model and perform inference.fpga_geometry.py: Contains information for the parameterized heatsink geometry.
Release Notes
v22.09
Release of FourCastNet scenario
Full release of Aneurysm scenario
Refactor of Modulus core UI API with more UI elements supported
Increased control and customization of UI for custom scenarios
UI clean up and improvements for all scenarios
HPC vis backend update with better stability and improved streamline creation
v22.06
Create documentation for Modulus Omniverse extension
Preliminary release of Aneurysm scenario