Warehouse Extensions
Introduction to Custom Extensions with Omniverse Kit
You can create custom extensions / applications for several purposes – for e.g., script-based scene creation. For your custom applications/extensions, you can use the NVIDIA Omniverse™ Kit. Omniverse Kit is designed to be the premiere foundation for new Omniverse-connected tools and microservices. It can be run headless to create a microservice, or with a UI. The UI is generated dynamically with Python allowing full customization.
Omniverse Kit comes with a default UI that allows it to act as a USD inspector, editor, layout tool and viewer. Customized UI’s may look nothing like the default. NVIDIA expects to ship sets of customizations that are more appropriate to specific target industries and user communities. Read more about Omniverse Kit here.
Warehouse Creator Extension
Overview
The Warehouse Creator is an extension for KIT based apps (like Omniverse USD Composer) that allow you to quickly get started with building Warehouse Digital Twins in an automated way. It supports procedurally generating full warehouse scenes, as well as customized generation based on layouts and assets that you want in the scene.

The extension works by spawning USD assets from Nucleus based on predefined asset-based rules. The image below illustrates the development workflow.
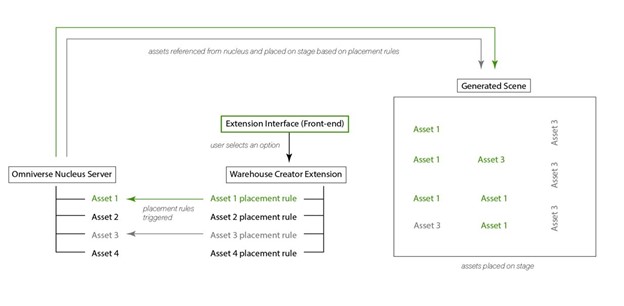
The pre-defined asset placement rules control the sample-space of the various positions, rotations, and scaling of the asset to be spawned. Based on user-defined parameters, assets are randomly chosen from Nucleus and placed in random positions from the sample space of positions defined by the placement rules. Occupied positions are recorded, and new assets are spawned in the unoccupied positions of the sample space.
You can modify the assets and their paths to several types and locations based on preference – this allows you to use the extension to generate scenes with your own custom assets from their defined locations.
Enabling the Warehouse Creator Extension
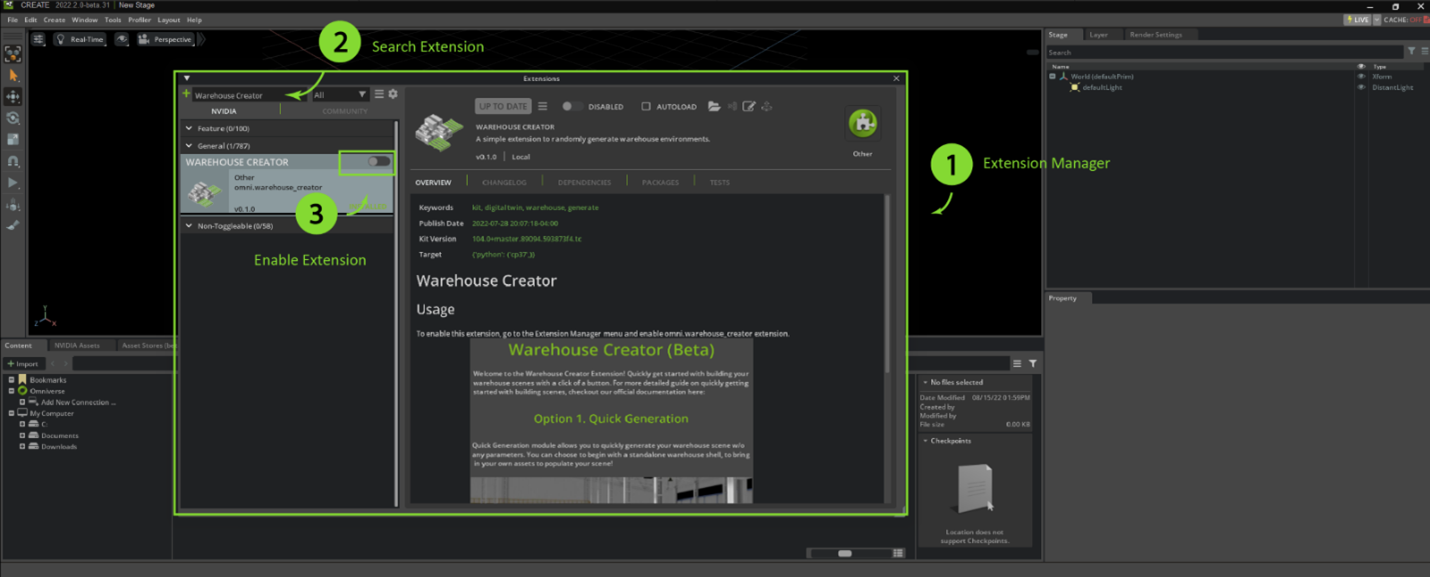
The extension can be enabled in Omniverse USD Composer by:
Navigating to Window > Extensions Manager from the top-level menu
Searching for Warehouse Creator in the text field of the Extension Manager window, to reveal the omni.warehouse_creator result.
Clicking the toggle to enable the extension.
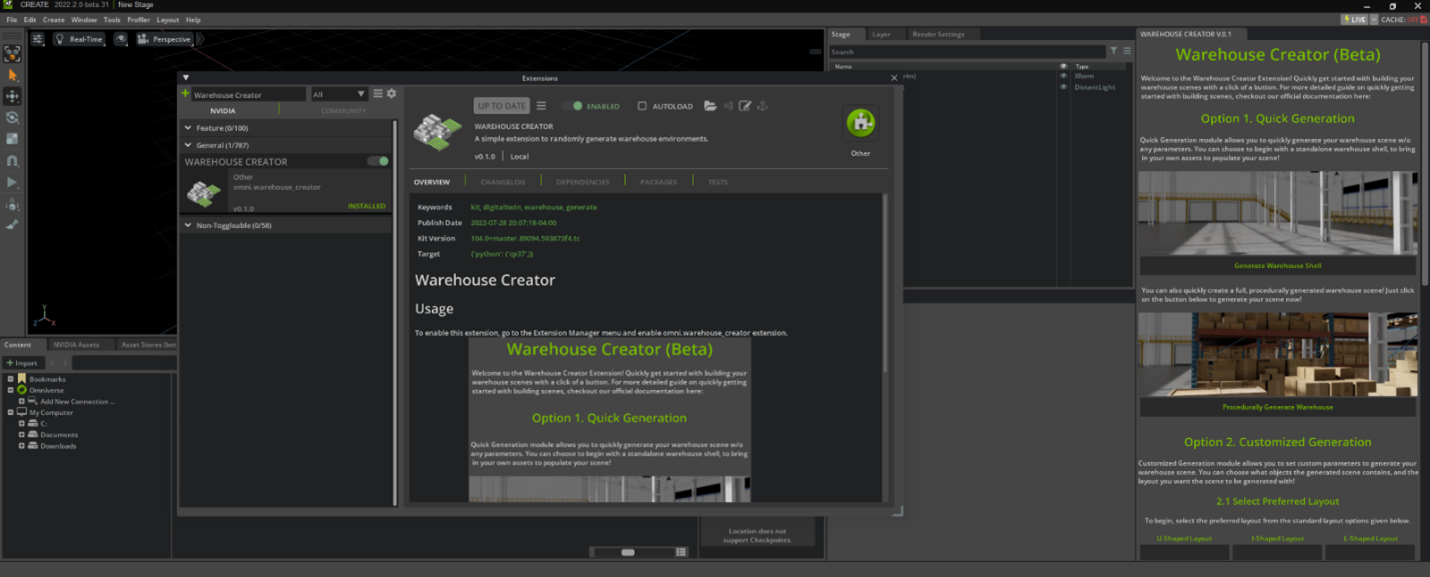
Once enabled, a new extension window pops up. The image below illustrates this process:
Here’s what it should look like when it’s been enabled:
Navigating the User Interface
Warehouse Creator – User Interface:
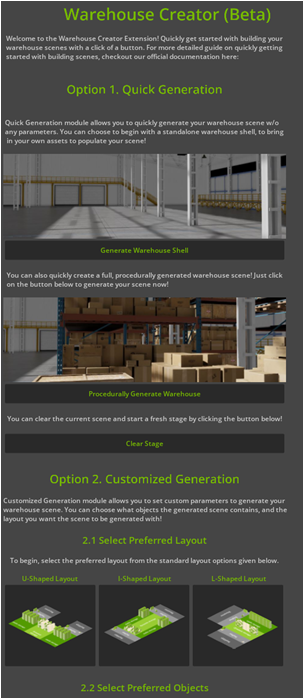
The extension UI (User Interface) contains a vertically scrollable window that hosts several quick recipes to get started with building your warehouse scenes. The different recipes and descriptions are elucidated below:
Option 1. Quick Generation
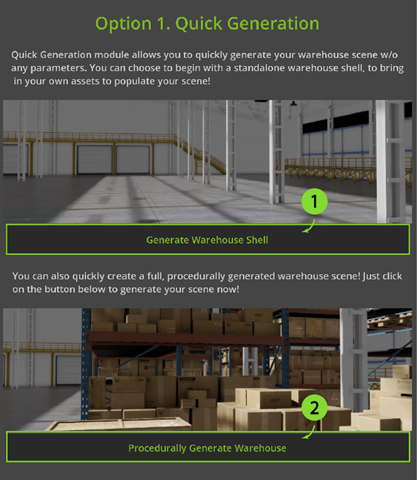
Quick Generation module allows you to quickly generate your warehouse scene without any parameters. It contains two different options:
Warehouse Shell Generation:
Instantly creates an empty warehouse shell in the stage. Users can import their own assets and build their scene in this shell.
Procedural Warehouse Generation:
Procedurally generates a complete warehouse scene with different assets. Users can explore and understand the stage with this generated scene. You can choose to begin with a standalone warehouse shell using the Generate Warehouse Shell option to bring in your own assets to populate your scene or use the Procedurally Generate Warehouse option to procedurally generate a full-fidelity warehouse scene with different assets. Simply click on the corresponding buttons to generate your scene.
Option 2. Customized Generation
The Customized Generation option allows you to control different parameters for scene generation to generate scenes attuned to your need. The option supports two different parameters:
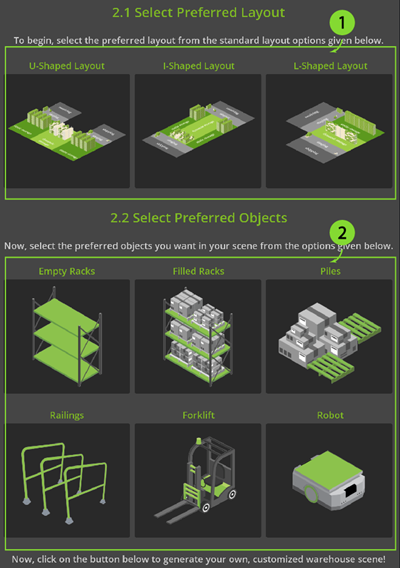
Layout Parameters
The layout parameters allow you to control the layout shape with which assets are spawned on stage to generate the scene. There are 3 different layout options that you can choose from. The layouts are shown below:
U-Shaped Layout:
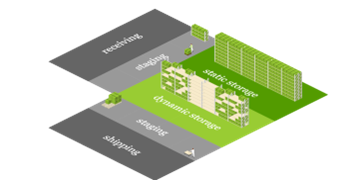
The U-shaped Layout arranges all racks and storage towards the farther end of the Warehouse, with static storage on two ends and dynamic storage in-between – as shown below.
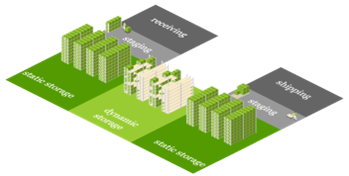
I-Shaped Layout:
The I-shaped Layout arranges all racks and storage towards the left and right ends of the Warehouse, with static storage on two ends and dynamic storage in-between – as shown below.
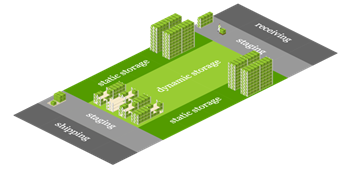
L-Shaped Layout:
The L-shaped Layout arranges all racks and storage towards one end of the Warehouse, with static and dynamic storage adjacent to each other in an L shape – as shown below.
Object Parameters
Asset parameters define what assets you want to spawn to construct the generated scene. There are 6 different assets [or objects] that can be used to create your warehouse scene:
Filled Racks
Empty Racks
Piles
Railings
Forklift
Robot
To select the assets you want in your scene, simply click on the corresponding object icons to “filter” the scene generation with those assets as shown below in the image.

The selected objects are highlighted as shown. In this case, the selection shows that Empty Racks, Piles, Forklift and Robot assets are selected to be spawned in the scene generation. The generated scene would contain these objects exclusively. Once the objects are selected, click the Generate Customized Warehouse Button to generate your scene!
Option 3. Smart Import
The Smart Import module allows you to magically import your own assets that fall under the following asset categories:
Filled Racks
Empty Racks
Piles
Railings
Forklift
Robot
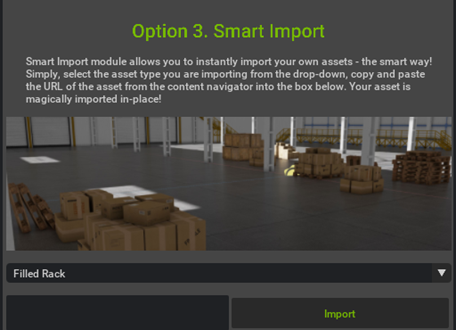
To import your own asset, click on the drop-down menu and select the asset category you choose to spawn. Once selected, paste in the URL of the USD asset, and select “Import”. Once selected, the asset will be spawned into an empty space that is constrained to the warehouse layout. Empty spaces are reserved for the Smart Import feature during initial generation of warehouse. When used, Smart Import will randomly choose a location from a list of reserved spaces to place an imported asset.
Clear Stage
As quickly as the Warehouse Extension enables you to generate your own warehouse digital twin, the extension also contains a feature to quickly clear the scene allowing users to iterate their designs. Users can select this button to delete all existing assets from their scene.
