Extending Editor Applications#

This tutorial section demonstrates the process of extending the Base Editor template provided by the kit-app-template repository to create tooling for interacting with real-time rendered USD Scenes. This tutorial is meant to be a generic representation of one potential use case for Kit SDK editor applications.
Prerequisites#
The following prerequisites are required to complete this tutorial:
Have cloned the
kit-app-templaterepository from GitHub-or-
Have downloaded the Omniverse Kit SDK Resource from NGC for your chosen operating system.
A development machine with an NVIDIA RTX GPU and latest drivers installed.
(recommended) Familiarity with Python.
Tutorial#
The goal of the default Base Editor template application is to provide developers with a starting point for creating custom user interface based tools and experiences that require direct user interaction. This includes functionality for rendering, USD asset loading/manipulation, and basic scene interaction. In this tutorial we will extend the default editor application to include additional user interface elements and functionality.
1. Create A New Editor#
Start by creating a new editor application.
1a - Create a New Editor Application#
From a new project or a fresh clone kit-app-template repository, create a new editor application using the template new tool:
Linux:
./repo.sh template new
Windows:
.\repo.bat template new
Follow the prompt instructions, choosing:
? Select what you want to create with arrow keys ↑↓: Application
? Select desired template with arrow keys ↑↓: Kit Base Editor
? Enter name of application .kit file [name-spaced, lowercase, alphanumeric]: tutorial.editor
? Enter application_display_name: Tutorial Extended Editor
? Enter version: 0.1.0
1b - Build and Launch the Editor#
With the new editor application created, we are now able to build:
Linux
./repo.sh build
Windows
.\repo.bat build
After the build is complete, we can launch to observe the default editor behavior:
Linux
./repo.sh launch
Windows
.\repo.bat launch
The launch tool will prompt you to select an application .kit file to launch. Select tutorial.editor.kit
Note that the first time startup of a rendering application may take 5-8 minutes as the shader cache is built.
2. The Default Editor#
This is an optional section with the goal of understanding the default editor application behavior and the code that drives it.
2a Default Editor Functionality#

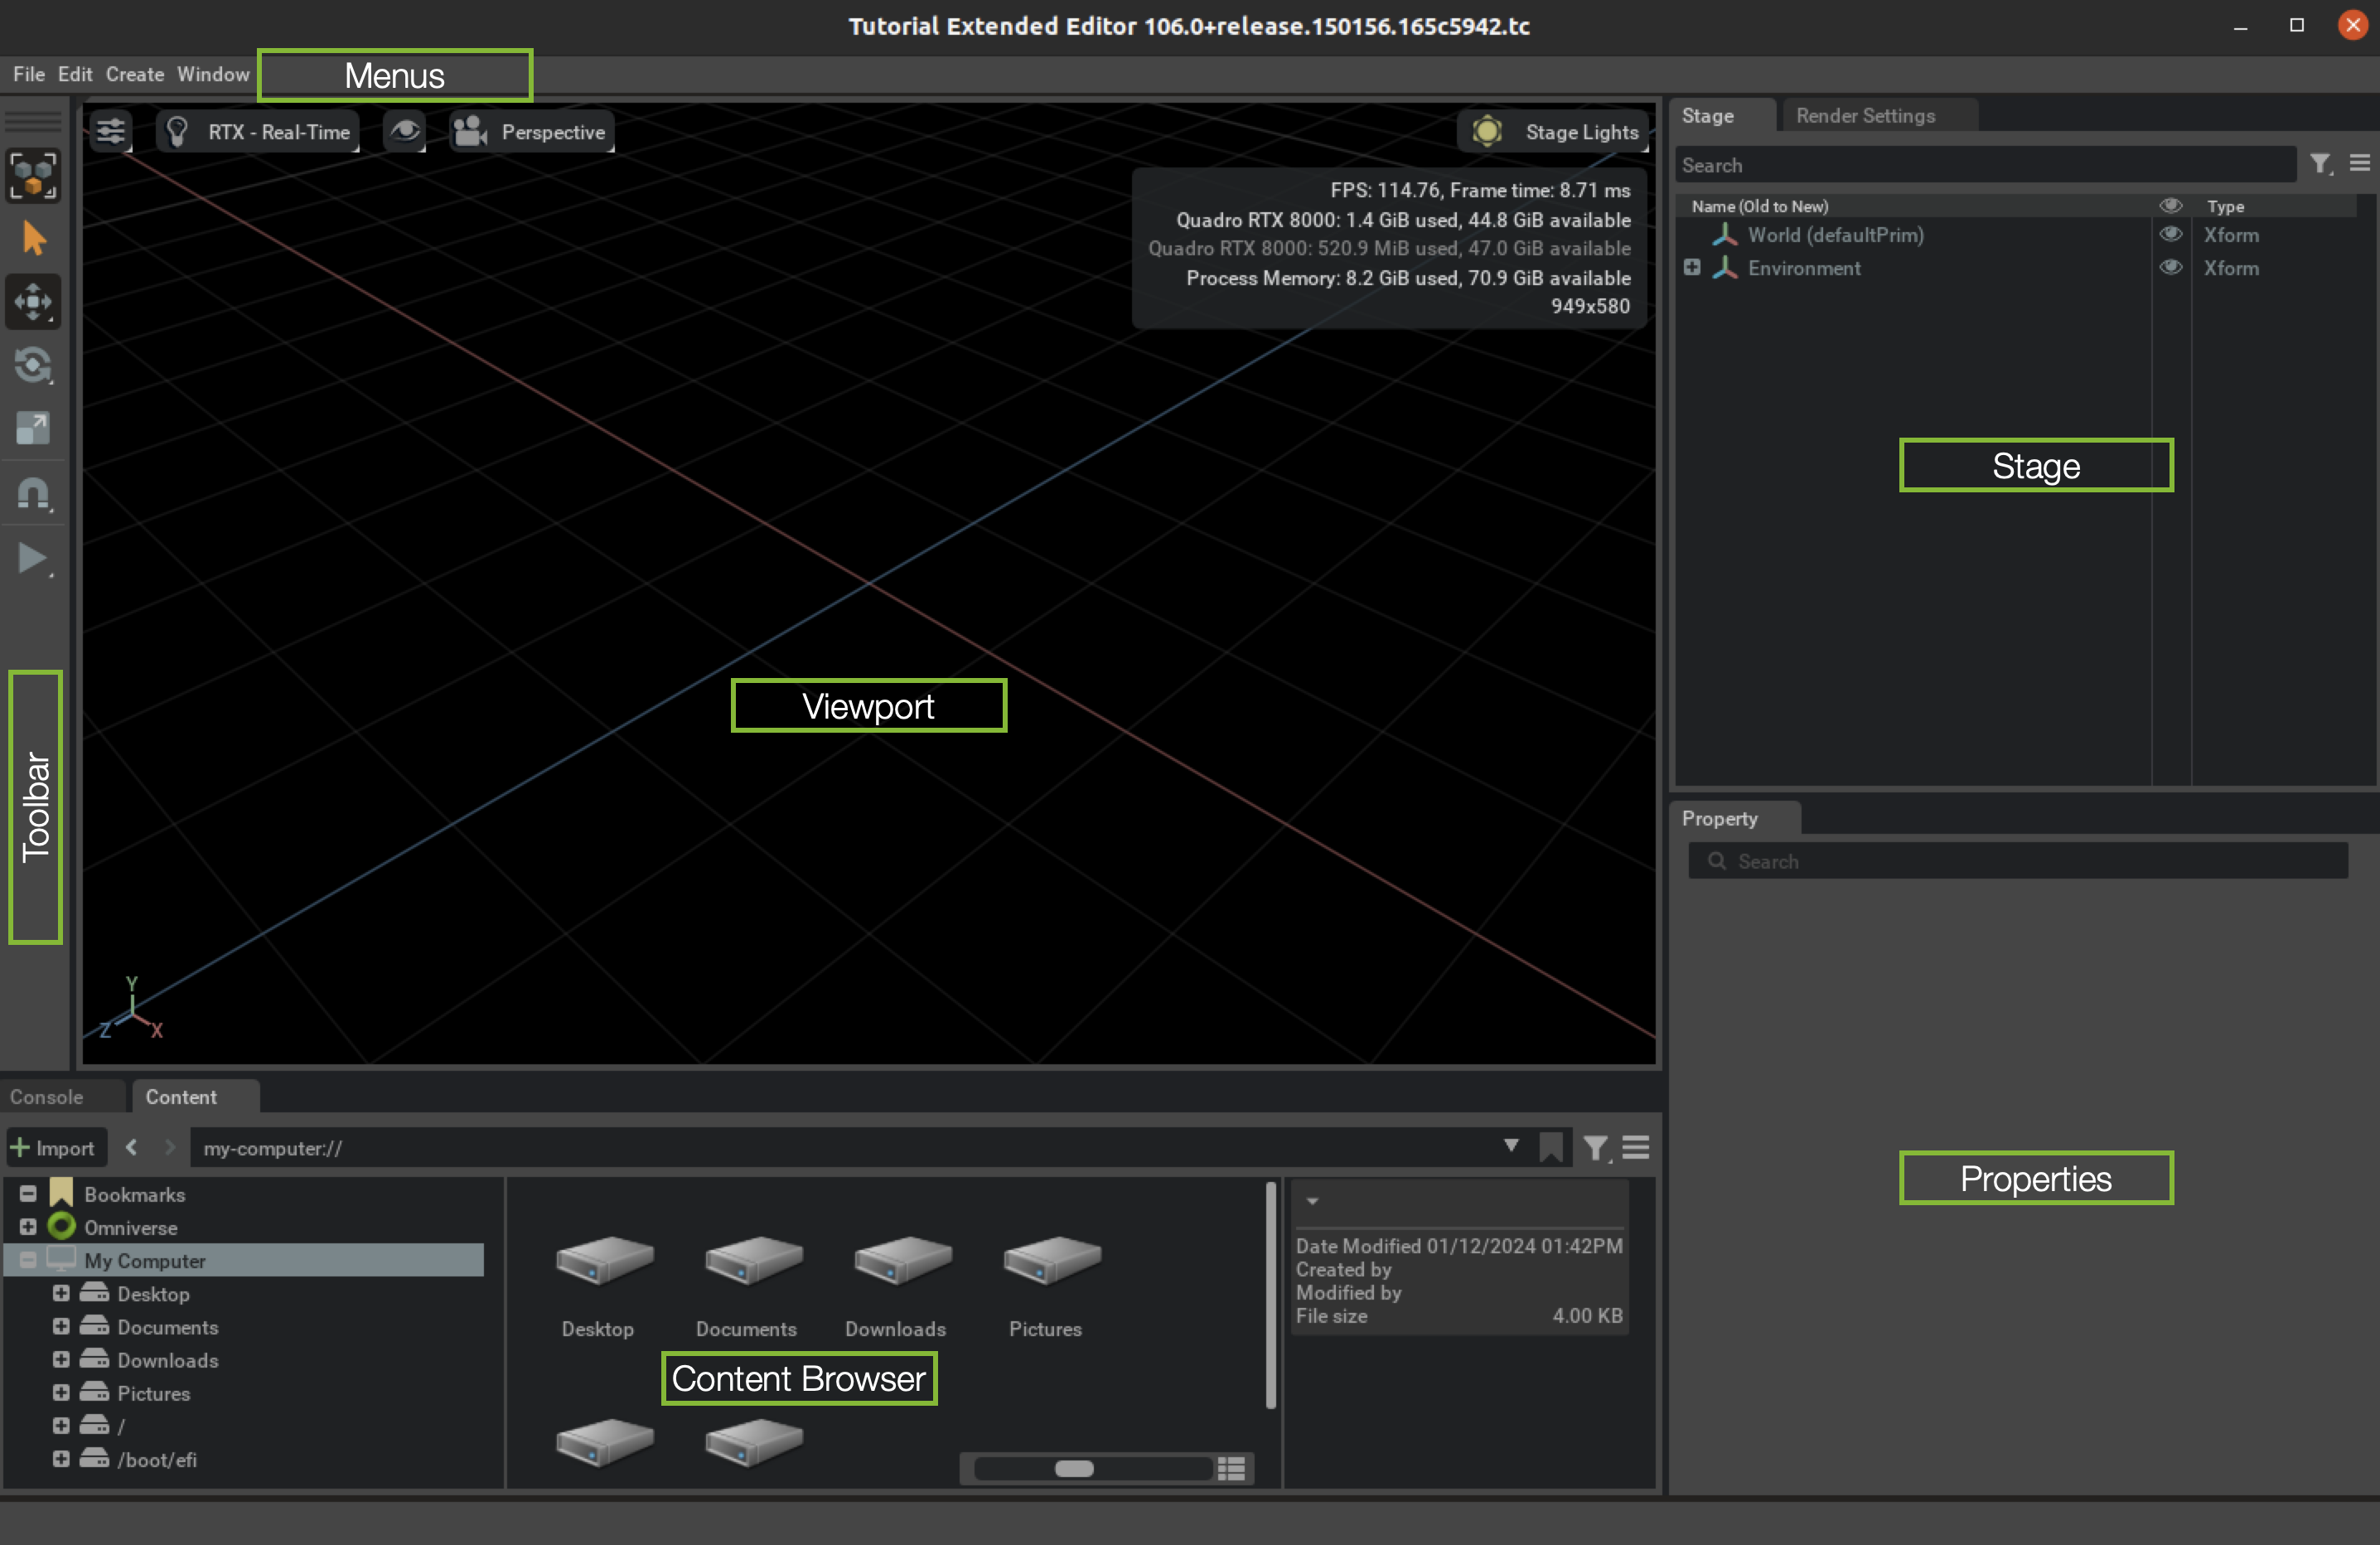
The default editor application is setup to serve as a basic starting point for typical editor applications. A non-exhaustive list of features includes:
Menus: A familiar menu structure for loading, saving, common scene operations, and the ability to control application windows.
Toolbar: The toolbar provides basic scene manipulation tools such as selection, translation, rotation, and scaling.
Viewport: The interactive viewport displays the loaded scene.
Stage Window: The stage window displays the USD stage hierarchy.
Content Browser: The content browser displays local and remote content for loading into the scene.
Property Window: The property window displays the properties of the selected object (e.g. transform, material, etc.).
To create a simple primitive in the scene:
From the menu, select
Create > Mesh > Cube.The cube will be created at the origin of the scene.
Observe that a new entry called
Cubeis added to the stage window.
2b - Default Editor Code Walkthrough#
Configuration:
All of the functionality enabled by default within the Base Editor Template is listed within the .kit application configuration file.
All dependencies are contained within the [dependencies] section of the .kit file with each dependency accompanied by a brief comment explaining its purpose.
Of note are some of the window and menu items listed in the section 2a above:
"omni.kit.viewport.window" = {}  # Load the actual ViewportWindow extension
...
"omni.kit.menu.create" = {} # Create menu
"omni.kit.menu.edit" = {}  # Edit menu
"omni.kit.menu.file" = {}  # File menu
...
"omni.kit.window.content_browser" = {} # Add content browser to UI
"omni.kit.window.property" = {} # Property editor window
"omni.kit.window.stage" = {}  # Stage tree
...
"omni.kit.window.toolbar" = {}  # Manipular Toolbar
In addition, there are a number of extensions that are loaded by default that provide functionality for the editor such as:
"omni.kit.manipulator.camera" = {}  # Load the camera-manipulator (navigation)
"omni.kit.manipulator.prim" = {}  # Load the prim-manipulator (translate, rotate, scale)
"omni.kit.manipulator.selection" = {}  # Load the selection-manipulator (selectable prims)
"omni.kit.material.library" = {} # Create and assign materials.
...
"omni.physx.stageupdate" = {} # Physics runtime support - will pull in physx dependencies.
"omni.rtx.settings.core" = {} # RTX Settings
"omni.uiaudio" = {} # for audio playback.
"omni.warp" = {} # Warp support
Behavior:
Unlike the Service and USD Explorer Templates the behavior of the Base Editor does not rely on a setup extension. Instead, it relies only on the default behavior of the extensions it lists as dependencies.
It is worth noting that some extensions are brought in as dependencies to extensions listed in the .kit file.
3. Extend the Editor#
With a solid understanding of the default application, we can now begin extending the capabilities of the editor. We will accomplish this in 3 parts:
3a. Create a simple user interface to generate scene elements.
3b. Integrate actions and hotkeys for efficient interaction.
3c. Integrate our new UI feature into the existing menu structure.
3a - Scene Manipulation UI#
First we will need to create a new extension that will allow us to manipulate the scene. For the purpose of this tutorial we will create a user interface to create a random assortment of simple primitives. We will start with the Python UI Extension Template.
Create a new extension using the template new tool
Linux:
./repo.sh template new
Windows:
.\repo.bat template new
Follow the prompt instructions, choosing:
? Select what you want to create with arrow keys ↑↓: Extension
? Select desired template with arrow keys ↑↓: Python UI Extension
? Enter name of extension .py file [name-spaced, lowercase, alphanumeric]: tutorial.editor.random_prim_ui
? Enter extension_display_name: Random Prim UI
? Enter version: 0.1.0
Add tutorial.editor.random_prim_ui to the .kit file
Within the .kit file for the editor application (/source/apps/tutorial.editor.kit), add the new extension to the [dependencies] section:
[dependencies]
"tutorial.editor.random_prim_ui" = {}
Python Dependencies
Open the newly created extension file (/source/extensions/tutorial.editor.random_prim_ui/tutorial/editor/random_prim_ui/extension.py) and add the following python dependencies:
import omni.kit.commands
import omni.usd

from pxr import Sdf, Usd
import random
Build and Launch the Editor
After adding the new tutorial.editor.random_prim_ui to the kit file and adding the python dependencies, build and launch the editor to see the new extension in action. We will make the remaining changes to this extension while taking advantage of the hot-reloading feature of the Kit SDK.
Linux
./repo.sh build
Windows
.\repo.bat build
After the build is complete, we can launch the editor:
Linux
./repo.sh launch
Windows
.\repo.bat launch
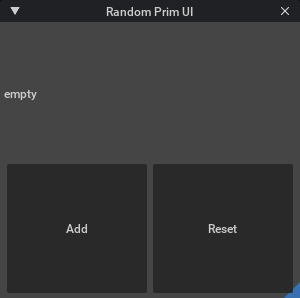
Once the application launches we will see the new extension enabled within the application UI. The extension will be in it’s default state at this point.

Modify UI Elements
We can now begin adding UI elements to the extension. Within extension.py replace the code defining the UI (starting at self._window) with the following:
self._window = ui.Window("Random Prim UI", width=300, height=150)
with self._window.frame:
   with ui.VStack():
      label = ui.Label("", height=ui.Percent(15), style={"alignment": ui.Alignment.CENTER})

      def on_click():
         step = self._step_size_model.as_int
         self._count += step
         label.text = f"count: {self._count}"

      def on_reset():
         self._count = 0
         label.text = "empty"


      with ui.HStack():
         ui.Button("Add", clicked_fn=on_click)
         ui.Button("Reset", clicked_fn=on_reset)

      with ui.HStack(height=0):
         ui.Label("Step Size", style={"alignment": ui.Alignment.RIGHT_CENTER})
         ui.Spacer(width=8)
         self._step_size_model = ui.IntDrag(min=1, max=10).model
         self._step_size_model.set_value(1)

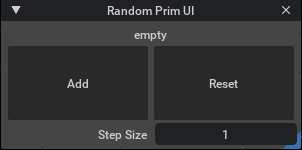
You’ll notice the size and styling of the UI window has changed. In addition you will notice a step size element has been added to the UI. This element will allow us to control the number of primitives added to the scene with each click of the “Add” button by either dragging or typing a value. For now it increments the count.
Generate and Reset Simple Primitives
Next we will replace some_public_function with the following code:
def scatter_cones(quantity: int):

    usd_context = omni.usd.get_context()
    stage = usd_context.get_stage()

    for _ in range(quantity):
        prim_path = omni.usd.get_stage_next_free_path(
            stage,
            str(stage.GetPseudoRoot().GetPath().AppendPath("Cone")),
            False
        )

        omni.kit.commands.execute(
            "CreatePrimCommand",
            prim_path=prim_path,
            prim_type="Cone",
            attributes={"radius": 50, "height": 100},
            select_new_prim=True,
        )

        bound = 500
        rand_x = random.uniform(-bound, bound)
        rand_z = random.uniform(-bound, bound)

        translation = (rand_x, 0, rand_z)
        omni.kit.commands.execute(
            "TransformPrimSRT",
            path=prim_path,
            new_translation=translation,
        )
And add this function call to the on_click function. The on_click function should now look like this:
def on_click():
   step = self._step_size_model.as_int
   self._count += step
   label.text = f"count: {self._count}"
   scatter_cones(step)
Next we will need to add a reset function to the on_reset function. Add the following code after the scatter_cones function:
def clear_cones():
    usd_context = omni.usd.get_context()
    stage = usd_context.get_stage()

    # Empty list to hold paths of matching primitives
    matched_cones = []

    # Iterate over all prims in the stage
    for prim in stage.TraverseAll():
        # Check if the prim's name starts with the pattern
        if prim.GetName().startswith("Cone"):
            matched_cones.append(prim.GetPath())

    # Delete all the Cone prims
    omni.kit.commands.execute("DeletePrims", paths=matched_cones)
And add the function call to the on_reset function. The on_reset function should now look like this:
def on_reset():
   self._count = 0
   label.text = "empty"
   clear_cones()
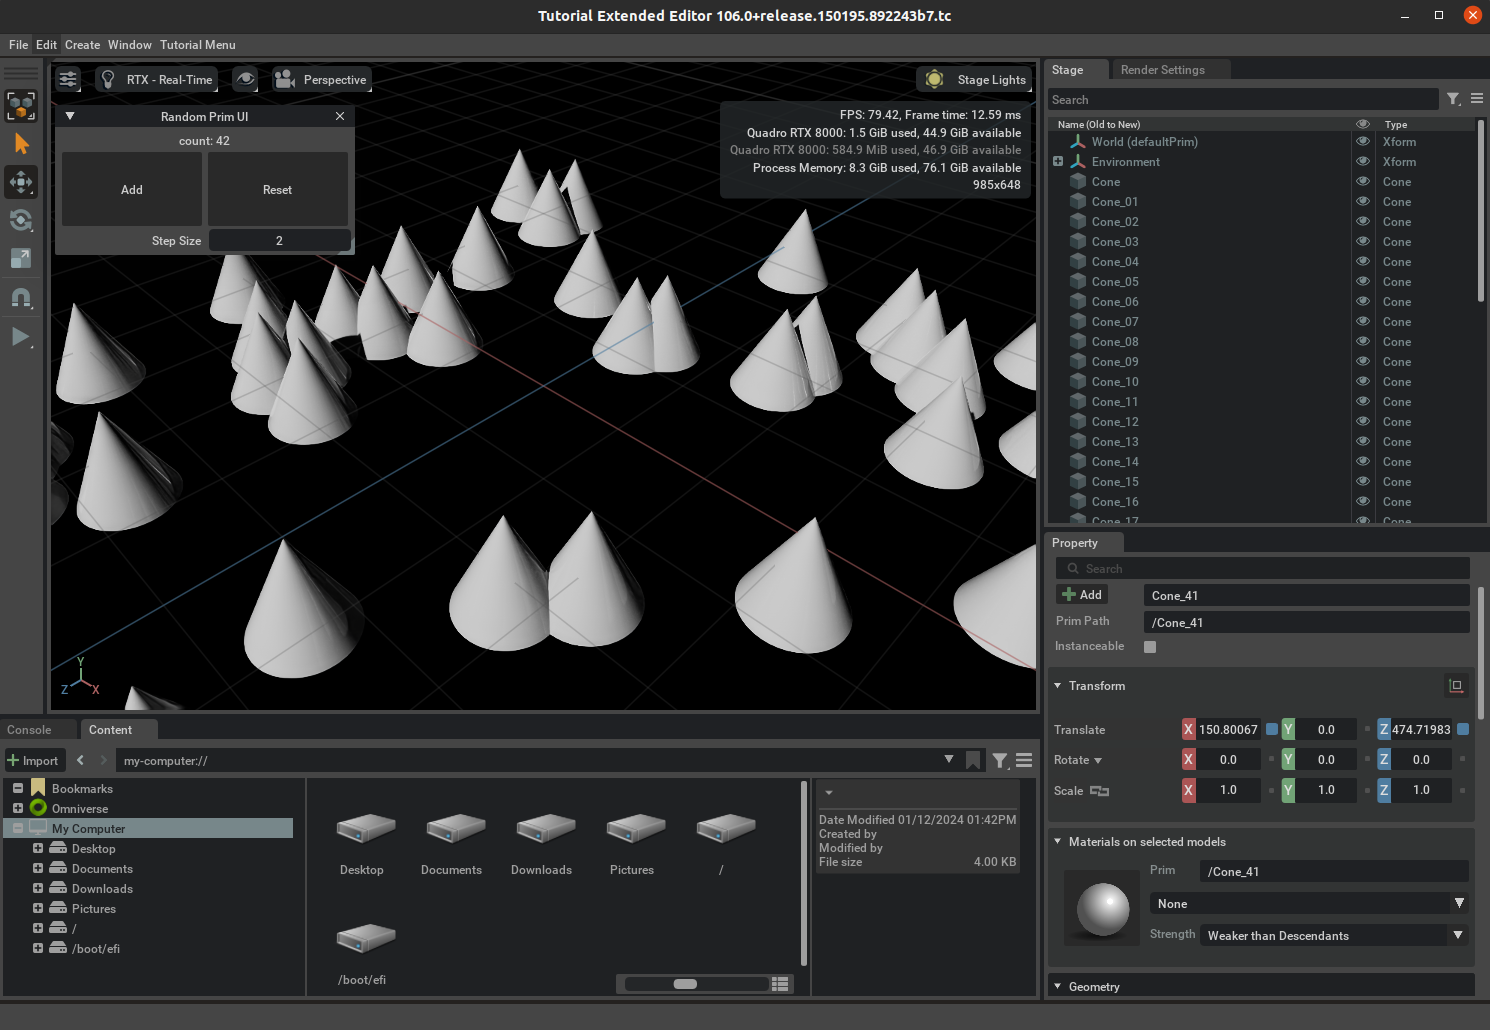
Testing our new functionality we can see that the “Add” button will now add a number of cones to the scene equal to the value in the step size field. The “Reset” button will remove all cones from the scene.
3b - Actions and Hotkeys#
In some instances it is helpful to create actions to quickly access predefined functionality and for efficiency bind them to hotkeys. To achieve this we will add another extension to the editor application, this time using the Basic Python Extension Template.
** Create a new extension using the template new tool**
Linux:
./repo.sh template new
Windows:
.\repo.bat template new
Follow the prompt instructions, choosing:
? Select what you want to create with arrow keys ↑↓: Extension
? Select desired template with arrow keys ↑↓: Basic Python Extension
? Enter name of extension .py file [name-spaced, lowercase, alphanumeric]: tutorial.editor.actions
? Enter extension_display_name: Tutorial Editor Actions
? Enter version: 0.1.0
Add tutorial.editor.actions to the .kit file
Within the .kit file for the editor application (/source/apps/tutorial.editor.kit), add the new extension to the [dependencies] section:
[dependencies]
"tutorial.editor.actions" = {}
Extension Dependencies
For this extension we will need to add the following dependencies to the extension.toml file (/source/extensions/tutorial.editor.actions/config/extension.toml):
[dependencies]
"tutorial.editor.random_prim_ui" = {}  # UI Extension
"omni.kit.actions.core" = {}
"omni.kit.hotkeys.core" = {}
Python Dependencies
Open the newly created extension file (/source/extensions/tutorial.editor.actions/tutorial/editor/actions/extension.py) and add the following python dependencies:
import omni.kit.actions.core
import omni.kit.hotkeys.core as hotkeys
After adding extensions dependencies to .kit and extension.toml files, it is good practice to build the application.
Linux
./repo.sh build
Windows
.\repo.bat build
Register and Deregister Actions and Hotkeys
With the extension file (/source/extensions/tutorial.editor.actions/tutorial/editor/actions/extension.py) we will now setup the actions and hotkeys for the new extension. Replace the contents of the on_startup and on_shutdown functions with the following code:
def on_startup(self, ext_id):
   # add actions
   self._ext_name = omni.ext.get_extension_name(ext_id)
   register_actions(self._ext_name)

   # add hotkeys
   register_hotkeys(self._ext_name)

   print("[tutorial.editor.actions] MyExtension startup.  Registered Actions and Hotkeys")
def on_shutdown(self):
   deregister_hotkeys(self._ext_name)
   deregister_actions(self._ext_name)
   print("[tutorial.editor.actions] MyExtension shutdown.  Deregistered Actions and Hotkeys")
Add required helper functions
Replace some_public_function with the following code:
def register_actions(extension_id: str):
   import tutorial.editor.random_prim_ui  # Change to the name of your extension
   action_registry = omni.kit.actions.core.get_action_registry()
   actions_tag = "My Actions"

   action_registry.register_action(
      extension_id,   # extension_id: The id of the source extension registering the action.
      "scatter_8_cones",  # action_id: Id of the action, unique to the extension registering it.
      lambda: tutorial.editor.random_prim_ui.scatter_cones(8),  # The Python object called when the action is executed. (Change to use the name of your extension)
      display_name="Scatter 8 Cones",  # The name of the action for display purposes.
      description="Scatter 8 Cones in random positions",  # A brief description of what the action does.
      tag=actions_tag,  # Arbitrary tag used to group sets of related actions.
   )

def deregister_actions(extension_id: str):
   action_registry = omni.kit.actions.core.get_action_registry()
   action_registry.deregister_all_actions_for_extension(extension_id)


def register_hotkeys(extension_id: str):
   hotkey_registry = hotkeys.get_hotkey_registry()
   action_registry = omni.kit.actions.core.get_action_registry()
   ext_actions = action_registry.get_all_actions_for_extension(extension_id)

   hotkey_registry.register_hotkey(
      hotkey_ext_id=extension_id,
      key="CTRL+8",
      action_ext_id=ext_actions[0].extension_id,
      action_id=ext_actions[0].id,
   )


def deregister_hotkeys(extension_id: str):
   hotkey_registry = hotkeys.get_hotkey_registry()
   hotkey_registry.deregister_all_hotkeys_for_extension(extension_id)
4. Cleanup#
Before continuing to the next section, it is recommended to clean up the applications, extensions, and any other repository changes that were created during this exploration.
Either revert all local changes or remove your existing repository/project entirely. Then, recreate it by cloning the repository again or by running the new project script from the Kit SDK.
Typical cleanup steps include:
Revert changes to top level
premake5.luafileRevert changes to
repo.tomlDelete the
source/directoryDelete the
_build/directory, or run./repo.sh build -cor.\repo.bat build -c
Additional Considerations#
Loading USD Content: In order to eliminate the need for an asset dependency the entirety of this tutorial has used simple primitives to generate scene geometry. However, similar operations can be done with more complex USD content loaded into the stage. To load a USD file into the stage, the following code can be used:
# Load a USD file
stage = omni.usd.get_context().get_stage()
asset_stage_path = "/World/Asset"
asset_path = "/path/to/usd_asset"
asset_prim = stage.DefinePrim(asset_stage_path, "Xform")
asset_prim.GetReferences().AddReference(asset_path)