User Guide#
UI#
Viewport UI
In the center of the viewport a small UI can be found that allows the user to perform a few basic functions.
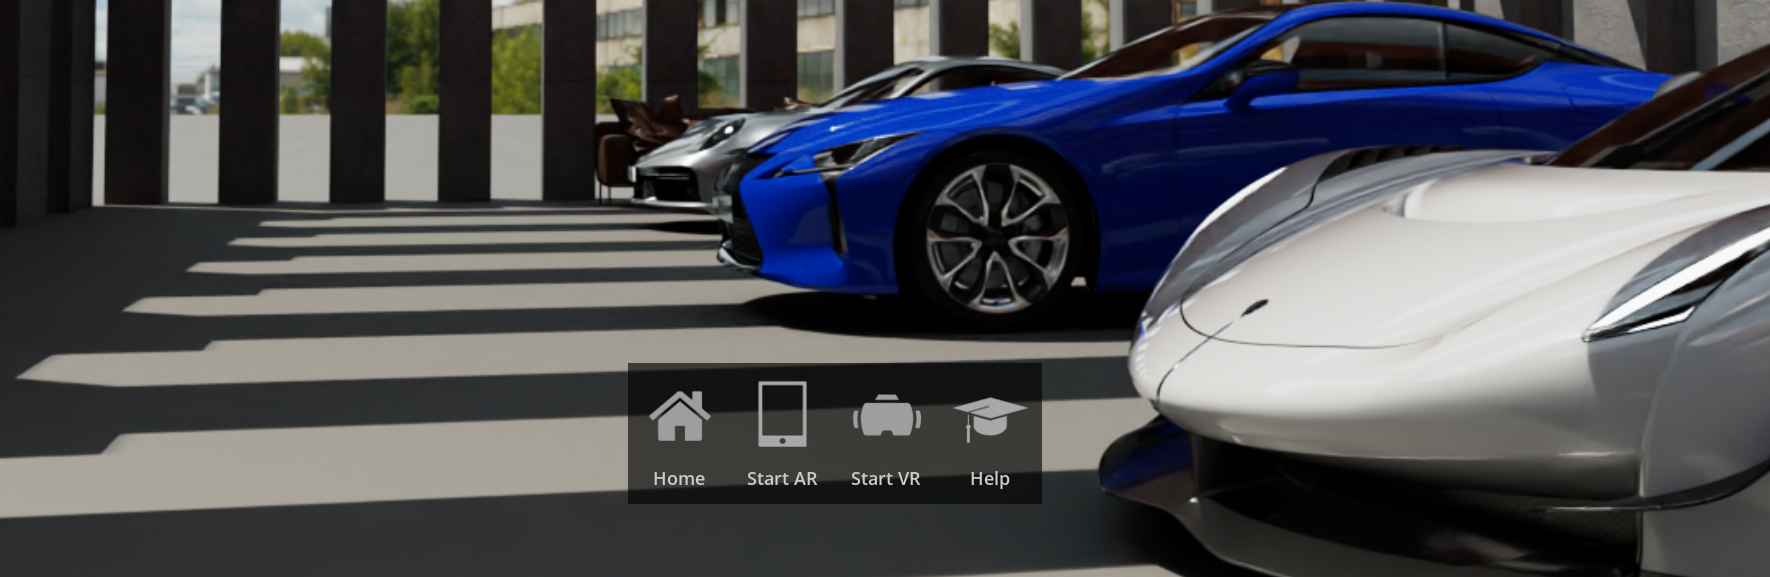
Home - Returns the active camera to the default spawn position in the stage
Start/Stop Tablet AR - Enable or Disable the tablet AR experience
Start/Stop VR - Enable or Disable the VR experience
Help - Opens a web browser directly to the Omniverse Create XR documentation
General Settings#
General#
HMD View
Allows the user to select between different viewing modes.
SteamVR
SimulatedXR
Desktop View
Allows the user to select which elements of the VR display are shown on your desktop display. (Same as “Mirror Display Mode” in Advanced Settings)
Left Eye
Right Eye
Both Eyes
Spawn Point
Allows the user to select where they will spawn upon entering VR.
Active Camera - Spawn at the current location of the active camera in desktop mode
Custom Spawn Point - Spawn at the location of a chosen prim in the scene (see below)
Scene Origin - Spawn at the scene origin (X=0, Y=0, Z=0)
Path for Custom Spawn Point
Allows the user to select a custom prim in the scene to be used as the spawn point while using “Custom Spawn Point” above. Select a prim in the stage and press “Set”
Performance#
Performance and Quality Menu
See also Performance & Optimization
VR Mode allows the user to adjust the quality of rendering according to their computer’s performance capabilities and the scene’s needs. For best visual results, we recommend using Quality mode. Stage settings can be used to allow for special cases. If performance gets slower, switching to Balanced or Performance can help get a speedup.
Setting |
Description |
|---|---|
Quality |
Attempts to maximize image quality within VR, but still turns on some optimizations |
Balanced |
Keeps all materials while previwing VR, but sacrifices reflection and shadow quality |
Performance |
Only keeps solid materials, reduces secondary rays to minimize GPU time |
Stage |
Uses the stage’s render settings. |
Scaling Settings#
Scaling Factor Override A scale ratio (in meters) that is applied to the scene in order to change the perceived size of your environment. Requires “Apply Scaling Factor Override” to be turned on for this to be used. The lower the number, the greater your perceived size relative to your environment
Predefined Scaling Factor Overrides A number of pre-defined scales have been included if you wish to explore your environment in one of any number of common scale factors. Requires “Apply Scaling Factor Override” to be turned on for this to be used.
Meters
Centimeters
Millimeters
Inches
Feet
Yards
Other
Apply Scaling Factor Override Must be checked in order to override scene scale. If unchecked, scale will be taken from scene data.