Replicator Materials
Overview
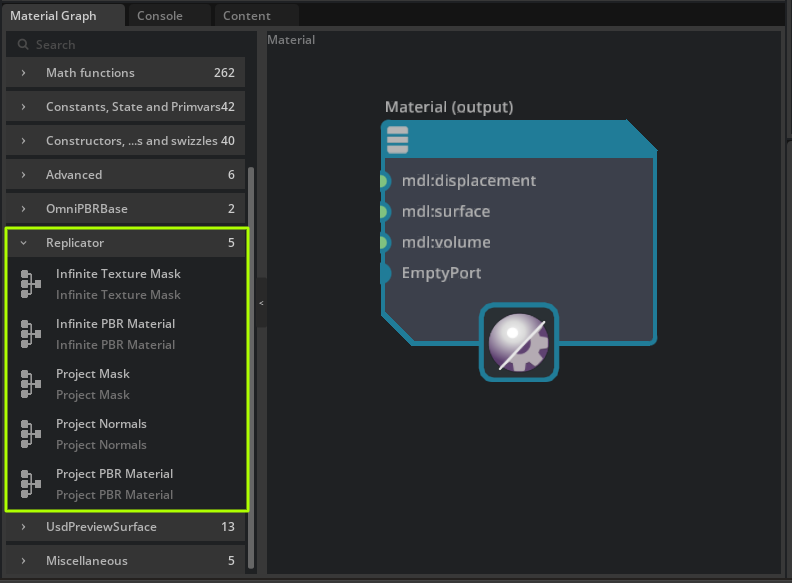
Replicator now offers custom materials built specifically for synthetic data workflows. These new materials can be viewed in the Material Graph, but are also used by some replicator functions by default. If you open the Material Graph tab, you’ll see a new “Replicator” section at the bottom of the list of available nodes. These can be used within Material Graphs, or constructed programmatically, to create various material effects.
Projection Materials
The projection material and replicator projection material function offers a way to project material features onto mesh objects, similar to a decal. The individual nodes themselves can be used when constructing your own projection materials. Below is a brief description of the nodes:
Project PBR Material - Projects an image onto a surface. This node takes diffuse, normals, roughness, metal. The opacity is taken from the diffuse texture. This material is used in the
rep.modify.projection_materialfunction by default.Project Mask - Performs the same projection technique, but the input is a single greyscale mask, and the output is a float, not a material. This is not a material but a helper node to be used in conjunction with other materials using the Material Graph.
Project Normals - Projects normal only surface details. Also not a material, but to be used with other materials using Material Graph.
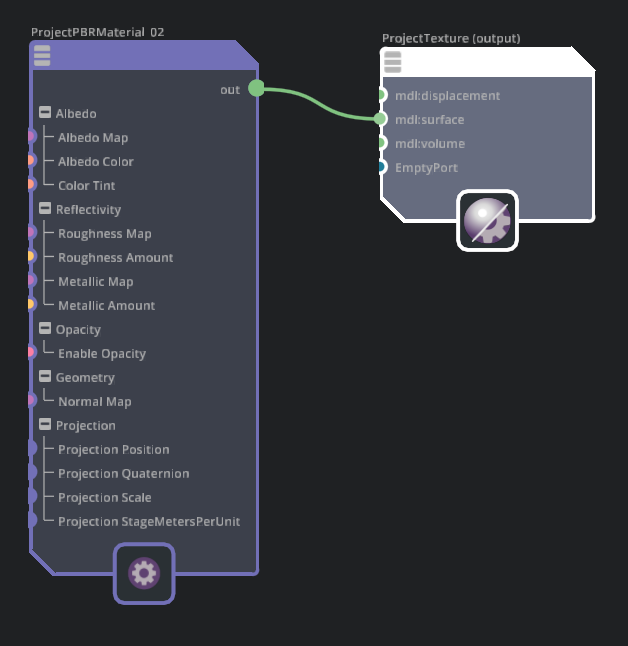
Projection PBR Material
Albedo Map - Diffuse (color only) texture input
Albedo Color - Used when there is no diffuse texture assigned
Color Tint - Multiplies this color onto the albedo color, or albedo texture Map
Roughness Map - Roughness texture input
Roughness Amount - Roughness values used when there is no assigned roughness texture
Metallic Map - Metallic texture input
Metallic Amount - Metallic value used when no texture assigned
Enable Opacity - Boolean value to enable or disable opactiy. Opacity is taken from the Albedo Map in the Alpha channel
Normal Map - Normal map input texture
Projection Position - Primvar used to pass the projection position to the material this is created automatically by the
rep.create.projection_materialProjection Quaternion - Primvar used to pass the projection rotation to the material this is created automatically by the
rep.create.projection_materialProjection Scale - Primvar used to pass the projection scale to the material this is created automatically by the
rep.create.projection_materialProjection StageMetersPerUnit - Primvar used to pass the scene unit scale to the material this is created automatically by the
rep.create.projection_material
Use of rep.create.projection_material and rep.modify.projection_material
With this new material projection technique we’ve provided a replicator function to generate segmentable projections onto meshes. From a high level, what the node does, is it creates a copy of the base mesh geometry, expands it slightly along the vertex normals and applies a projection material to it. This way, we can project material details ontop of existing meshes that can segment in AOVs.
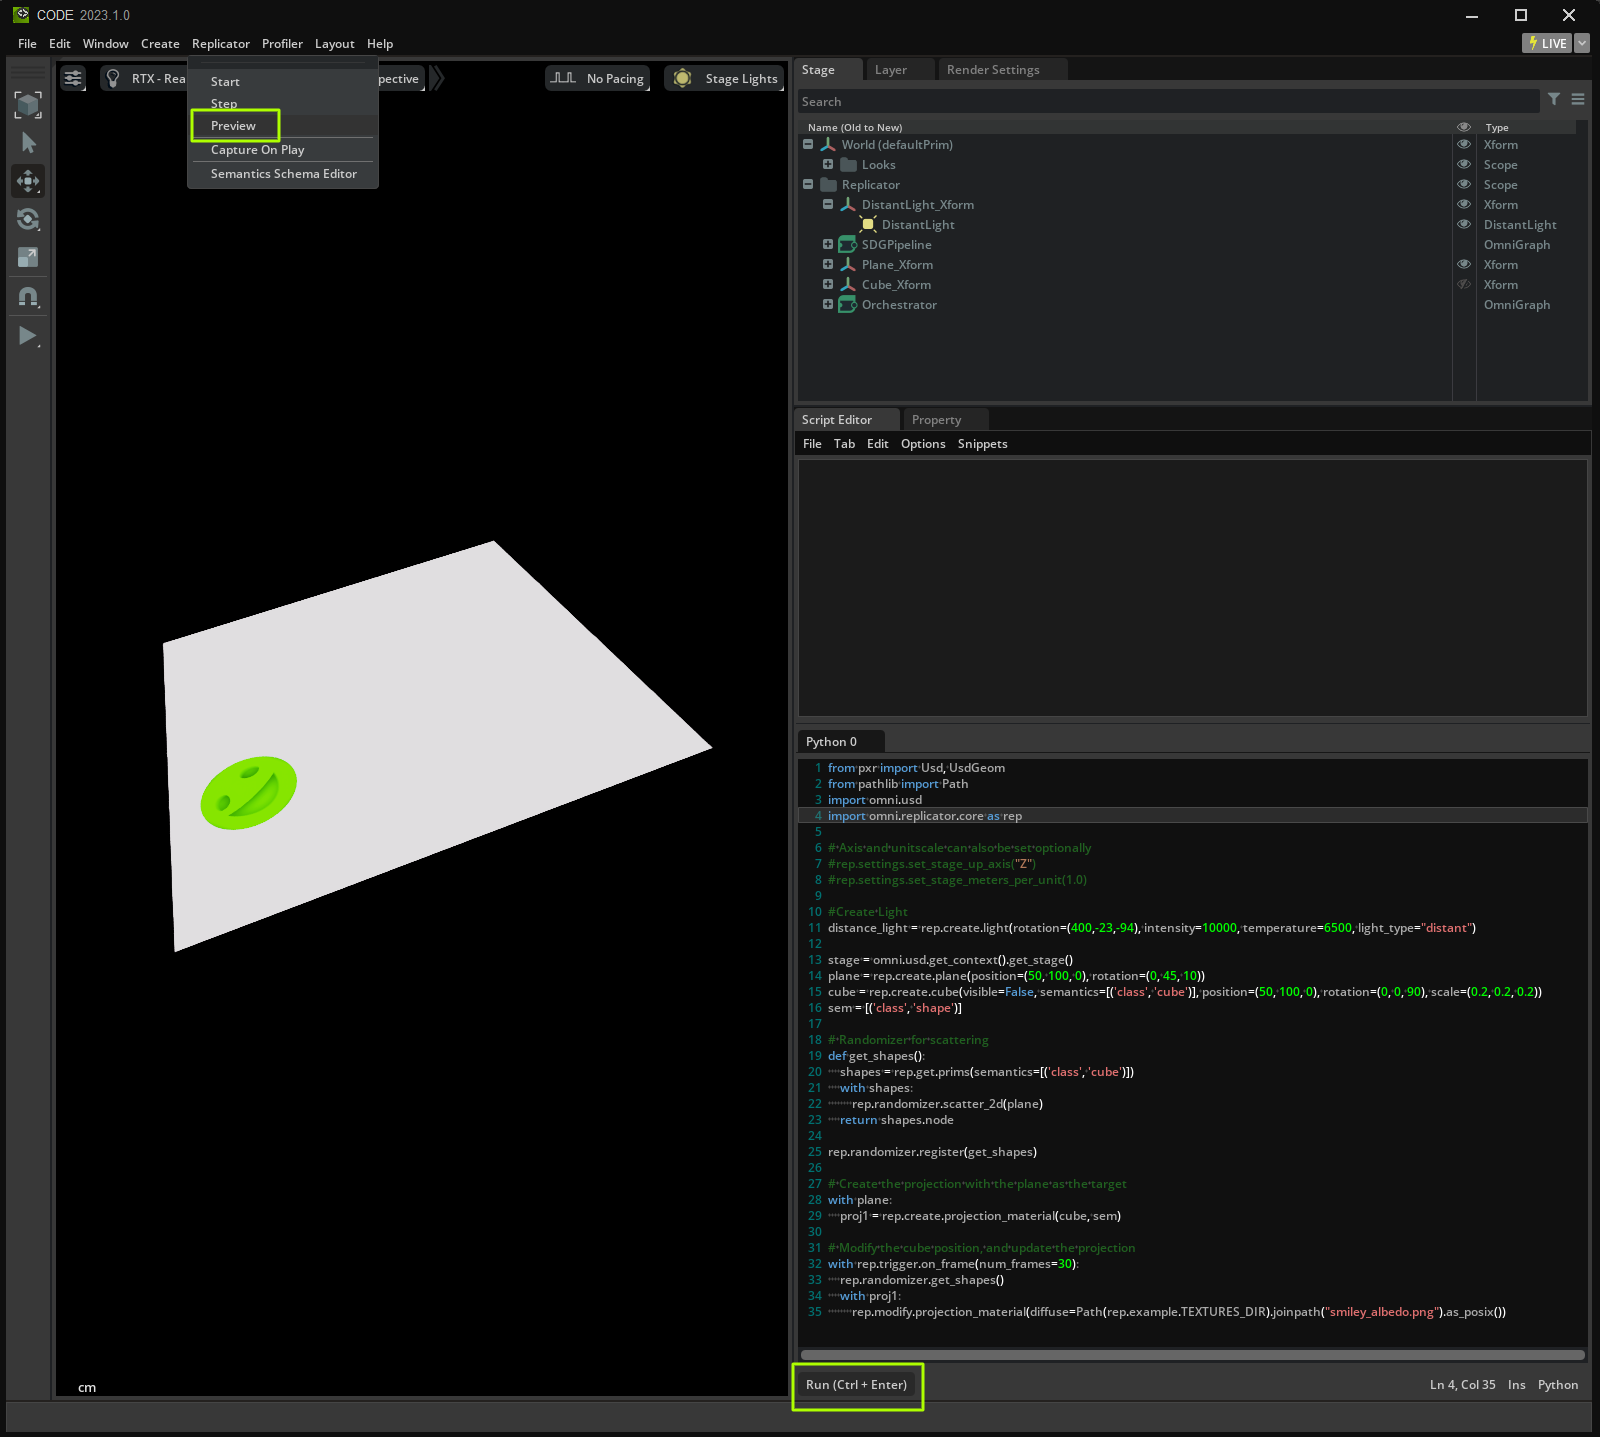
Below is a simple test example, demonstrating the use of the projection node. Enter the script into the script editor, click the Run (Ctrl + Enter) Button at the bottom of the script tab, and then, in the menu, select Replicator > Preview
from pxr import Usd, UsdGeom
from pathlib import Path
import omni.usd
import omni.replicator.core as rep

# Axis and unitscale can also be set optionally
#rep.settings.set_stage_up_axis("Z")
#rep.settings.set_stage_meters_per_unit(1.0)

#Create Light
distance_light = rep.create.light(rotation=(400,-23,-94), intensity=10000, light_type="distant")

stage = omni.usd.get_context().get_stage()
plane = rep.create.plane(position=(50, 100, 0), rotation=(0, 45, 10))
cube = rep.create.cube(visible=False, semantics=[('class', 'cube')], position=(50, 100, 0), rotation=(0, 0, 90), scale=(0.2, 0.2, 0.2))
sem = [('class', 'shape')]

# Randomizer for scattering
def get_shapes():
    shapes = rep.get.prims(semantics=[('class', 'cube')])
    with shapes:
        rep.randomizer.scatter_2d(plane)
    return shapes.node

rep.randomizer.register(get_shapes)

# Create the projection with the plane as the target
with plane:
    proj1 = rep.create.projection_material(cube, sem)

# Modify the cube position, and update the projection
with rep.trigger.on_frame(num_frames=30):
    rep.randomizer.get_shapes()
    with proj1:
        rep.modify.projection_material(diffuse=Path(rep.example.TEXTURES_DIR).joinpath("smiley_albedo.png").as_posix())
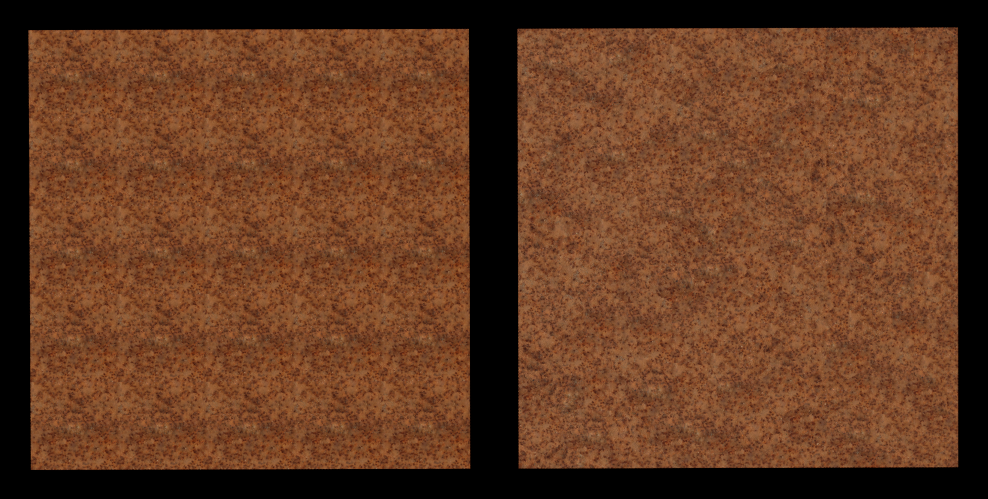
Infinite Tiling Materials
The “infinite” replicator materials are for breaking up repetitive texture tiling. Note that this technique is best used for stochastic, or natural textures with no strong structure. Ideal materials are things like, rust, gravel, tree bark, etc.
Infinite PBR Material - Takes PBR inputs, diffuse, normals, roughness, metal as inputs. Can be used by itself as this is a full MDL material.
Infinite Mask - Takes a greyscale mask as input, and performs the same breakup technique. The output is a float, and this node is intended to be used within a Material Graph.
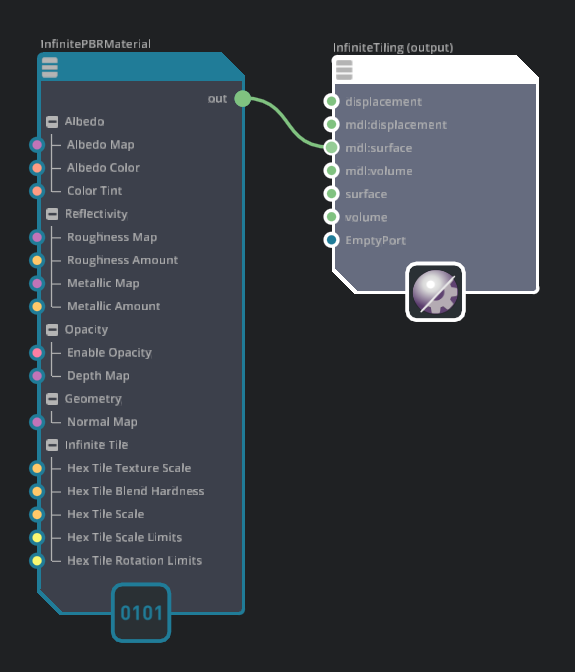
Infinite PBR Material
Albedo Map - Diffuse (color only) texture input
Albedo Color - Used when there is no diffuse texture assigned
Color Tint - Multiplies this color onto the albedo color, or albedo texture Map
Roughness Map - Roughness texture input
Roughness Amount - Roughness values used when there is no assigned roughness texture
Metallic Map - Metallic texture input
Metallic Amount - Metallic value used when no texture assigned
Enable Opacity - Boolean value to enable or disable opactiy. Opacity is taken from the Albedo Map in the Alpha channel
Depth Map - A greyscale displacement map. This is used to sort and blend details of the texture at the borders of the hexagonal tiles used to break up the texture.
Normal Map - Normal map input texture
Hex Tile Texture Scale - Global texture scale
Hex Tile Blend Hardness - The blending range between the hex tile boundaries
Hex Tile Scale - The size of the hex tiles created by the material.
Hex Tile Scale Limits - The range of random scale applied to each hex tile.
Hex Tile Rotation Limits - The rotation range used in the randomization in each hex tile.