Hello USD Stage
10 minutes
Overview
In this Universal Scene Description (OpenUSD) tutorial, you will use the USD Python API to write code that creates a basic Stage. You will also familiarize yourself with USDView where you will load a Stage to visualize and inspect it as well as use USDView’s built-in Python interpreter to create your first Stage.
Prerequisites
Follow the USDView Quickstart to install USDView.
USDView/USD 22.11+ is required.
Learning Objectives
Create a Stage using the USD Python API
Explore the USDView interface
Interact with the USDView Python interpreter window
In this tutorial:
Load your first USD Stage in USDView
Familiarize yourself with USDView and the Stage
Create your first Stage
1. Load your first USD Stage in USDView
In this section, you will open an existing USD stage in USDView in order to visualize and explore its contents.
Open USDView.
Click .
In the file dialog window, locate the file
share/usd/tutorials/traversingStage/HelloWorld.usdain your USDView installation. The USDView Quickstart has detailed steps on how to locate the tutorial content. Alternatively, if you built USD from the Github repository, you can find the file atUSD/extras/usd/tutorials/traversingStage/HelloWorld.usda.Select the
HelloWorld.usdafile.Click the Open button.
You should see the file path printed in the title bar of the USDView window and a blue sphere in the viewport. You have successfully loaded your first Stage in USDView.

2. Familiarize yourself with USDView and the Stage
USDView is a useful tool for visualizing USD Stages, inspecting the contents of a Stage, and debugging the composition of a Stage. In this section, you will learn some of the basics of USDView.
Click on the triangle icons within the Tree View to expand and view the hierarchy of the Stage’s contents.
Apart from
root, which is the pseudo-root present in every Stage, you should see two items:helloandworld.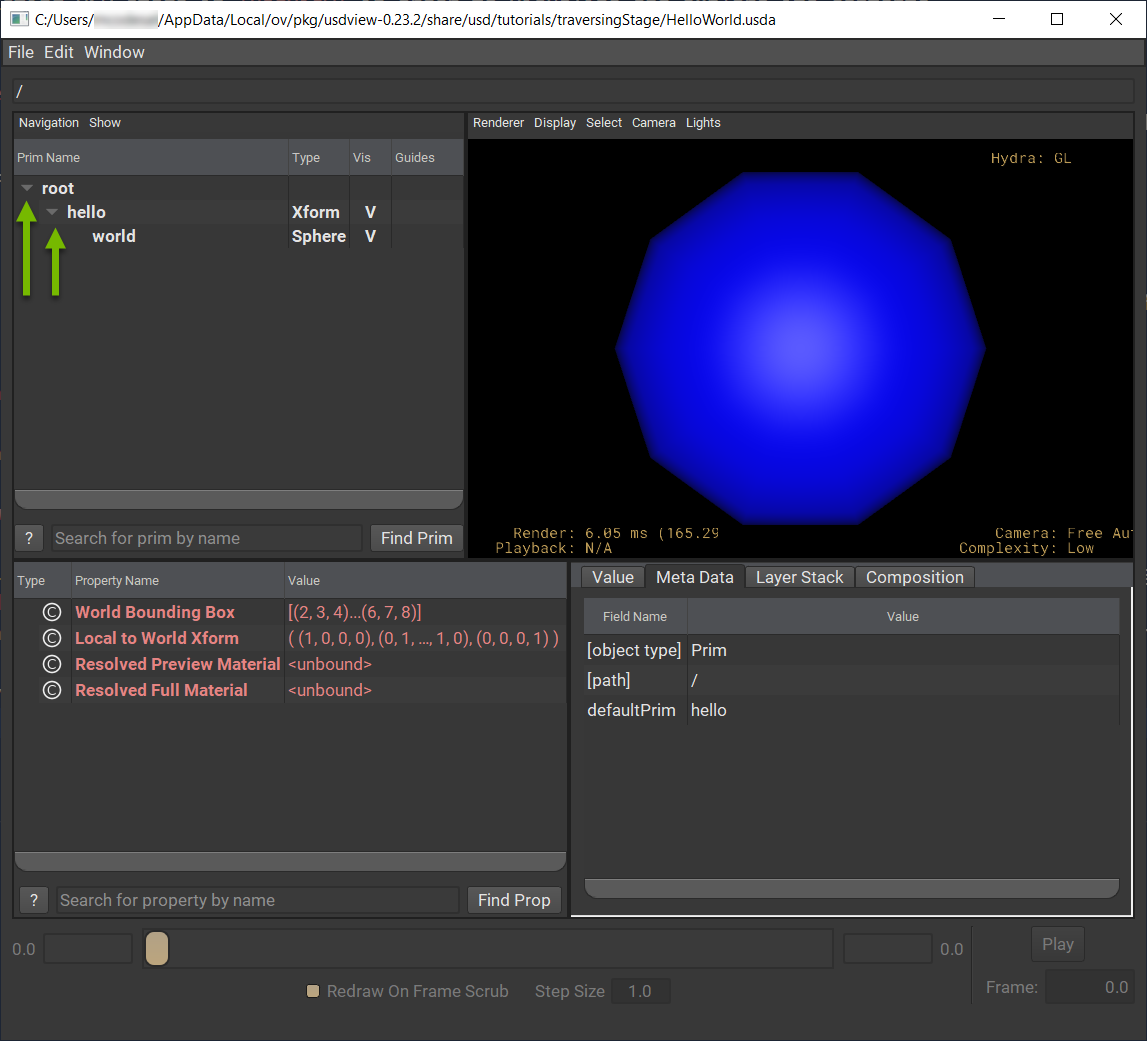
Click in the Viewport panel.
This will smooth the sphere in the viewport.
Let’s update your current selection. Select the
worlditem by clicking on it from the Tree View.In the next steps, you will access the current selection using Python code.
Open the Python interpreter window by clicking .
This is USDView’s embedded Python interpreter which you can use to interactively write code to inspect or edit the Stage. The interpreter has a built-in object called
usdviewApi. This object has a number of useful properties and methods. Some of which are listed immediately when the Interpreter window opens.Input
usdviewApi.primin the Interpreter window to see your current selection reflected in theviewportApiobject: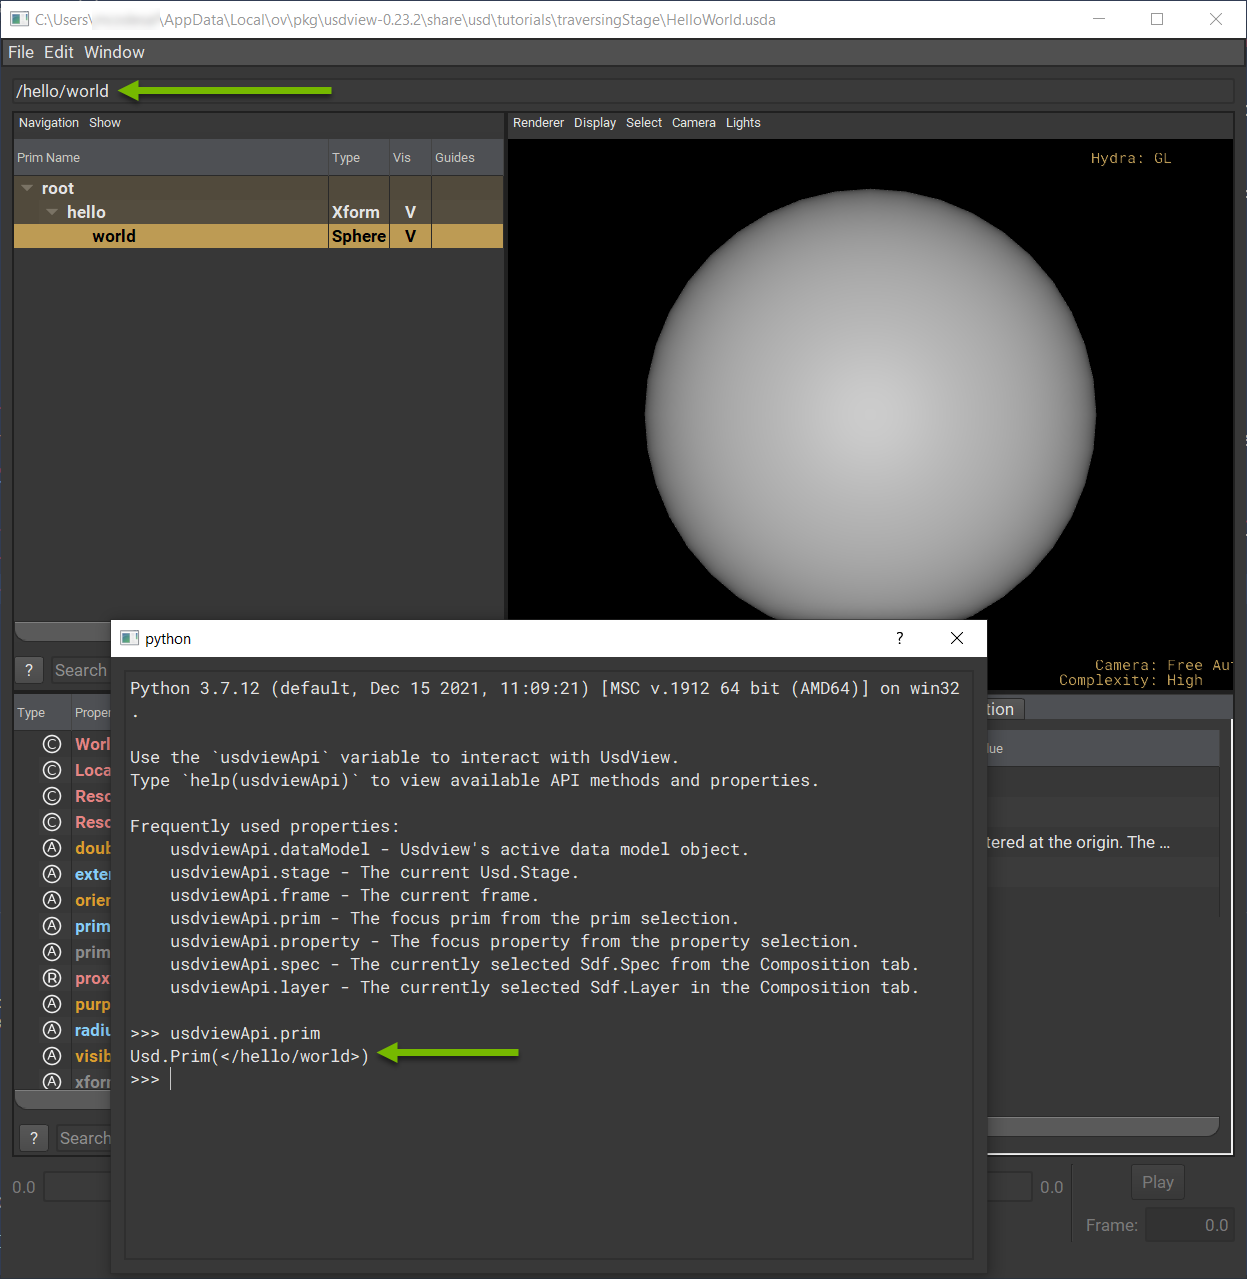
usdviewApi.primstores the first object from the current selection. Every object, or Prim as we call them in OpenUSD, can be identified by its Prim path. You can see that the field above the Tree View displays the Prim path as/hello/worldto reflect your currently selected Prim. The path printed for theUsd.Primobject in the Interpreter window matches to confirm that the same Prim is stored in theusdviewApi.primvariable.You can explore some of the member functions of the
Usd.Primobject returned byusdviewApi.primto learn more about that Prim. Run this code in the Interpreter window:>>> usdviewApi.prim.GetTypeName() 'Sphere' >>> usdviewApi.prim.GetAttribute('radius').Get() 2.0
You can see that this Prim is a
Spheretype, and it has aradiusattribute which is set to2.0unit.
3. Create your first Stage
Next, you will use the Usd.Stage class to create your first Stage.
In the Interpreter window, run this code to create a new USD Stage:
from pathlib import Path

from pxr import Usd

layer_path = str(Path.home() / "first_stage.usda")
print(f"USD Stage file path: {layer_path}")
stage = Usd.Stage.CreateNew(layer_path)
This will create a root USD layer (or file) in your user home directory and set it on the Stage. You created the Stage using the USD Python API, but USDView still has the
HelloWorld.usdaopen. Let’s open the file that you just created in USDView.From the Interpreter window, copy the file path you printed for your USD Stage file path.
Click .
In the file dialog window, paste file path you copied into the File name: field.
Click the Open button.
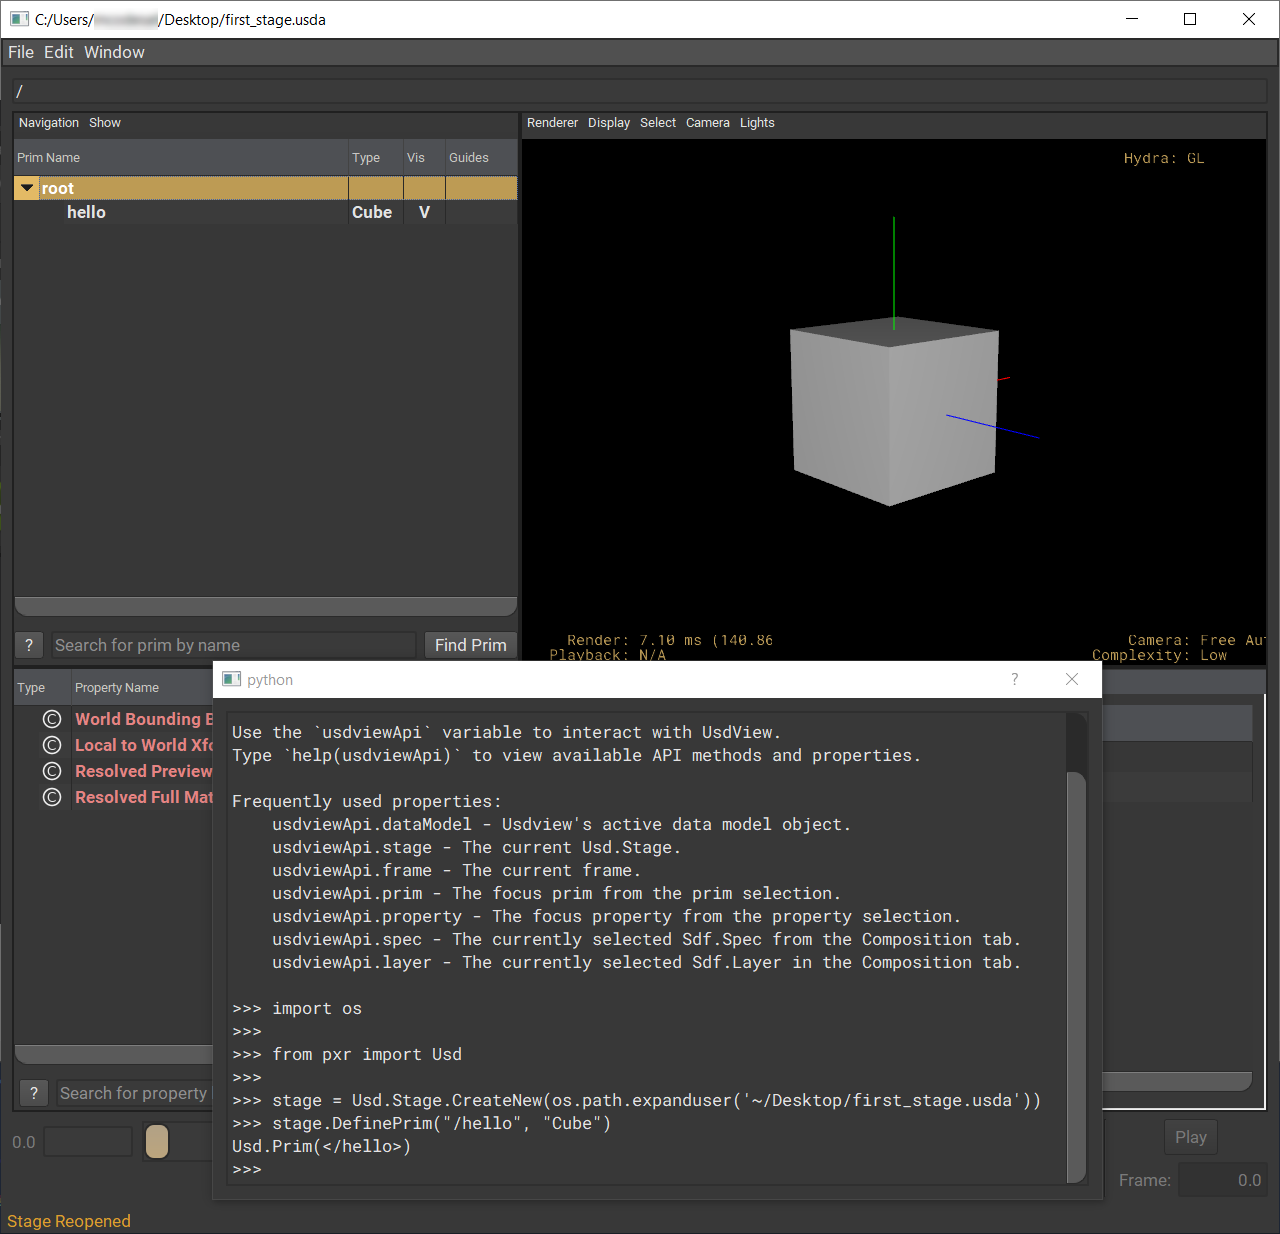
This will open an empty stage in USDView, but you can confirm that it loaded correctly by observing that the file path in the USDView window title is the one you selected.
To make the Stage a little more interesting, let’s add a Cube on the Stage. The Interpreter window still holds a history of the code that you ran so you can continue where you left off and run this:
stage.DefinePrim("/hello", "Cube")
Notice that USDView automatically updated and you should now see a Cube Prim in the viewport. You can orbit around with Alt+LMB (left mouse button) to get a better view. See the USDView documentation for more information about navigating within the viewport.
You updated the Stage in-memory, but your changes are not yet reflected in the backing file(s) (i.e.
first_stage.usda). Let’s save the Stage. Run this code in the Interpreter Window:stage.Save()
Because you saved your USD layer as a USDA file, you can open it in any text editor to inspect its contents. Open
first_stage.usdain a text editor and inspect its contents.Reminder
You can copy the file path for
first_stage.usdafrom the Interpreter window where you printed it out.It should look like this:
#usda 1.0

def Cube "hello"
{
}
Note
A good text editor to use is Visual Studio Code using the USD Language extension which adds syntax highlighting for USDA files.
Completed Code
For your reference, here is the completed script for creating your first stage.
Click to expand and see the full solution…
from pathlib import Path

from pxr import Usd

layer_path = str(Path.home() / "first_stage.usda")
print(f"USD Stage file path: {layer_path}")
stage = Usd.Stage.CreateNew(layer_path)
stage.DefinePrim("/hello", "Cube")
stage.Save()
Conclusion
Congratulations on completing the Hello USD Stage tutorial and creating your first USD Stage using the USD Python API. As a bonus, you got a little preview of defining Prims. You can continue with the Defining Your First Prims tutorial to learn about different types of Prims and ways to create them.