Zero Gravity
Overview
When in need of placing many objects in a natural way, the Zero Gravity tool can ease this burden. Placing books on a bookshelf with traditional no-physics mouse-drag approaches can require multiple iterations, objects can be placed in a wrong non-colliding way and frustratingly going through each other.
Zero Gravity adds temporary physics properties such as collision and gravity to help artists position assets in a controlled and natural way without the need to add explicitly add detailed physics behaviors.
Designed to use physics interactions while editing, users can now nudge, slide bump and push objects into position. Making a shelf full of doodads is now as easy as click and drag.
ZeroGravity is a Kit extension loaded by default immediately available to use.
Note
The Zero Gravity tool only works on assets with geometry.
Set Up
Enable the Extension
Using the Omniverse Zero Gravity Tool begins with enabling the extension.
Check if Enabled
You can quickly see if the extension is already loaded by looking at the toolbar.
If your toolbar displays with the above icon appearing; the Zero Gravity extension is enabled.
Note
Omniverse USD Composer has the Zero Gravity Extension enabled by default.
Enable
To enable the extension
Navigate to
window > extensionsIn the search bar enter
Zero GravityLocate the Zero Gravity extension and select it.
Select the
Enabledtoggle to enable the extension.Select the
Check Marknext to auto-load to Load the Extension Automatically on App Start if desired.Close the Extensions Panel.
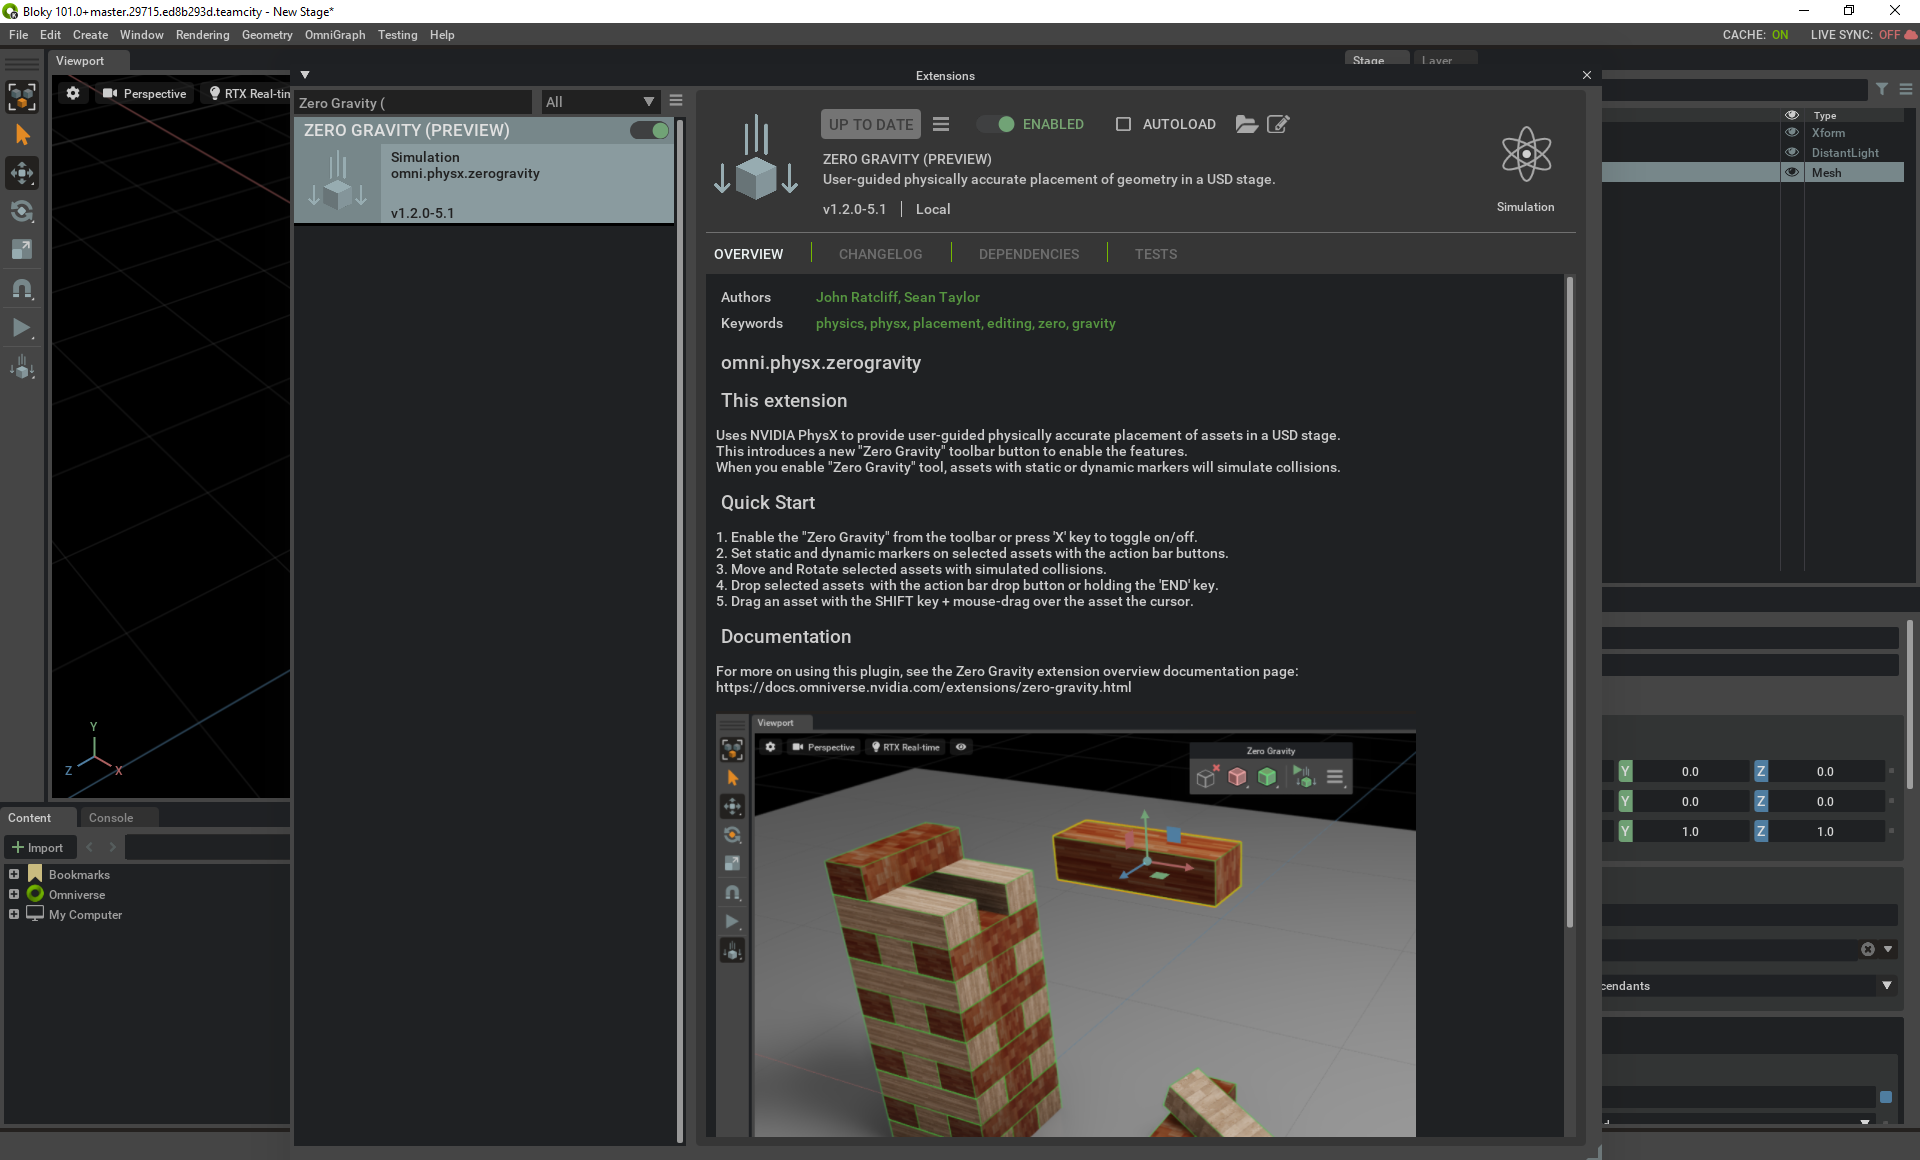
At this point the extension should be enabled and you should now see the tool’s icon on the leftmost toolbar.
User Guide
Enable Zero Gravity Mode
To enable Zero Gravity Mode, Simply Select the tool’s icon from the main toolbar. While Active, the icon will be Dark Grey.
Note
You can enable the Zero Gravity tool with the X Hotkey.
When selecting the Zero Gravity tool, notice that your stage may be updated with a Temporary Physics Scene. This temporary physics scene will be removed when the tool is disabled. If a physics scene already exists, the Zero Gravity tool will utilize the existing physics scene.
Now you can start selecting objects, marking your selection as static or dynamic manually and then moving the marked objects to have them collider (dynamically or statically) against other marked objects. Alternatively turn on the Sweep Mode and forget abour manual markup: objects nearby your selected prim will automatically be marked (as static by default) and you can start moving objects around immediately via the selection gizmos.
Action Bar
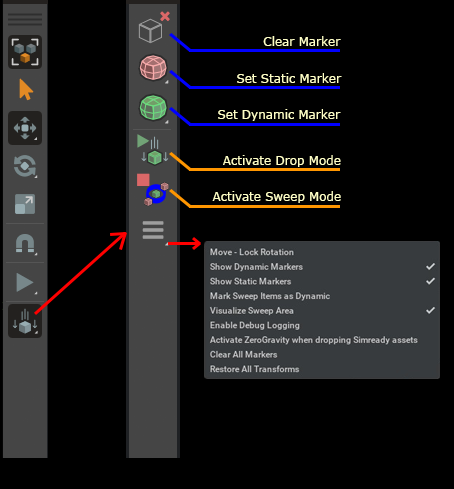
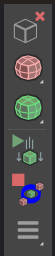
Upon enabling the Zero Gravity tool, the Zero Gravity toolbar will appear. This toolbar allows you to clear and set markers, drop assets and access additional settings related to the Zero Gravity tool.
Action |
Description |
|---|---|
Clear Marker(s) |
Removes all Zero Gravity physics on on selected assets.
|
Set Static Marker(s) |
Sets selected assets as non-moveable
|
Set Dynamic Marker(s) |
Sets selected assets to be moveable.
|
Start/Stop Dropping |
Toggles simulated gravity on selected dynamic assets.
|
Start/Stop Sweep Mode |
Toggles sweep mode which marks selection-nearby objects automatically
|
Settings |
Additional options.
|
Marker Types
Markers act as a set of rules for your asset to follow during editing. They can broadly be termed as either static or dynamic which will set them to either non-moveable or moveable respectively. Each of these types have different detail levels which allow for control over accuracy and speed of simulation.
Option |
Result |
|---|---|
Set Static Markers |
Non-Moveable Colliders, Asset(s) become outlined in Red
|
|
Mesh Simplification Approximation
|
|
Use Triangle Mesh, No Approximation
|
Set Dynamic Markers |
Moveable Colliders, Asset(s) become outlined in Green
|
|
Convex Hull Approximation
|
|
Convex Decomposition Approximation
|
Setting Zero Gravity Markers
Before setting a Zero Gravity Marker on an asset in your Stage, objects will move, rotate and scale as they normally would. In order for physics to be applied to an asset, users are required to Mark the asset for its intended purpose.
To apply a Zero Gravity Marker
Ensure the Zero Gravity tool is Enabled.
Select an Asset in the Viewport or Stage.
Select one of the Static or Dynamic choices found in the Action Bar.
Note
While set to Static, objects can not be moved with the transform gizmo. To temporarily allow movement, simply disable the Zero Gravity tool and re-enable when moving/positioning the asset is complete.
Note that overlapping assets set to Dynamic will become outlined in purple. They will remain purple and will not interact with each other until the assets are no longer overlapping. Once the overlap issue is resolved, they will return to a green outlined and the Zero Gravity tool will again work as expected.
Zero Gravity Settings
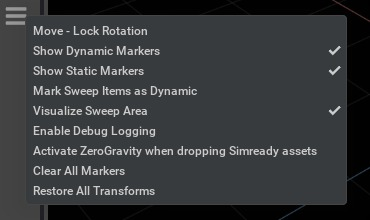
The options menu is revealed by right clicking on the Zero Gravity tool icon or selecting the option in the Action Bar. Options within this menu only affect the Zero Gravity tool, no other tools (including other physics tools) are affected.
Toggle Option |
Result |
|---|---|
Move-Lock Rotation |
Toggles to prevent moved assets from rotating.
|
Show Dynamic Markers |
Outlines Dynamic Objects in Green
|
Show Static Markers |
Outlines Static Objects in Red
|
Mark Sweep Items as Dynamic |
If selected, selection-nearby items swept in Sweep Mode are marked as Dynamic, otherwise Static
|
Visualize Sweep Area |
Visualizes an outline of the current in-progress sweeping area (mostly used for debugging)
|
Enable Debug Logging |
Enables additional debug logging in the console
|
Activate ZeroGravity when dropping Simready assets |
Automatically enable ZeroGravity when a Simready asset is dropped on the scene to facilitate placement
|
Clear All Markers |
Removes ALL Zero Gravity Assignments (See Note Below)
|
Restore All Transforms |
Restores all transforms as they originally were
|
Note
The Clear All Marker option is only available when the Physics Zero Gravity tool is enabled.
Positioning Assets
Moving and Rotating Assets
Using the move and rotate tools will allow users to move any selected assets with dynamic markers and will simulate physical interaction with other marked assets. Rotation of selected assets can be disabled in the options menu.
Positional Scale
While the Zero Gravity tool is enabled, the Scale tool is transformed into the Positional Scale Tool. Instead of scaling the geometry of objects, the Positional Scale tool allows you to scale the positions of multiple objects. This can help to group and position objects quickly for dropping purposes.
Note
If you have the need to scale assets traditionally, simply disable the Zero Gravity tool Scale and re-enable.
Drop Simulation
Dropped objects will fall and collide with other geometry that have Zero Gravity Markers set on them. Static objects will block and push the dropped object(s) while dynamic objects will be nudged and pushed.
To Drop Geometry…
Ensure Physics Zero Gravity Mode is Enabled.
Select any asset with a dynamic marker. (Outlined in Green)
While still Selected (Outlined in Orange) press the
ENDkey or click on the drop button.
Notice the selected assets will fall and interact with other Zero Gravity marked assets marked as static (Outlined in Red) and dynamic assets (Outlined in Green) differently.
Dropping mode will terminate automatically if the falling item is detected as ‘stationary’ after a short period of time. This allows you to drop items, get them in place, and automatically disable the dropping mode when things have fallen in place.
Sweep Mode for Automatic Markup
Marking up several objects in the scene can be very tedious. The Sweep Mode feature allows you to select an object and automatically mark nearby objects as either static or dynamic. You can also move the object around and nearby objects will be recalculated, swept and marked with static or dynamic markers. By default the Sweep Mode marks objects close to the selection area with Static markup, to mark nearby objects with Dynamic markup check the Mark Sweep Items as Dynamic menu item in the Zero Gravity bar Settings menu (see Zero Gravity Settings).
Saving Zero Gravity Mode Changes
All relevant information pertaining to Zero Gravity (such as position, rotation, scale) will be saved to the USD file. The temporary physics and markup data used by Zero Gravity will be removed keeping your scene un-affected.