Generate Synthetic Data
This guide uses a reference extension built on Omniverse Kit and the Omniverse Replicator Extension to randomize the location, size, and rotation of the scratches.
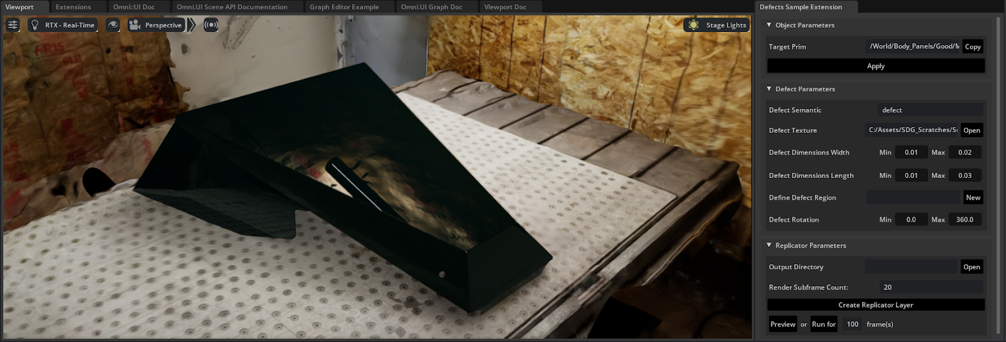
The extension in use with the sample scene.
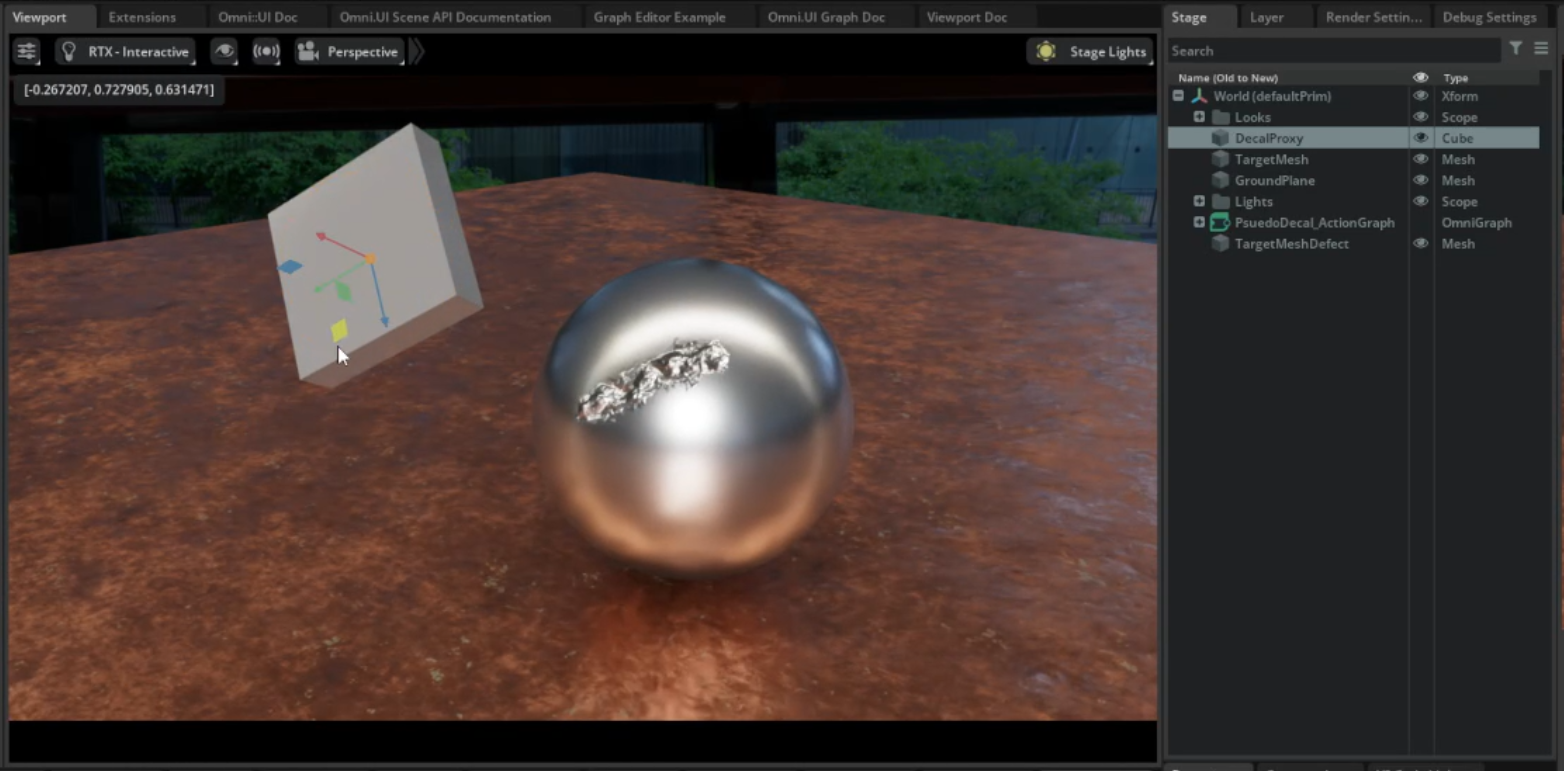
This reference extension was built to manipulate a proxy object that projects the normal map as a texture onto the surface of the CAD part. By changing the parameters in the extension, it is actually changing the size and shape of the cube projecting the texture.
After running the extension with the desired parameters, the output will be a set of annotated reference images saved into a folder (which can be defined through the extension) as .png, .json, and .npy files.
Note
This extension was built using Omniverse Code version 2023.3.1.
UI Overview
Object Parameters
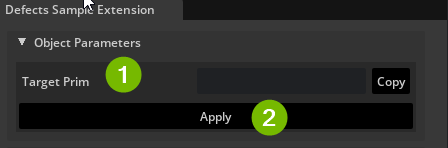
Target Prim: This defines what prim to apply the material to. To get the prim path, select a prim in the scene then hit the “Copy” button
Apply: Once you have a Target Prim selected and have copied its path, hit “Apply” to bring in the proxy decal material and create the primvars on the Target Prim.
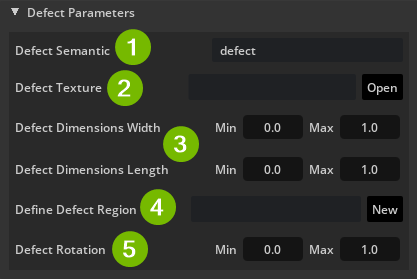
Defect Parameters
Randomizations are based on Replicator’s Distributions.
Defect Semantic: The semantic label that will be used to represent the defect in the output file produced by Replicator.
Default Value: defect
Defect Texture: A folder location that holds all the texture(s) to choose from. Textures should be in PNG format.
Default Value: None
Defect Dimensions (Width and Length): Replicator will choose random values between the Min and Max defined (cms) for the Width and Length.
Default Value Min: 0
Default Value Max: 1
Define Defect Region: This will create a Plane Prim, this is used as a reference to define a region in which the defect can be in.
Default Value: None
Defect Rotation: Replicator will choose random values between the Min and Max defined (cms) and will set that rotation.
Default Value Min: 0
Default Value Max: 1
Recommended Values
A recommended set of values using the CarDefectPanel scene is the following:
Defect Semantics: scratch
Defect Texture: [Path to folder containing scratch normal maps]
Defect Dimensions Width: Min 0.01; Max 0.02
Defect Dimensions Length: Min 0.015; Max 0.02
Define Defect Region: None
Defect Rotation: Min 0; Max 360
Replicator Parameters
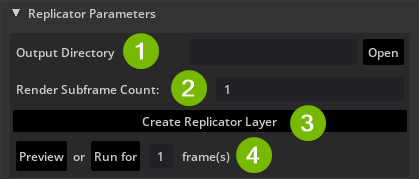
Replicator generates an action graph from the OmniGraph compute engine, and OmniGraph was also used to create materials and visualize the parameters of the material description language (MDL). Each image is taken on a separate rendering frame.
Output Directory: Defines the location in which Replicator will use to output data. By default it will be
DRIVE:/Users/USER/omni.replicator_outRender Subframe Count: If rendering in RTX Realtime mode, specifies the number of subframes to render in order to reduce artifacts caused by large changes in the scene.
Create Replicator Layer: Generates the OmniGraph or Omni.Replicator graph architecture, if changes are made the user can click this button to reflect changes. This does not run the actual execution or logic.
Preview / Run for X frames:
“Preview” performs a single iteration of randomizations and prevents data from being written to disk.
“Run for” will run the generation for a specified amount of frames. Each frame will be one data file so 100 frames will produce 100 images, 100 .json files, and 100 .npy files.
Extend the Extension
While the extension is useful for this specific scenario, it is meant to be built upon.
Add more constraints in the UI by using the custom widgets in widgets.py. For example, from .widgets import MinMaxWidget, CustomDirectory, PathWidget.
import omni.ui as ui

class WidgetContainer:
    def __init__(self) -> None:
        self.textures_dir = CustomDirectory(label="Textures Directory")
        self.prim_path = PathWidget(label="Prim Path")
Custom nodes can be registered to Replicator and called later during randomization. The sample uses a custom node in order to apply the defect onto the surface of the object.
def write_prim_vars(proxy_path: str = "", target_path: str = ""):
    node = rep.utils.create_node("omni.example.defects.WritePrimVars",
proxy_path=proxy_path, target_path=target_path)
    return node
            rep.modify.register(write_prim_vars)
Replicator’s base randomization tools allow developers to easily create domain randomized scenes, quickly sampling from assets, materials, lighting, and camera positions. However, other types randomizers can be defined for your use case:
Change the color of how the material gets presented
Applying more than one defect at a time
Setting conditions for the camera, possibly modifying the pose or post process settings of the camera
Randomizing how the scene is arranged presented
Data Generation
The output from Replicator is a set of new images with associated .json with .npy files containing the annotation data. These files use the Replicator Basic Writer, but you may need to create a custom writer to bring data into a specific model training platform.
Next Steps
For your use case, build on defect generation extension and create accompanying content.