Authoring geometry with USDRT and rendering with Fabric Scene Delegate
About
The Fabric Scene Delegate is the next-generation Omniverse scene delegate for Hydra. It leverages the power and performance of Fabric for a faster, more flexible, streamlined rendering pipeline.
As you might expect, Fabric Scene Delegate uses Fabric as its data source for all rendering operations. This is an exciting development, because it opens us to the possibility of authoring renderable data directly to Fabric for use cases where USD data persistence is not required.
This document gives a brief example of authoring geometry directly to Fabric using the USDRT Scenegraph API, and rendering with Fabric Scene Delegate.
Getting Started
Enable Fabric Scene Delegate
Before you begin, you’ll need to enable Fabric Scene Delegate in Kit or Create. Select Edit->Preferences in the main toolbar, and in the Preferences tab, click Rendering. Then, in the Fabric Scene Delegate rendering preferences, toggle the checkbox next to Enable Fabric delegate.
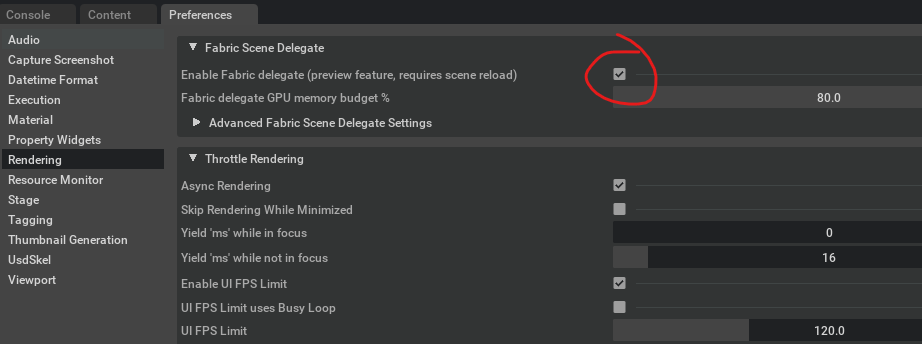
Finally, open or create a new USD stage to ensure that Fabric Scene Delegate is active.
Note
The Enable Fabric delegate setting is not sticky, so it currently needs to be re-enabled between Kit sessions. This will likely change in a future release.
Enable the USDRT Scenegraph API
You’ll need to enable the USDRT Scenegraph API as well. Select Window->Extensions in the main toolbar, and find USDRT SCENEGRAPH API in the extension list. Toggle the slider to enable the extension.
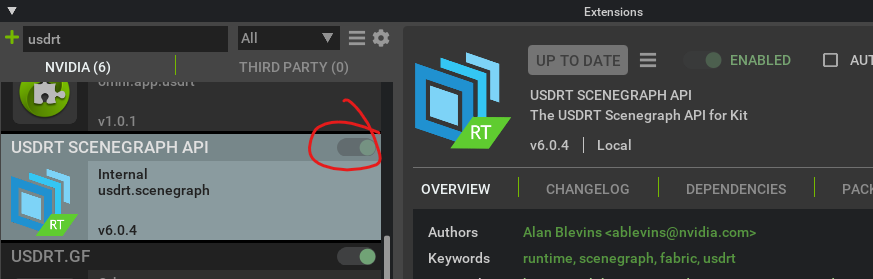
Now you’re ready to create some geometry in Fabric!
Create geometry with USDRT Scenegraph API
In the Kit Script Editor window, or your own extension code, authoring geometry is very similar to how it would be accomplished with the USD API. Here’s a small example that creates a triangle using a Mesh prim.
import omni.usd
from usdrt import Usd, Sdf, UsdGeom, Rt, Gf, Vt

stage_id = omni.usd.get_context().get_stage_id()

stage = Usd.Stage.Attach(stage_id)

prim = stage.DefinePrim("/World/Triangle", "Mesh")
mesh = UsdGeom.Mesh(prim)

points = mesh.CreatePointsAttr()
points.Set(Vt.Vec3fArray([Gf.Vec3f(1.0, 0, 0), Gf.Vec3f(0, 1.0, 0), Gf.Vec3f(-1.0, 0, 0)]))
face_vc = mesh.CreateFaceVertexCountsAttr()
face_vc.Set(Vt.IntArray([3]))
face_vi = mesh.CreateFaceVertexIndicesAttr()
face_vi.Set(Vt.IntArray([0, 1, 2]))

rtbound = Rt.Boundable(prim)
world_ext = rtbound.CreateWorldExtentAttr()
world_ext.Set(Gf.Range3d(Gf.Vec3d(-1.0, 0, -1.0), Gf.Vec3d(1.0, 1.0, 1.0)))
After this code runs, the triangle should appear in your viewport:
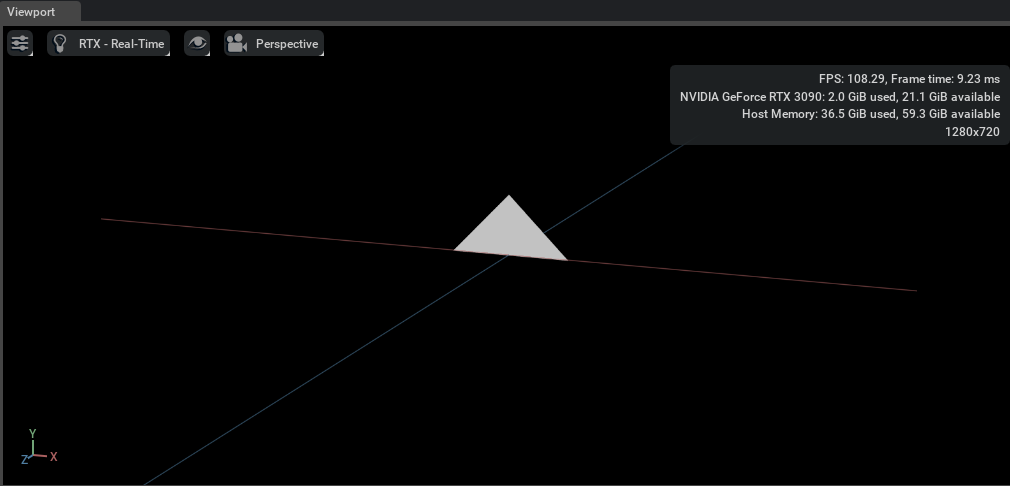
One potentially unfamiliar item in this example is the use of the Rt.Boundable schema.
Fabric Scene Delegate requires that all renderable prims hold an attribute that
contains the extents of the prim in world space - the CreateWorldExtentAttr() API
is the way to create and author that attribute. It is the responsibility of the author
to calculate those extents and ensure their correctness.
Of course, Fabric Scene Delegate does not support only Mesh prims. Nearly all prim types are supported. Let’s add a Cube to the scene:
prim = stage.DefinePrim("/World/Cube", "Cube")

rtbound = Rt.Boundable(prim)
world_ext = rtbound.CreateWorldExtentAttr()
world_ext.Set(Gf.Range3d(Gf.Vec3d(-0.5, -0.5, -0.5), Gf.Vec3d(0.5, 0.5, 0.5)))
It should appear in the viewport intersecting the original triangle Mesh:
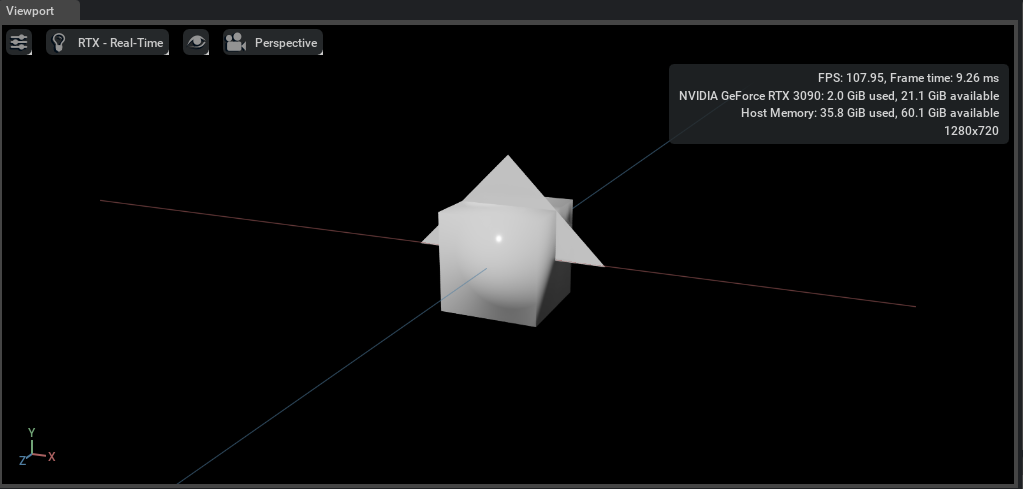
Fabric Scene Delegate also uses the same transform attributes as OmniHydra, as described in the Working with OmniHydra Transforms documentation. Let’s adjust the cube so that it sits below the triangle. Note that the world extents for the prim will need to be adjusted after the prim is transformed.
xformable = Rt.Xformable(prim)
xformable.CreateWorldPositionAttr(Gf.Vec3d(0, -0.5, -0.5))

rtbound = Rt.Boundable(prim)
world_ext = rtbound.GetWorldExtentAttr()
world_ext.Set(Gf.Range3d(Gf.Vec3d(-0.5, -1, -1), Gf.Vec3d(0.5, 0, 0)))
Here is the result:
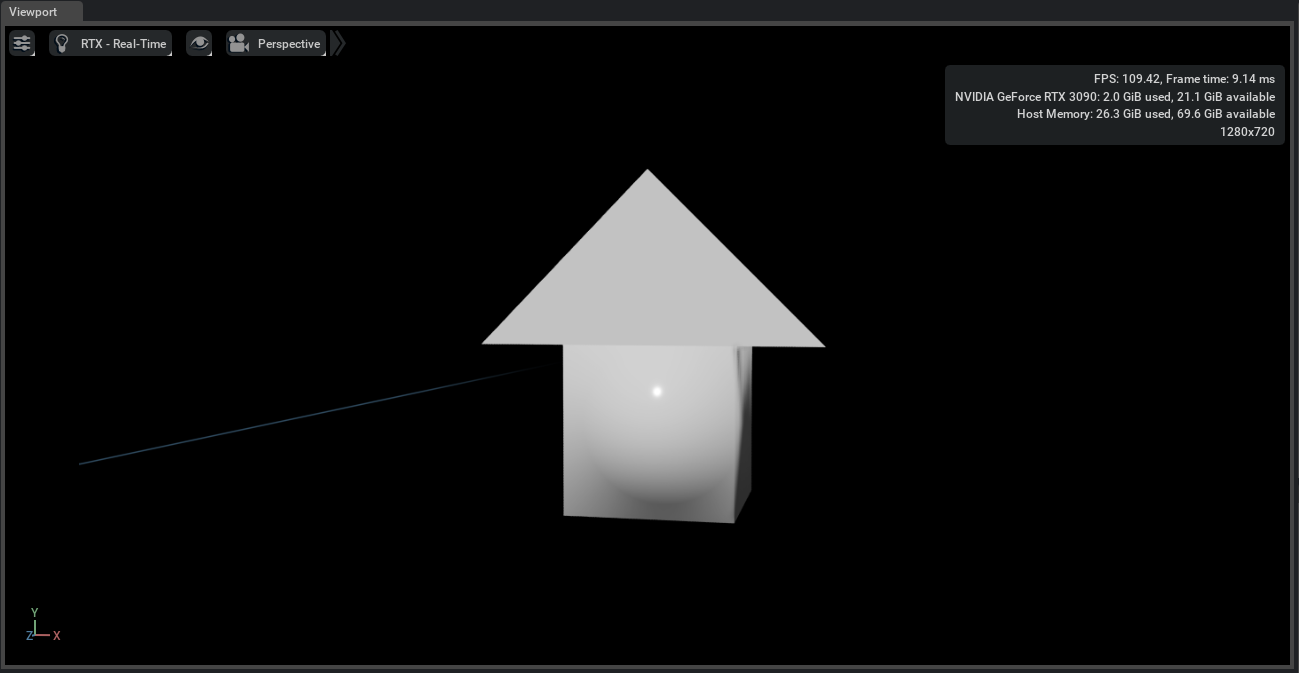
It’s not my dream house, but it will have to do for now!